

Create an Expo access token
StackOne connects to Expo (EAS) with an EAS access token, sent as a bearer token. The most common choice for an integration is a robot user token created on your Expo account, so the access is not tied to a personal login. Create the robot user, generate its token, and paste the token into StackOne.
Open the Access tokens page
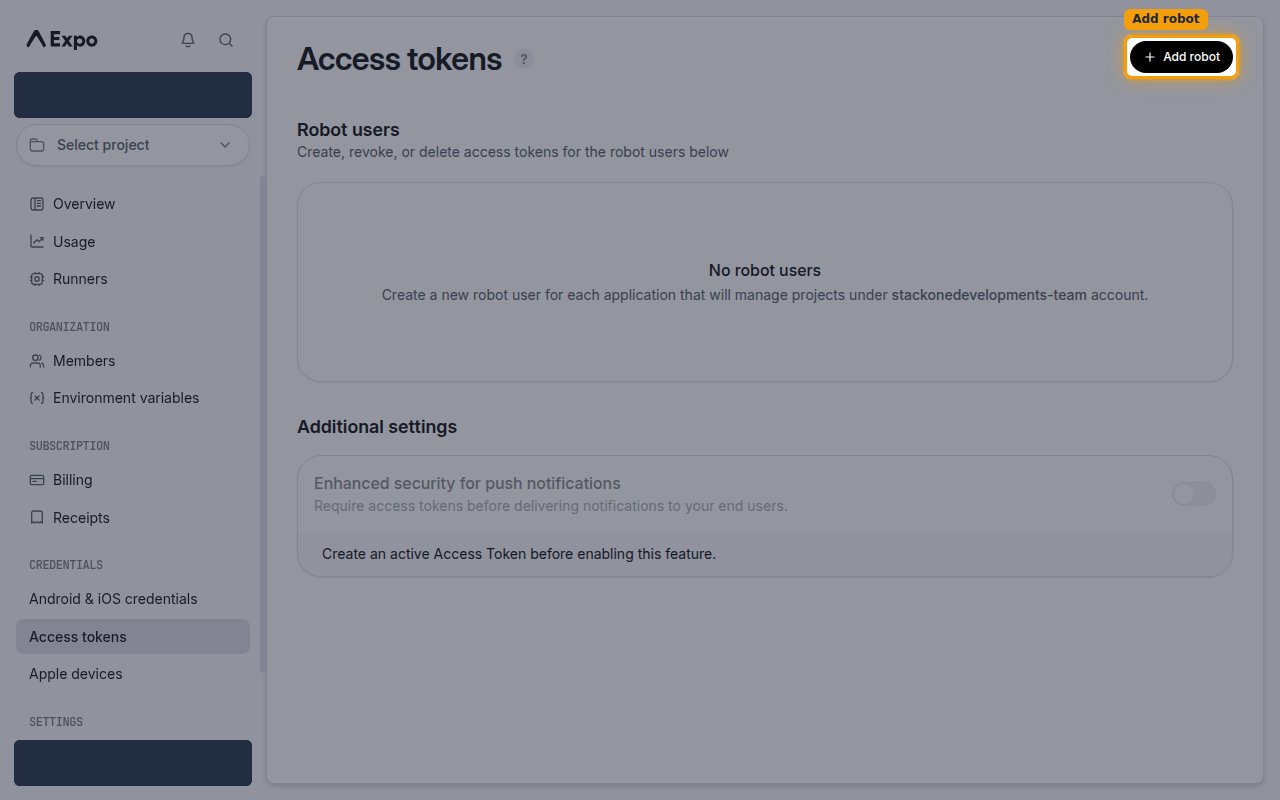
Sign in to Expo, then open your account. In the left sidebar under Credentials, click Access tokens. In the top-right, click + Add robot to create a robot user that will own the token.
- Sign in at the Expo dashboard.
- Open Access tokens under Credentials in the sidebar, then click + Add robot.
Create a robot user
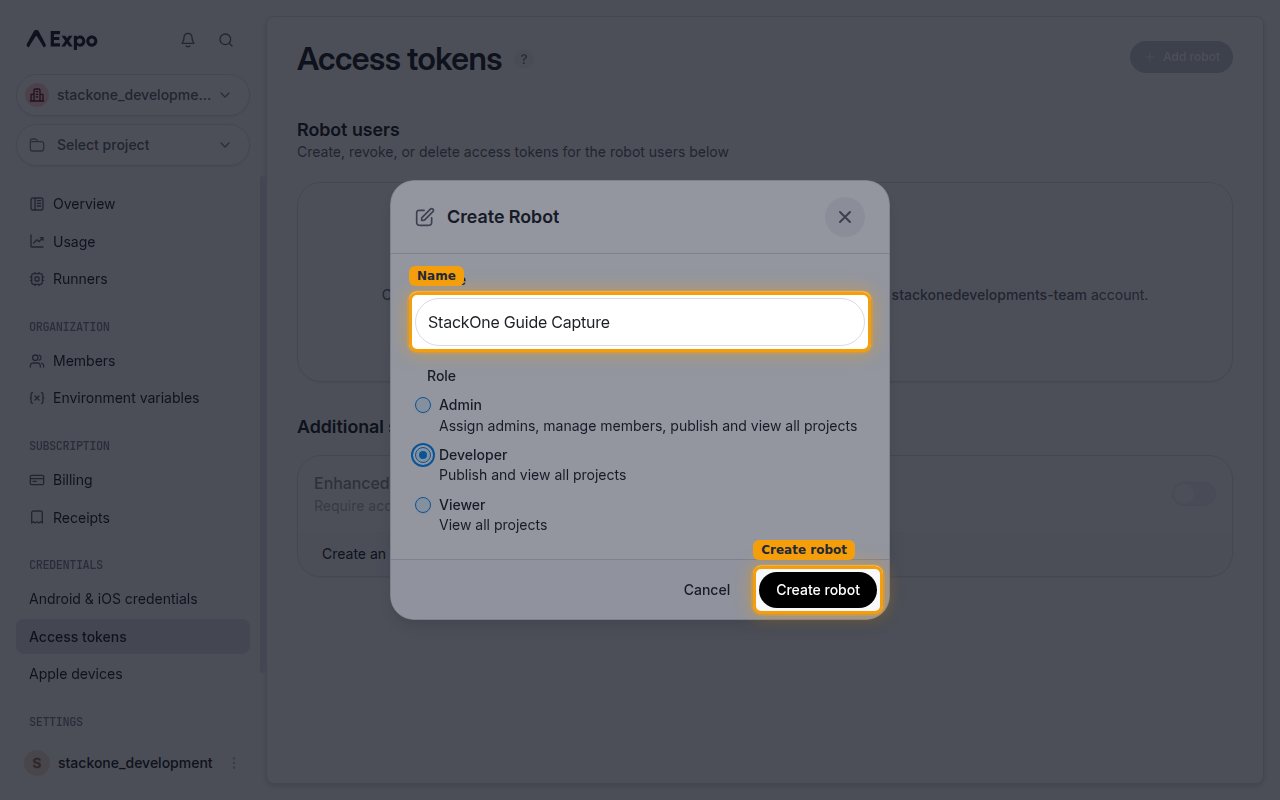
In the Create Robot dialog, enter a Name for the robot (for example, StackOne), choose a Role, and click Create robot. The token inherits the robot’s role, so pick the level of access StackOne needs.
- Admin — Assign admins, manage members, publish and view all projects.
- Developer — Publish and view all projects (recommended for read and write access).
- Viewer — View all projects (read-only).
Create a token for the robot
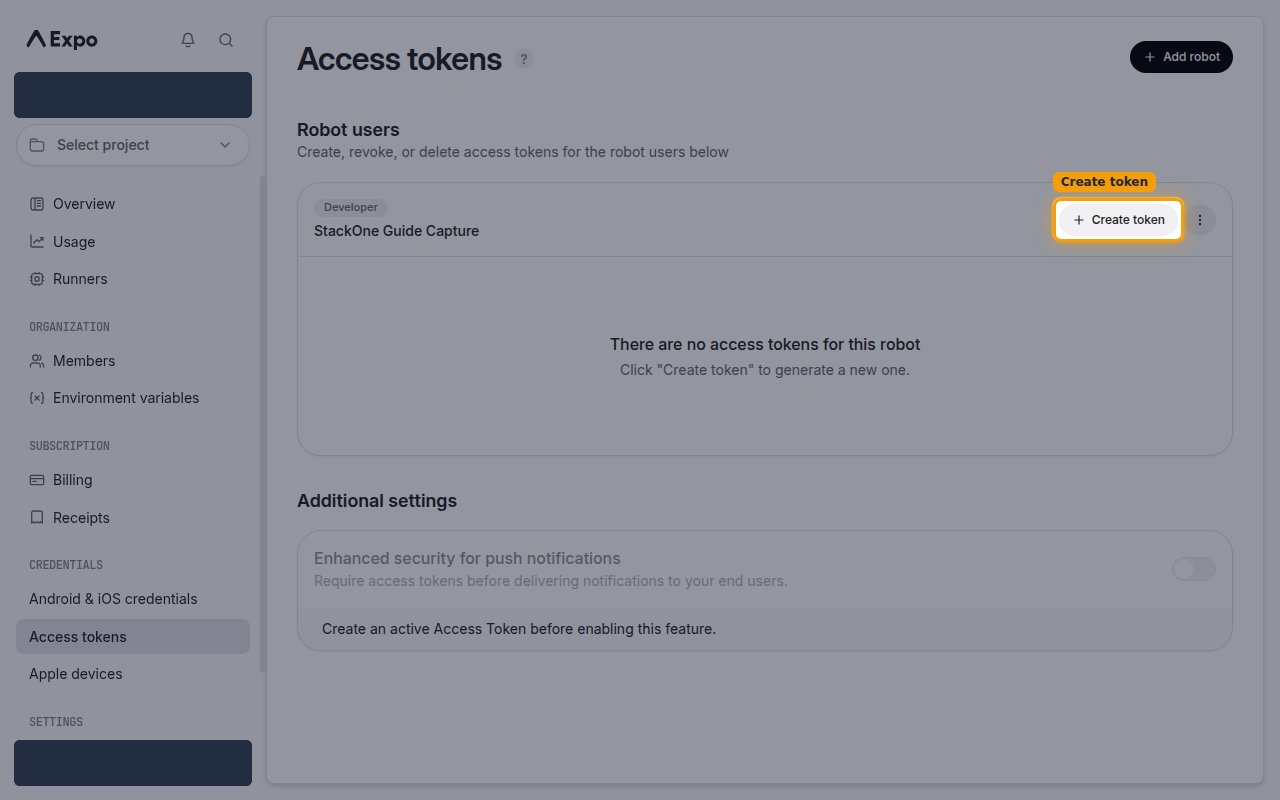
The new robot user appears under Robot users. On that robot, click + Create token to start generating an access token.
Generate the token
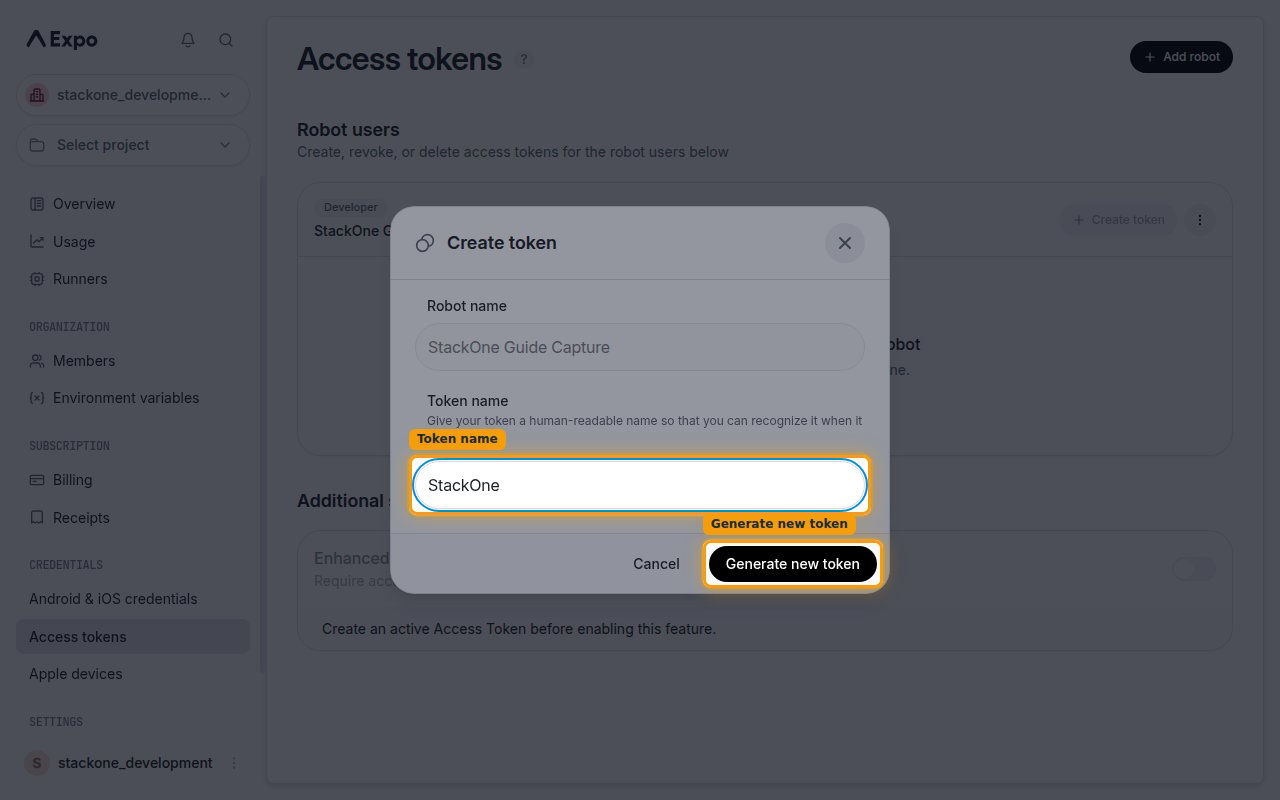
In the Create token dialog, the Robot name is pre-filled. Enter a Token name so you can recognize it later (for example, StackOne), then click Generate new token.
Copy the access token
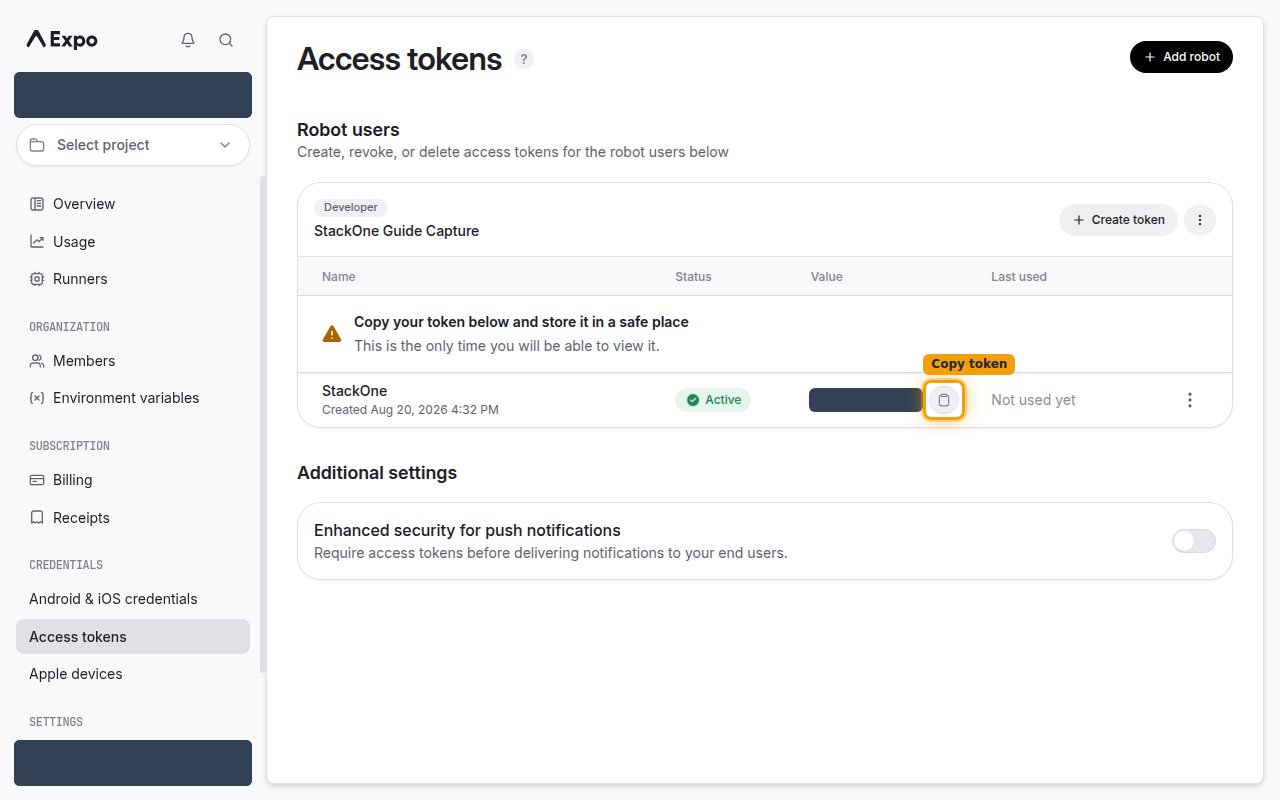
Expo shows the generated token once, next to the token name. Click the copy button to copy the value, then paste it into the Access Token field in StackOne Hub.
- Copy your token below and store it in a safe place — this is the only time you will be able to view it. If you lose it, create a new token.
Linking the Account from the Hub
Navigate to the Hub
Fill out the fields
- Access Token
Connect
- Click Connect
- If applicable, the provider will redirect you to a sign-in or authorization page. Complete the provider’s authorization flow.
- Once authorization is successful, you will see a confirmation popup
If the account linking is successful, you will see the newly linked account in your Accounts page.
Next Steps
Webhooks setup
Configure receiving Events for Expo into StackOne.