

Create an E2B API key
E2B authenticates API requests with an API key that you create in the E2B console. Keys belong to a single project, so the key you create reaches only the sandboxes, templates, volumes and secrets in that project.
Sign in and select your project
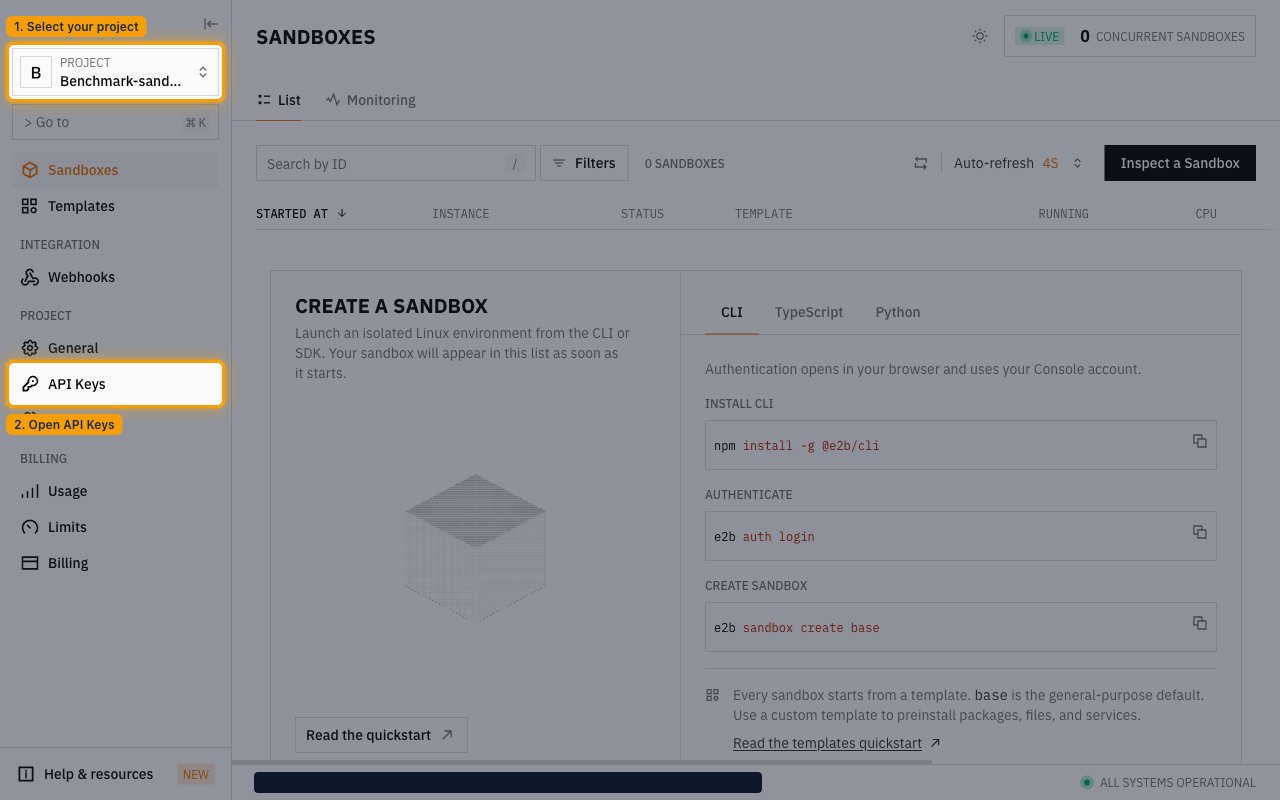
Sign in to the E2B console with the account that owns the project you want to connect. In the top-left of the sidebar, use the PROJECT switcher to select that project, then open API Keys in the sidebar under PROJECT.
- The key is scoped to the project shown in the PROJECT switcher — pick the project whose sandboxes you want StackOne to reach before creating the key.
Open the create key dialog
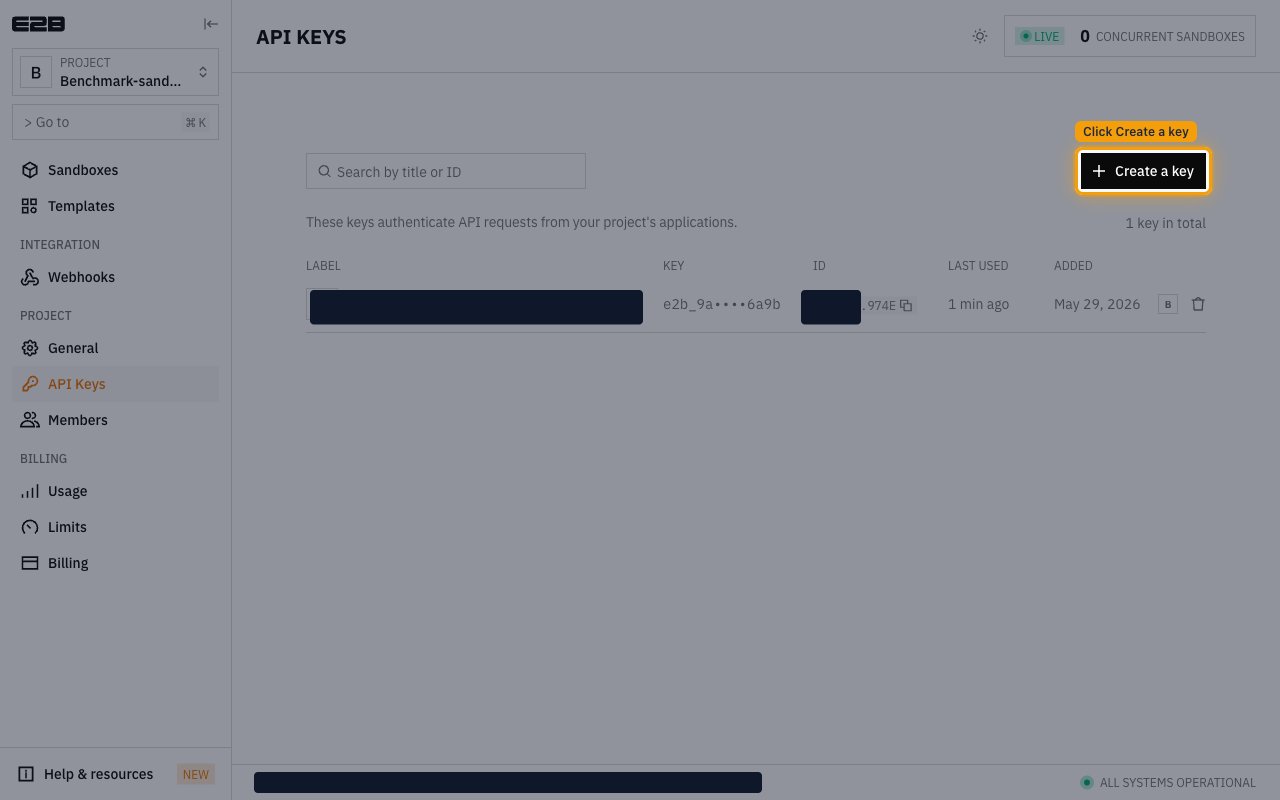
The API Keys page lists the existing keys for the project under the LABEL, KEY, ID, LAST USED and ADDED columns. Click Create a key in the top right.
Create the key
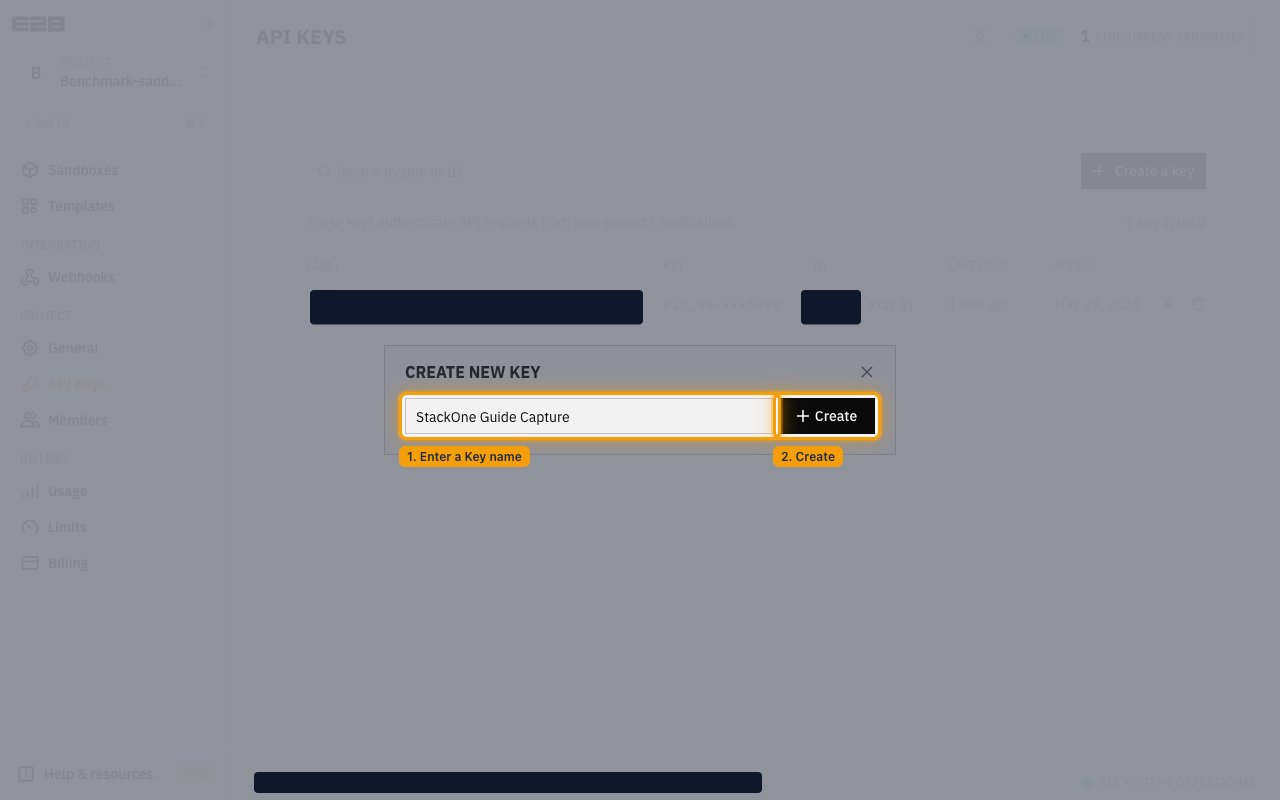
In the Create new key dialog, type a name in the Key name field — for example StackOne — so you can recognise the key later in the LABEL column. Click Create.
Copy the key
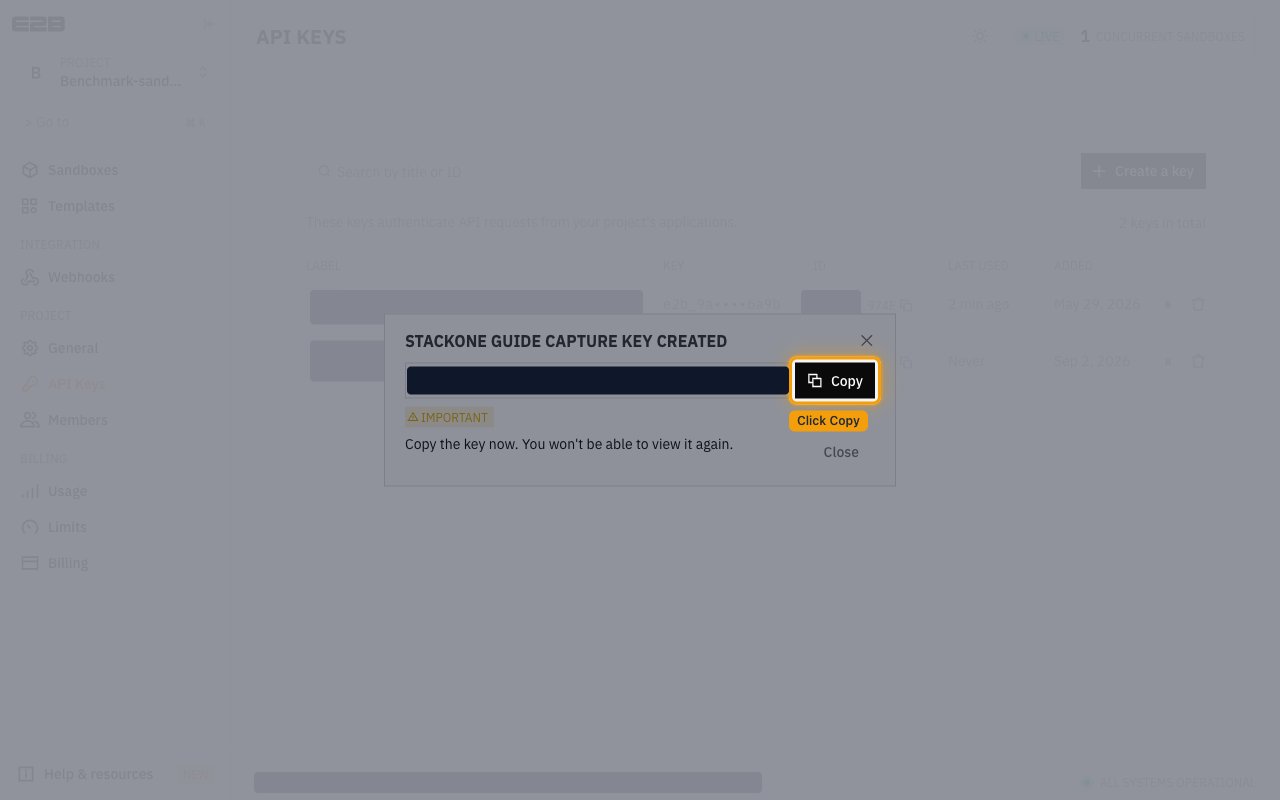
The full key is displayed once, in a read-only box in the confirmation dialog. Click Copy to copy it, then click Close.
- The dialog warns under IMPORTANT that you should Copy the key now. You won’t be able to view it again. — once you close it, the KEY column only ever shows a masked value such as
e2b_8d••••6a47. - The key cannot be retrieved after you close the dialog. If you lose it, create a new key and delete the old row from the API Keys page.
- Keys do not expire, so the value you copy stays valid until you delete it.
Linking the Account from the Hub
Navigate to the Hub
Fill out the fields
- API Key
Connect
- Click Connect
- If applicable, the provider will redirect you to a sign-in or authorization page. Complete the provider’s authorization flow.
- Once authorization is successful, you will see a confirmation popup
If the account linking is successful, you will see the newly linked account in your Accounts page.
Next Steps
Webhooks setup
Configure receiving Events for E2B into StackOne.