

Generating an API token
An API token authenticates StackOne requests to your Deel organization. You generate it in the Deel Developer settings and paste it into StackOne Hub.
Sign in to Deel
Sign in to the Deel account for the environment you are connecting:
- Production — Deel production sign-in
- Sandbox — Deel demo sign-in
- The steps below are identical in both environments; the screenshots show production.
- Generate the token in the same environment you select in StackOne Hub — a production token does not work against the sandbox, and vice versa.
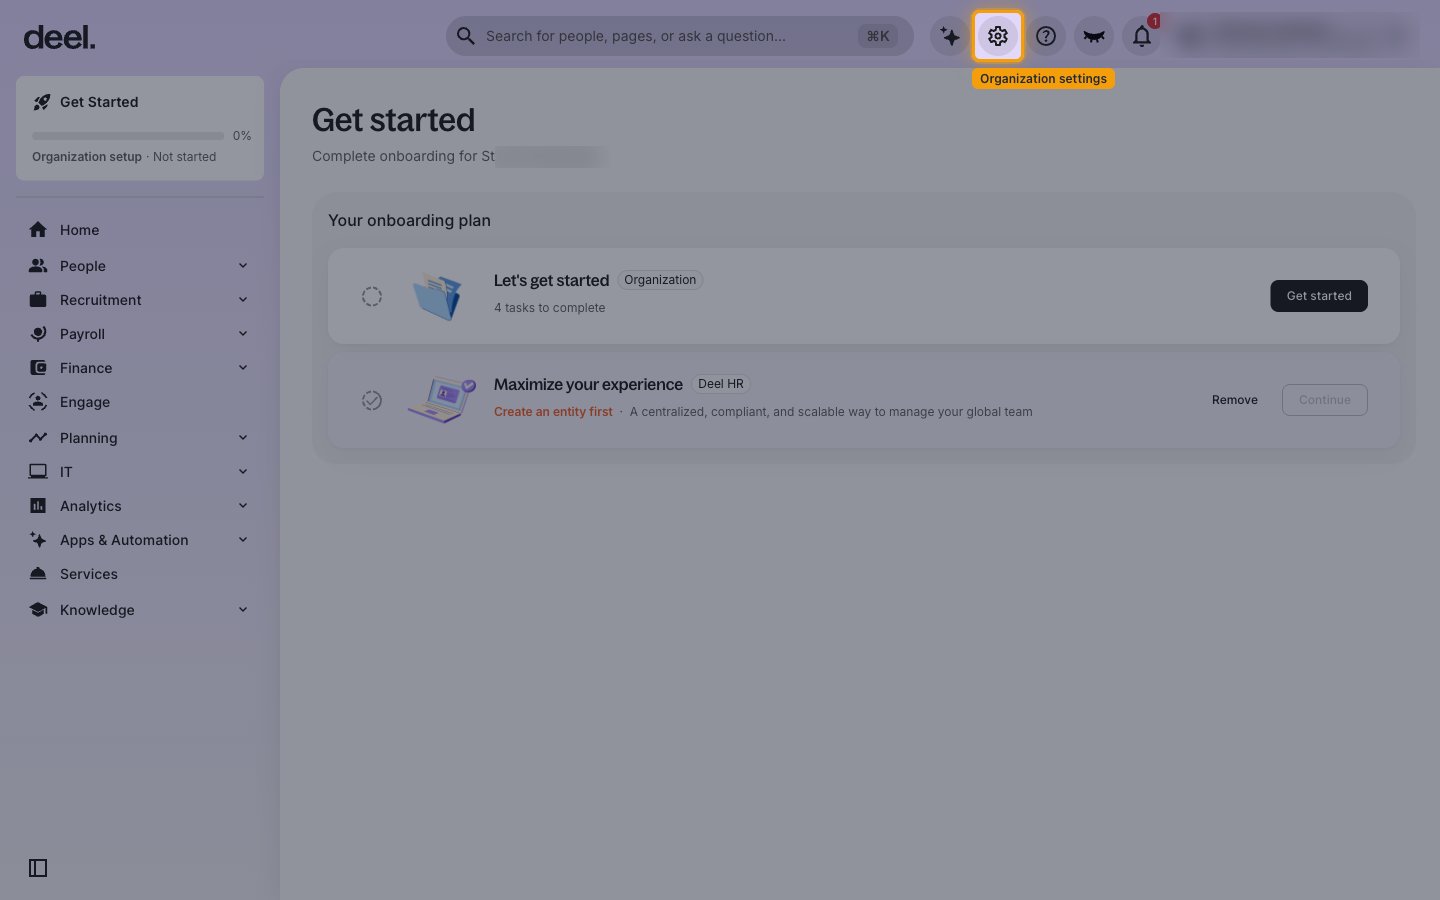
Open Organization settings
Click the Organization settings gear icon in the top bar.
Open the Developer tokens page
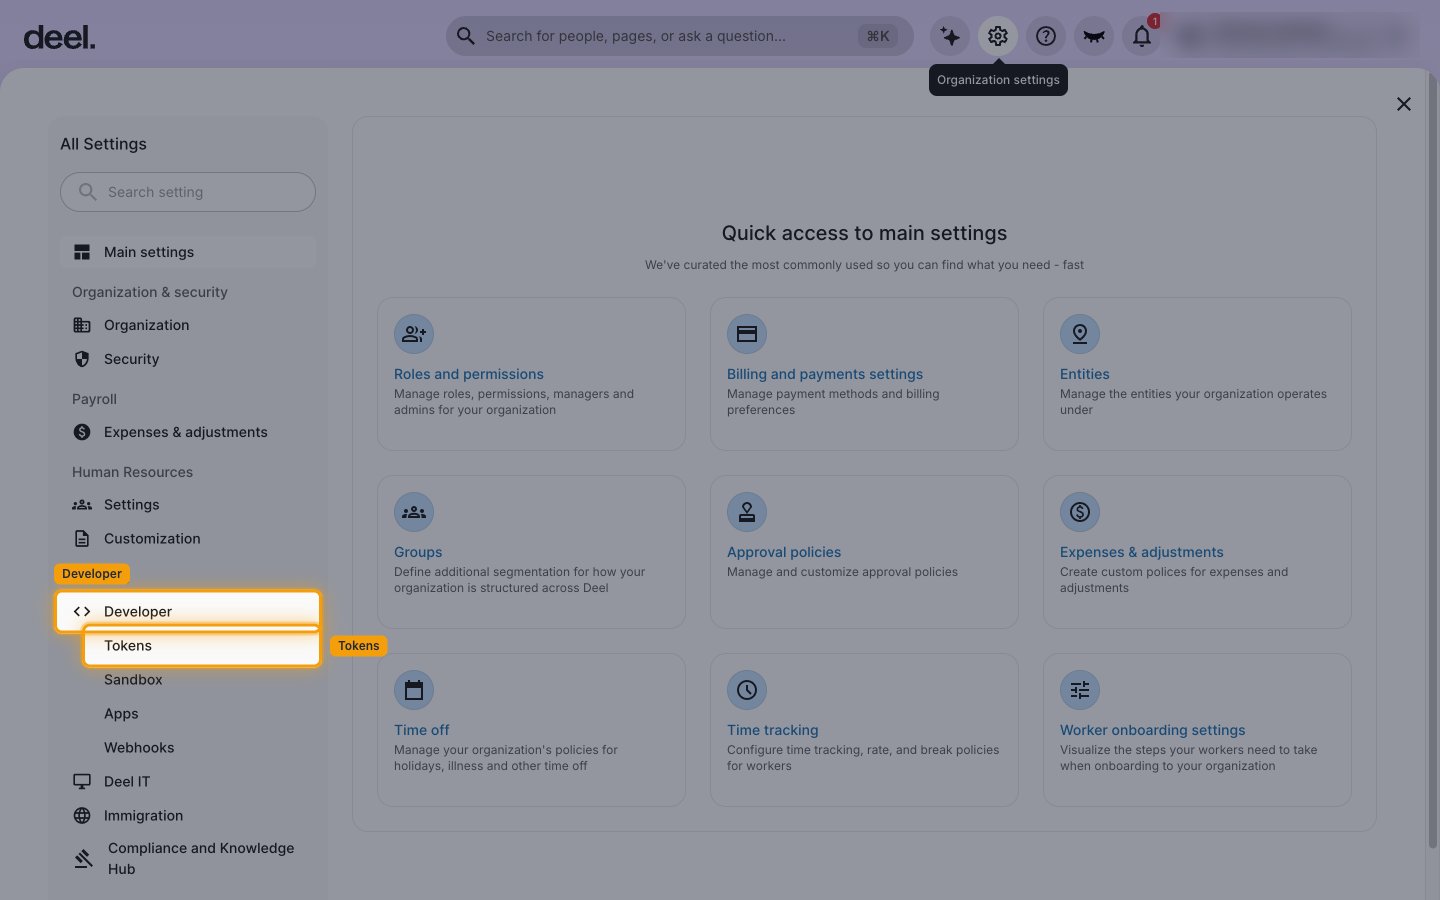
In All Settings, scroll to the Services group in the left menu.
- Click Developer to expand it.
- Click Tokens.
Generate a new token
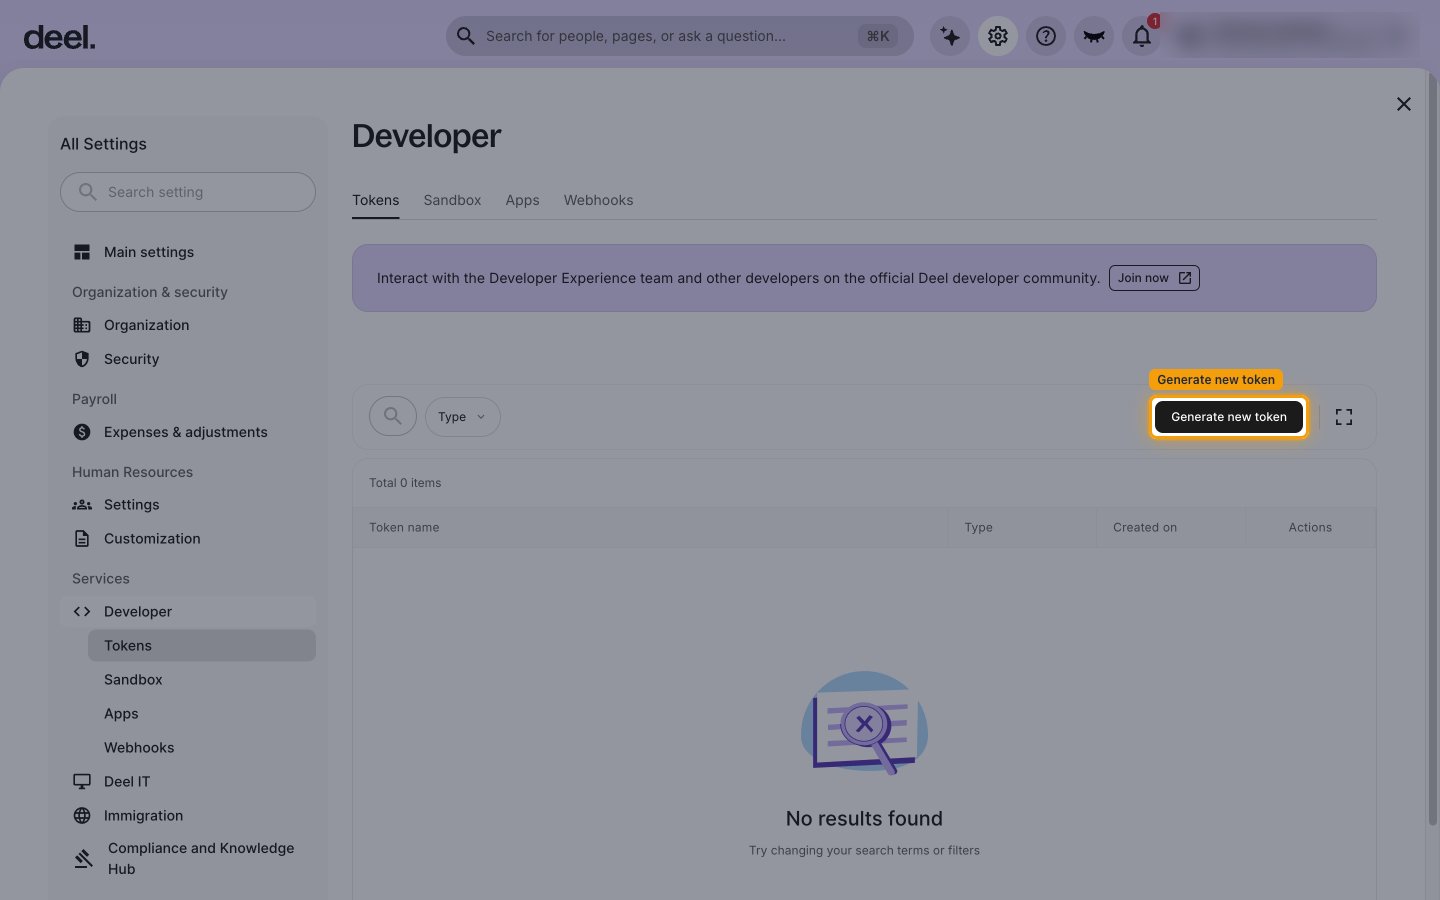
On the Developer page, with the Tokens tab selected, click Generate new token.
Enter the token details
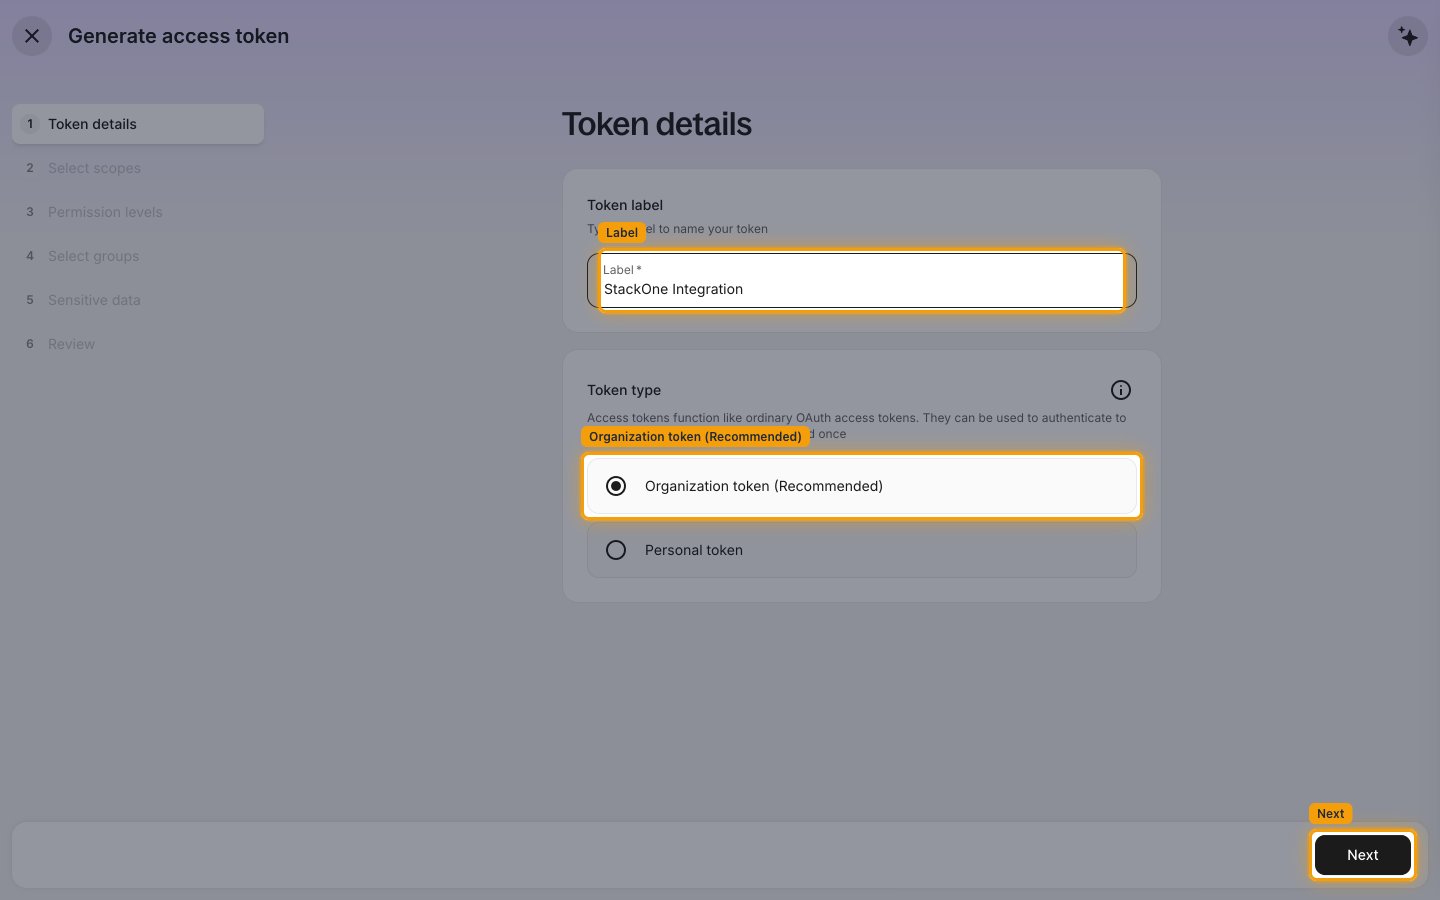
In Token details, type a name for the token in the Label field.
- Label:
StackOne Integration - Keep Organization token (Recommended) selected. A Personal token only reaches the resources your own user can access.
- Click Next.
Select the token scopes
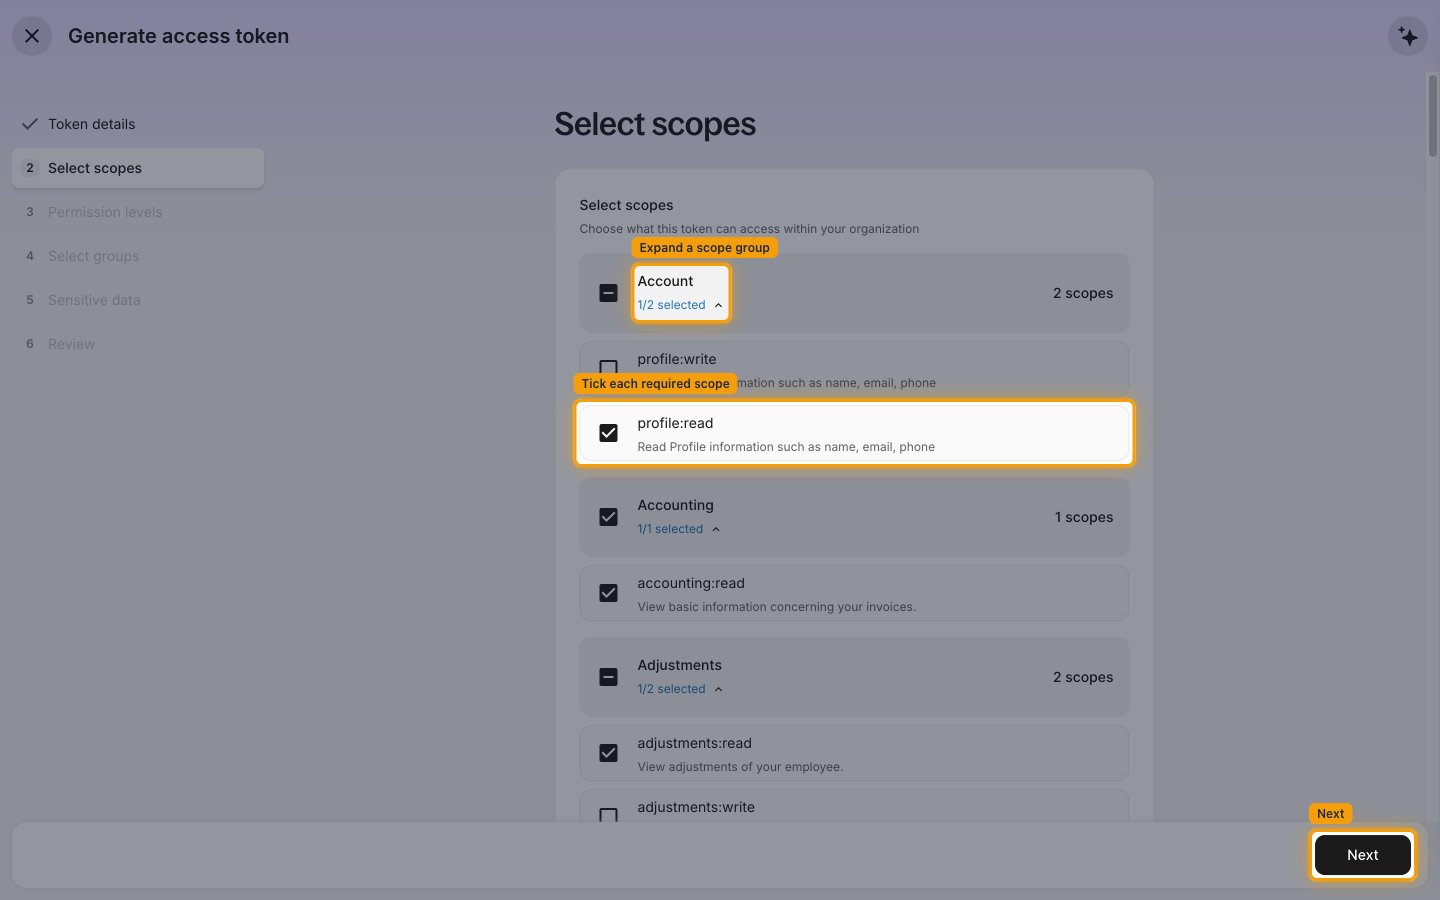
In Select scopes, expand each scope group and tick the scopes the integration needs, then click Next. The scopes required by this connector are listed below.
Set the permission level
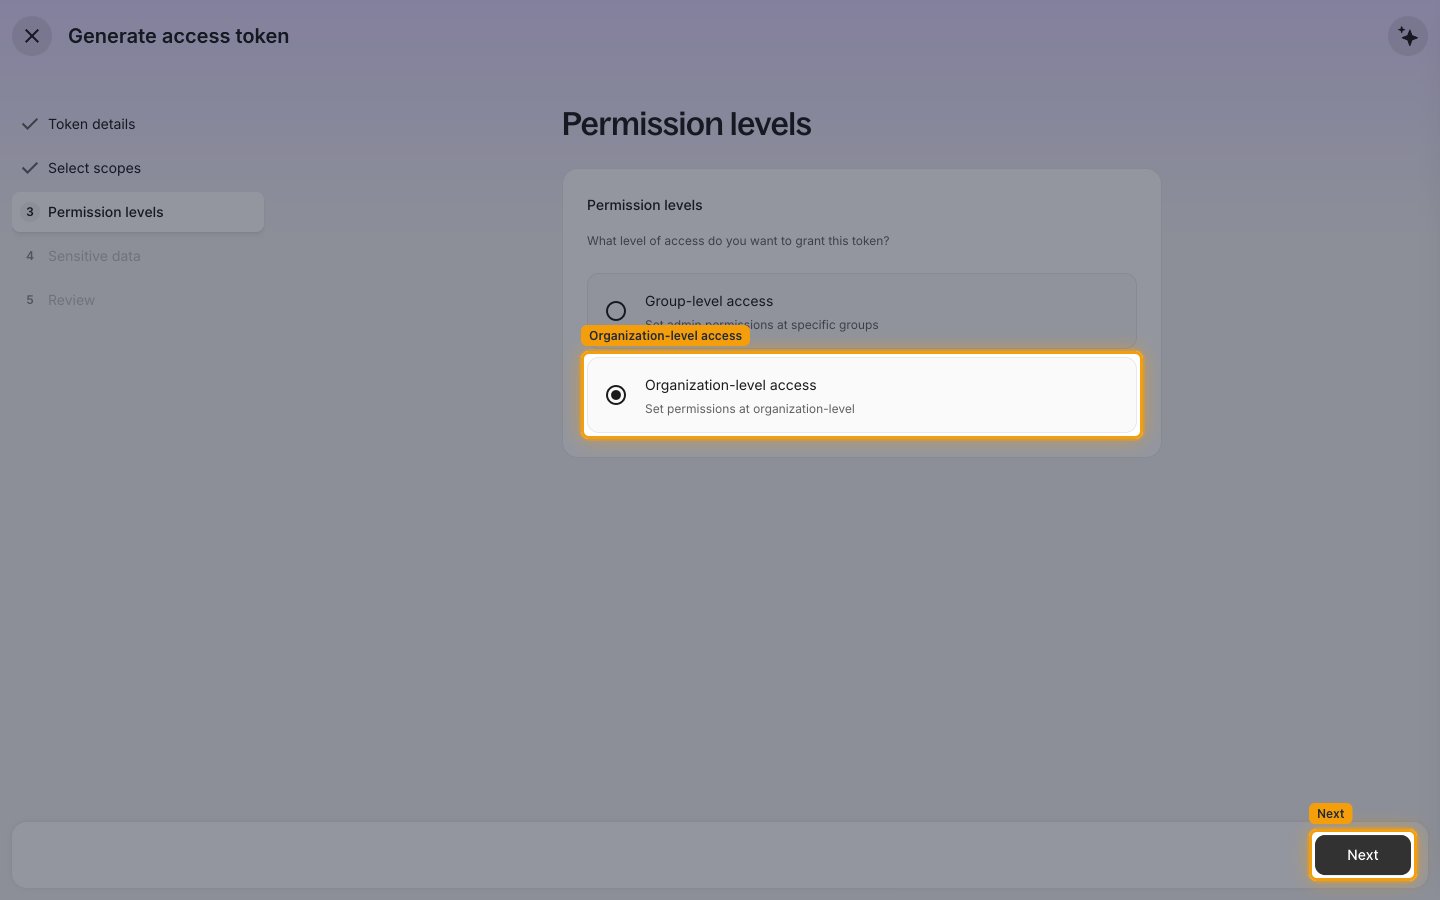
In Permission levels, select Organization-level access so the token can read data across the whole organization, then click Next.
- Group-level access limits the token to specific groups; choosing Organization-level access also removes the Select groups step from the wizard.
Review the sensitive data settings
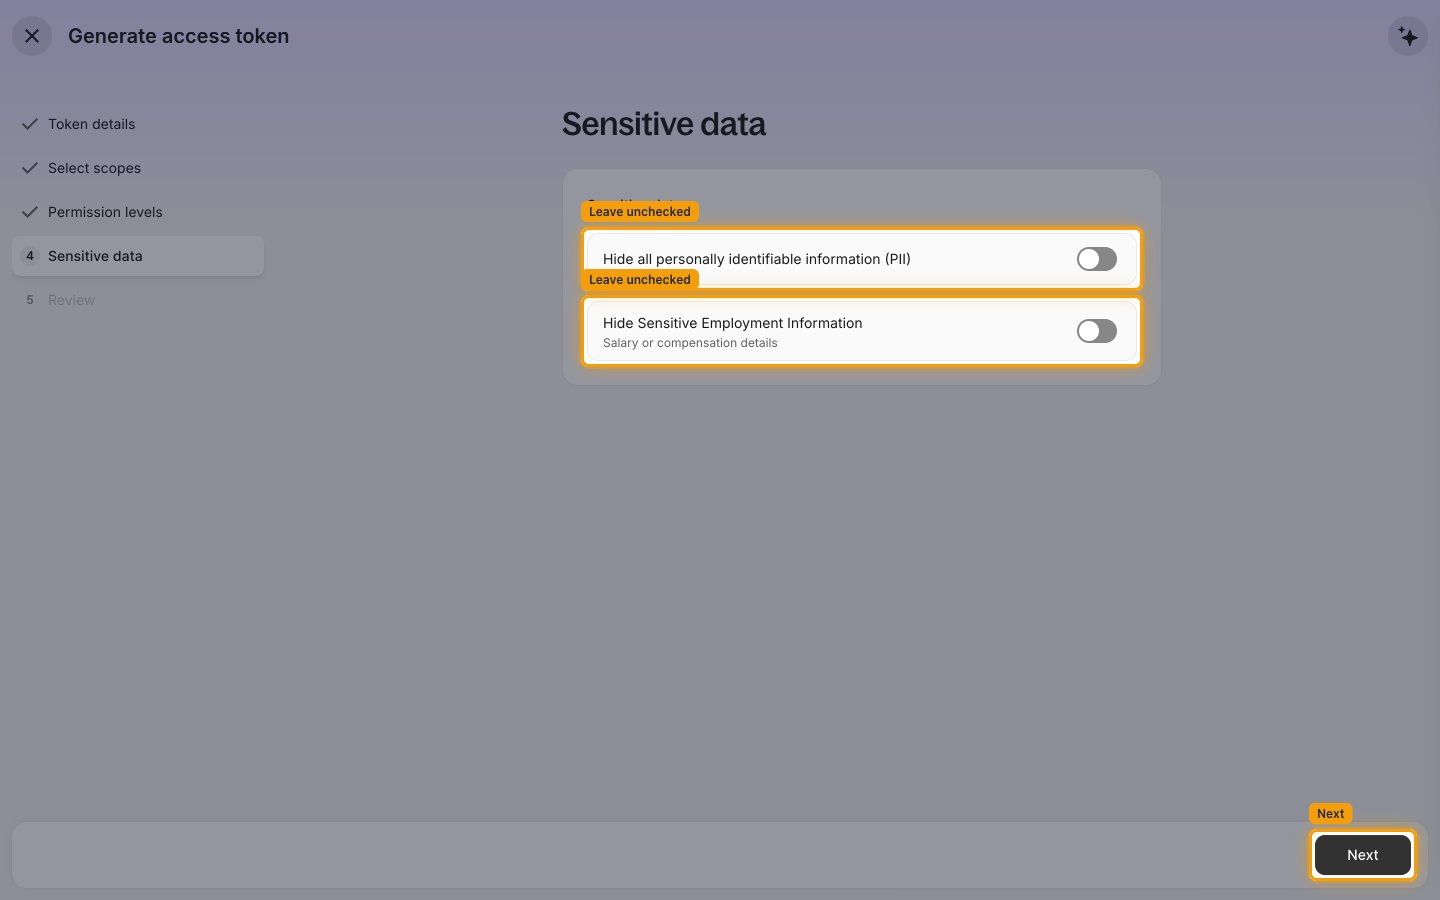
In Sensitive data, leave both toggles off so StackOne can read the fields it syncs, then click Next.
- Hide all personally identifiable information (PII) — leave off.
- Hide Sensitive Employment Information — leave off.
Review and generate the token
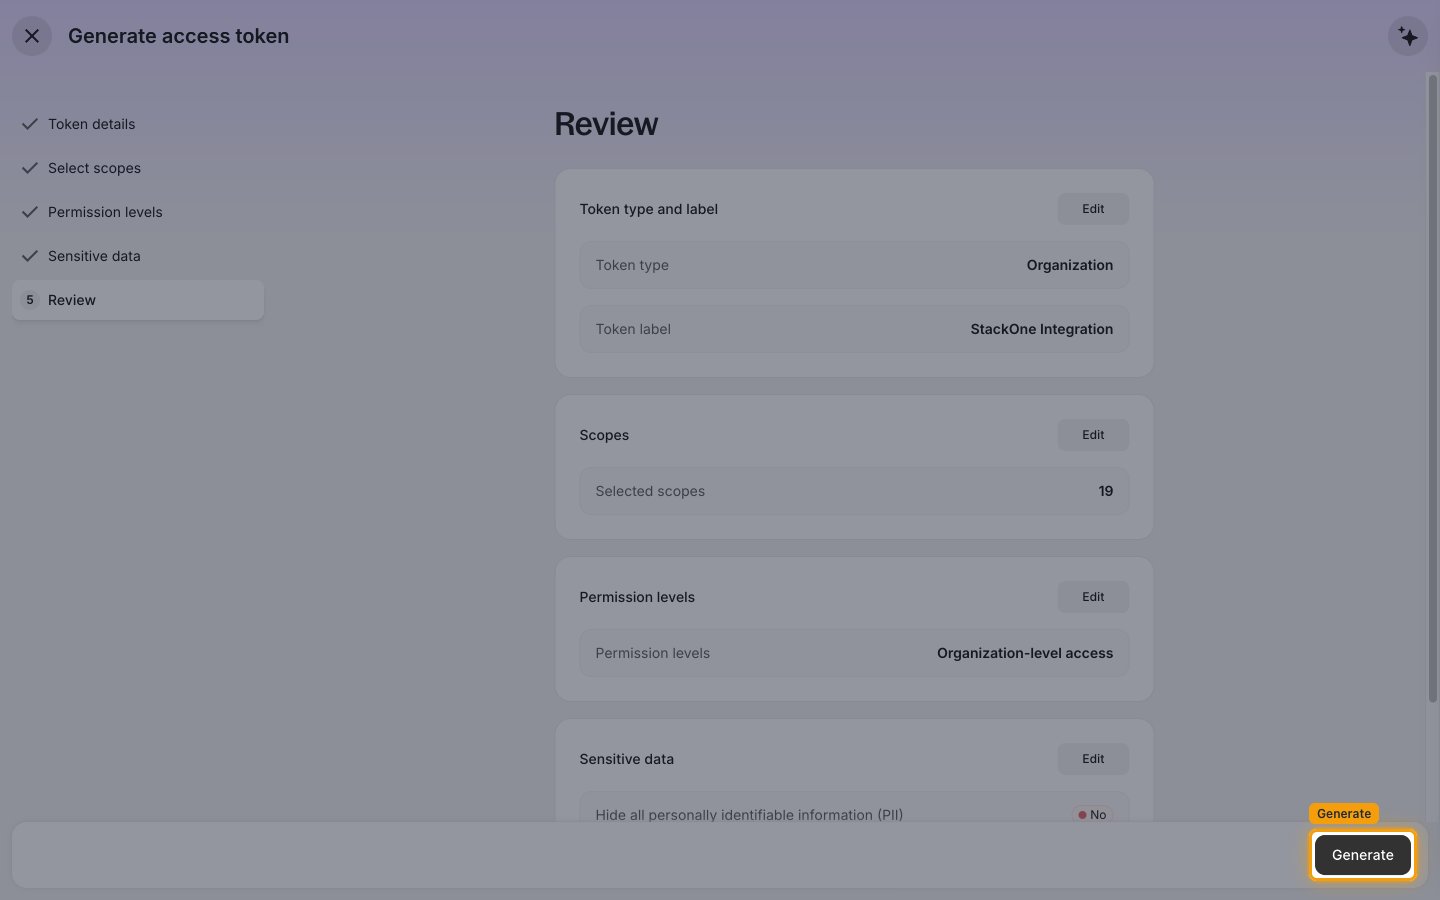
In Review, check the token type, label, selected scopes and permission level, then click Generate.
Copy the token
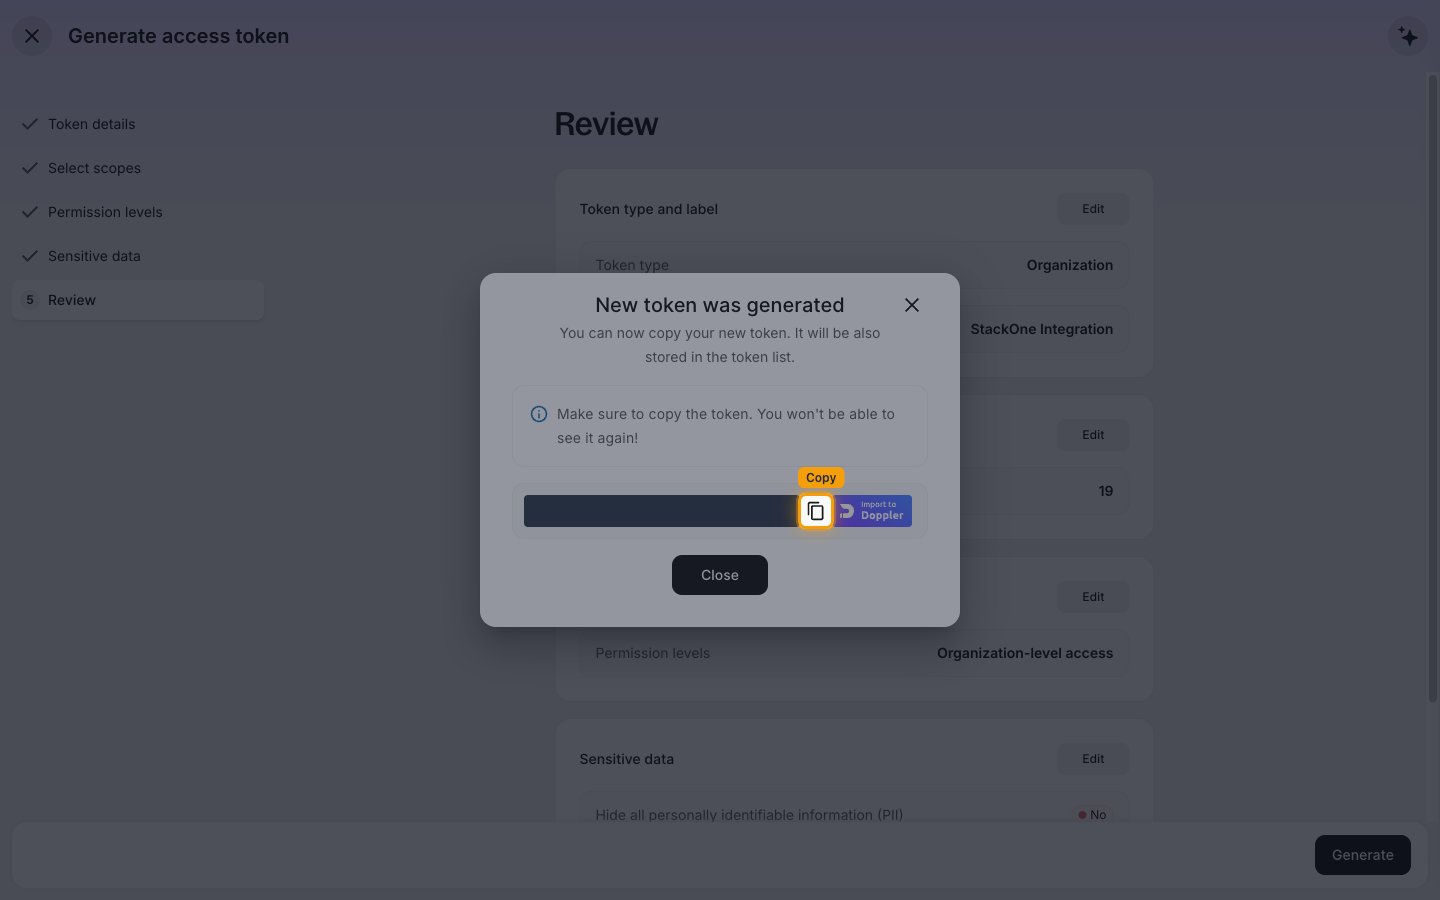
In the New token was generated dialog, click Copy next to the token value and store it securely for use later.
- The token is shown only once. If you close the dialog without copying it, you must generate a new token.
- Paste it into the API Token field in StackOne Hub.
- Click Close.
Linking the Account from the Hub
Navigate to the Hub
Fill out the fields
- API Token
Connect
- Click Connect
- If applicable, the provider will redirect you to a sign-in or authorization page. Complete the provider’s authorization flow.
- Once authorization is successful, you will see a confirmation popup
If the account linking is successful, you will see the newly linked account in your Accounts page.
Next Steps
Webhooks setup
Configure receiving Events for Deel into StackOne.