

Generate an API Key
To connect Copper with StackOne you’ll need an API key from your Copper account. Copper’s API validates every request against the pair of {API key, admin email}, so you’ll need to provide both the API key value (in the API Key field) AND the email address of the admin user that generated it (in the User Email field, covered in the next section).
Sign in to Copper
Open the Copper web app and sign in with an Admin user.
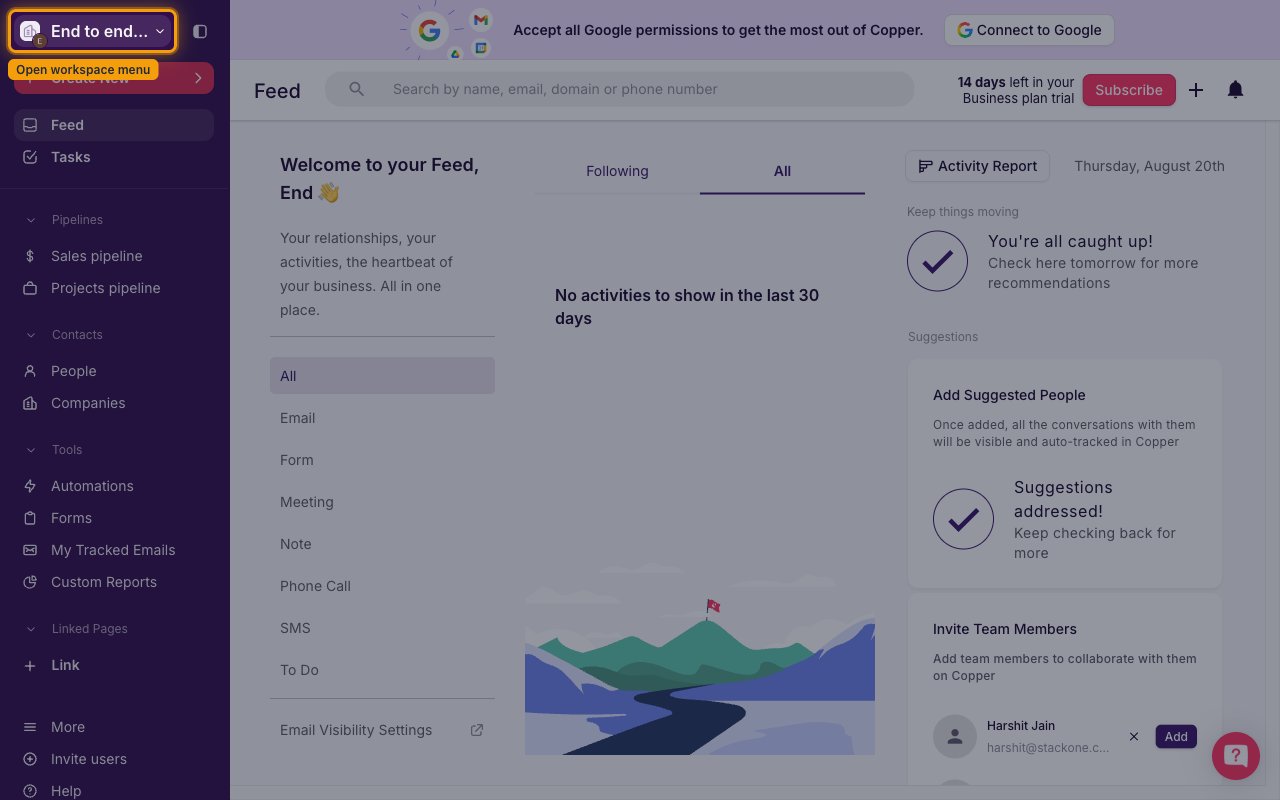
Open the workspace menu
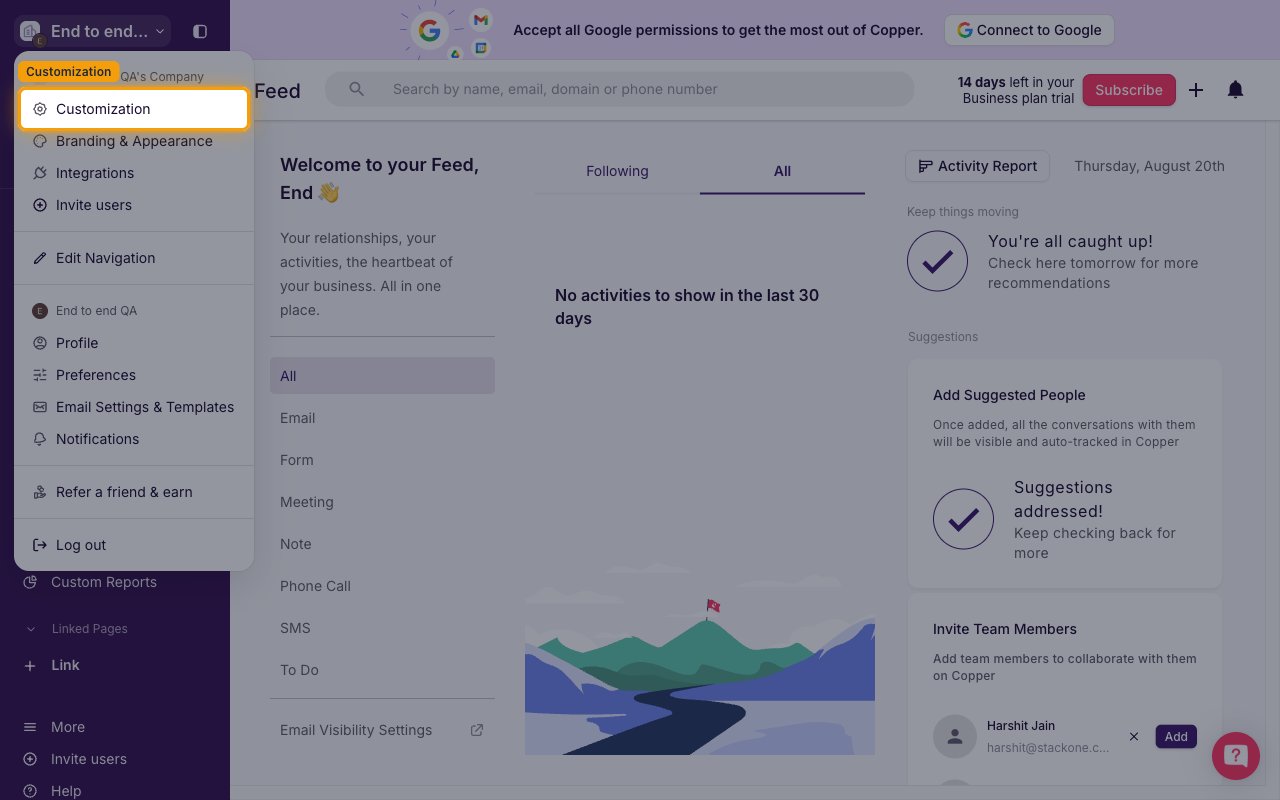
In the top-left of the Copper sidebar, click your workspace name (e.g. End to end QA’s Company) to open the workspace menu.
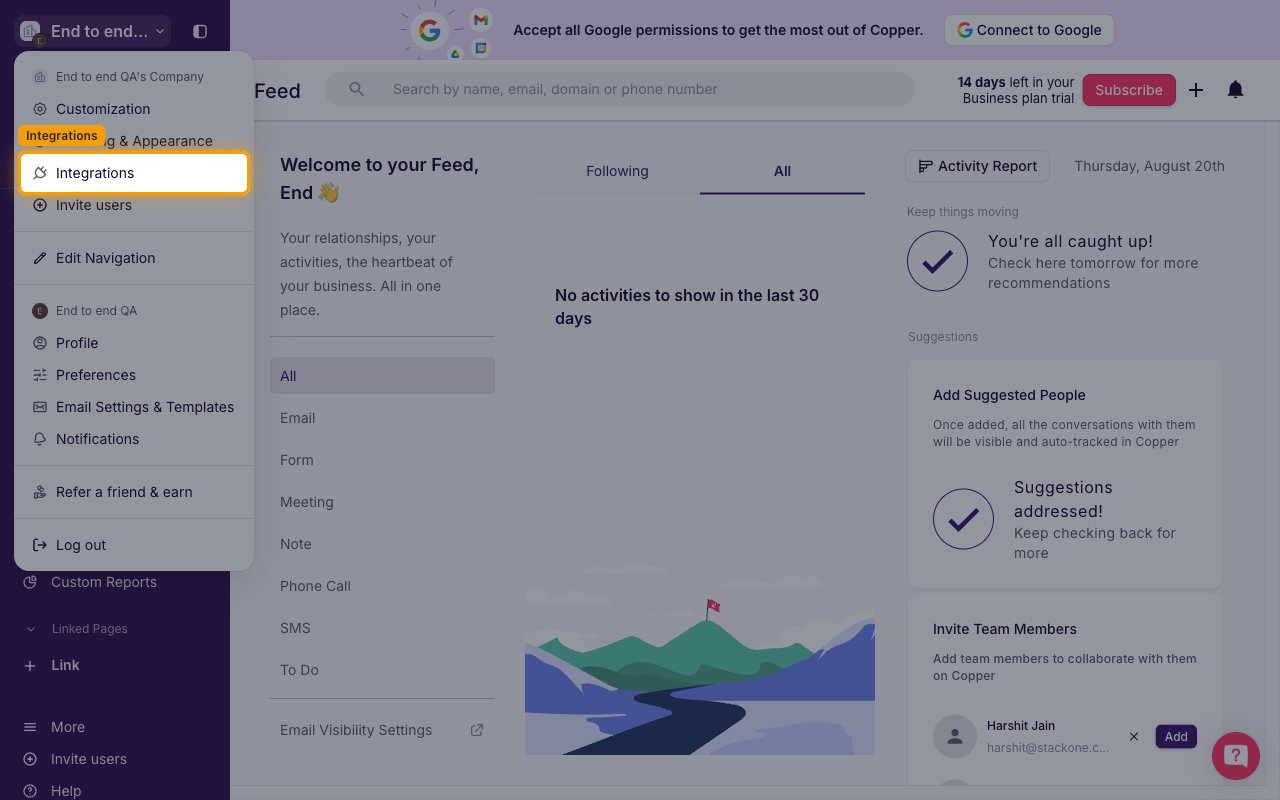
Select Integrations
From the workspace menu, click Integrations. This opens the Settings page on Integrations.
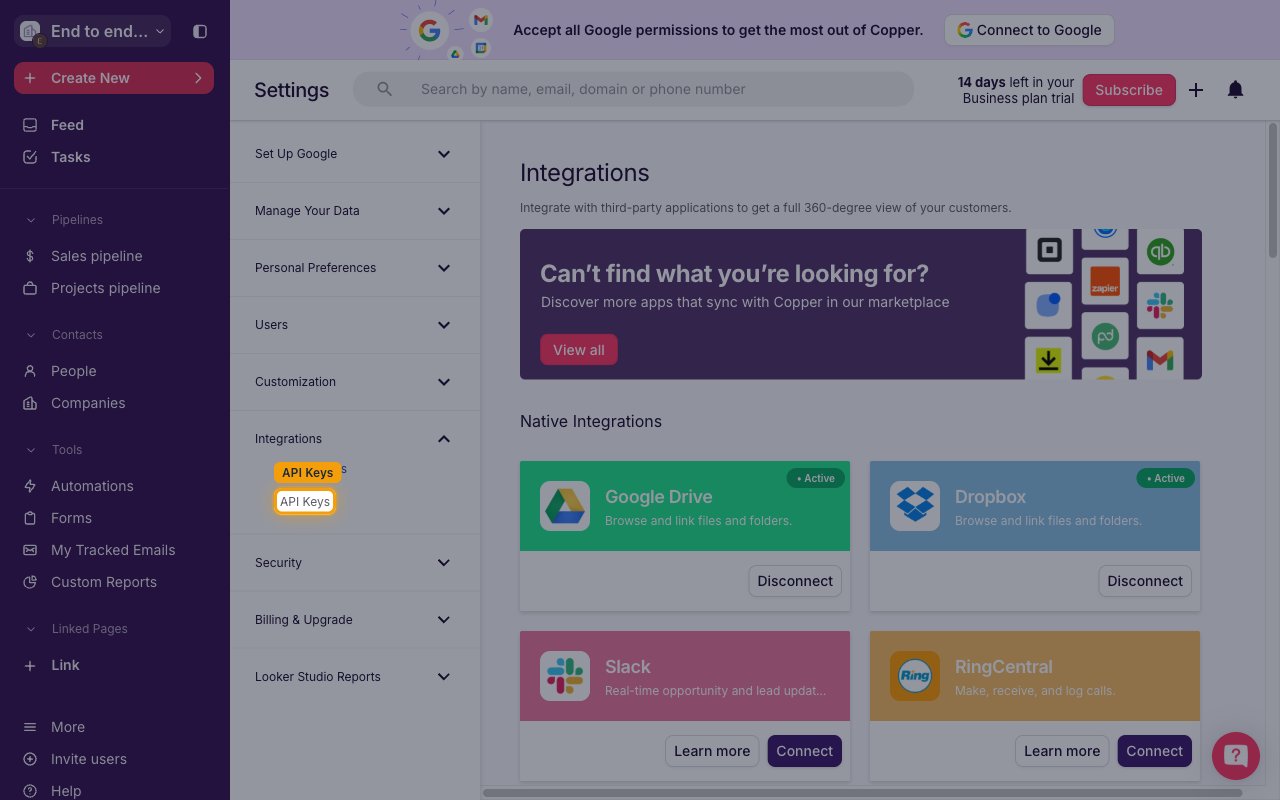
Open API Keys
In the left settings navigation, expand Integrations and click API Keys.
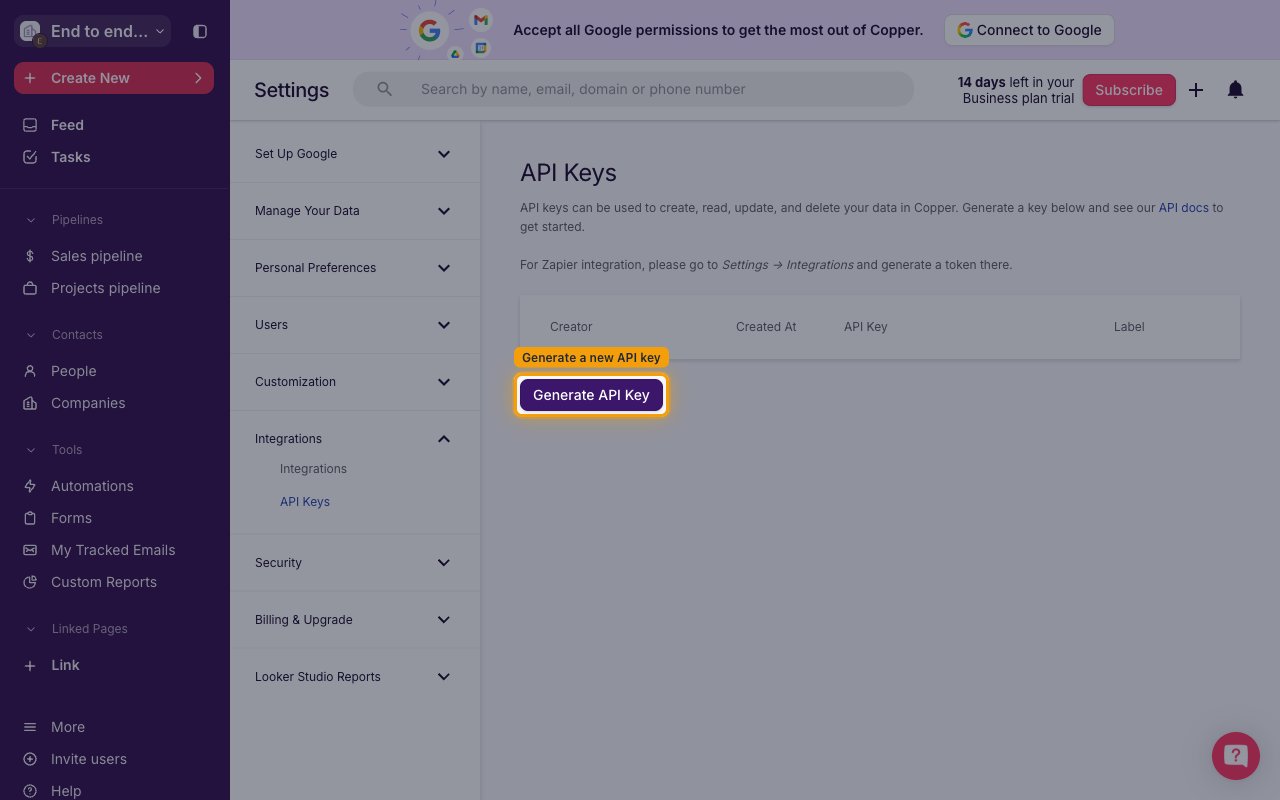
Generate a new API Key
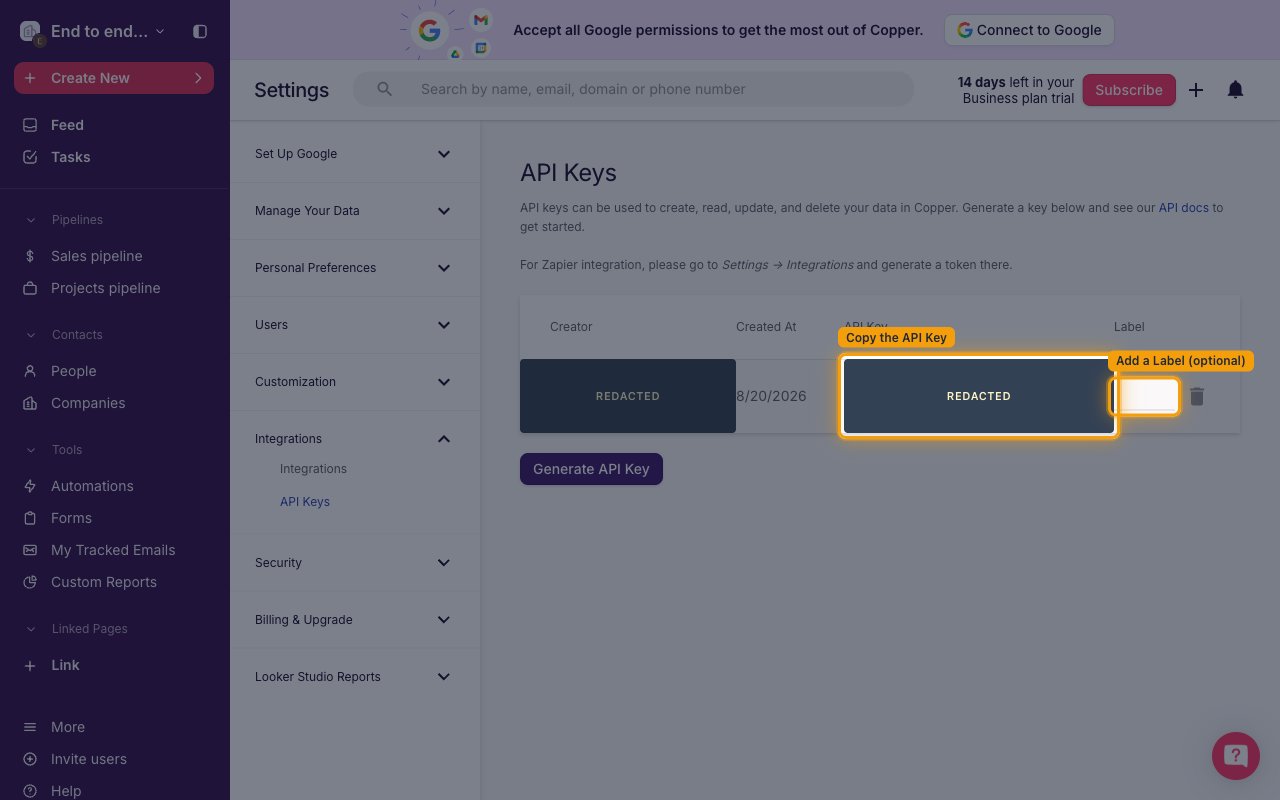
Click Generate API Key. Copper creates a new key immediately and adds it as a row to the table on this page.
Copy the API Key and add a Label
Copper displays the new key inline in the table. Copy the value shown under the API Key column — this is the token StackOne needs. You can also type a name into the Label field (e.g. stackone-integration) so this key is easy to identify later — labels are optional and can be edited at any time.
- Format:
32 hex characters - Example:
f180b30bf843d0c228e3f274dd3c9e70 - Paste the value into the API Key field in StackOne Hub.
- Treat the key like a password — it grants full access to the Copper workspace under the admin user, and it remains visible on the API Keys page until you delete it.
Provide the admin User Email
Copper validates every request against the pair of {API key, admin email}, so StackOne also needs the email address of the Copper user that generated the key. This is provided as a separate User Email field on the connection.
Enter the admin User Email
Use the same email you signed in with when you generated the API key — the address shown under the Creator column of the new API-key row on the API Keys page.
- Paste that email into the User Email field in StackOne Hub.
- The email must belong to the same Admin user whose API key you copied — Copper rejects requests where the two don’t match.
Enable the Leads feature (grants the leads scope)
Lead-related actions require Copper’s Leads module to be turned on. New Copper workspaces ship with Leads disabled by default, and every lead endpoint returns HTTP 403 “Feature not enabled” until you flip the toggle. Enabling Leads grants the leads scope to your API key. Skip this section if you don’t plan to use lead-related StackOne actions.
Open Lead Management settings
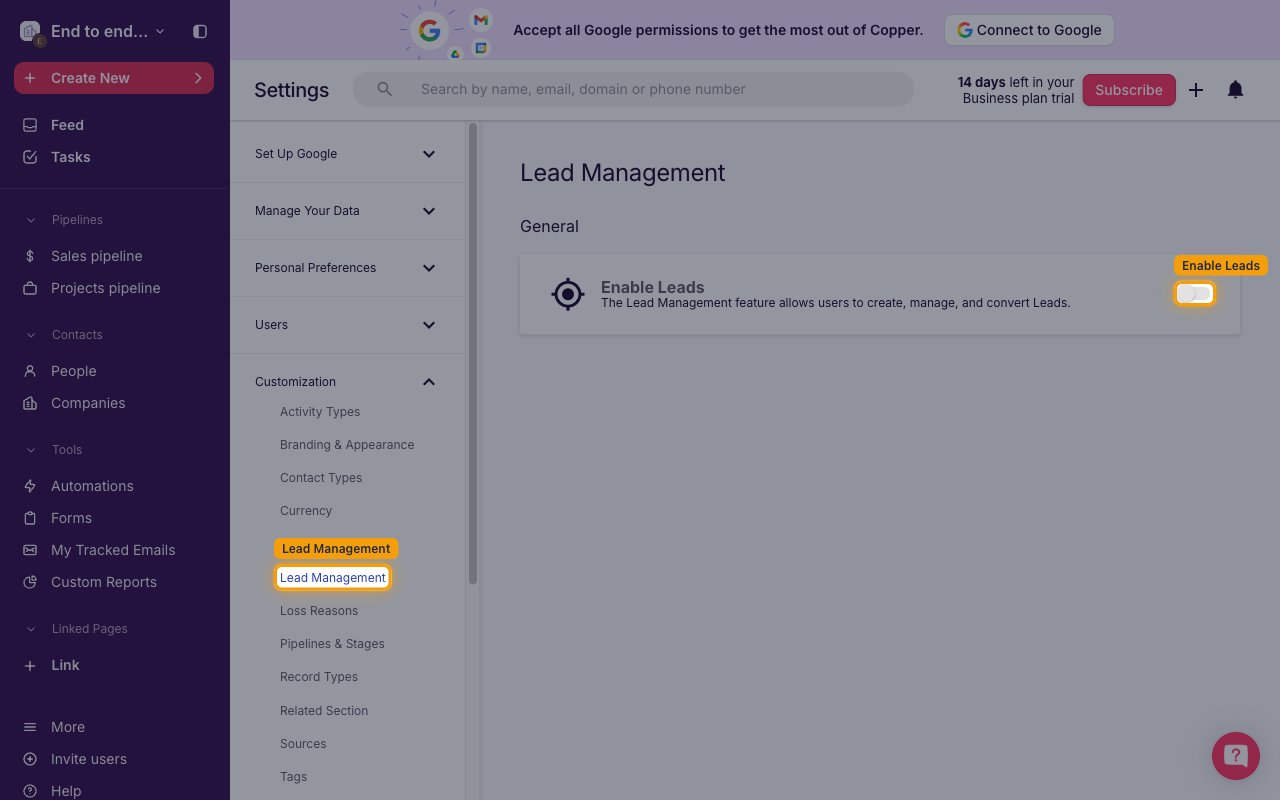
Sign in as the workspace Admin, click your workspace name in the Copper sidebar and choose Customization, then click Lead Management in the left settings navigation. You can also jump straight there with the direct URL below.
- Direct URL —
https://app.copper.com/companies/{COMPANY_ID}/app#/settings/lead-management(replace{COMPANY_ID}with the numeric workspace ID visible in your Copper URL bar).
Toggle Leads on (grants `leads`)
On the Lead Management settings page, click the Enable Leads switch so it shows ON. The change takes ~30 seconds to propagate through Copper’s API. This grants the leads scope to your API key — every lead-related StackOne action requires it.
Verify
Reload Copper — a Leads tab should appear in the main left navigation. Once the tab is visible, the leads scope is granted and lead-related StackOne actions will work.
Linking the Account from the Hub
Navigate to the Hub
Fill out the fields
- API Key
- User Email
Connect
- Click Connect
- If applicable, the provider will redirect you to a sign-in or authorization page. Complete the provider’s authorization flow.
- Once authorization is successful, you will see a confirmation popup
If the account linking is successful, you will see the newly linked account in your Accounts page.