

Create an OAuth 2.0 (3LO) integration
Register a new integration in the Atlassian Developer Console. The integration provides the Client ID and Client Secret.
Create a new integration
Sign in to the Atlassian Developer Console with the Atlassian account that administers your organization.
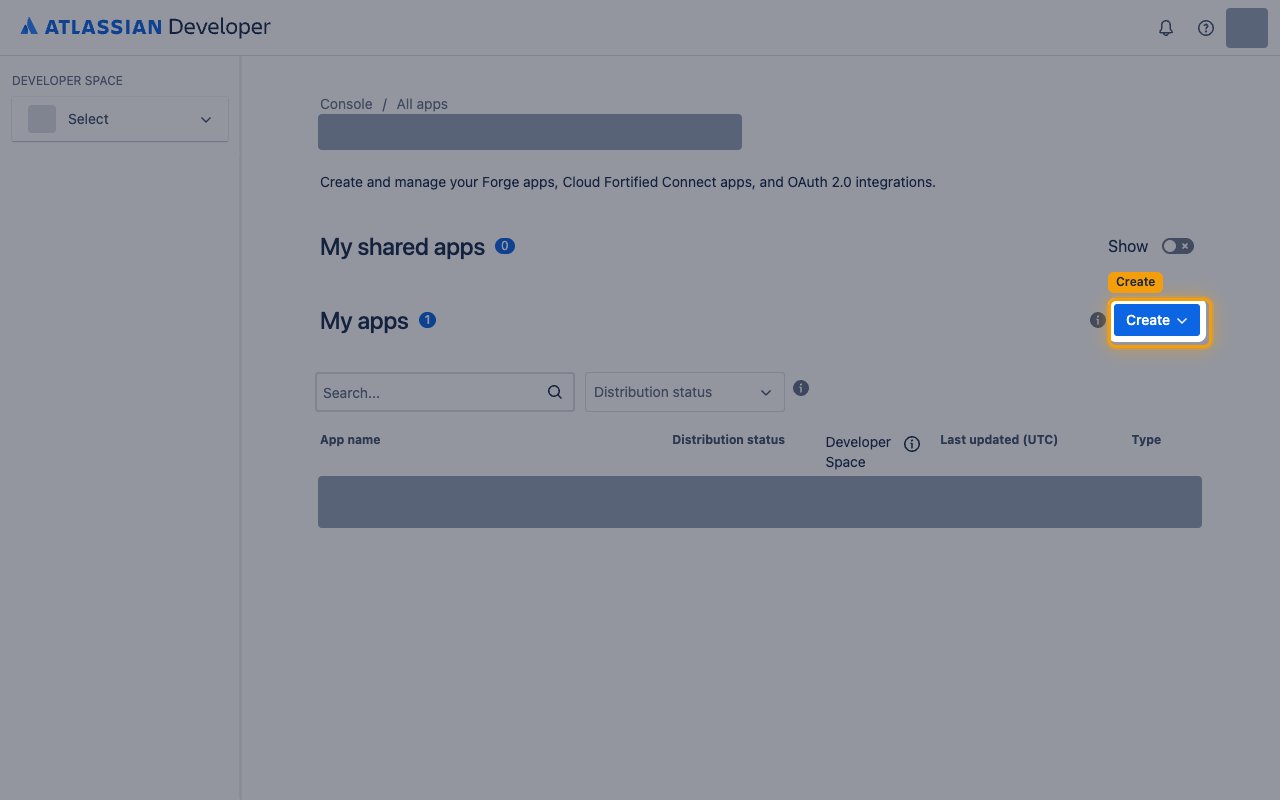
- On the My apps page, click Create.
- Choose OAuth 2.0 integration.
Enter the integration details
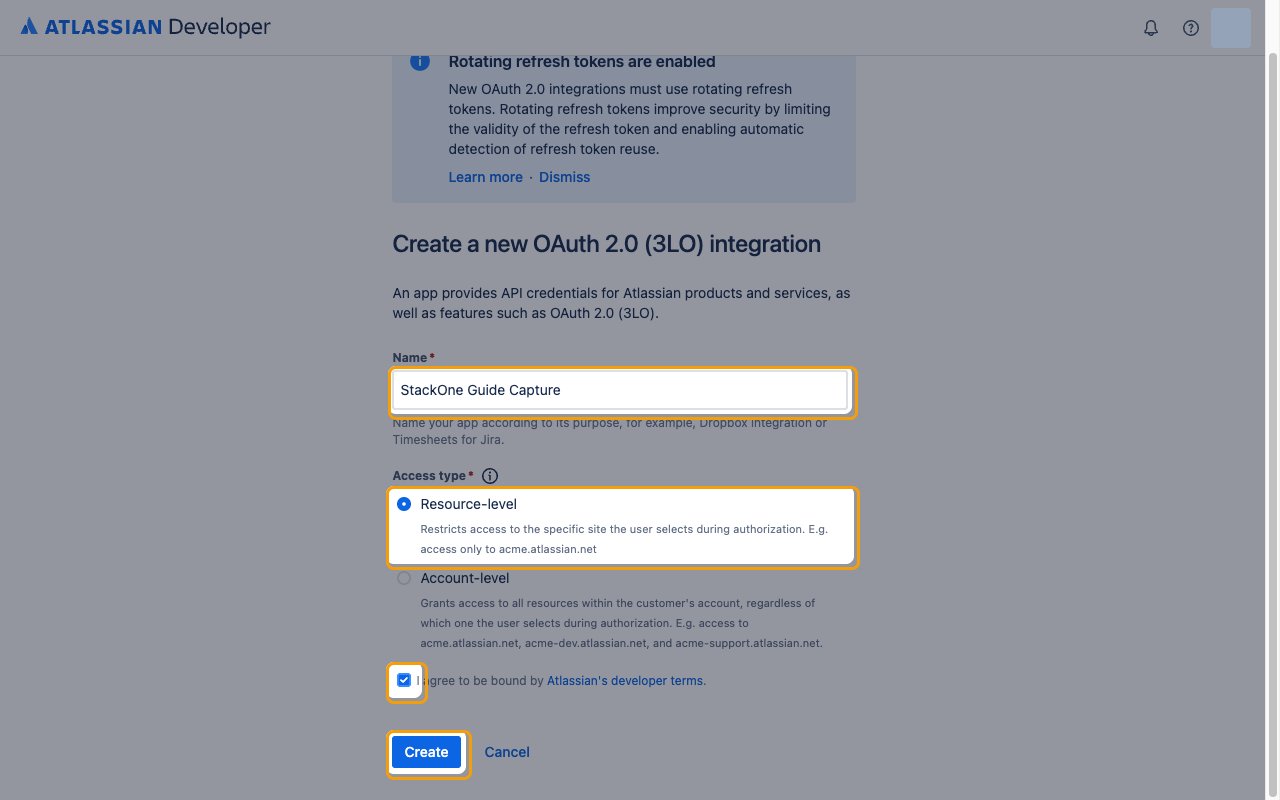
Fill in the Create a new OAuth 2.0 (3LO) integration form.
- Name:
StackOne Integration - Access type: Resource-level, which restricts access to the specific site the user selects during authorization
- Select Account-level only if you need one connection to reach every site in the Atlassian account.
- Tick I agree to be bound by Atlassian’s developer terms.
- Click Create.
Grant the Confluence API scopes
An integration starts with no permissions. Add the Confluence API and enable the scopes the connector’s actions need.
Add the Confluence API
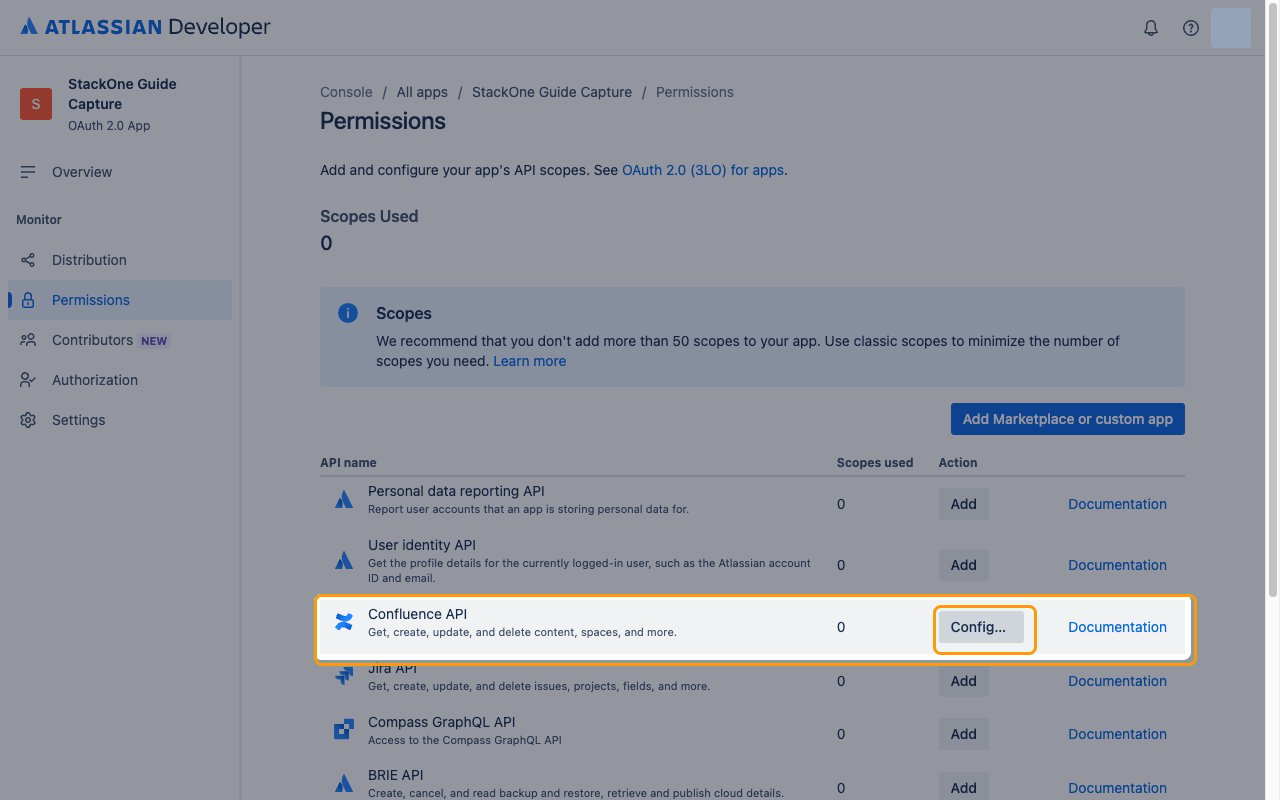
In the left sidebar, click Permissions.
- Find the Confluence API row.
- Click Add.
- Click Configure, which replaces Add once the API is added.
Enable the required scopes
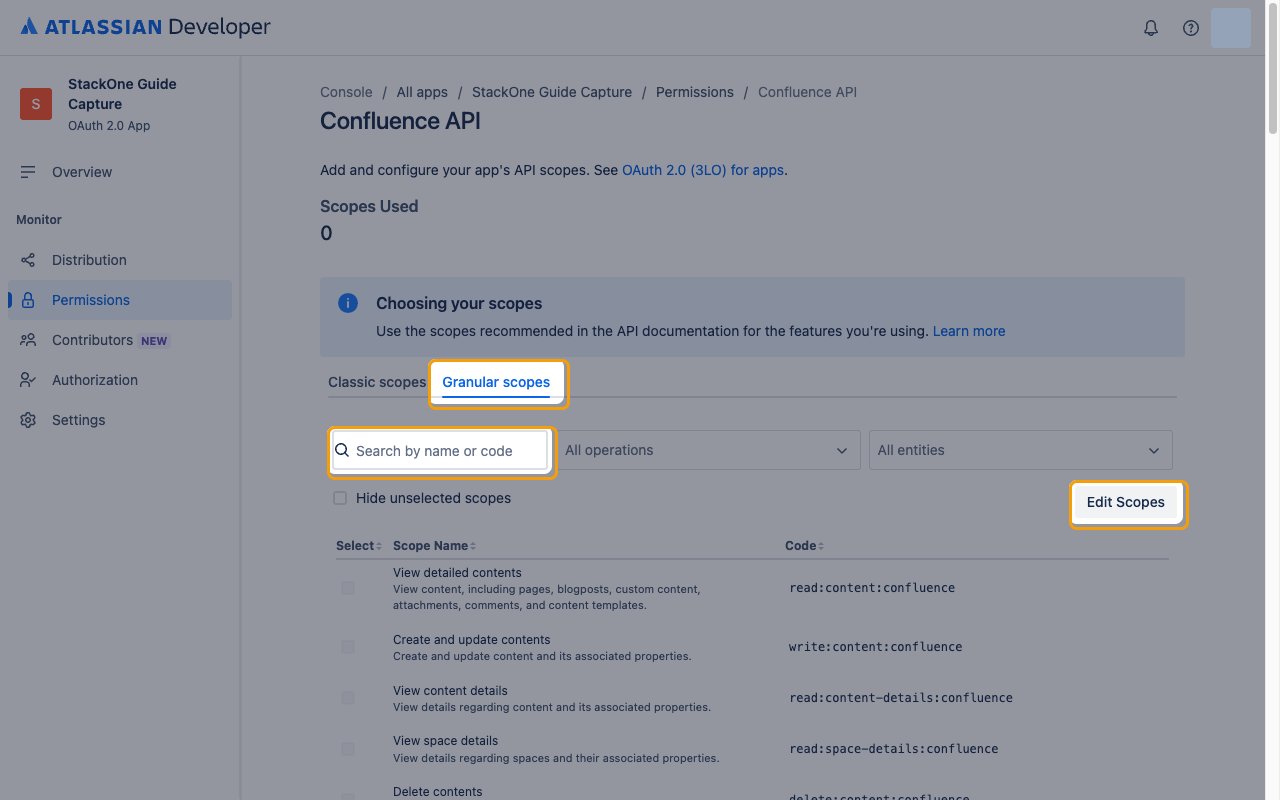
Open the Granular scopes tab.
- Click Edit Scopes.
- Use Search by name or code to find each scope in the list by its Code.
- Tick each scope in the Select column.
- Save your changes.
- Stay on the Granular scopes tab, not Classic scopes.
- The read scopes alone are enough for a read-only integration.
read:email-address:confluenceis also governed by your site’s external user data privacy setting.
Register the callback URL
The integration needs the callback URL from your Connector Profile.
Add the StackOne callback URL
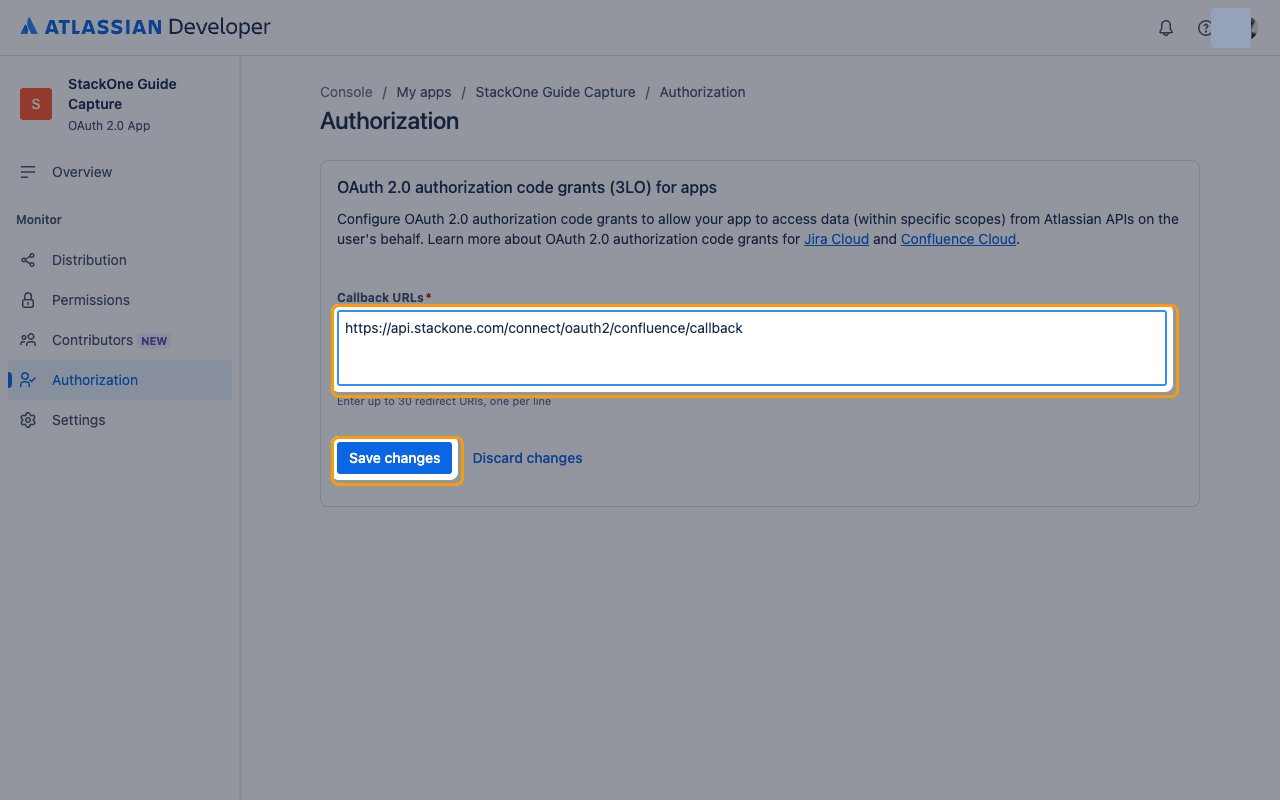
In the left sidebar, click Authorization.
- Click Add on the OAuth 2.0 (3LO) row.
- In the Callback URLs field, enter the Callback URL from your Connector Profile exactly as shown.
- Click Save changes.
Copy the client credentials
Copy the two values from the integration.
Copy the Client ID and Secret
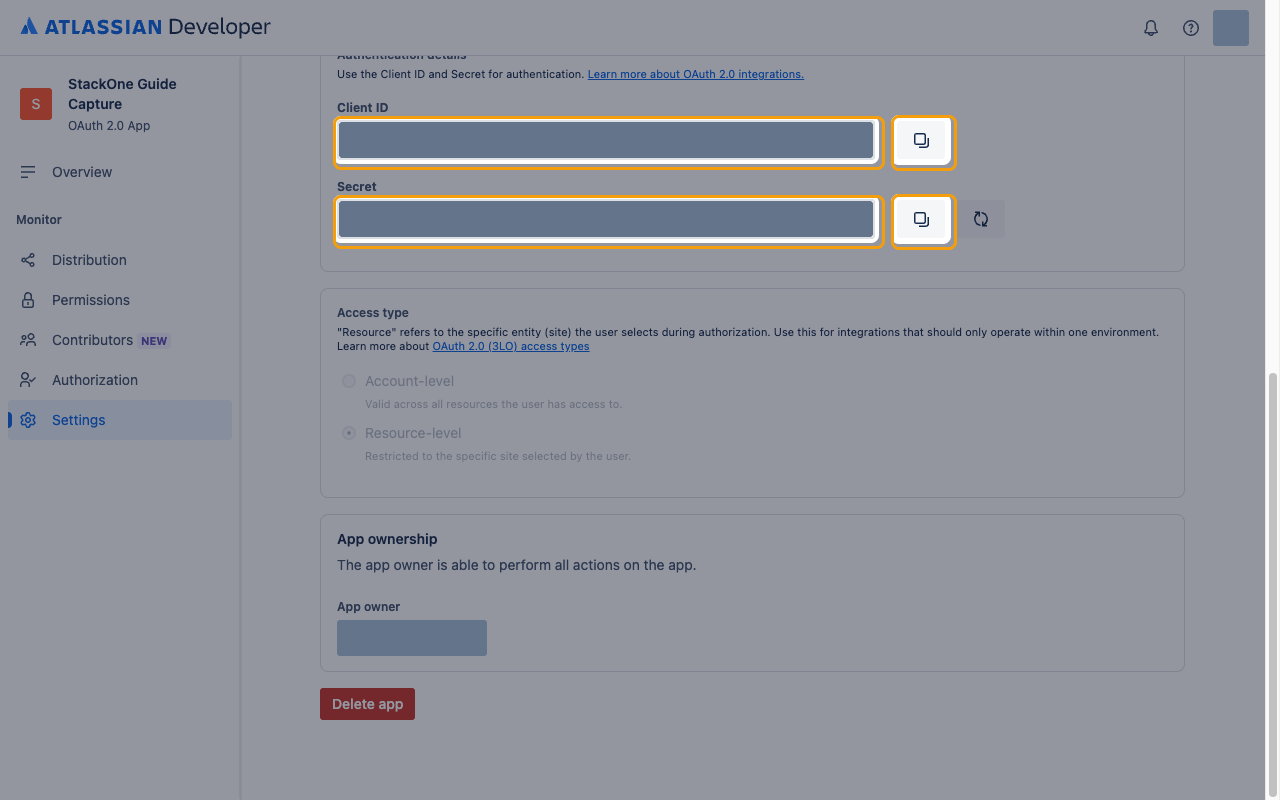
In the left sidebar click Settings and scroll to Authentication details.
- Use the copy button beside each value.
- Client ID: the public identifier of your integration, shown under Client ID. Copy it across.
- Client Secret: shown under Secret. Copy it across.
Add an organization API key
This key is optional. Create it only if you need organization data.
Create the organization API key
Create the key in Atlassian administration under Settings, API keys. This is issued at the Atlassian organization level, so it is separate from the OAuth integration you just created.
- Copy the Organization Admin API Key across.
- Atlassian lets you create the key with scopes or without scopes (full access). If you create a scoped key, select the
read:orgs:adminscope.
Link the Account
Connect
- Click Connect.
- If applicable, the provider will redirect you to a sign-in or authorization page. Complete the provider’s authorization flow.
- Once authorization is successful, you will see a confirmation popup.
Use Actions