

Create an OAuth 2.0 (3LO) integration
Register a new integration in the Atlassian Developer Console. This is what issues the Client ID and Client Secret that StackOne uses.
Sign in to the Developer Console
Sign in with the Atlassian account that administers your organization.
- Open the Atlassian Developer Console.
- Use an account with administrator access — creating an integration and granting API scopes both require it.
Create a new integration
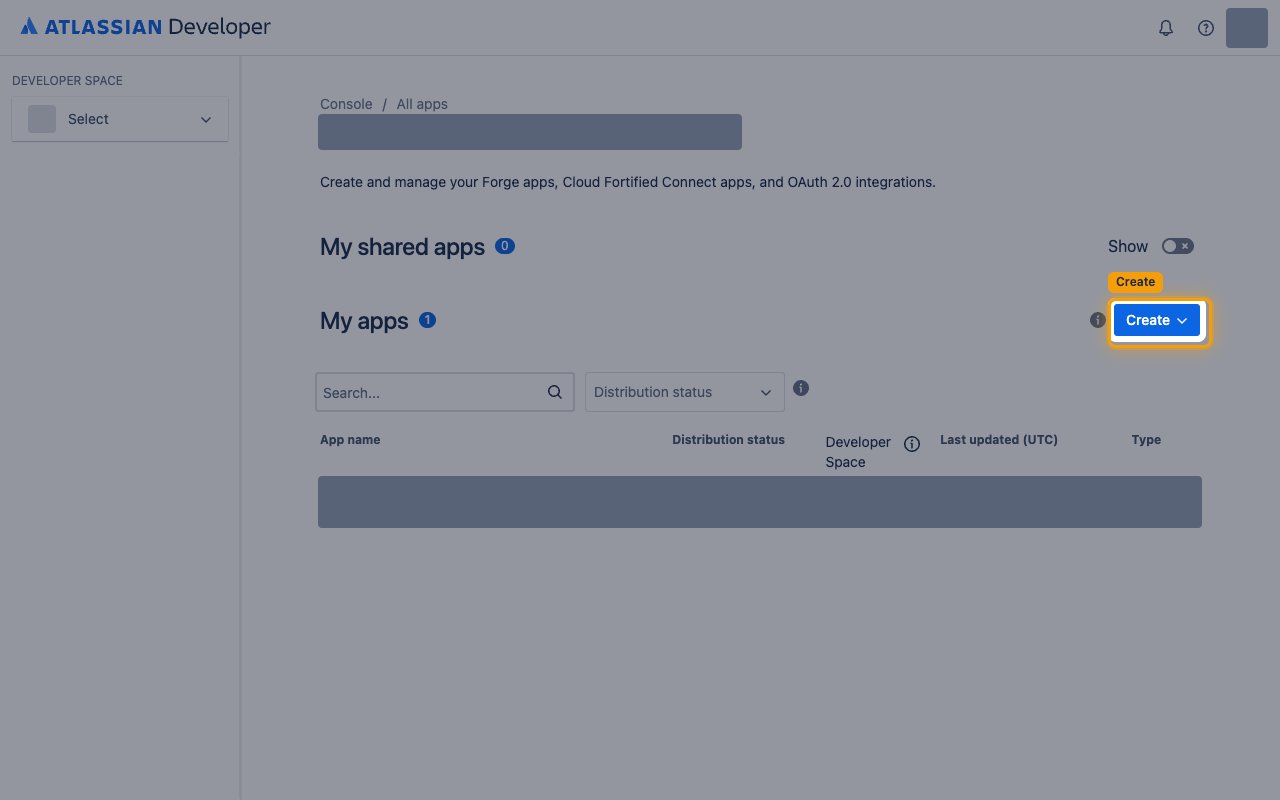
On the My apps page, click Create and choose OAuth 2.0 integration.
Enter the integration details
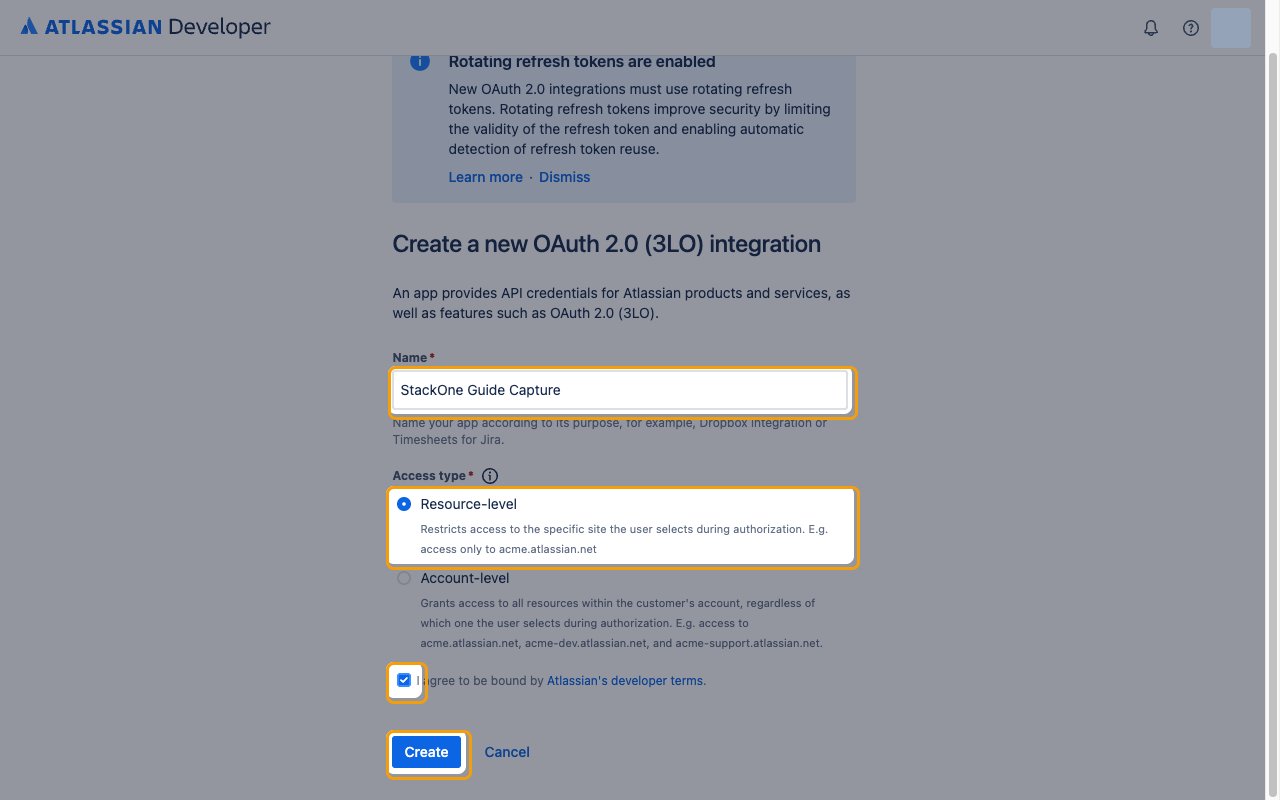
Fill in the Create a new OAuth 2.0 (3LO) integration form.
- Enter a Name for the integration (for example,
StackOne Integration). - For Access type, select Resource-level — it restricts access to the specific site the user selects during authorization.
- Select Account-level only if you need one connection to reach every site in the Atlassian account.
- Tick I agree to be bound by Atlassian’s developer terms. and click Create.
- Atlassian shows a Rotating refresh tokens are enabled notice. This is expected — StackOne stores the new refresh token each time it renews the access token.
Grant the Confluence API scopes
An integration starts with no permissions. Add the Confluence API and enable the scopes the connector’s actions need.
Add the Confluence API
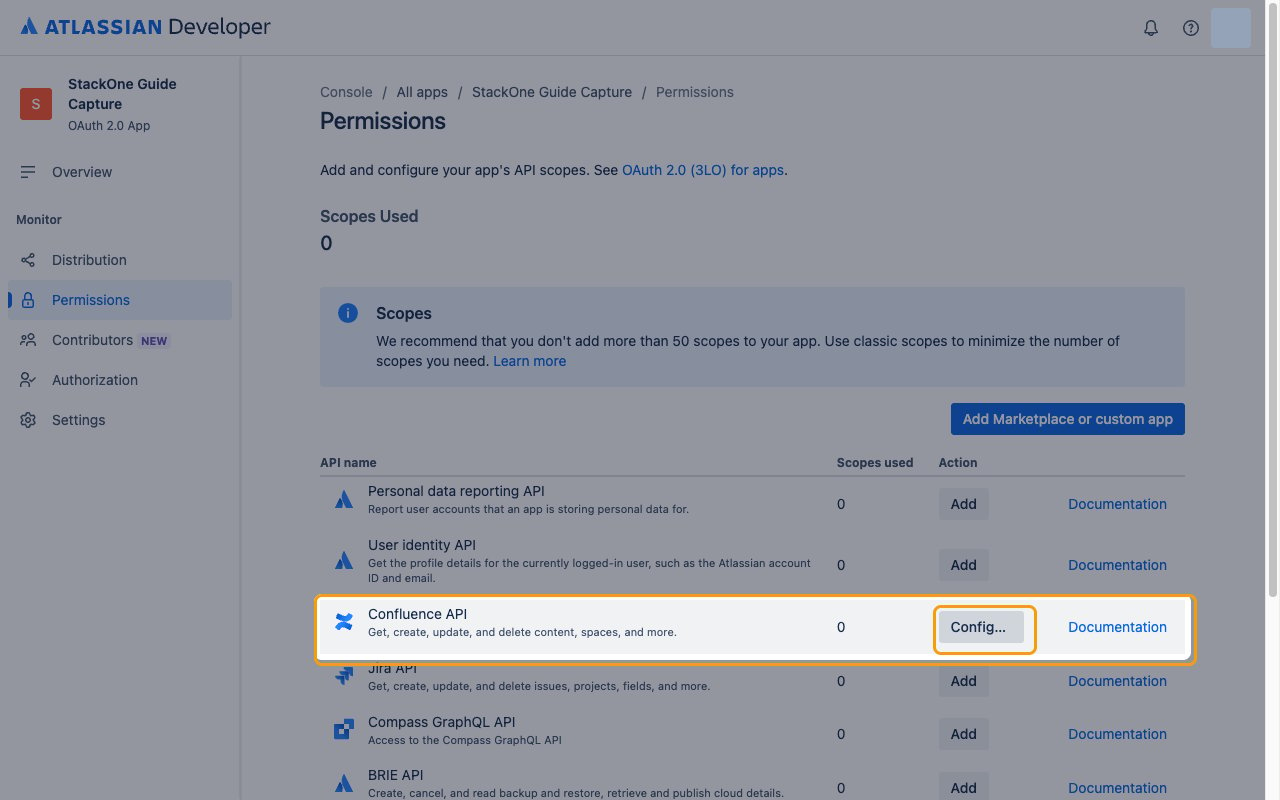
In the left sidebar click Permissions, find the Confluence API row, then click Add. Once it is added the button changes to Configure — click it.
Enable the required scopes
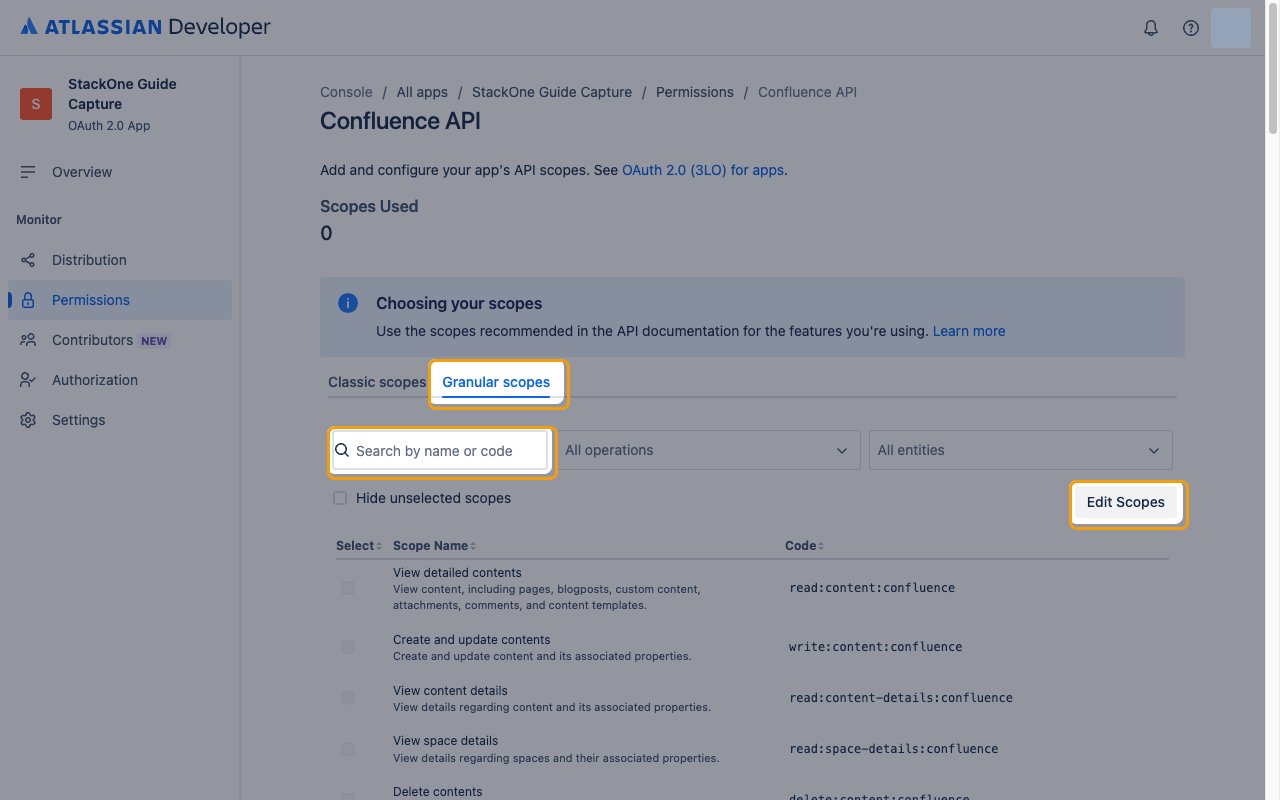
Open the Granular scopes tab and click Edit Scopes. Use Search by name or code to find each scope below by its Code, tick it in the Select column, then save.
- Stay on the Granular scopes tab — the connector requests granular scopes, not the ones on the Classic scopes tab.
- The read scopes alone are enough for a read-only integration. Leaving a scope out only affects the actions that need it — those return a permission error while the rest of the connector keeps working.
read:email-address:confluenceis also governed by your site’s external user data privacy setting. If that setting hides email addresses, the email fields come back empty even with the scope granted.
Register the callback URL
Atlassian only completes an authorization if the callback URL is registered on the integration first.
Add the StackOne callback URL
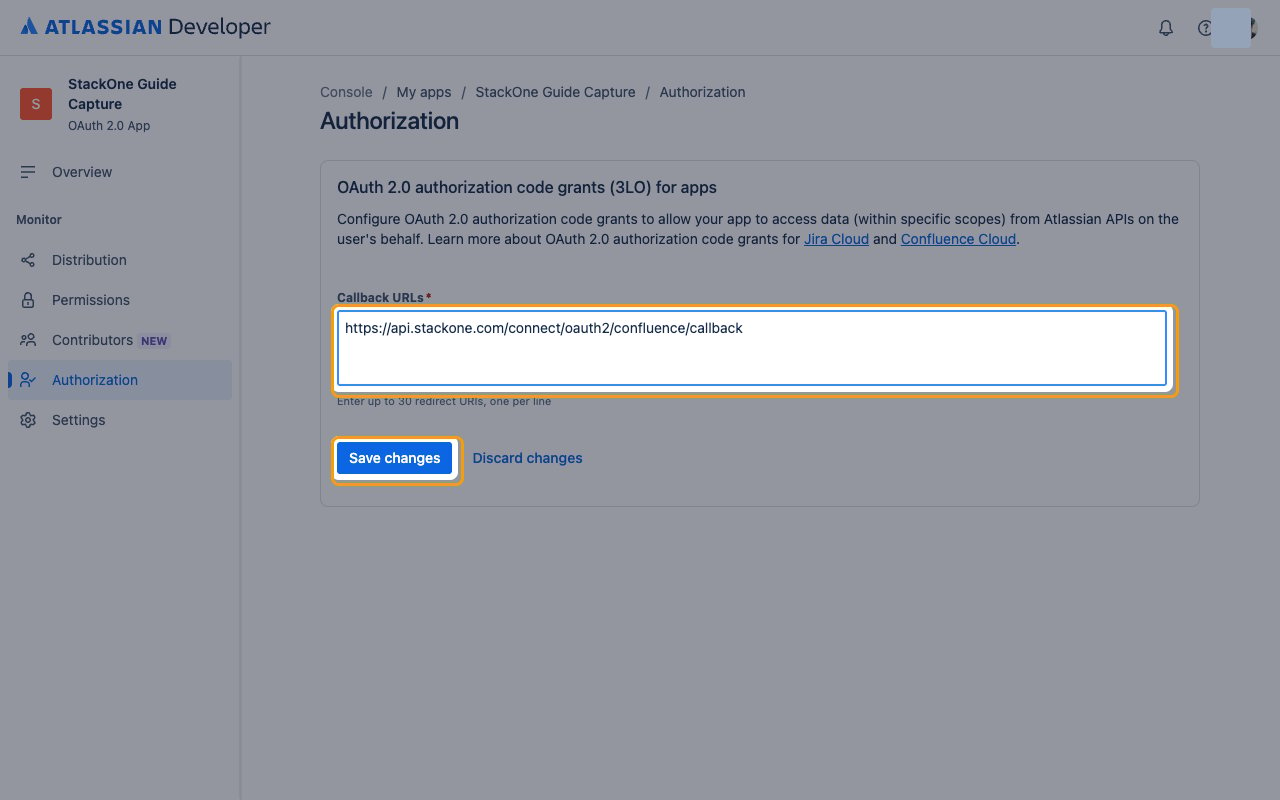
In the left sidebar click Authorization, then click Add on the OAuth 2.0 (3LO) row. Paste the StackOne callback URL into Callback URLs and click Save changes.
- Callback URL:
https://api.stackone.com/connect/oauth2/confluence/callback - Enter it exactly as shown — a trailing slash or a different host makes the authorization fail.
Copy the client credentials
The last step reads the two values StackOne needs from the integration.
Copy the Client ID and Secret
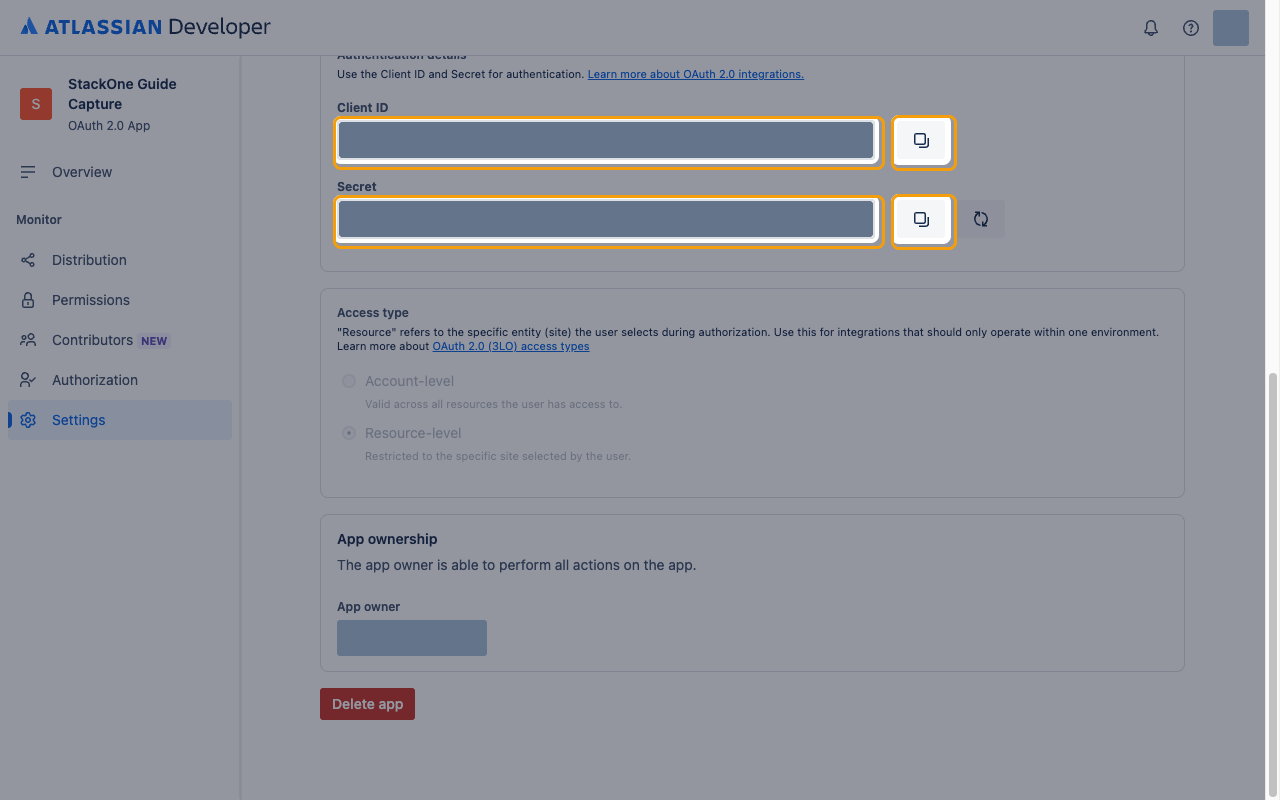
In the left sidebar click Settings and scroll to Authentication details. Use the copy button beside each value.
- Client ID — the public identifier of your integration, shown under Client ID. Paste it into the Client ID field in StackOne Hub.
- Client Secret — shown under Secret. Paste it into the Client Secret field in StackOne Hub.
- Store the secret securely. If it is lost you can rotate it here, but rotating invalidates every connection using the old value.
- OAuth Scopes — leave this field in StackOne Hub empty to request every scope listed above. Set it only to narrow the request to a smaller subset, and make sure each scope you list is also enabled on the integration.
Add an organization API key
Only needed for the unified IAM organization actions. They read from the Atlassian organization admin API, which uses its own key rather than the OAuth app.
Create the organization API key
Create the key in Atlassian administration under Settings, API keys. This is issued at the Atlassian organization level and requires organization admin access, so it is separate from the OAuth integration you just created.
- Paste it into the Organization Admin API Key field in StackOne Hub.
- Leave the field empty if you do not need List Unified Organizations or Get Unified Organization. Calling either without the key returns an error naming it; nothing else in the connector is affected.
- Atlassian lets you create the key with scopes or without scopes (full access). If you create a scoped key, select the
read:orgs:adminscope — Get Unified Organization requires it, and Atlassian’s docs specify no required scope for List Unified Organizations.
Linking the Account from the Hub
Navigate to the Hub
Fill out the fields
- Client ID
- Client Secret
- OAuth Scopes (Optional)
- Organization Admin API Key (Optional)
Connect
- Click Connect
- If applicable, the provider will redirect you to a sign-in or authorization page. Complete the provider’s authorization flow.
- Once authorization is successful, you will see a confirmation popup
If the account linking is successful, you will see the newly linked account on your Accounts page.