

Create a Bronto API key
Bronto authenticates API requests with an API key sent in the X-BRONTO-API-KEY header. Generate one from the Bronto app and paste it, along with your data region, into StackOne Hub.
Sign in to Bronto
Sign in to Bronto for the data region your organisation is hosted in, then note which region you used — you will select the matching region in StackOne Hub.
- EU — Bronto EU dashboard
- US — Bronto US dashboard
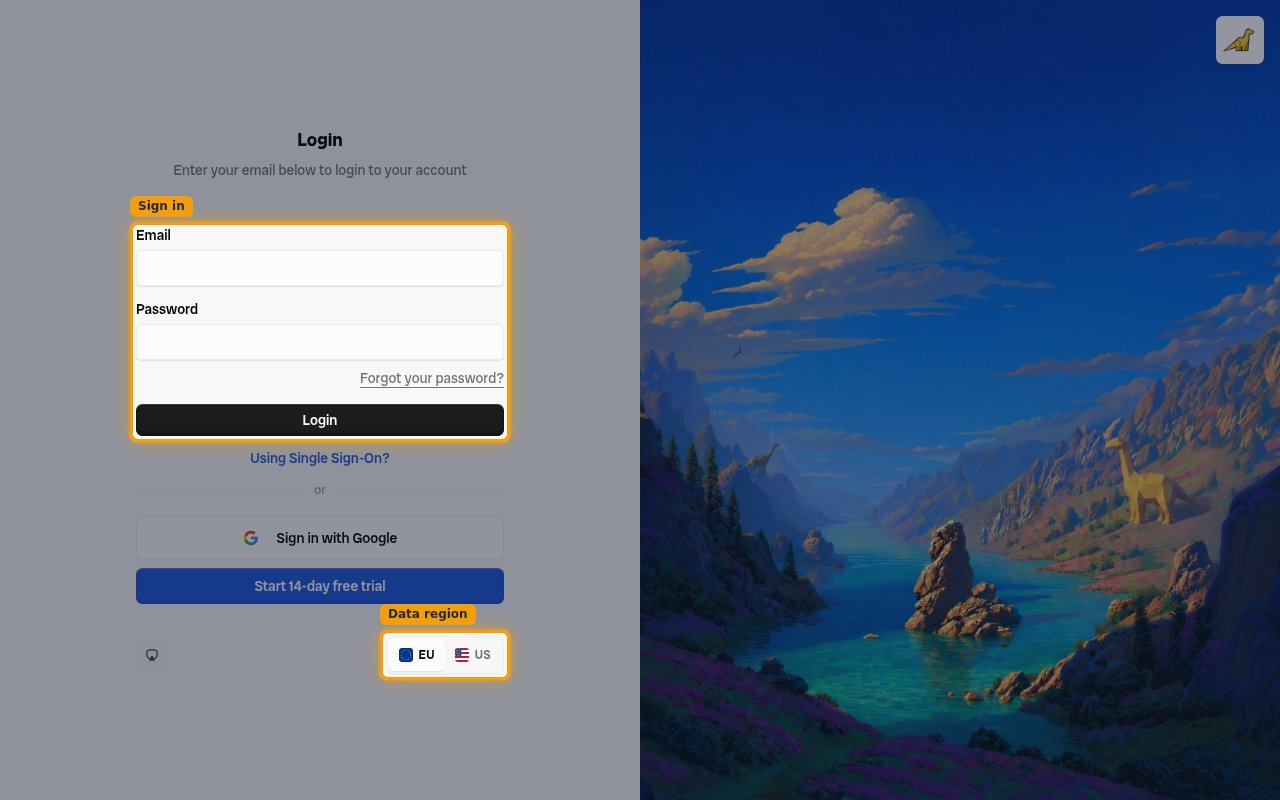
- On the Login screen, enter your Email and Password and click Login (or use Sign in with Google / Using Single Sign-On?).
- Use the Data region toggle (EU / US) at the bottom of the login form to pick the region before signing in.
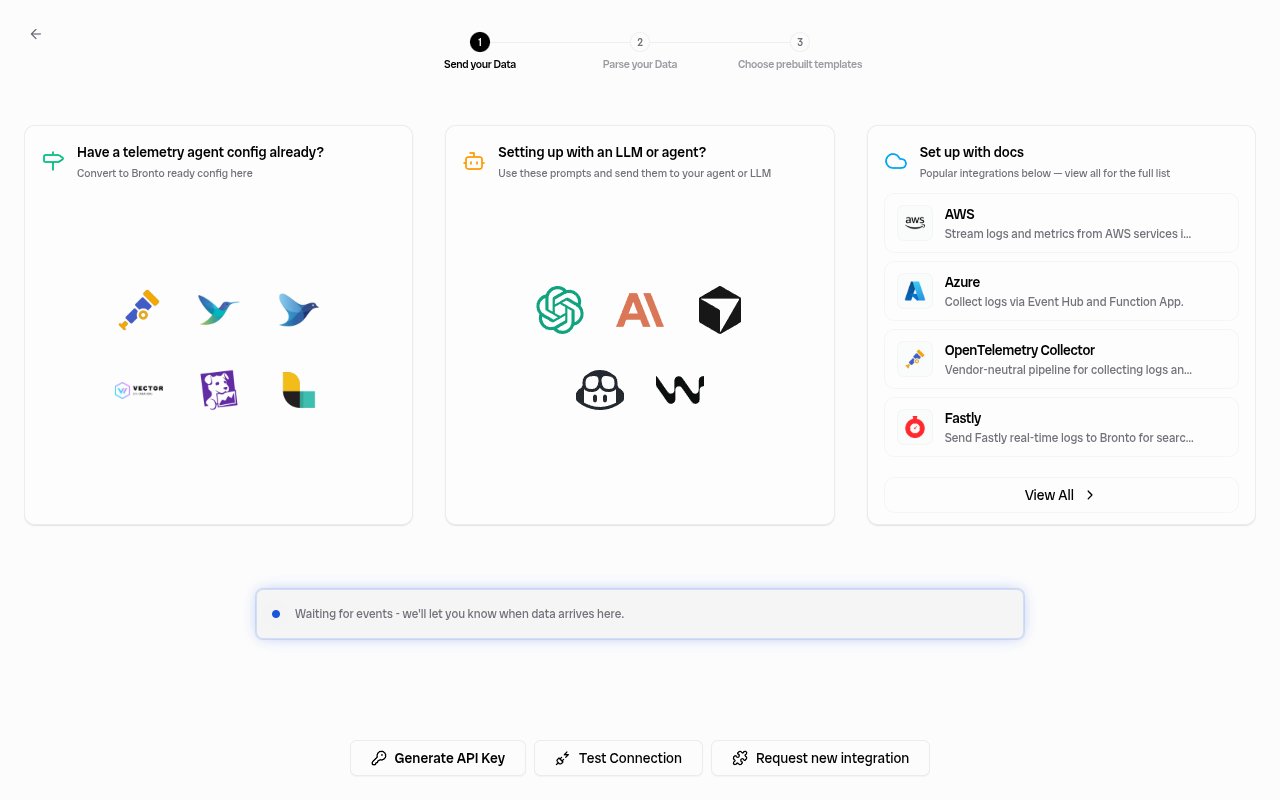
Navigate out of the onboarding wizard
Right after signing in, some accounts open an onboarding wizard instead of the main dashboard. It shows the steps Send your Data, Parse your Data, and Choose prebuilt templates, and does not display the Settings menu.
- Do not use the wizard’s Generate API Key button for StackOne — it creates a key with the Ingestion Role (send-data only), which cannot read logs, datasets, or monitors. Create the key from Settings instead (next step) so you can choose a role that has read access.
- To leave the wizard, remove
/onboarding/configurefrom the browser address bar (leaving the/org/{id}URL) and press Enter — your organisation dashboard loads with the left sidebar visible, then follow the next step. - Or go straight to the API Keys screen by URL — replace
/onboarding/configurein the address with/settings/api-keys. Format:https://app.{region}.bronto.io/org/{id}/settings/api-keys(for examplehttps://app.eu.bronto.io/org/{id}/settings/api-keys).
Open API Keys settings
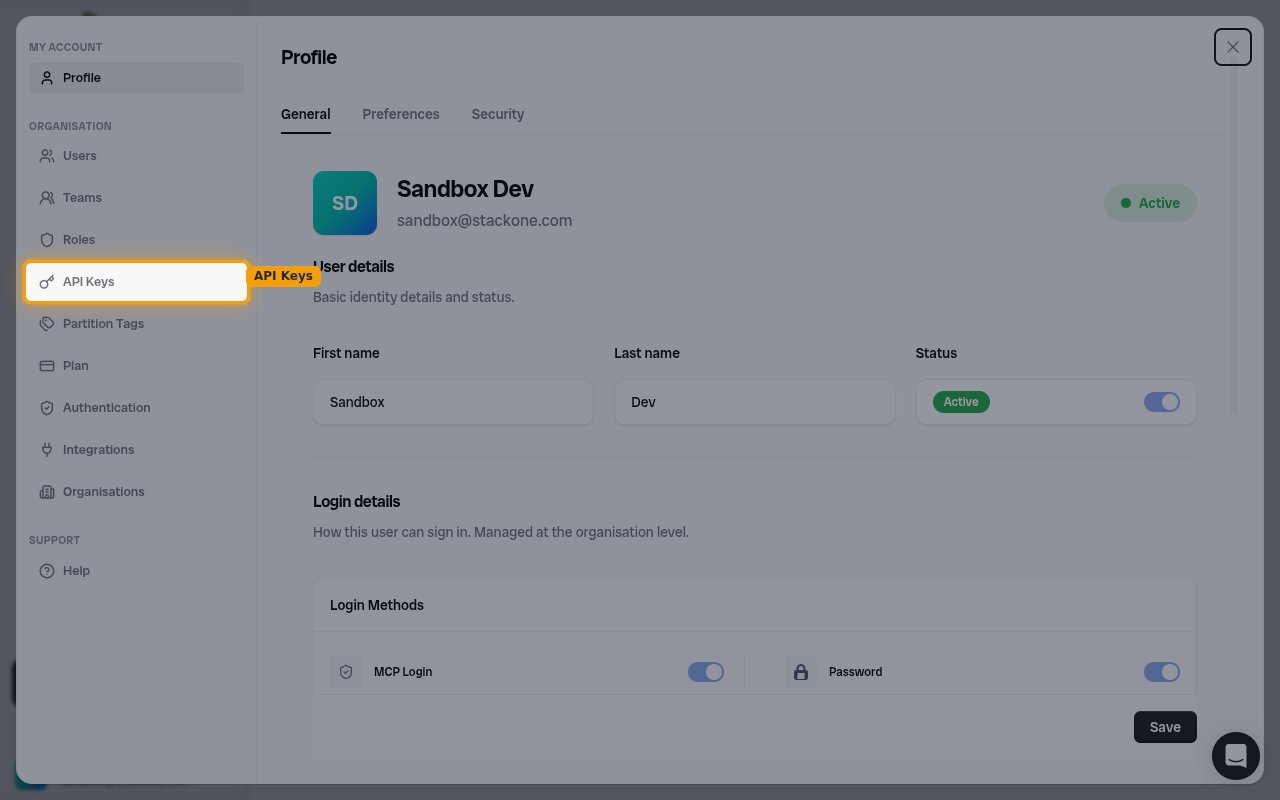
With the main dashboard open, open the API key management screen.
- In the left sidebar, open Settings.
- Under Organisation, click API Keys.
Add an API key
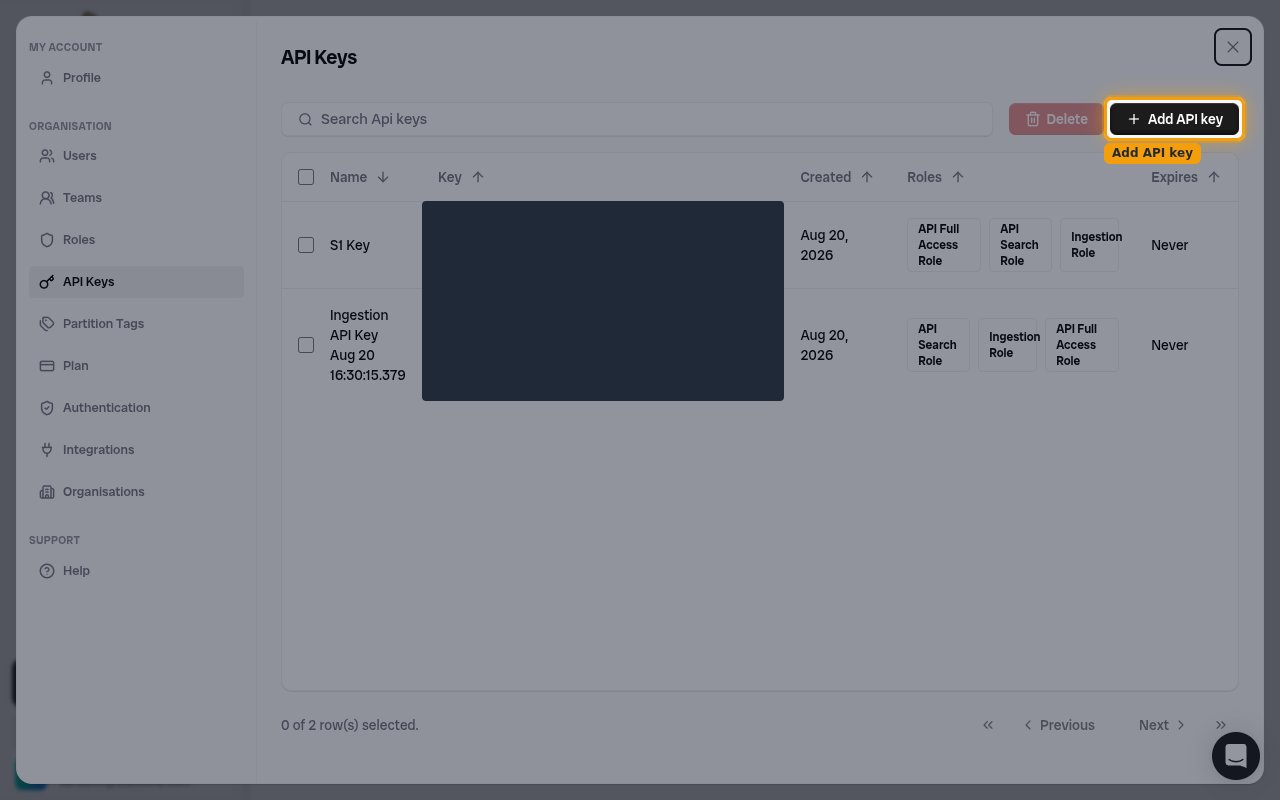
On the API Keys page, click + Add API key in the top-right corner.
Configure and create the key
Fill in the new key details, then create it.
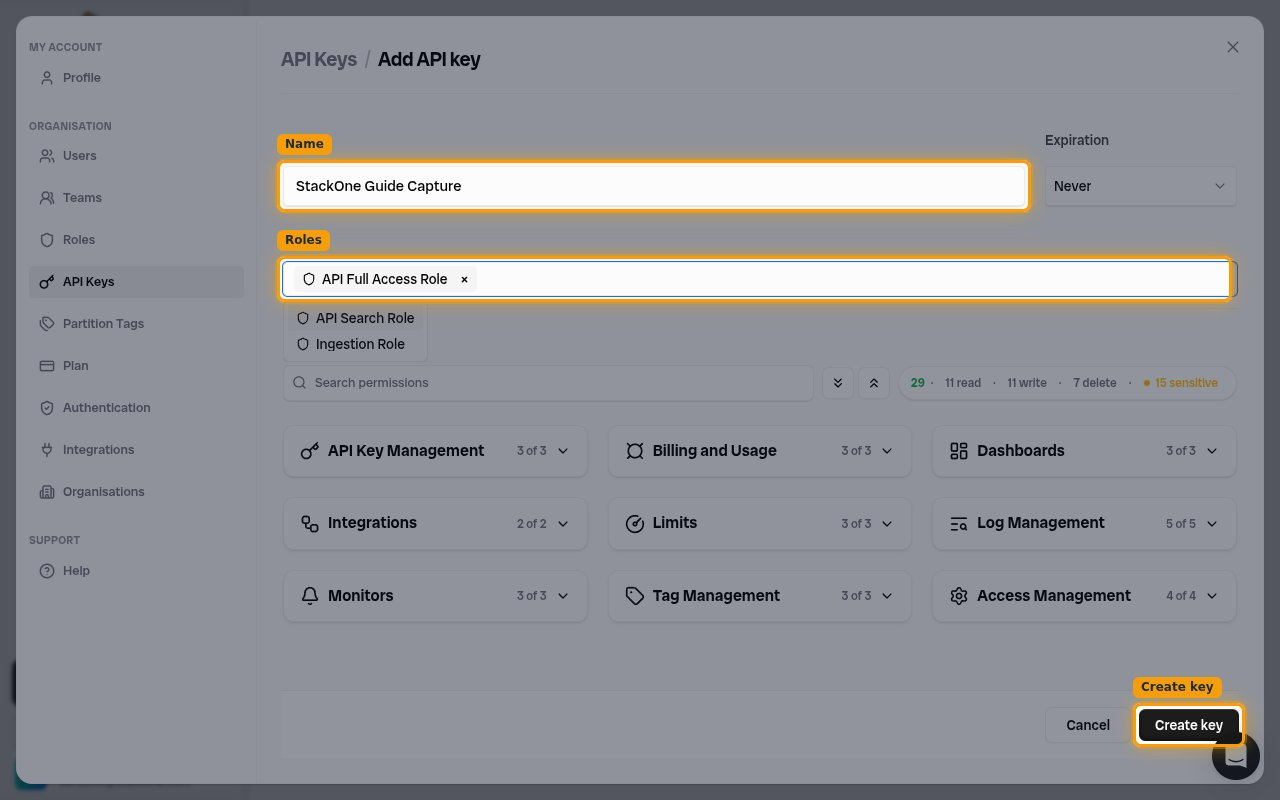
- Name — enter a descriptive name for the key (for example
StackOne Integration). - Roles — select a role that grants the access your integration needs. Choose API Full Access Role for full read, write, and delete access; API Search Role for read/search only; or Ingestion Role for sending data. Selecting a role automatically enables its Permissions.
- Expiration — leave as Never, or choose an expiry if you want the key to expire.
- Click Create key.
Copy the API key
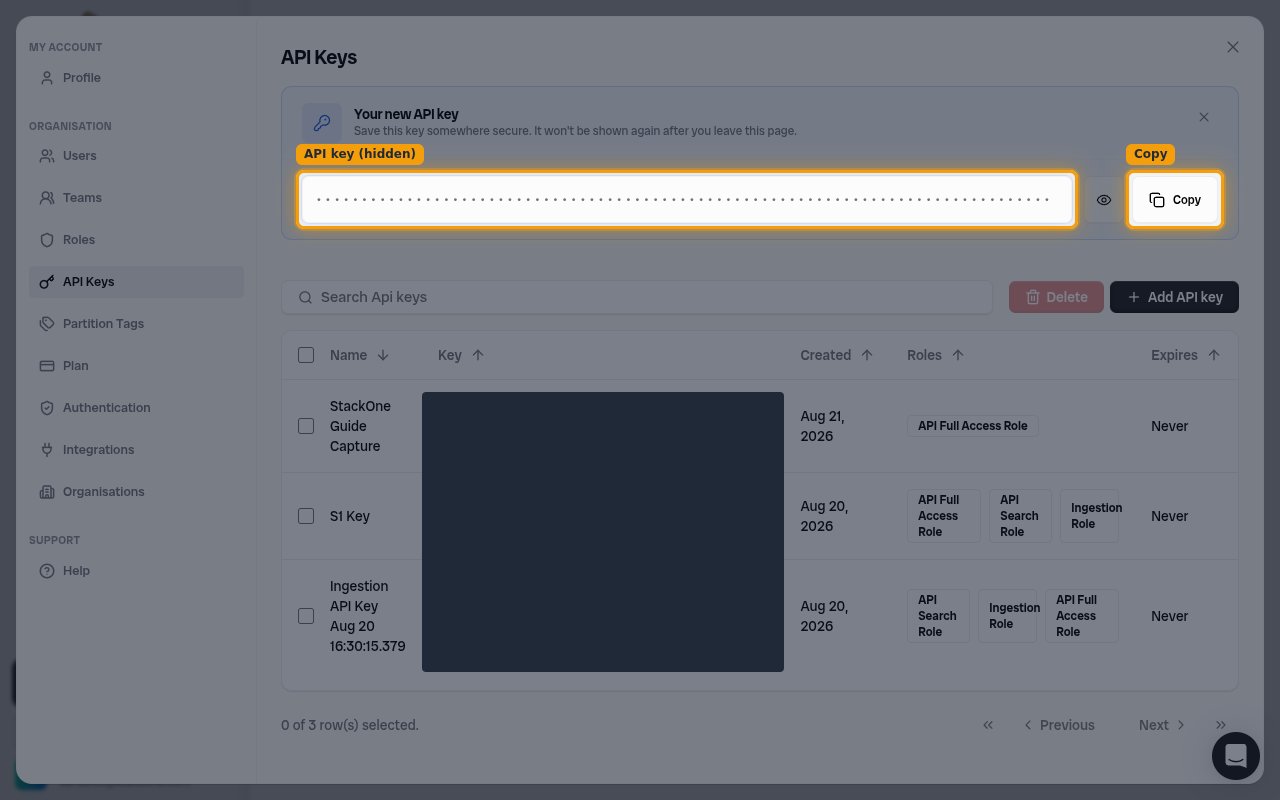
After creating the key, the Your new API key banner shows the key value.
- Click Copy to copy the key (use the eye icon to reveal it first if you want to check it).
- This key is only shown once — Save this key somewhere secure. It won’t be shown again after you leave this page. If you lose it, delete the key and create a new one.
Connect in StackOne Hub
Enter the values you collected into StackOne Hub to finish connecting Bronto.
Enter your credentials
In StackOne Hub, complete the Bronto connection fields:
- Data Region — select the region you signed in to (EU (api.eu.bronto.io) or US (api.us.bronto.io)). This must match your Bronto account’s region.
- API Key — paste the API key you copied from Bronto. It is sent as the X-BRONTO-API-KEY header on every request.
Linking the Account from the Hub
Navigate to the Hub
Fill out the fields
- Data Region
- API Key
Connect
- Click Connect
- If applicable, the provider will redirect you to a sign-in or authorization page. Complete the provider’s authorization flow.
- Once authorization is successful, you will see a confirmation popup
If the account linking is successful, you will see the newly linked account on your Accounts page.
Next Steps
Webhooks setup
Configure receiving Events for Bronto into StackOne.