

Create a Brave Search API account
To connect Brave Search with StackOne, you’ll need an API key from the Brave Search API dashboard. If you already have an account, log in and skip to the next section.
Register an account
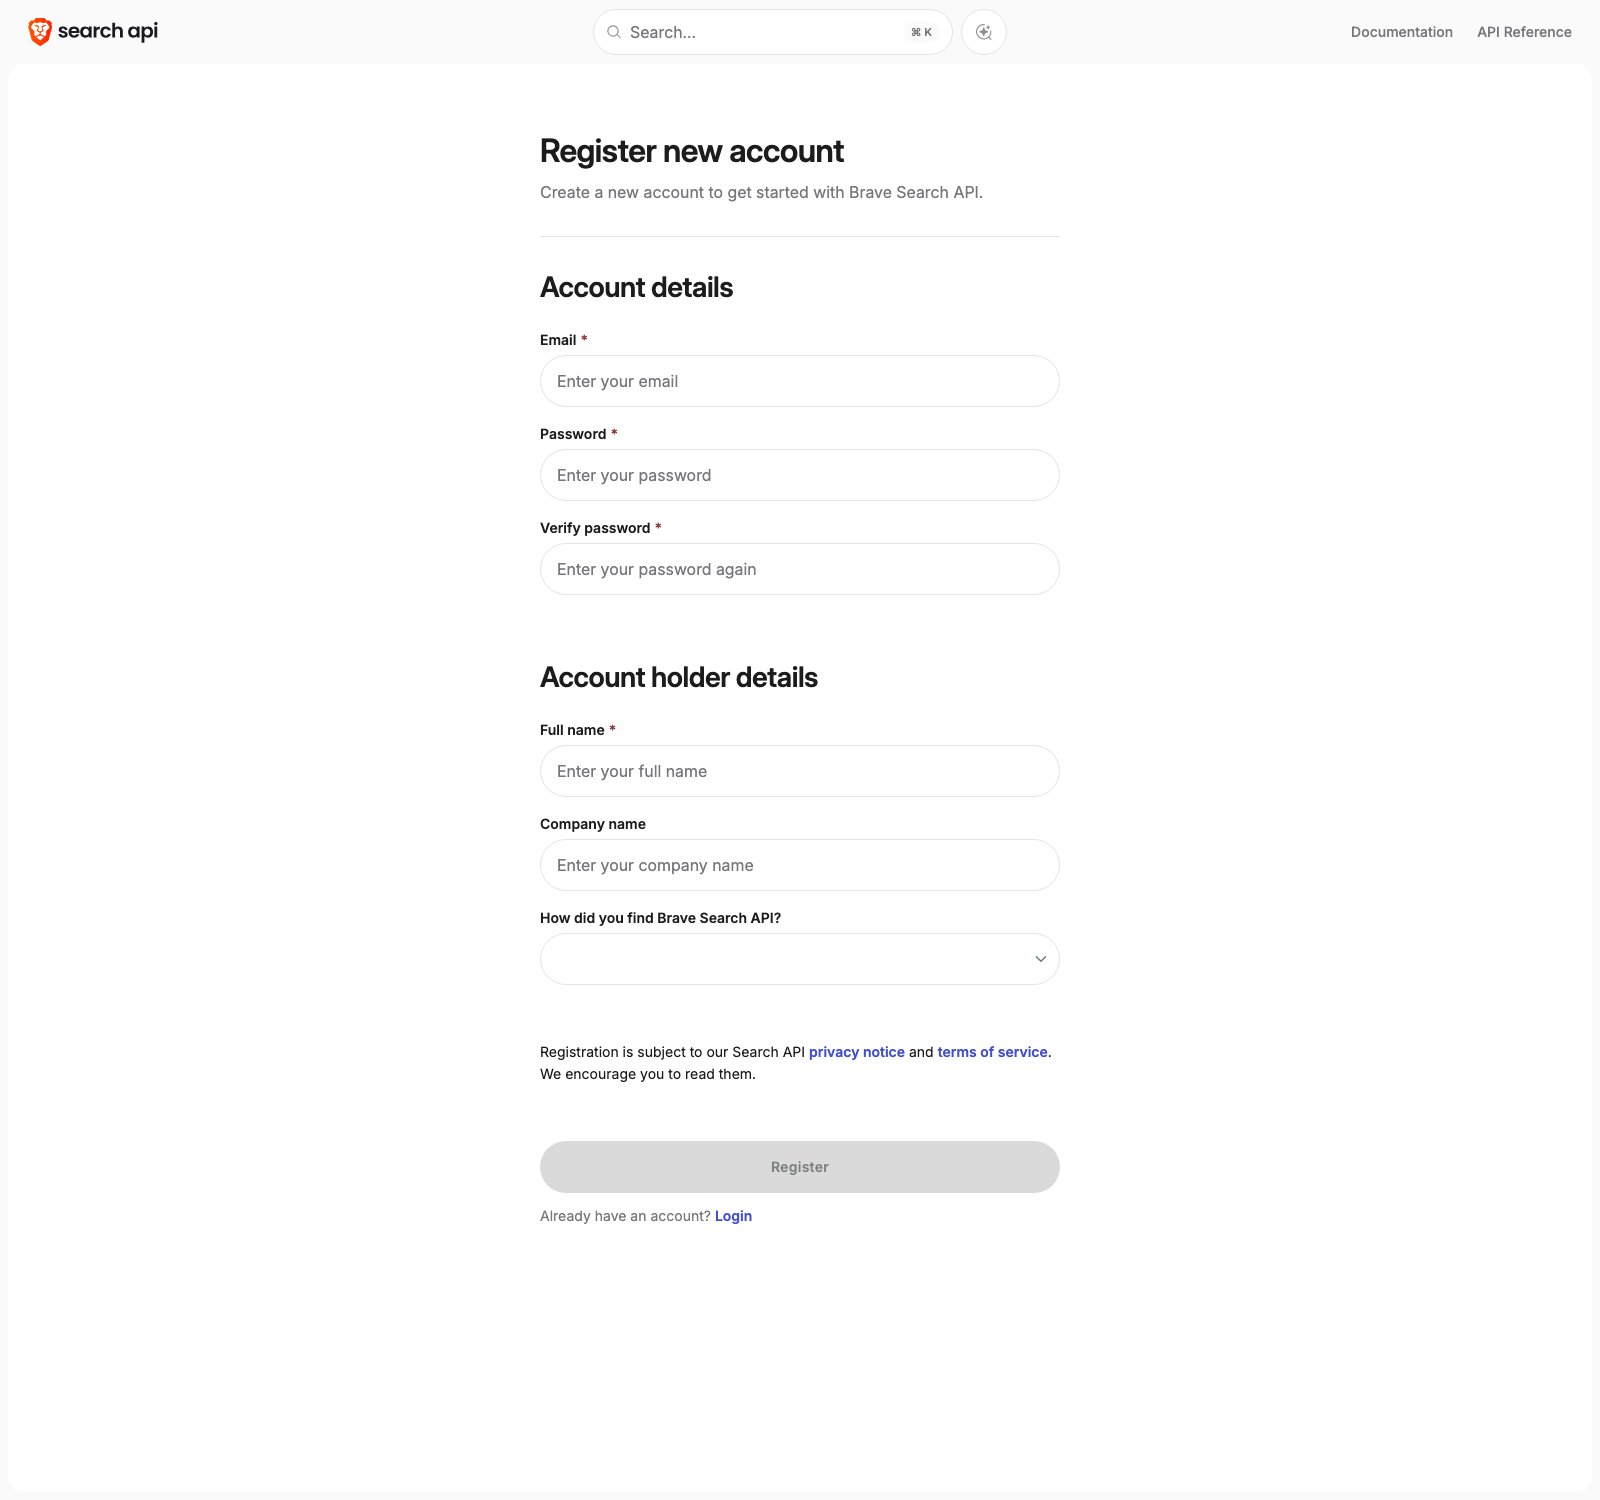
Go to the registration page and fill in the sign-up form, then click Register.
- Account details — Email, Password, and Verify password
- Account holder details — Full name, Company name (optional), and the optional How did you find Brave Search API? dropdown
Verify your email
Click the confirmation link Brave sends to your inbox, then log in to the dashboard.
Activate a plan
Activating a plan is a required prerequisite — API keys can only be created against an active plan, so this step cannot be skipped. Each API is gated by its own plan, and every plan includes $5 in free monthly credits.
Open Available plans
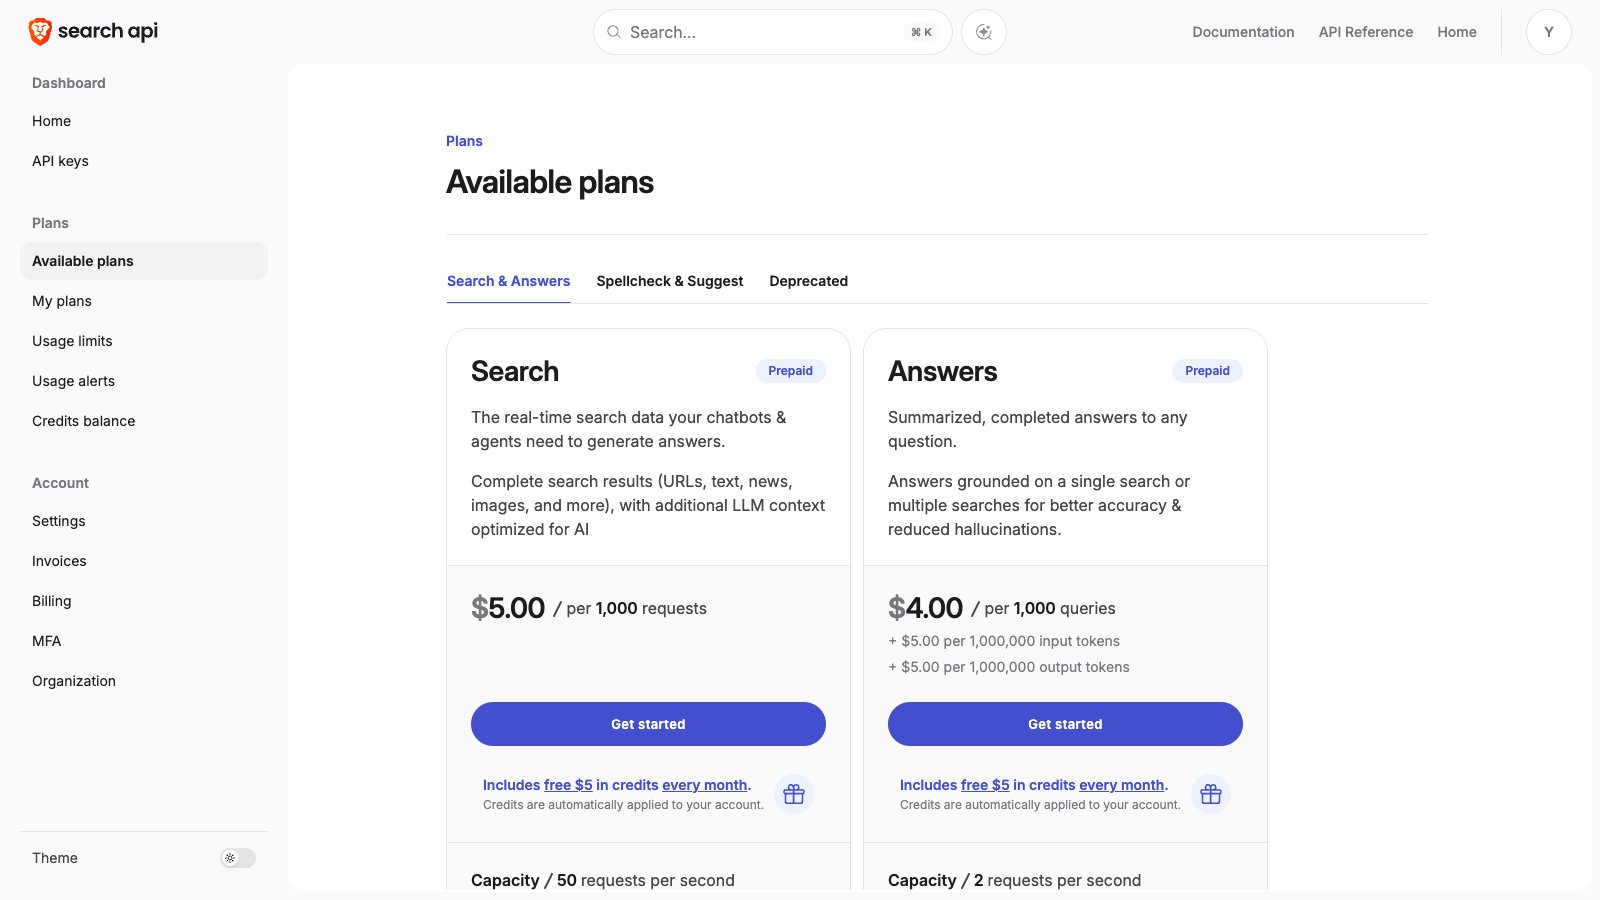
In the dashboard, navigate to Available plans under the Plans group in the left sidebar, or go directly to the Available plans page. Plans are grouped into the Search & Answers and Spellcheck & Suggest tabs.
Choose a plan
Select the plan(s) that cover the actions you need. If you are unsure which plan to pick, start with Search — it is the most common option and covers the most actions.
- Search (recommended) covers web, news, image, video, place, and LLM context actions
- Answers covers the chat completions action
- Spellcheck covers the spellcheck action
- Autosuggest covers the suggestions action
Add payment details and activate
Click Get started on the plan card and enter your payment details to complete the activation. Each plan includes free $5 in credits every month, applied automatically to your account.
Confirm the plan is active
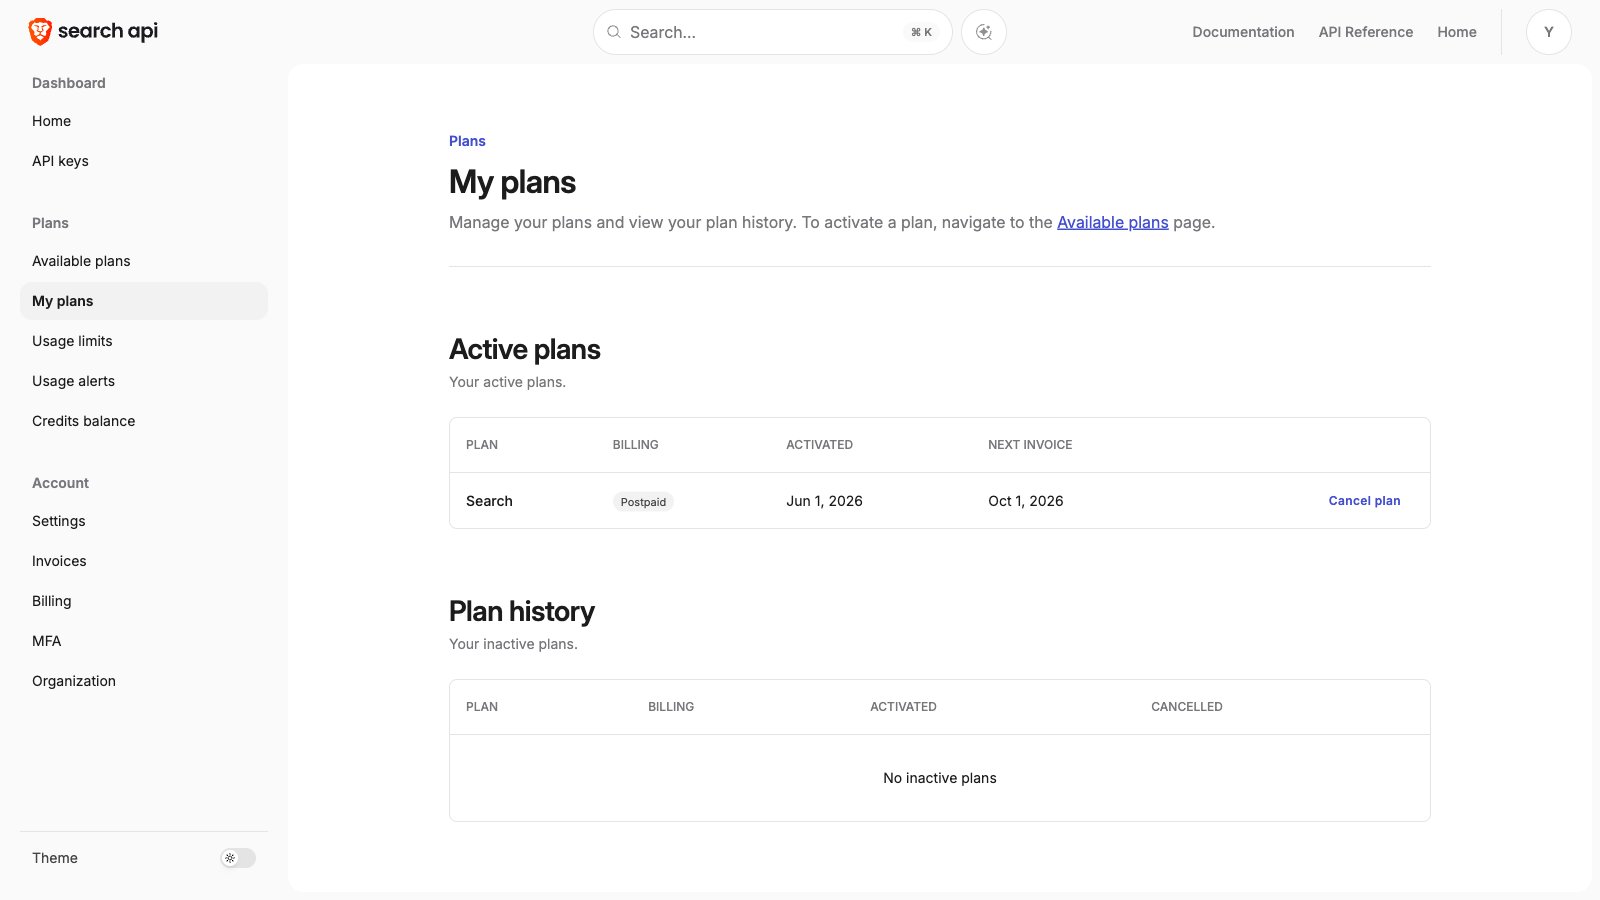
The activated plan appears in the Active plans table on the My plans page (My plans in the left sidebar). You can now create API keys against it.
Create your API Key
Generate the subscription token StackOne will use to authenticate.
Open API keys
In the dashboard, go to the API keys section in the left sidebar, or go directly to the API keys page.
Add an API key
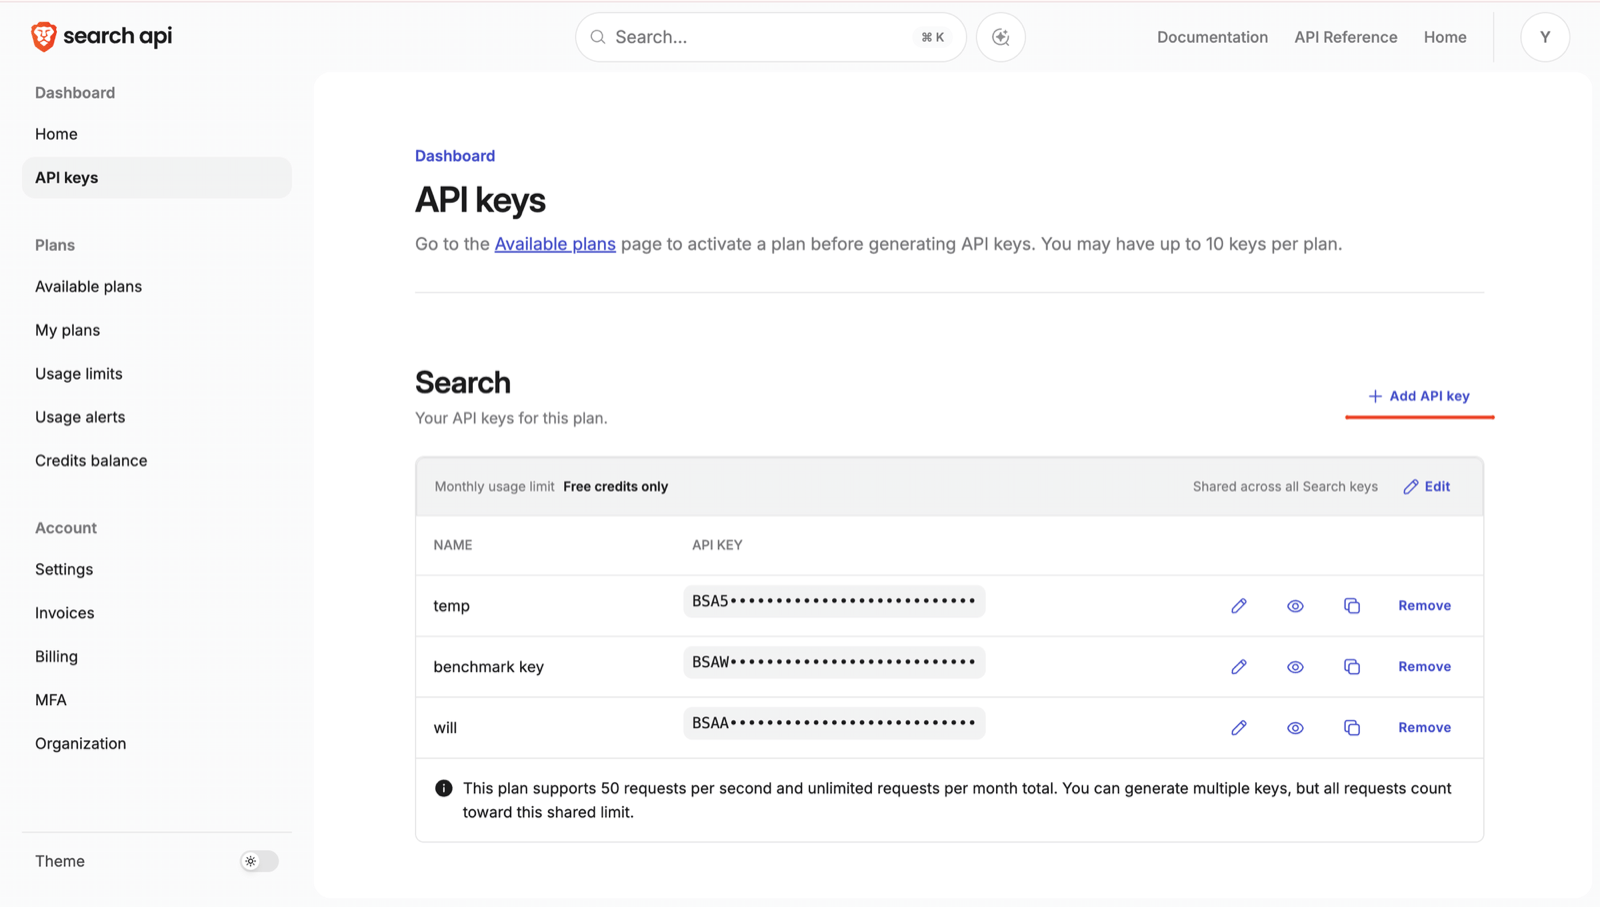
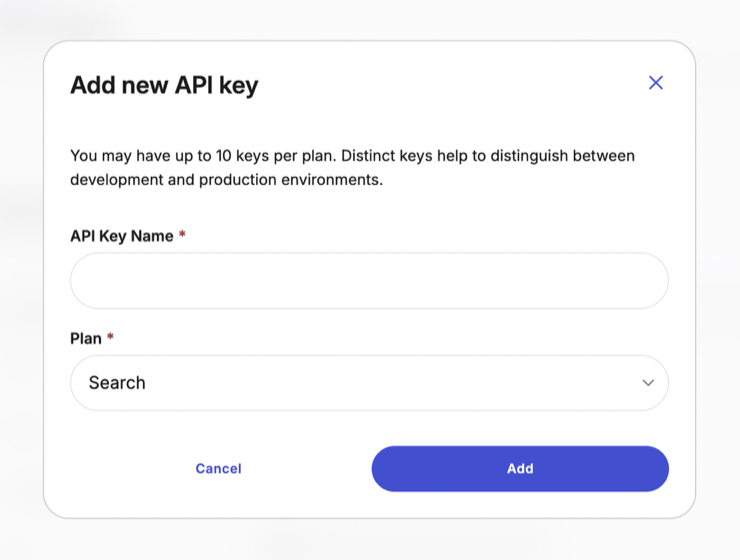
Click + Add API key. In the Add new API key dialog, give the key a descriptive name (e.g. “StackOne”), select the Plan it should use from the dropdown, then click Add. You may have up to 10 keys per plan.
Copy the key
The new key appears as a row in the table for its plan. Use the eye icon to reveal it and the copy icon to copy it, then store it securely — it is sent as the X-Subscription-Token header on every request. Paste it into the API Key field in StackOne.
Linking the Account from the Hub
Navigate to the Hub
Fill out the fields
- API Key
Connect
- Click Connect
- If applicable, the provider will redirect you to a sign-in or authorization page. Complete the provider’s authorization flow.
- Once authorization is successful, you will see a confirmation popup
If the account linking is successful, you will see the newly linked account in your Accounts page.