

Sign in to the Braintree Control Panel
Your Merchant ID, Public Key and Private Key all come from the Braintree Control Panel.
Start by signing in to the environment you are connecting.
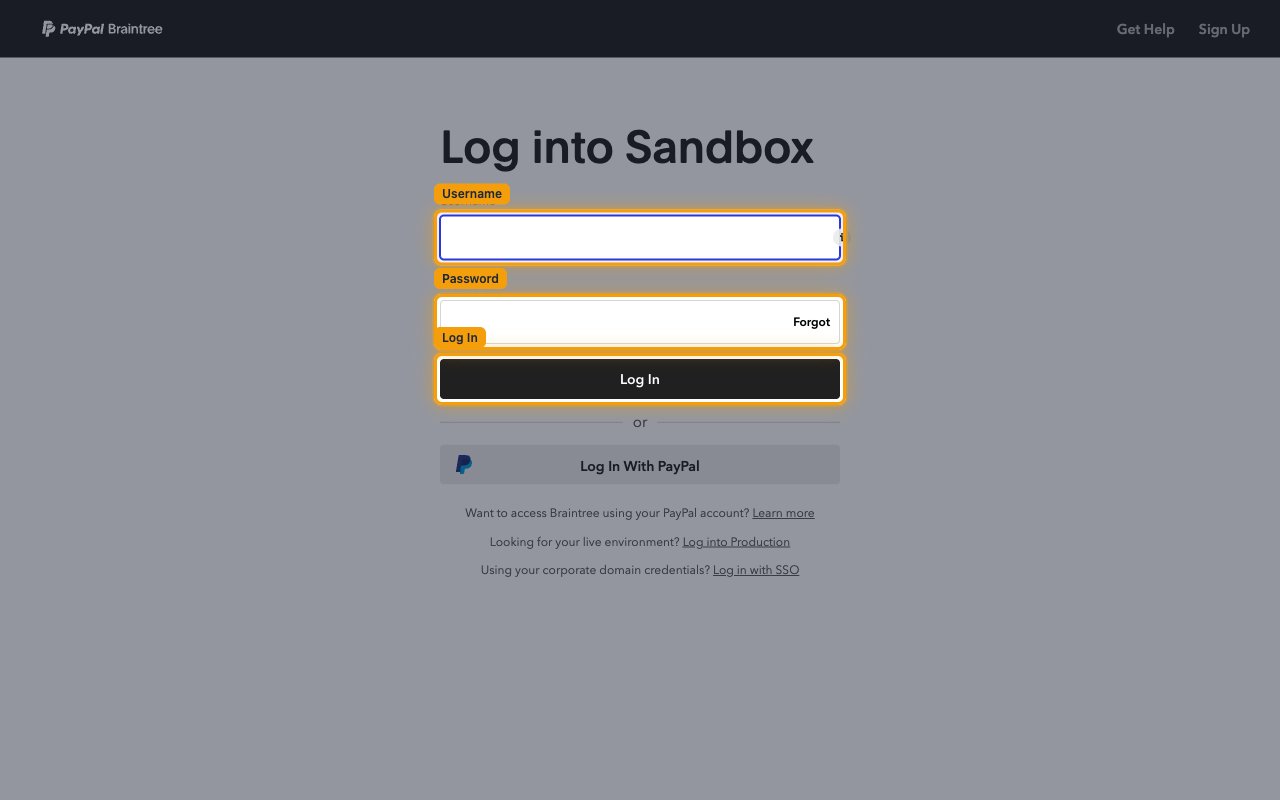
Sign in to the Control Panel
Open the Braintree Control Panel for your environment, enter your Username and Password,
then click Log In.
- Production — Braintree production Control Panel
- Sandbox — Braintree sandbox Control Panel
- If your team signs in through PayPal or a corporate domain, use Log In With PayPal or Log in with SSO on the same screen.
Find your Merchant ID
The Merchant ID identifies your whole Braintree gateway account and lives on the Business page.
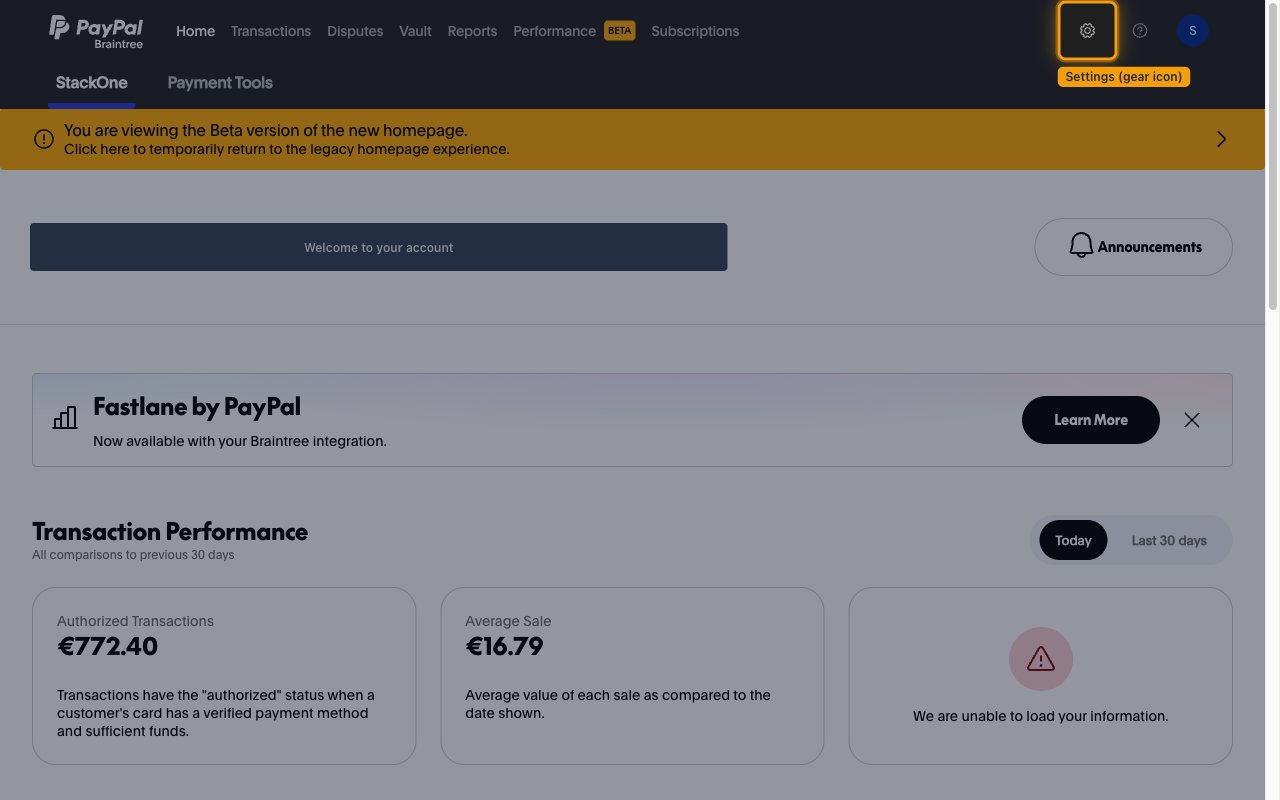
Open the settings menu
In the top-right corner of the Control Panel, click the settings menu gear icon.
- The menu lists Team, API, Fraud Management, Account Settings, Business and OAuth.
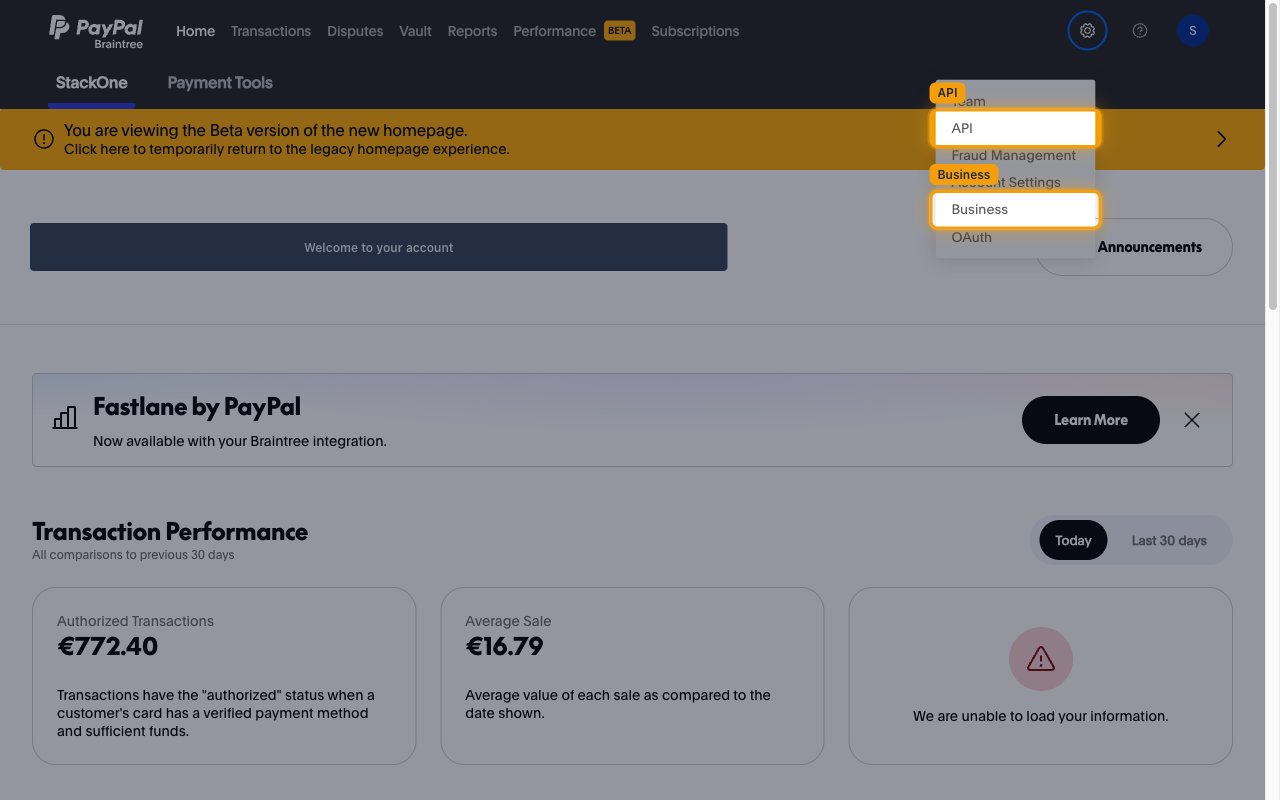
Open the Business page
In the settings menu, select Business. You will come back to this menu later for API.
- The Business page opens on the Merchant Accounts tab.
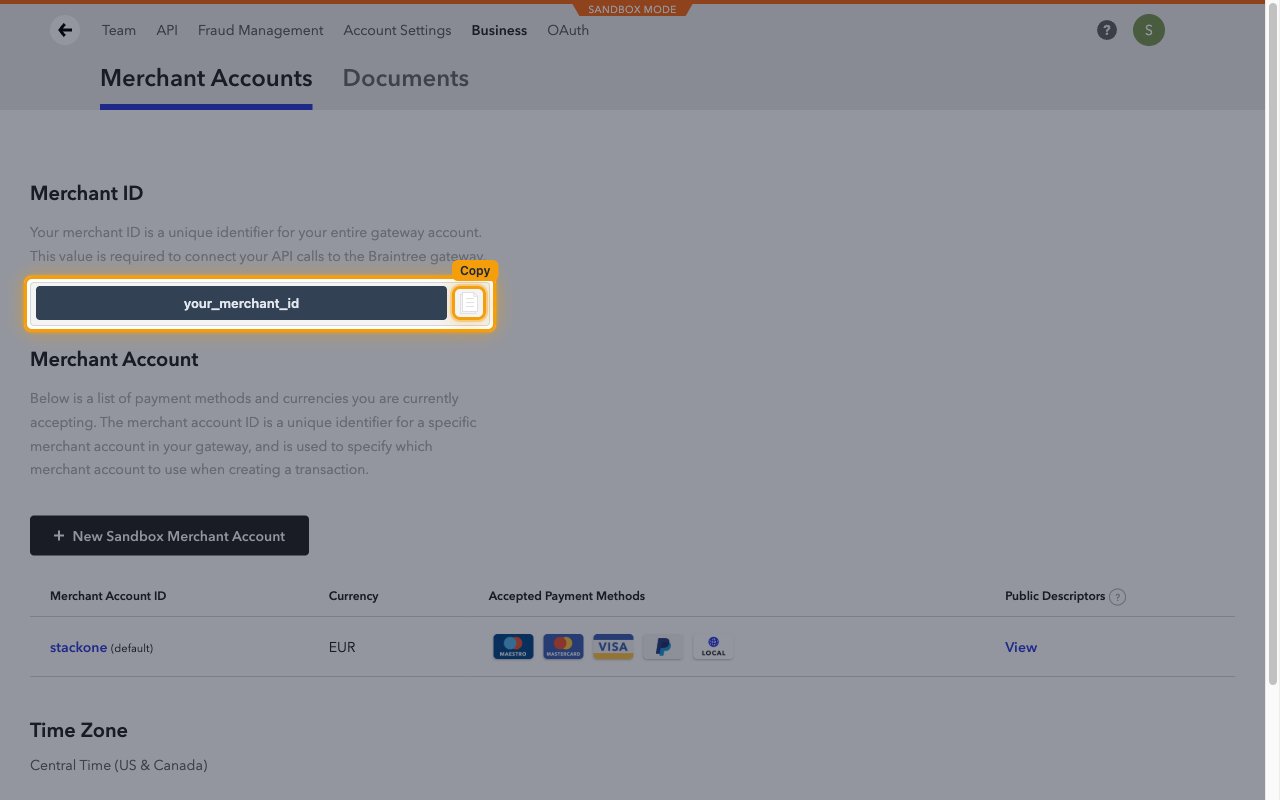
Copy your Merchant ID
Under the Merchant ID heading, click Copy to copy the value shown in the field next to it.
- Braintree describes this value as a unique identifier for your entire gateway account, required to connect your API calls to the Braintree gateway.
- Paste it into the Merchant ID field in StackOne Hub.
- Do not use a Merchant Account ID from the Merchant Account table further down the page — that identifies one merchant account inside your gateway, not the gateway itself.
Create and copy your API keys
The Public Key and Private Key are the username and password Braintree uses for server-side
API access. Both live on the API page of the settings menu.
Open the API keys page
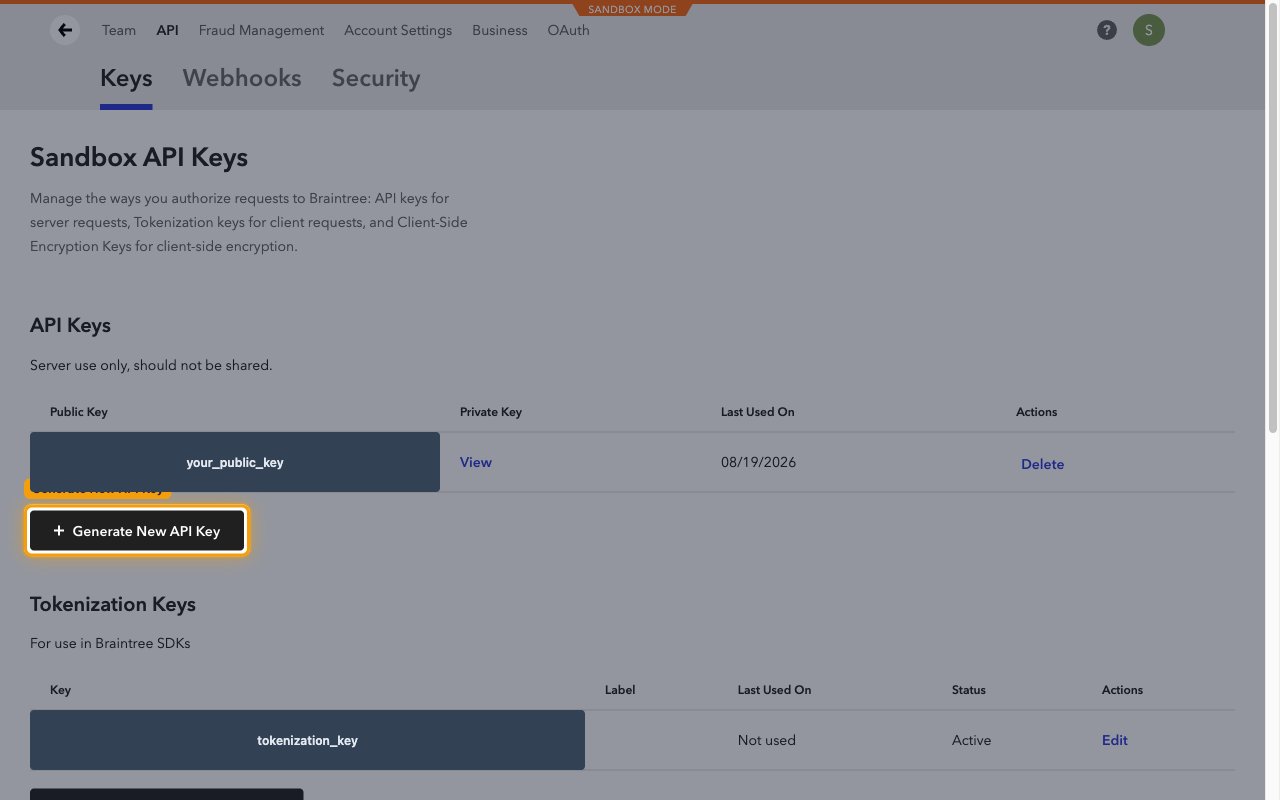
Click the settings menu gear icon again, select API, and stay on the Keys tab.
- Braintree lists your server credentials under API Keys, and notes that they are for server use only and should not be shared.
- If the API Keys table is empty, click Generate New API Key to create a key pair.
Open your private key
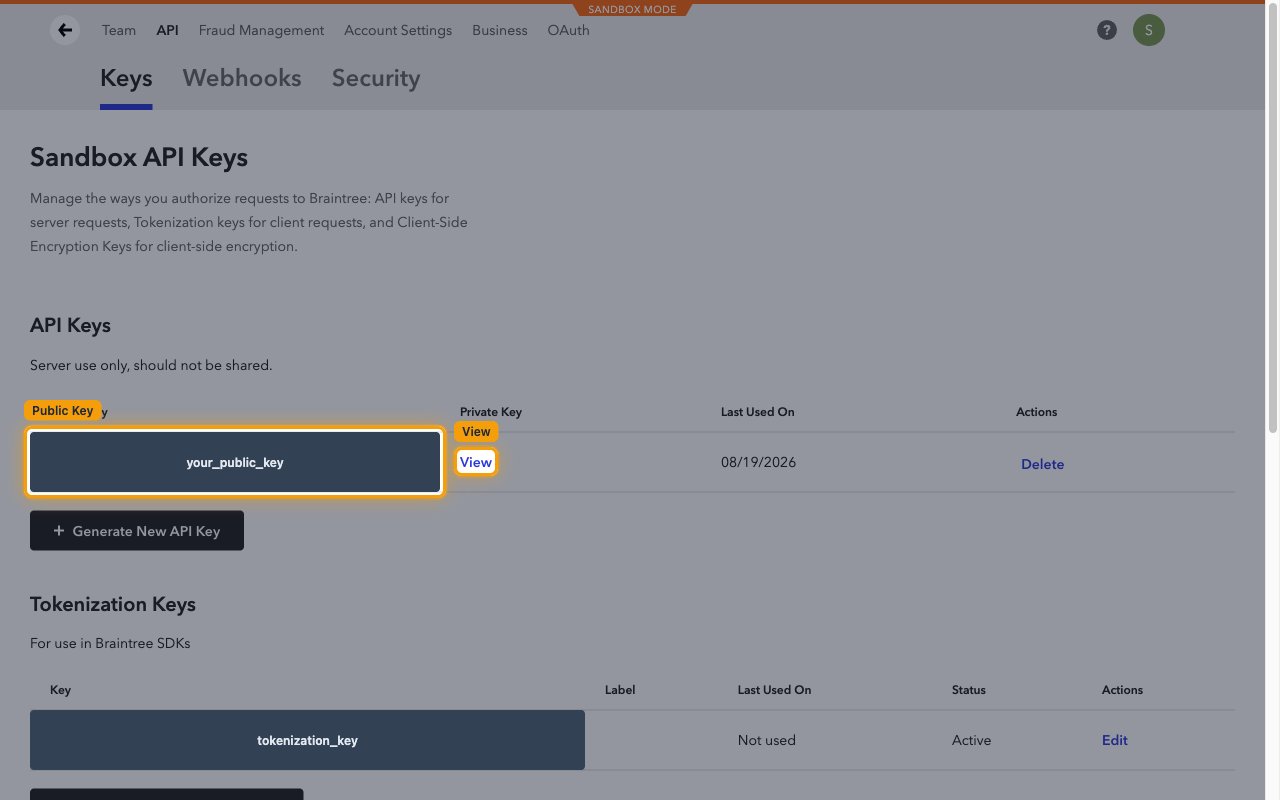
In the API Keys table, find your key and click View in the Private Key column.
- The Public Key is shown directly in the Public Key column of the same row.
- Each API key belongs to the user who created it, so use a key that belongs to the user account you want StackOne to act as.
Copy your credentials into StackOne Hub
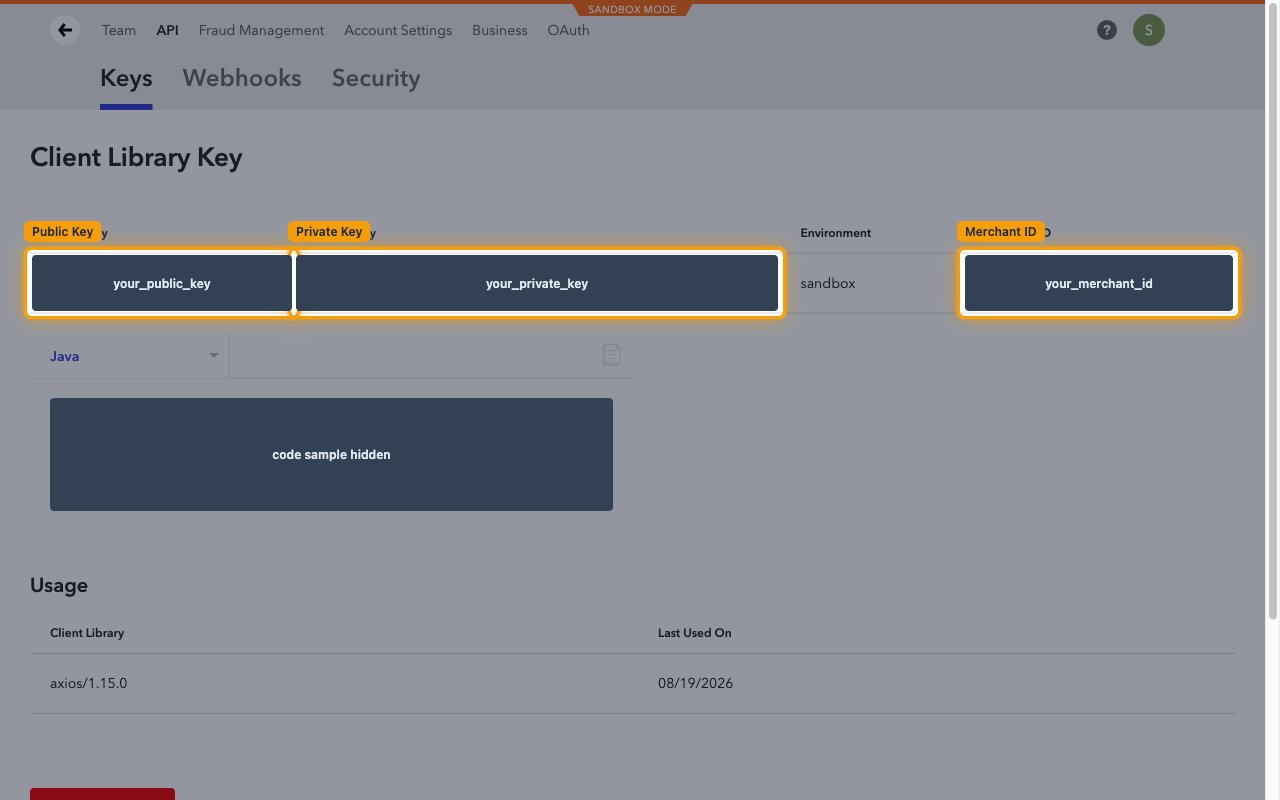
The Client Library Key page shows Public Key, Private Key, Environment and
Merchant ID together. Copy each value into the matching field in StackOne Hub.
- Merchant ID — your Braintree gateway account identifier; paste it into the Merchant ID field in StackOne Hub.
- Public Key — the username half of the Basic Auth pair; paste it into the Public Key field in StackOne Hub.
- Private Key — the password half of the Basic Auth pair; paste it into the Private Key field in StackOne Hub and treat it like a password.
- Environment — shows whether this key belongs to
sandboxorproduction; select the same environment in StackOne Hub.
Linking the Account from the Hub
Navigate to the Hub
Fill out the fields
- Merchant ID
- Public Key
- Private Key
Connect
- Click Connect
- If applicable, the provider will redirect you to a sign-in or authorization page. Complete the provider’s authorization flow.
- Once authorization is successful, you will see a confirmation popup
If the account linking is successful, you will see the newly linked account in your Accounts page.
Next Steps
Webhooks setup
Configure receiving Events for Braintree into StackOne.