

Creating a repository access token
A repository access token reaches only the repository it was created in, and works on any Bitbucket Cloud plan.
1
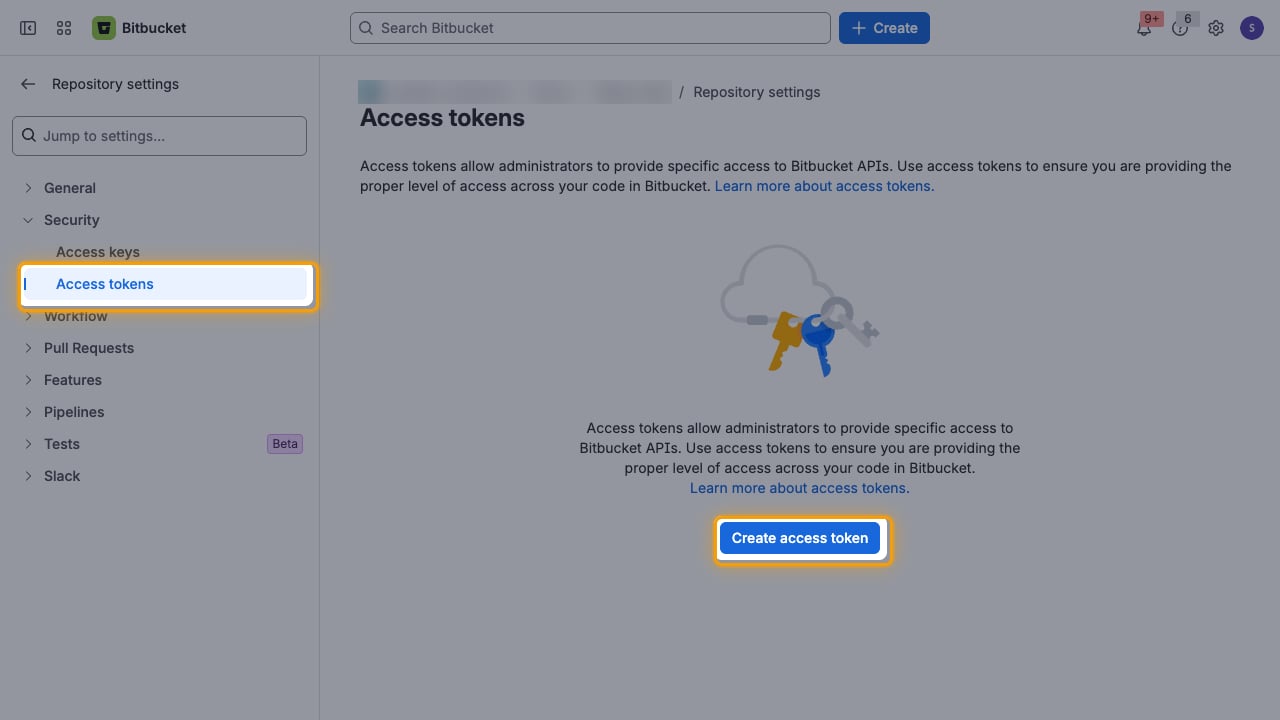
Open the access tokens page
Sign in to Bitbucket as an administrator of the repository, then open the repository.
- Next to the repository name in the left sidebar, select …, then select Settings.
- Under Security, select Access tokens.
- Click Create access token.
2
Create the token
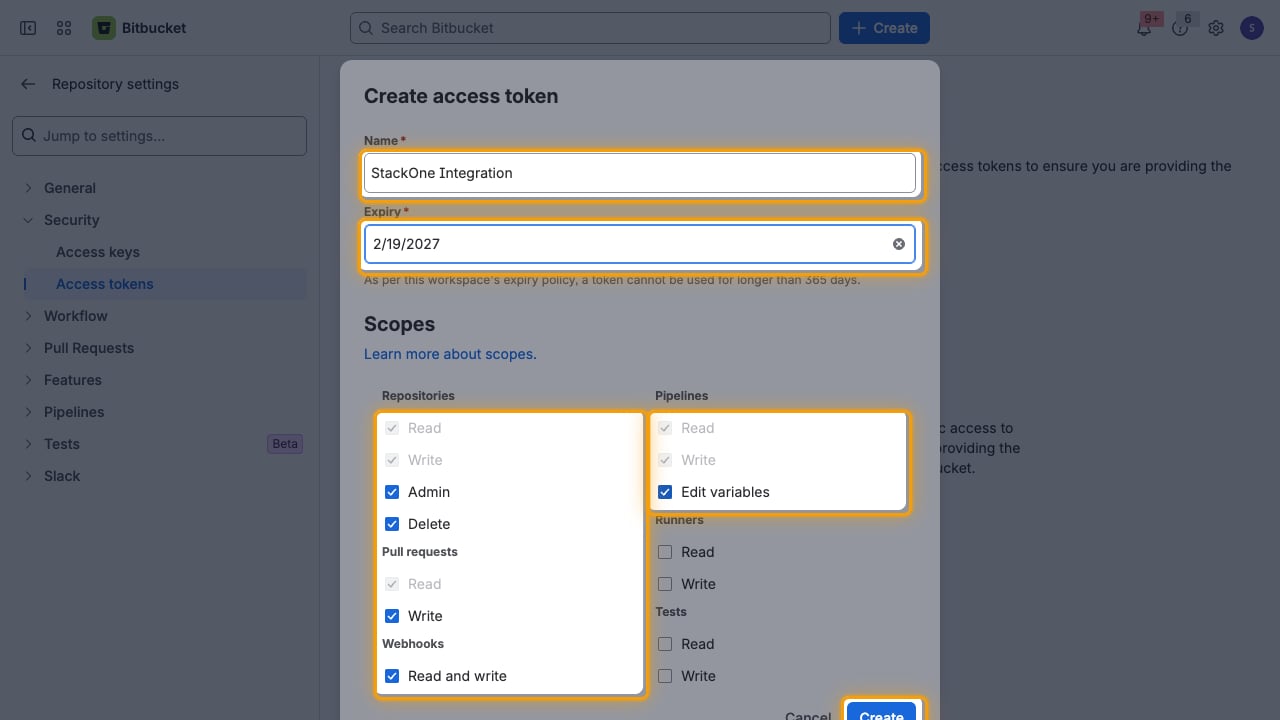
Enables actions: Add Default Reviewer, Approve Commit, Approve Pull Request, Create Branch Restrictions, Create Branches, Create Build, Create Comments, Create Commits, Create Environment, Create Pipelines, Create Pullrequests, Create Schedules, Create Src, Create Variables, Decline Pull Request, Delete Branch Restrictions, Delete Comments, Delete Default Reviewers, Delete Reports, Delete Repository, Delete Schedules, Delete Variables, Get Branch Restrictions, Get Branches, Get Branching Model, Get Branching Model Settings, Get Build, Get Comments, Get Commit, Get Default Reviewers, Get Deploy Keys, Get Deployment, Get Diff, Get Diffstat, Get Environment, Get Log, Get Logs, Get Patch, Get Pipelines, Get Pipelines Config, Get Pullrequests, Get Reports, Get Repository, Get Schedules, Get Src, Get Steps, Get Variables, List Branch Restrictions, List Branches, List Comments, List Commits, List Default Reviewers, List Deploy Keys, List Deployments, List Downloads, List Environments, List Forks, List Pipelines, List Pull Request Commits, List Pullrequests, List Reports, List Repositories In Workspace, List Schedules, List Src, List Statuses, List Steps, List Variables, List Watchers, Merge Pull Request, Remove Request Changes, Request Changes, Resolve Pull Request Comment, Stop Pipeline, Unapprove Commit, Unapprove Pull Request, Unresolve Pull Request Comment, Update Branch Restrictions, Update Build, Update Build Number, Update Comments, Update Environment, Update Pipelines Config, Update Pullrequests, Update Reports, Update Schedules, Update Settings, Update Variables
In the Create access token dialog, tick every scope listed under Scopes.
- Name:
StackOne Integration - Expiry: The date the token should stop working
- Click Create.
3
Copy the token
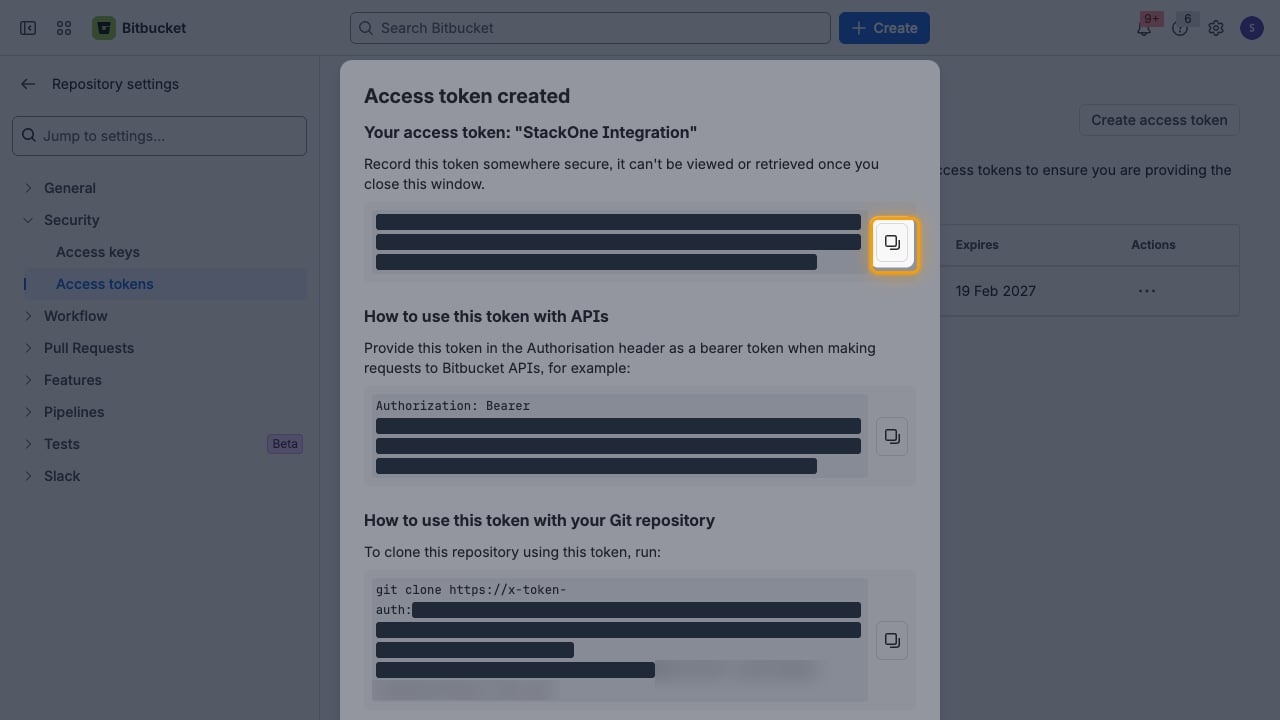
In the Access token created dialog, the token is shown only once and cannot be retrieved after you close the dialog.
- Click Copy.
- Copy the Access Token across.
Link the Account
1
Connect
- Click Connect.
- If applicable, the provider will redirect you to a sign-in or authorization page. Complete the provider’s authorization flow.
- Once authorization is successful, you will see a confirmation popup.
2
Use Actions
Connect an AI platform to the linked account’s actions. See AI Platforms.Other ways to call actions are listed in Protocols & SDKs.
Next Steps
Webhooks setup
Configure receiving Events for Bitbucket into StackOne.