

Create your BALLDONTLIE account
BALLDONTLIE issues an API key automatically as soon as you create an account — there is no app to register and nothing to generate. If you already have an account, skip straight to signing in.
Create a BALLDONTLIE account
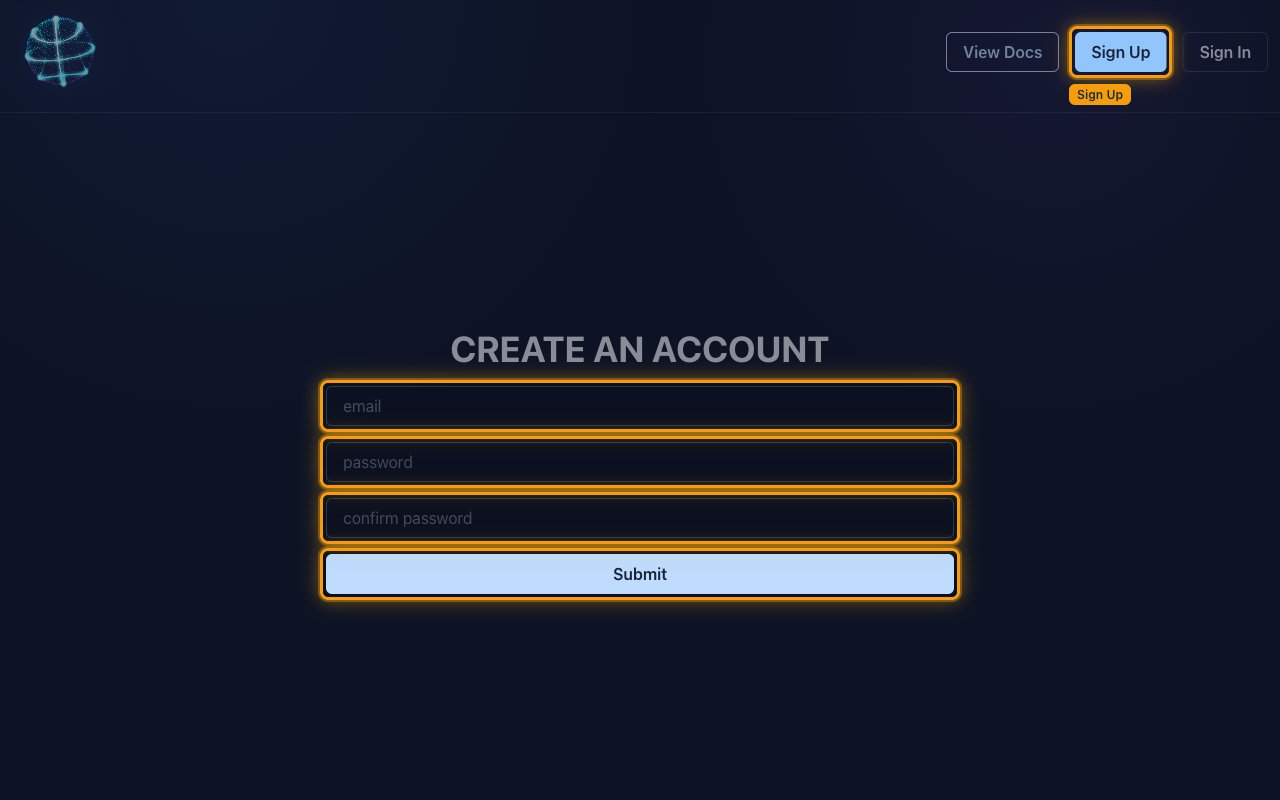
Open the BALLDONTLIE account sign-up page, or click Sign Up in the top-right corner. On the CREATE AN ACCOUNT screen, fill in email, password and confirm password, then click Submit.
- A free account requires no payment details.
Sign in to your account
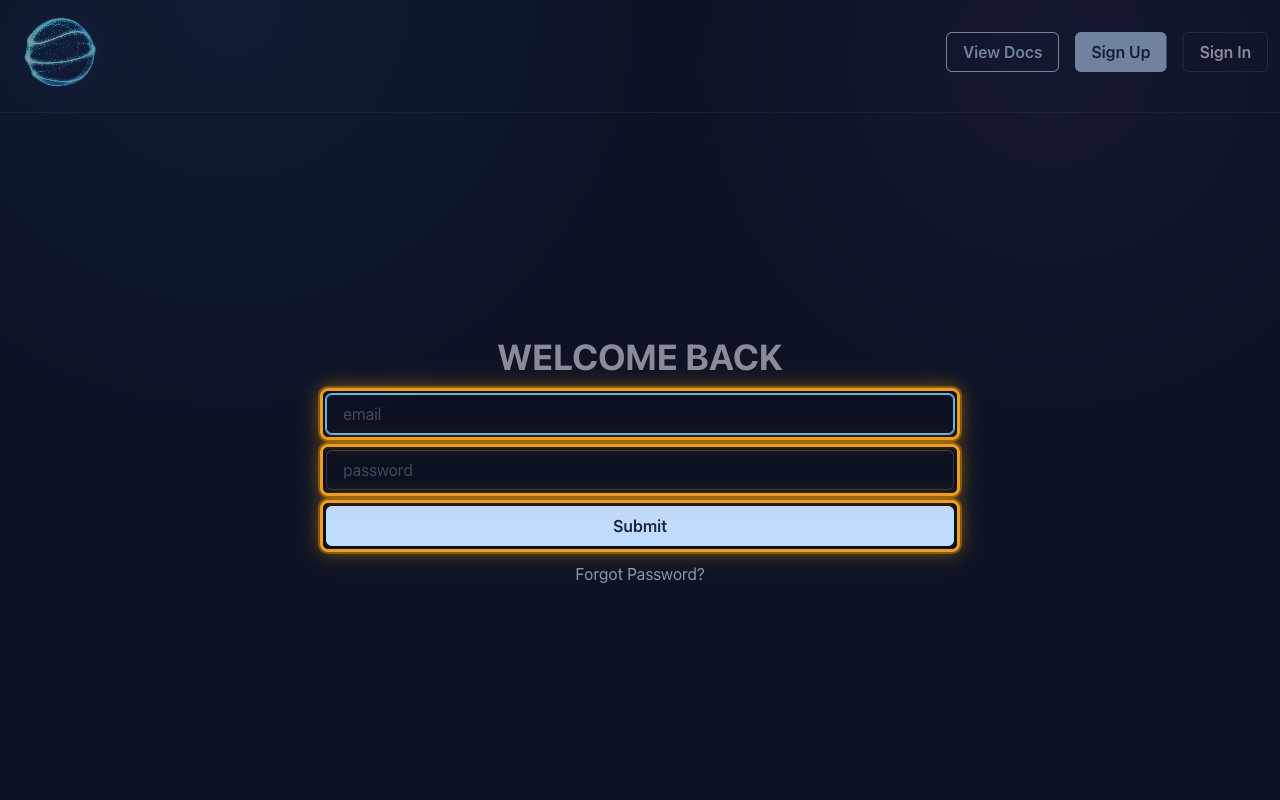
Go to the BALLDONTLIE account portal and sign in. On the WELCOME BACK screen, enter your email and password, then click Submit.
Copy your API key
Your key lives on the Account page of the portal and is the only value StackOne needs.
Open the Account page
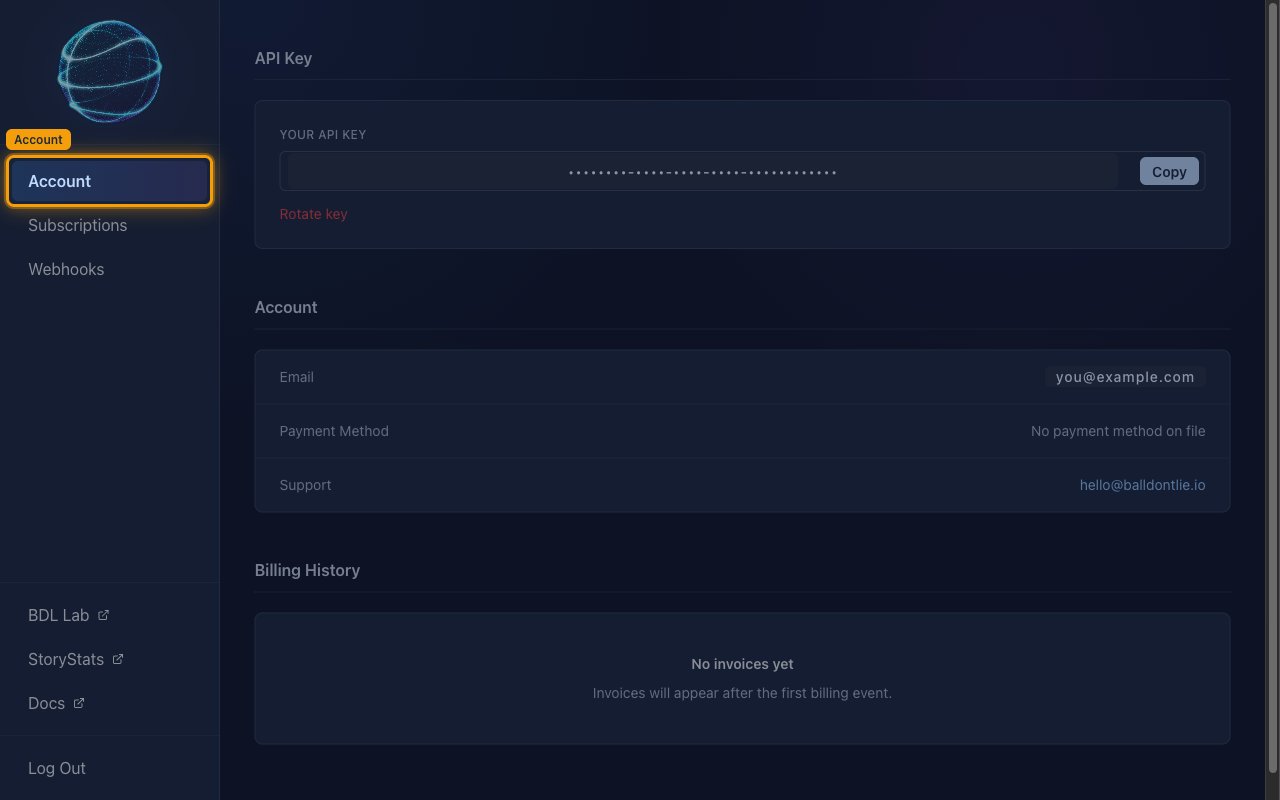
In the left sidebar, click Account. The Account page opens with an API Key card at the top, above the Account and Billing History cards.
Copy the API key
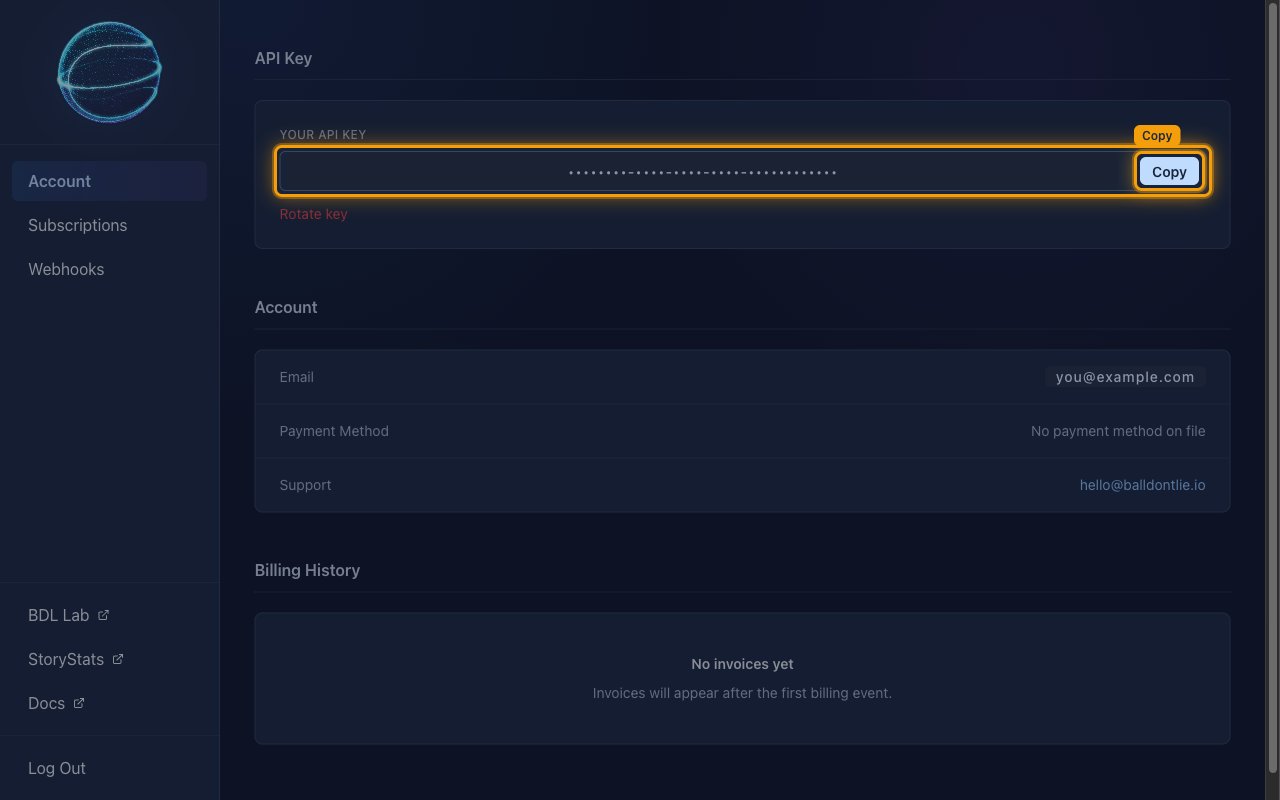
In the API Key card, your key is shown in the YOUR API KEY box. Click Copy at the right-hand end of the box to copy it to your clipboard.
- API Key — the value in the YOUR API KEY box. Paste it into the API Key field in StackOne Hub.
- Format:
12345678-abcd-1234-abcd-1234567890ab(a UUID) - The key is not displayed once — it stays visible on the Account page, so you can come back and copy it again at any time.
- Rotate key issues a replacement key and invalidates the current one. Only use it if the key has leaked, and update the value in StackOne Hub afterwards.
Choose the NBA tier you need
Upgrade only when you need NBA actions that sit above the tier your account holds today — actions above that tier return 401, and Get Current User reports the tier currently held for NBA. Tiers are bought per sport, so an NBA subscription does not carry over to the other BALLDONTLIE APIs, and the same key keeps working after an upgrade — no change is needed in StackOne Hub.
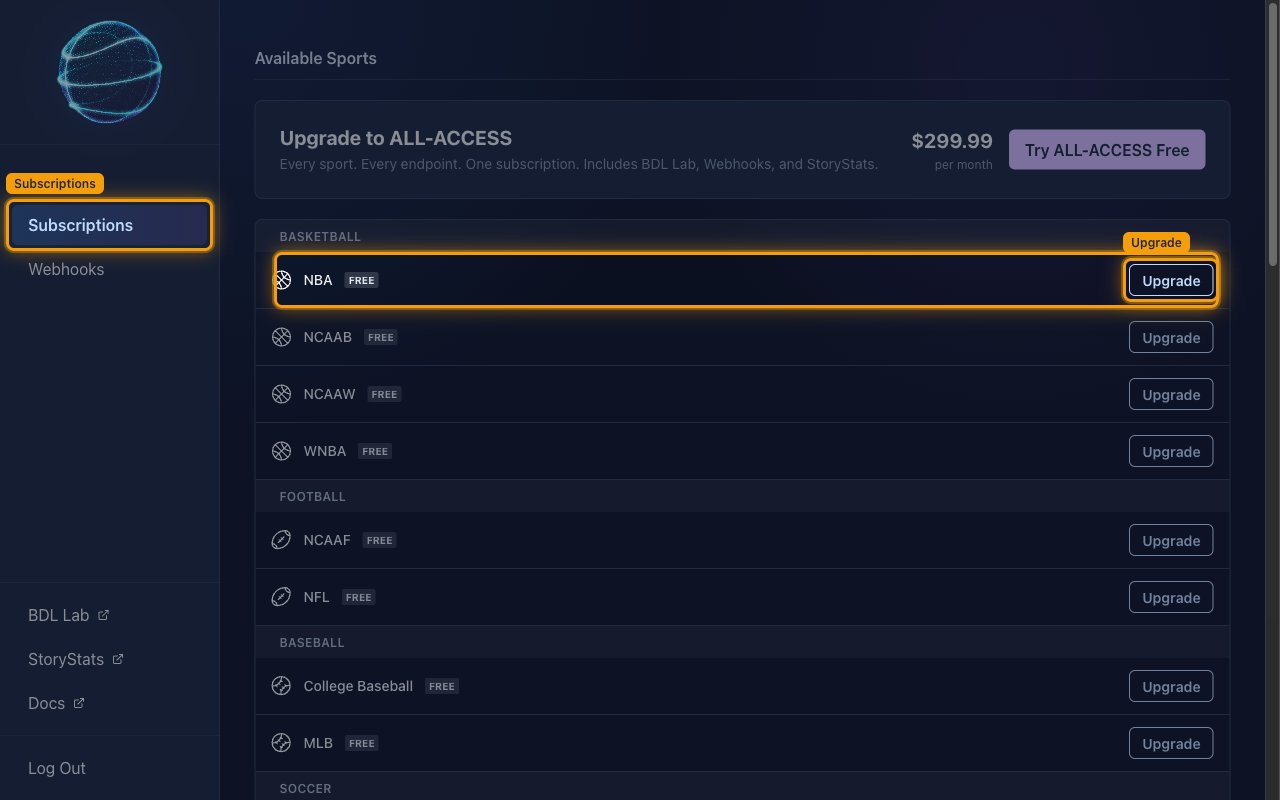
Open the Subscriptions page
In the left sidebar, click Subscriptions. On the Subscriptions page, the Available Sports table lists every sport with its current tier. Find NBA under BASKETBALL and click Upgrade on that row.
- Upgrade to ALL-ACCESS at the top of the page covers every sport and endpoint at
$299.99per month, and includes BDL Lab, Webhooks, and StoryStats.
Review the NBA tiers
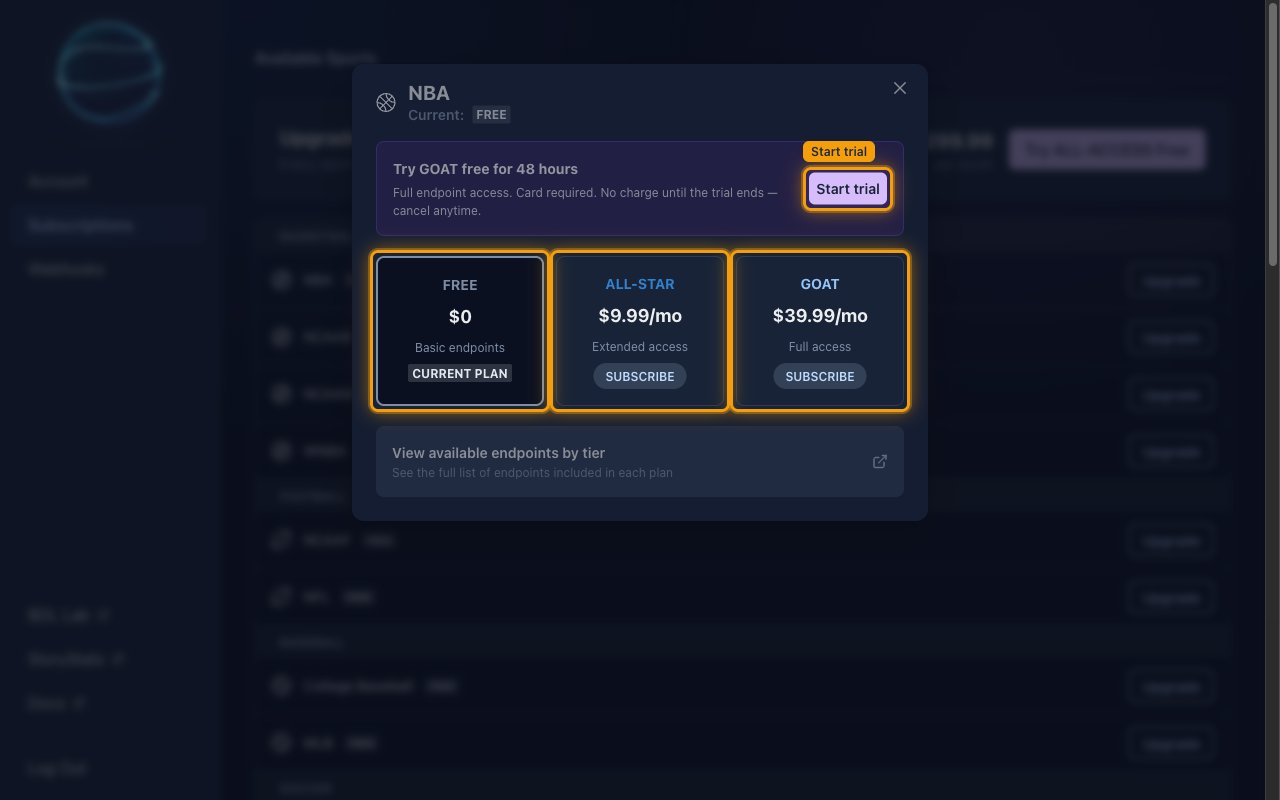
The NBA dialog shows your Current: tier and the three plan cards you can move to. Pick the card that covers the actions you need, then click SUBSCRIBE on that card.
- FREE —
$0, Basic endpoints. Covers Get Current User, Get All Teams, Get a Specific Team, Get All Players, Get a Specific Player, Get All Games and Get a Specific Game. - ALL-STAR —
$9.99/mo, Extended access. Adds Get All Active Players, Get All Player Injuries and Get All Stats. - GOAT —
$39.99/mo, Full access. Adds every remaining NBA action — box scores, live box scores, game lineups, play-by-play, season averages, team season averages, advanced stats, leaders, standings, betting odds, opening odds, player props, contracts and DFS slates. - A separate Try GOAT free for 48 hours banner sits above the plan cards with its own Start trial button. Clicking Start trial there opens the 48-hour GOAT trial instead of a paid subscription — a card is required, and no charge is made until the trial ends.
- View available endpoints by tier opens the NBA API account tiers reference — the full list of endpoints included in each plan.
Confirm the plan change
A Change NBA Plan dialog opens to confirm the card you clicked — for GOAT it reads “Subscribe to GOAT ($39.99) to get access to all endpoints for this sport”. Click Confirm to continue to payment.
- Close leaves the dialog and keeps the tier you are on today.
Enter your payment details
A Stripe payment form opens. Fill in Card number, Expiry date, Security code and Country or territory, then submit the form to finish the change.
- The 48-hour GOAT trial uses the same form — a card is required to start the trial.
- Once the change is processed, the new tier shows next to Current: in the NBA dialog, and the existing API key reaches the added endpoints straight away.
Linking the Account from the Hub
Navigate to the Hub
Fill out the fields
- API Key
Connect
- Click Connect
- If applicable, the provider will redirect you to a sign-in or authorization page. Complete the provider’s authorization flow.
- Once authorization is successful, you will see a confirmation popup
If the account linking is successful, you will see the newly linked account in your Accounts page.
Next Steps
Webhooks setup
Configure receiving Events for BALLDONTLIE into StackOne.