

Generate a Personal Access Token
Create a PAT in Azure DevOps to authenticate the StackOne connection.
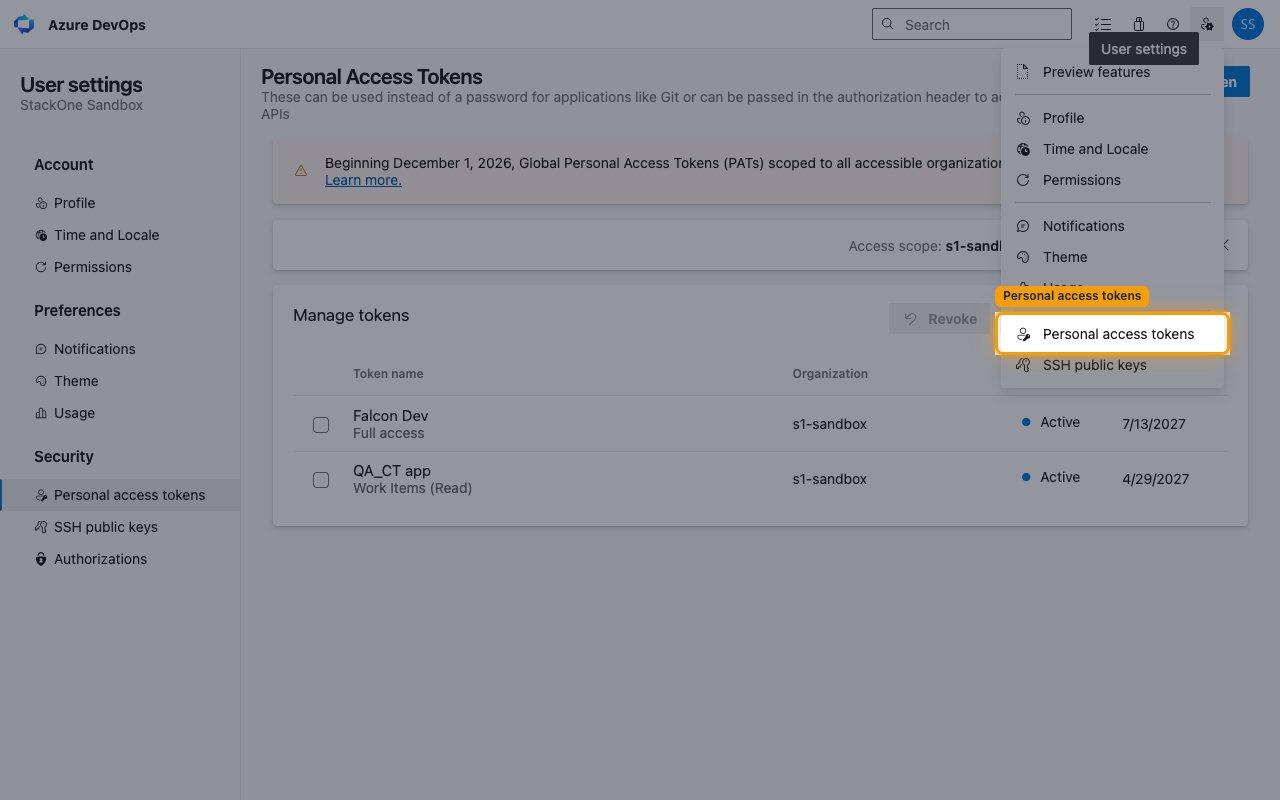
Open Personal access tokens
Sign in to Azure DevOps, click the User settings icon in the top-right corner, and select Personal access tokens.
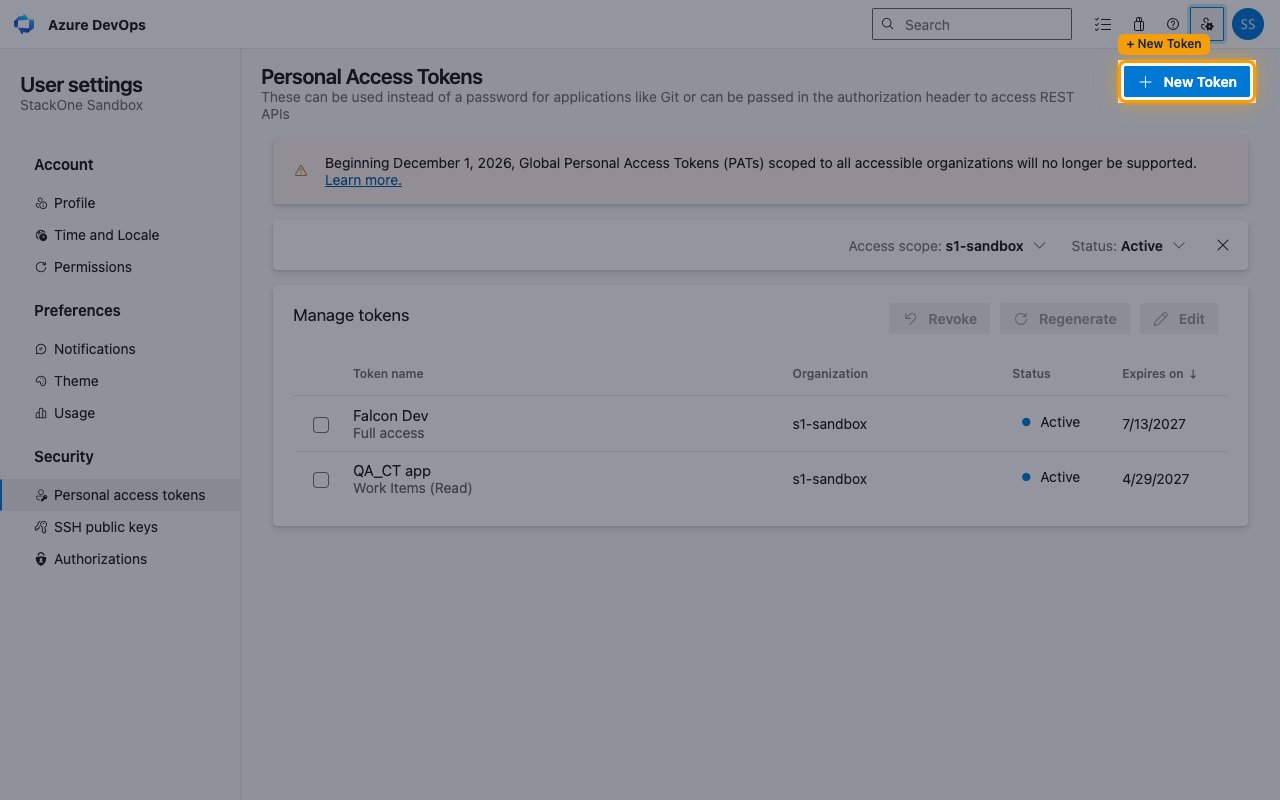
Open the new token panel
On the Personal Access Tokens page, click + New Token.
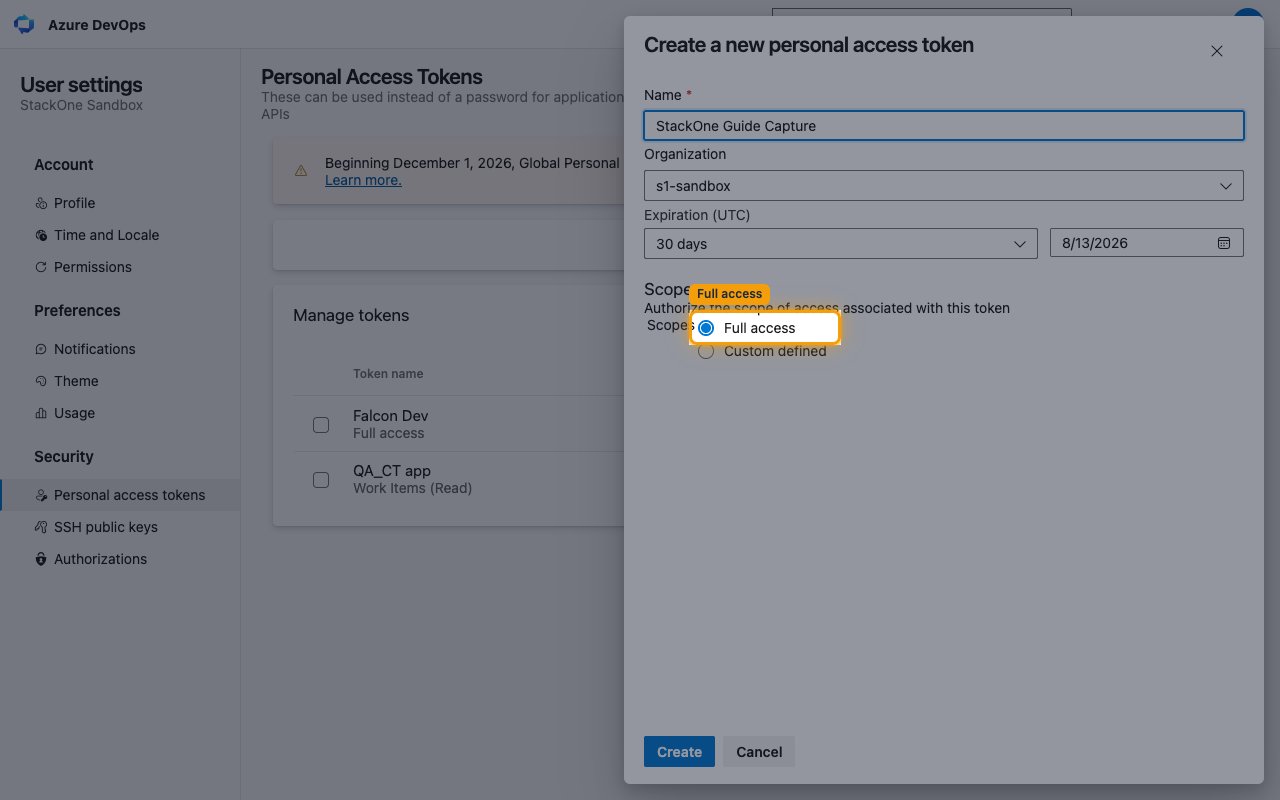
Configure and create the token
In the Create a new personal access token panel, fill in the details and click Create.
- Name — a label for the token (e.g., StackOne Integration).
- Organization — select the organization you will connect.
- Expiration (UTC) — set the expiry; the connection stops working when the token expires.
- Under Scopes, select Full access so every connector action (including webhook Service Hooks management) is covered. Custom defined with Show all scopes also works if you prefer granular scopes, but you must include all scopes the connector needs.
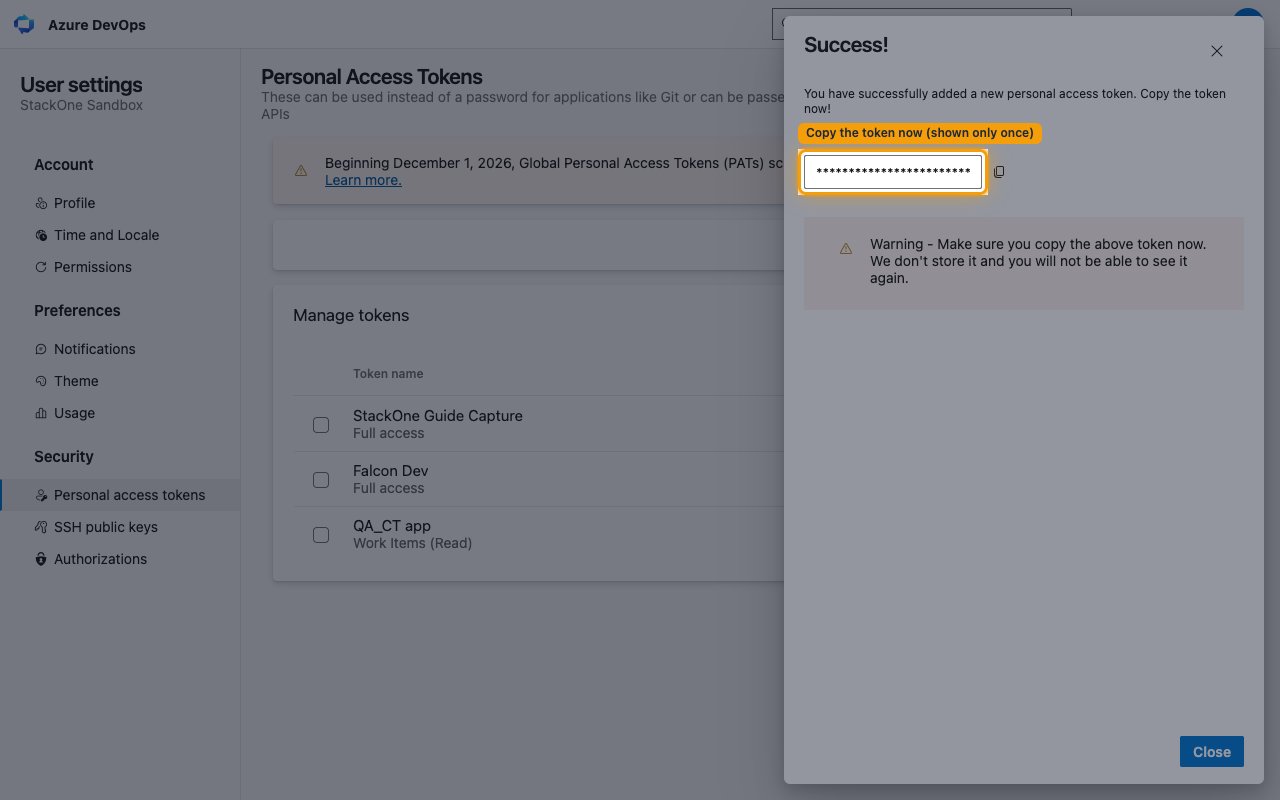
Copy the token
On the Success! screen, copy the token and paste it into the Personal Access Token field in StackOne Hub.
- The token is only displayed once and cannot be retrieved later — per the on-screen warning: “Make sure you copy the above token now. We don’t store it and you will not be able to see it again.”
Find your organization details
Identify the Azure DevOps organization (and optionally a project) this connection should use.
Find your organization name
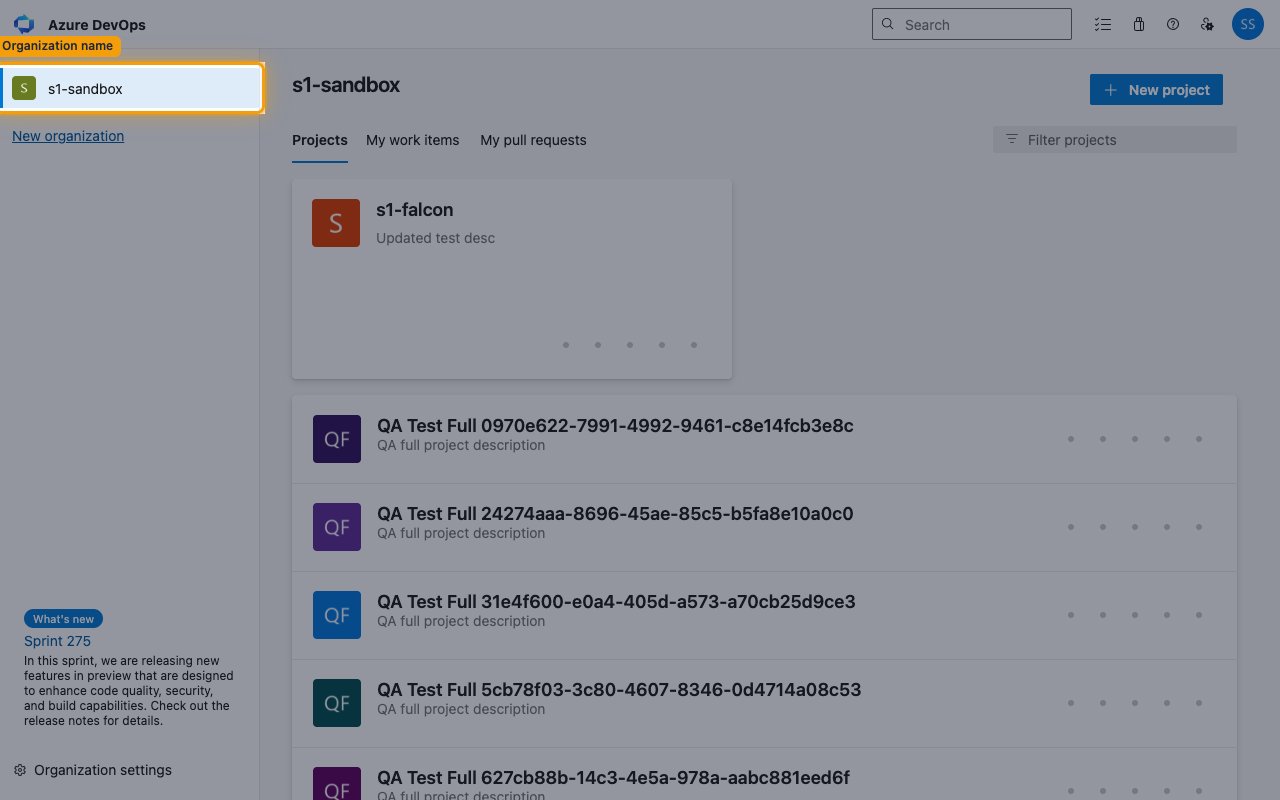
Your organization name appears in the top-left of the Azure DevOps organization home page and in the browser URL. Enter it in the Organization field in StackOne Hub.
- Format:
https://dev.azure.com/{organization} - Example: if your URL is
https://dev.azure.com/s1-sandbox, your organization iss1-sandbox
Set the Project name for webhook scoping
The Project name (webhook scoping) field in StackOne Hub is optional in general, but required if you enable pipeline events — Azure DevOps only allows those to be created within a project, so their subscriptions fail if it is left blank. Work item, git, pull request, and build events work without it (delivered from all projects in the organization) or can be scoped to one project by setting it.
- Enter the project name exactly as it appears in your browser URL after the organization — the
{project}segment ofhttps://dev.azure.com/{organization}/{project}. For example, forhttps://dev.azure.com/my-org/my-projectentermy-project. - No need to look up any GUID — StackOne resolves the project name to the internal project ID automatically when it registers the webhooks.
Linking the Account from the Hub
Navigate to the Hub
Fill out the fields
- Personal Access Token
- Organization
- Project name (webhook scoping) (Optional)
Connect
- Click Connect
- If applicable, the provider will redirect you to a sign-in or authorization page. Complete the provider’s authorization flow.
- Once authorization is successful, you will see a confirmation popup
If the account linking is successful, you will see the newly linked account in your Accounts page.
Next Steps
Webhooks setup
Configure receiving Events for Azure DevOps into StackOne.