

Register an application in Microsoft Entra ID
The application is the identity that accesses your storage account. The client credentials flow has no sign-in step, so no redirect URI is needed.
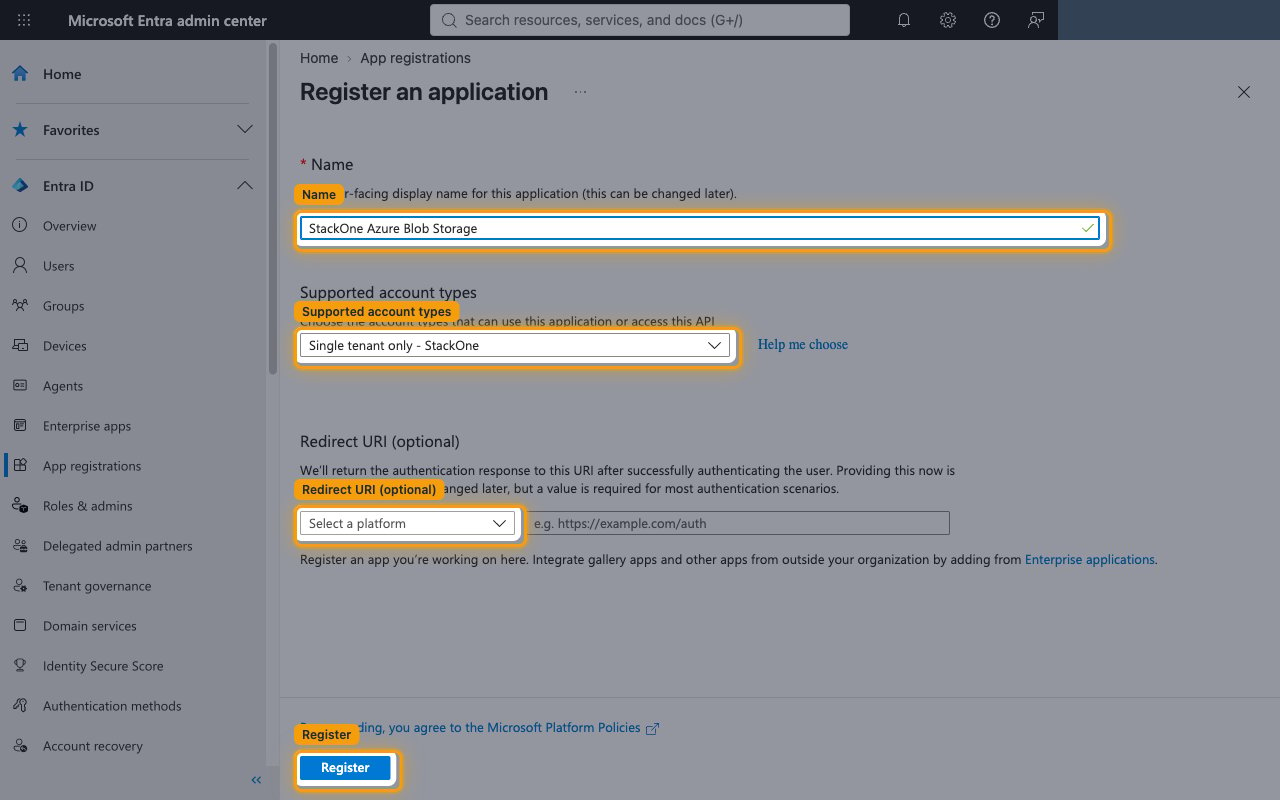
Register the app
Sign in to the Microsoft Entra admin center and open Entra ID > App registrations.
- If you manage more than one tenant, confirm you are in the correct directory using the Settings (gear) icon.
- Click New registration.
- Name:
StackOne Azure Blob Storage - Supported account types: Single tenant only
- Redirect URI (optional): leave empty
- Click Register.
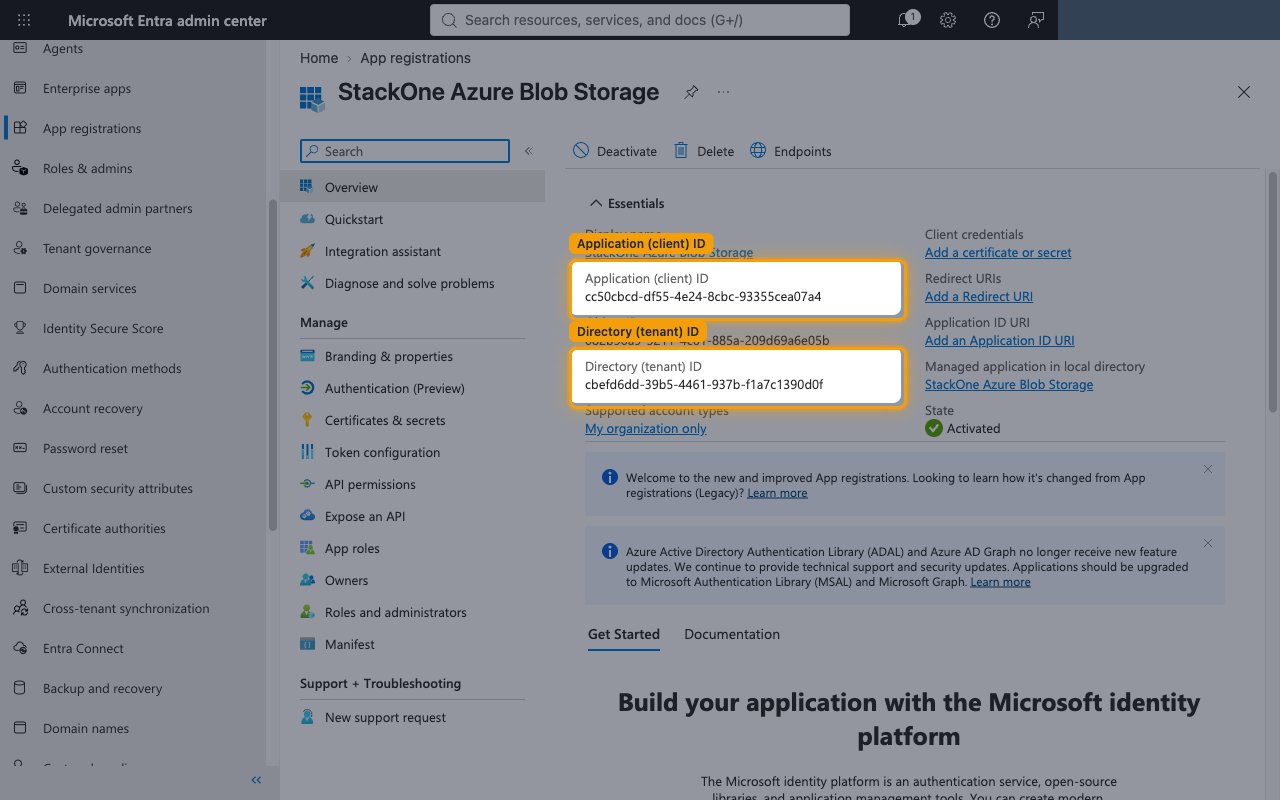
Copy the Application (client) ID and Directory (tenant) ID
After registration the app’s Overview page opens. In the Essentials panel, copy the Application (client) ID and the Directory (tenant) ID across.
- The Application (client) ID is your Client ID, and the Directory (tenant) ID is your Tenant ID.
- Format:
xxxxxxxx-xxxx-xxxx-xxxx-xxxxxxxxxxxx - No API permissions or admin consent are needed on the app registration. Access to blobs is granted by the Azure role you assign on the storage account.
Create a client secret
A client secret is the password the application uses to prove its identity.
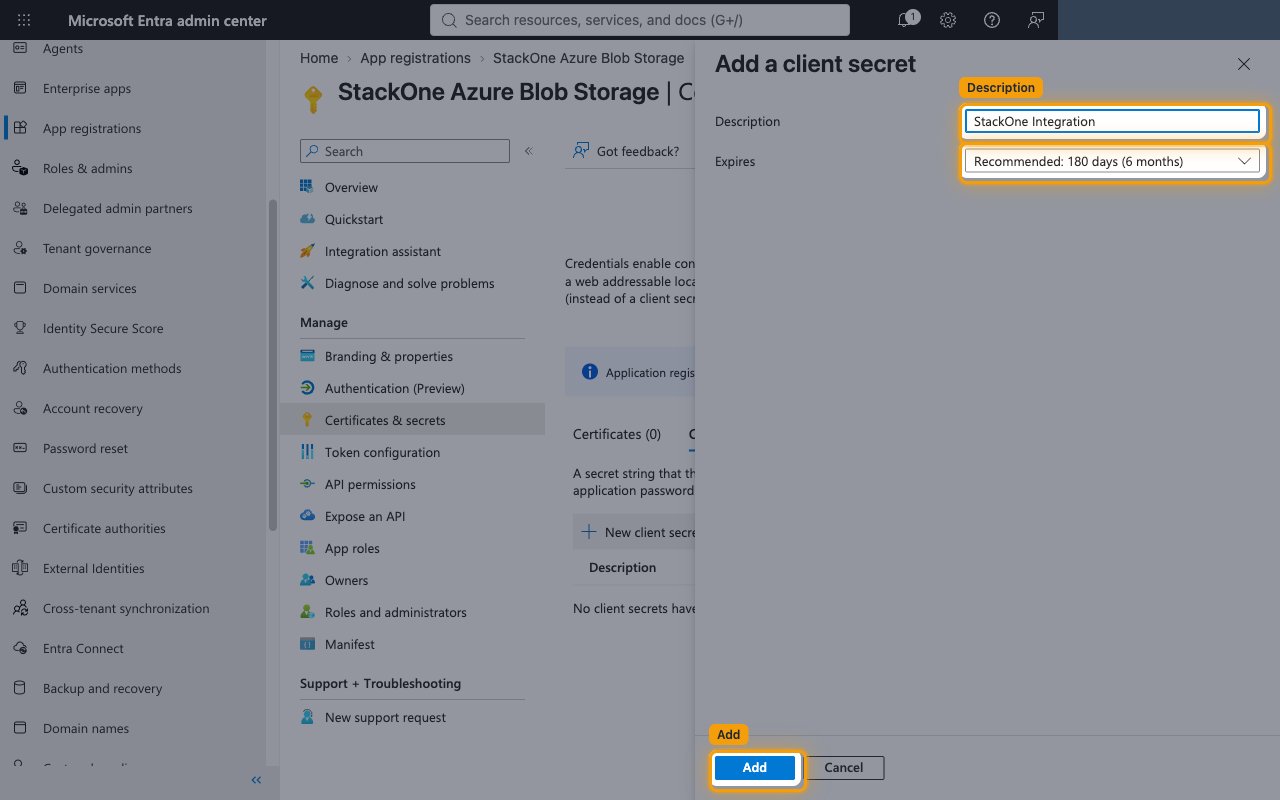
Generate the secret
In the app’s left menu, open Certificates & secrets, stay on the Client secrets tab, and click New client secret.
- Description:
StackOne Integration - Expires: Recommended: 180 days (6 months)
- Click Add.
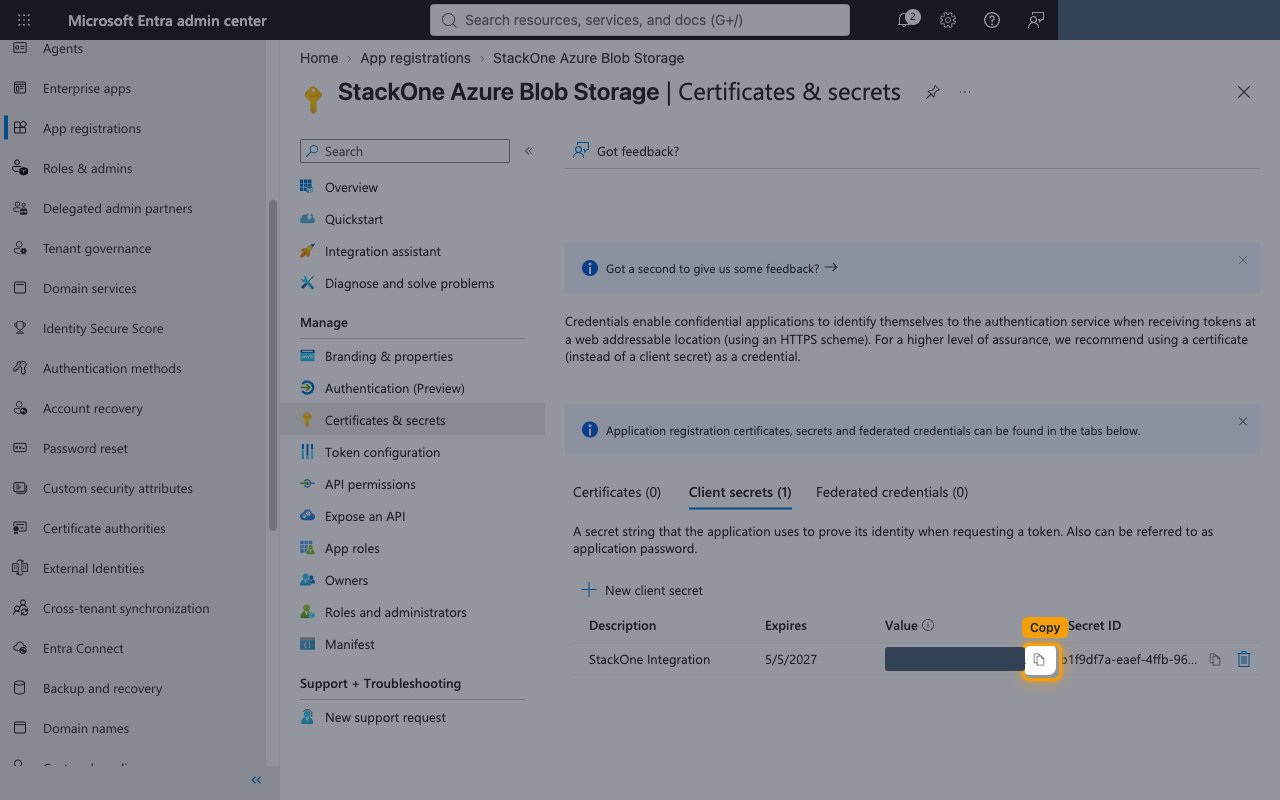
Copy the secret value
In the Client secrets table, click the Copy to clipboard icon beside the new secret’s Value and copy it across. It is your Client Secret.
- The Value is only displayed once and cannot be retrieved after you leave this page, so copy it now. Do not copy the Secret ID, which is a different value.
- Create a new secret before this one expires.
Assign an Azure role to the application
Azure Storage authorizes each request through an Azure role assigned on the storage account. Assign the role to the application you registered.
Select the Storage Blob Data Contributor role
Sign in to the Azure portal, search for Storage accounts in the top search bar, select the storage account you want to connect, and in its left sidebar select Access Control (IAM).
- Click Add.
- Select Add role assignment.
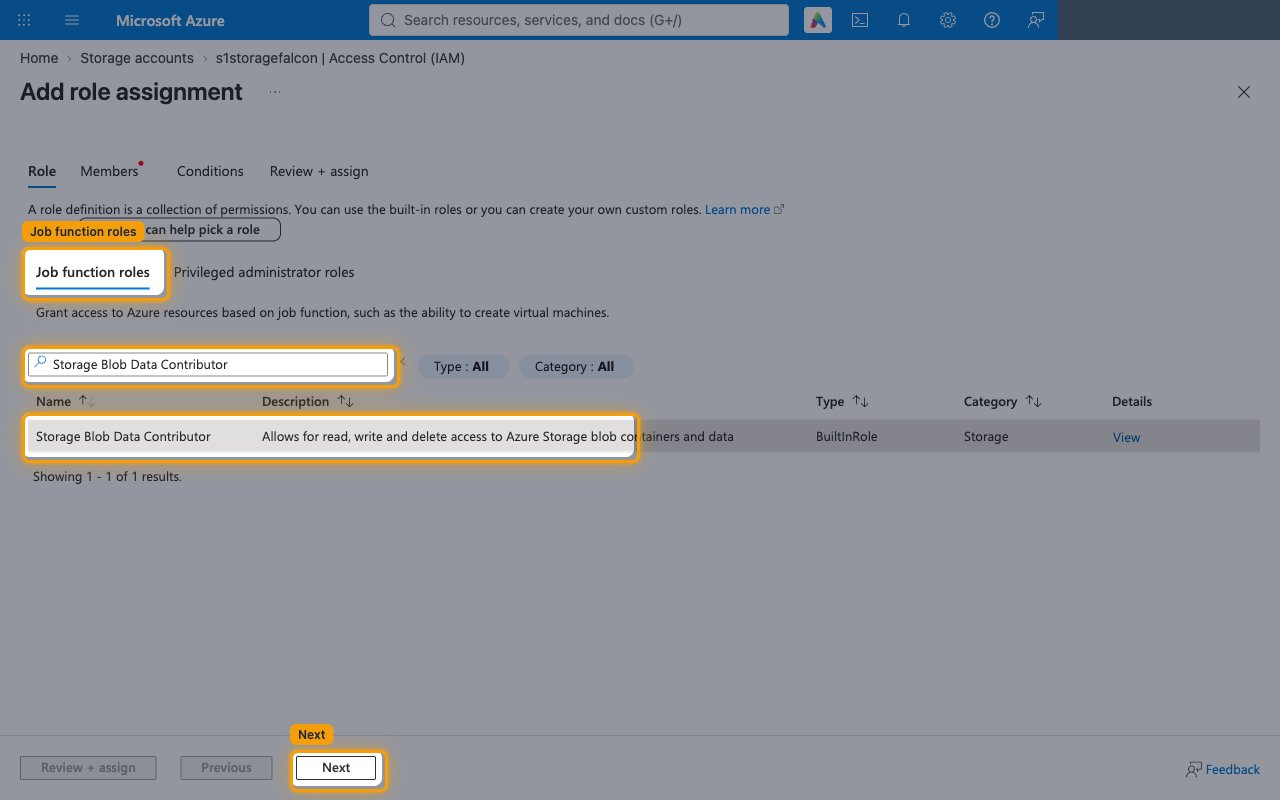
- On the Role tab, under Job function roles, search for Storage Blob Data Contributor.
- Select the Storage Blob Data Contributor row. It grants read, write and delete access to blobs and containers.
- If you need to read or set blob tags, find blobs by tags, or read or set container access policies, select Storage Blob Data Owner instead. It is a superset of Storage Blob Data Contributor.
- Reading or setting the blob service properties needs a second role assignment to the same application, since no Storage Blob Data role includes it. Repeat these steps with Reader for read-only access, or Storage Account Contributor to read and set them.
- Click Next.
Add the application as a member
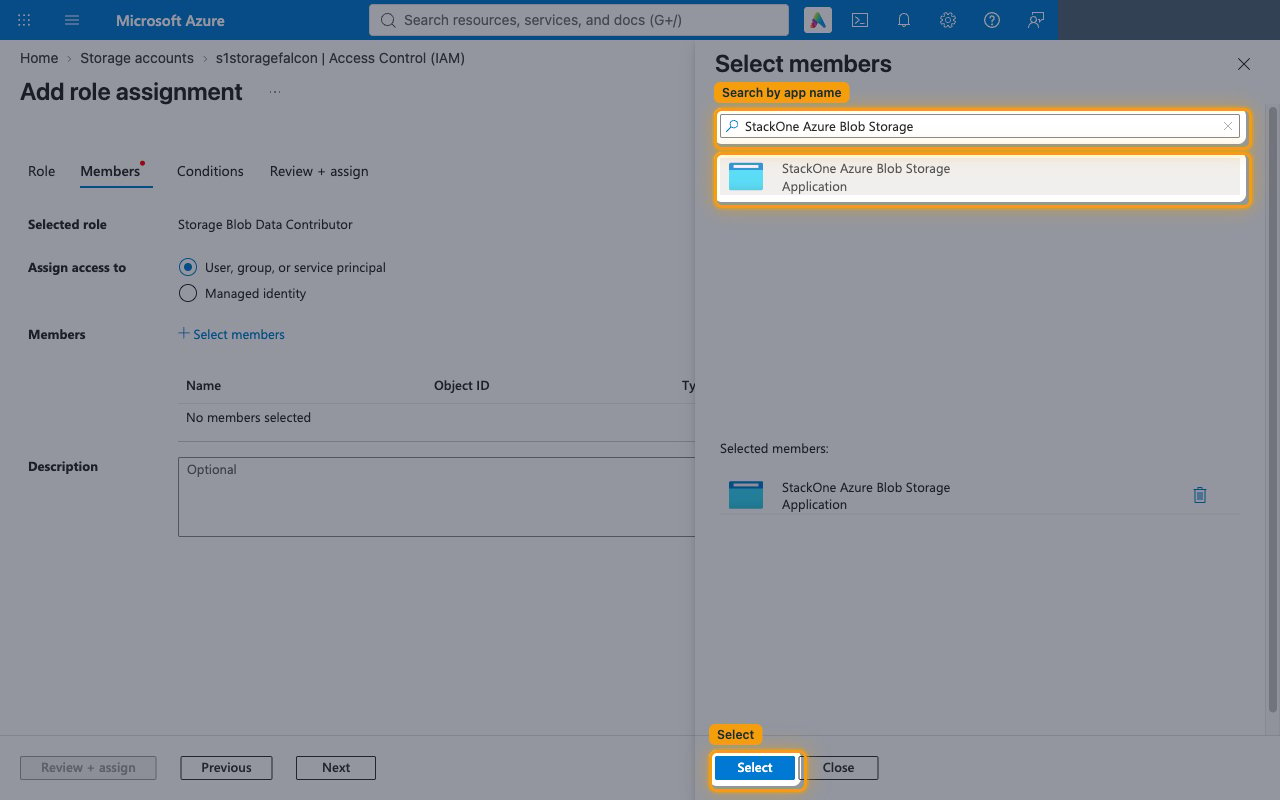
On the Members tab, keep Assign access to set to User, group, or service principal.
- Click Select members.
- In the search box, enter
StackOne Azure Blob Storage. Applications only appear in the results when you search for them by name. - Select the application in the results.
- Click Select.
- Click Review + assign.
Finish the role assignment
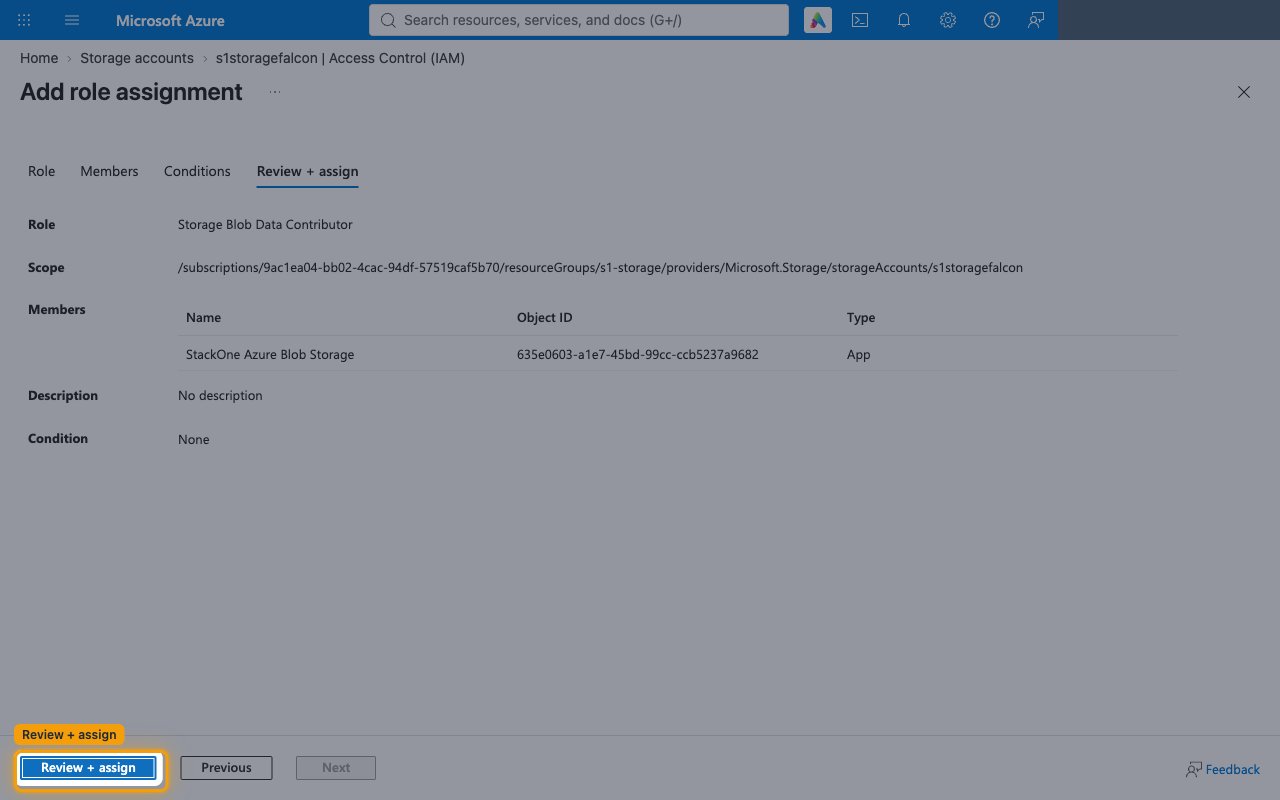
On the Review + assign tab, check the Role, Scope and Members, then click Review + assign.
- A new role assignment can take a few minutes to take effect.
Find your storage account name
Your storage account name identifies the Azure Storage resource to connect.
Copy the storage account name
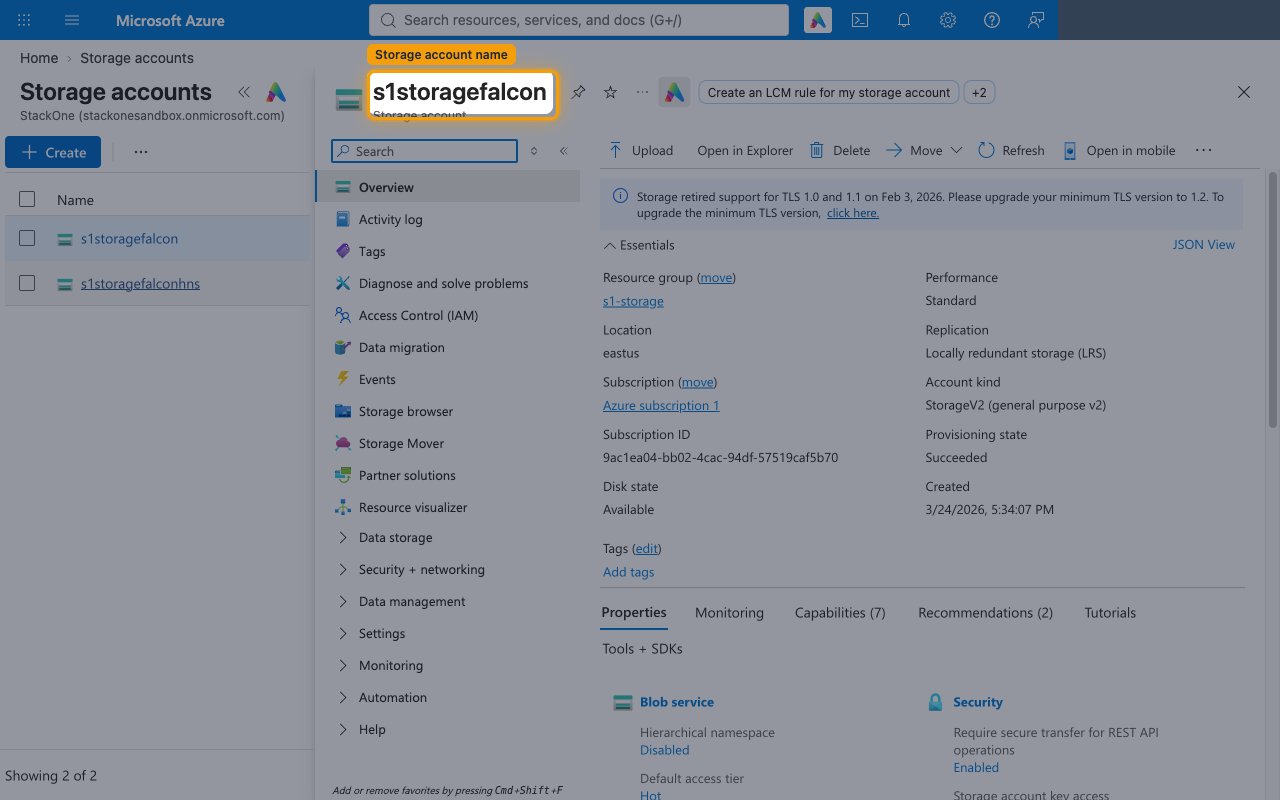
In the Azure portal, search for Storage accounts in the top search bar, select the storage account you assigned the role on, and on its Overview page copy the name shown as the page heading across. It is your Storage Account Name.
- Format:
mystorageaccount(lowercase; 3–24 characters; letters and digits only) - Example: if your blob endpoint is
https://acmeprod.blob.core.windows.net, your Storage Account Name isacmeprod
Link the Account
Connect
- Click Connect.
- If applicable, the provider will redirect you to a sign-in or authorization page. Complete the provider’s authorization flow.
- Once authorization is successful, you will see a confirmation popup.
Use Actions
Next Steps
Webhooks setup
Configure receiving Events for Azure Blob Storage into StackOne.