

Prerequisites
The connector should already be set up, with a Connector Profile and a Linked Account. See Getting Started on the Auvik connector page.Copy your Native Webhook URL
In StackOne Hub, open this connection and copy the read-only Native Webhook URL. This is the per-connection HTTPS endpoint Auvik posts alert notifications to. It already contains the token that authorizes deliveries — copy it whole, exactly as shown, and treat it like a password.
Create the webhook integration in Auvik
The integration stores the URL Auvik posts to. Webhook integrations can only be created from the MSP dashboard, so check the site selector at the top left shows your MSP site rather than a client site.
Open Integrations and add an integration
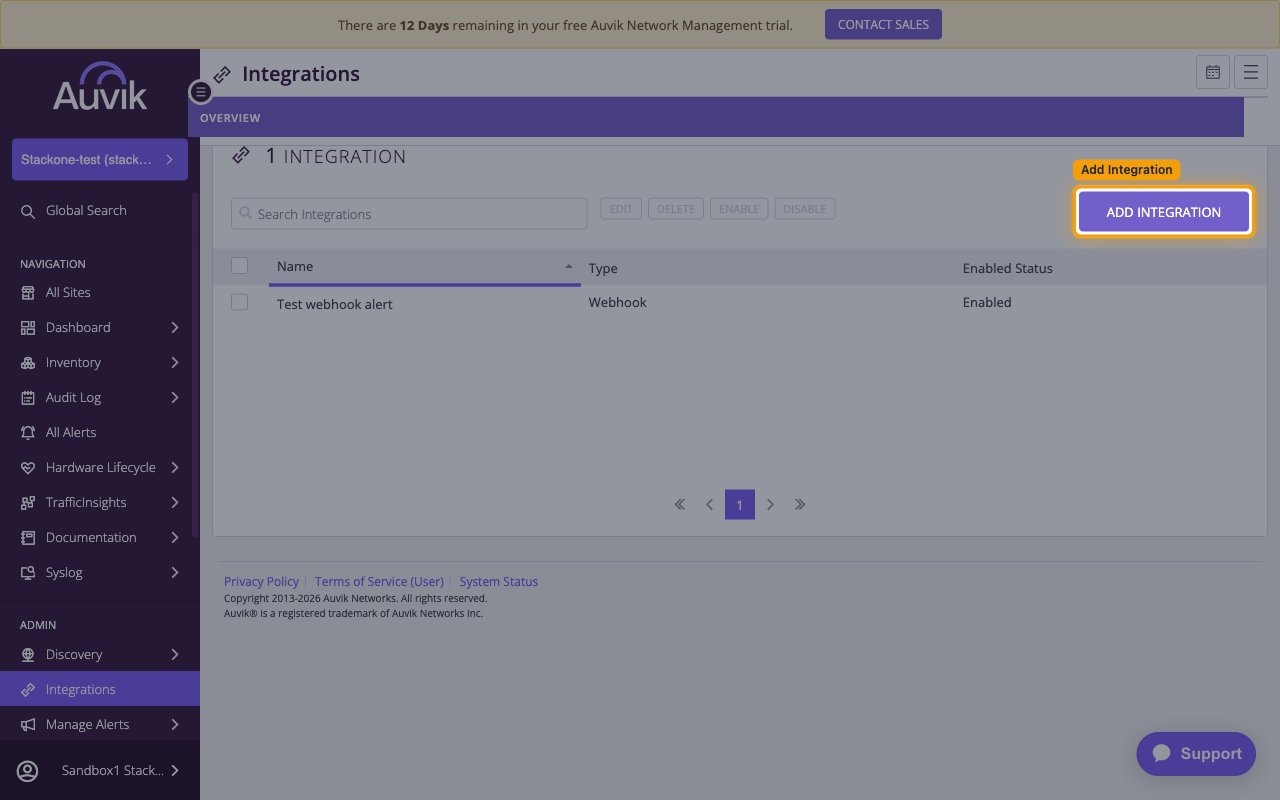
In the side navigation under ADMIN, click Integrations. The OVERVIEW tab lists your existing integrations with their Name, Type and Enabled Status. Hover ADD INTEGRATION and choose Webhook from the menu.
Select Webhook from the menu
The ADD INTEGRATION menu lists every integration type Auvik supports — Autotask, ConnectWise Manage™, ServiceNow, Slack, Microsoft Teams, Opsgenie, iLert and others. Choose Webhook.
Fill in the Add Webhook Integration form
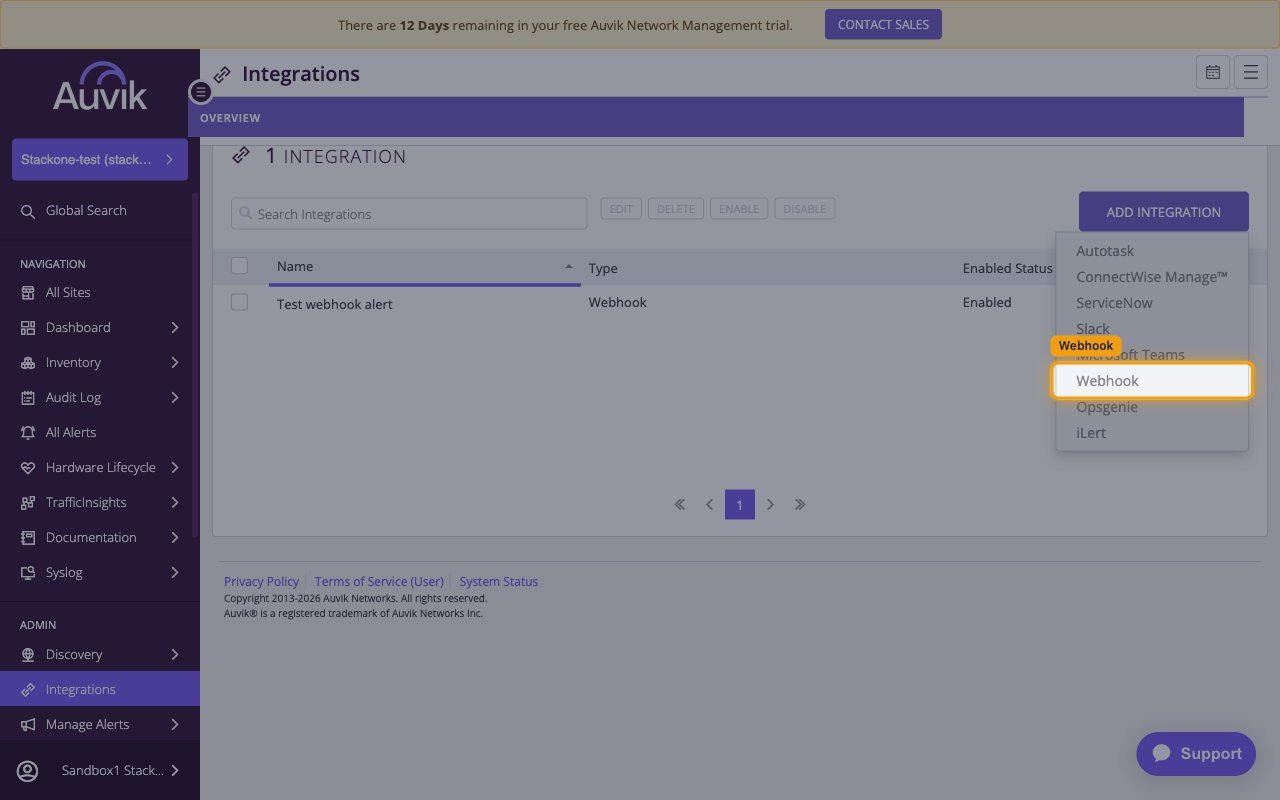
Complete the Add Webhook Integration form, then click Test Connection followed by Save.
- Integration Name — a label for this integration, for example
StackOne. - Webhook URL — paste the Native Webhook URL from step 1. It must be an HTTPS address.
- Select your authentication method — leave No Authentication selected. The token already in the URL authorizes the delivery, so no extra credential is needed. Header, Basic Authentication and OAuth are also offered but not required.
- Additional HTTP headers to send — leave the Key and Value fields empty.
- Payload Transformation — leave Apply transformation here empty. StackOne expects Auvik’s original alert format, and any Jsonata transformation here will stop events being recognised.
- Test Connection confirms Auvik can reach the URL. It posts directly from this screen and does not use a notification channel, so a successful test does not yet mean real alerts will be delivered.
Create a notification channel
The integration on its own is only a destination. A notification channel is what alerts actually send to.
Open Notification Channels
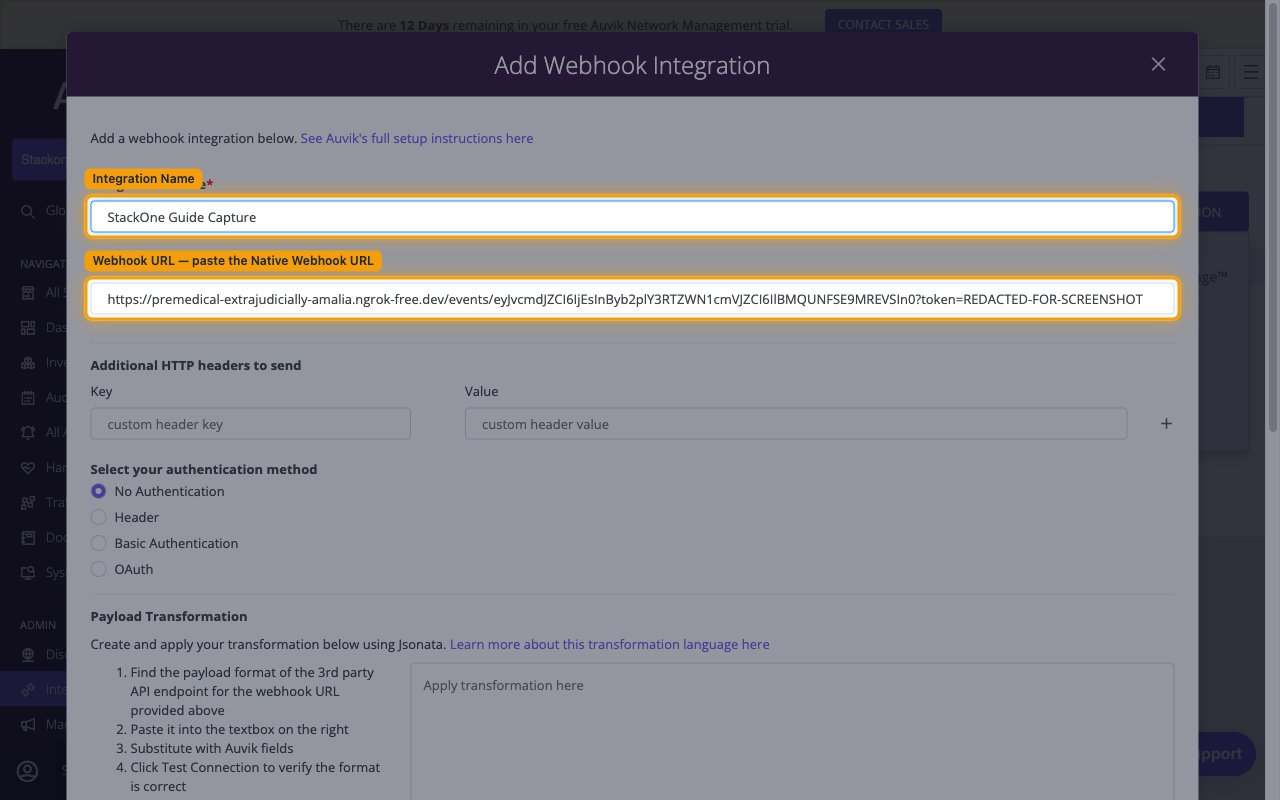
Go to Manage Alerts and open the NOTIFICATION CHANNELS tab. It lists each channel with its Name and Contact Method. Click ADD NOTIFICATION CHANNEL.
- SEND TEST ALERT on this screen sends a test through the channel itself, which is a better check than Test Connection because it exercises the channel too.
- Creating the channel from the MSP dashboard makes it available to all client sites; creating it from a client’s dashboard limits it to that client.
Set the Contact Method and pick your integration
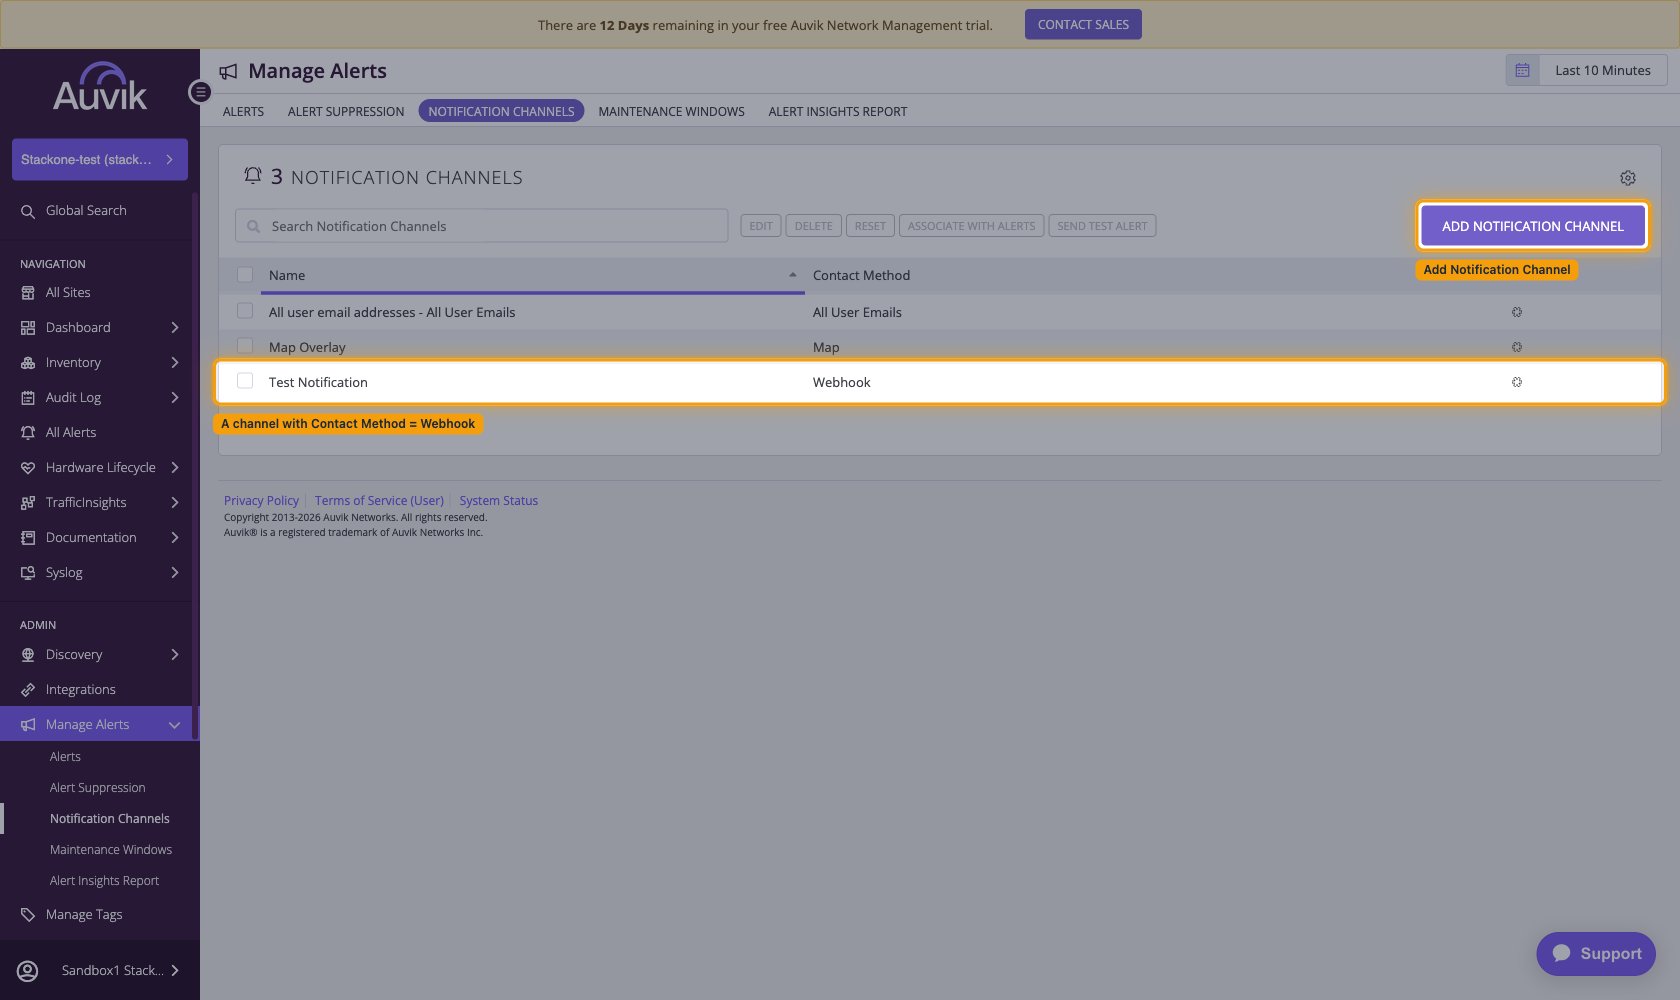
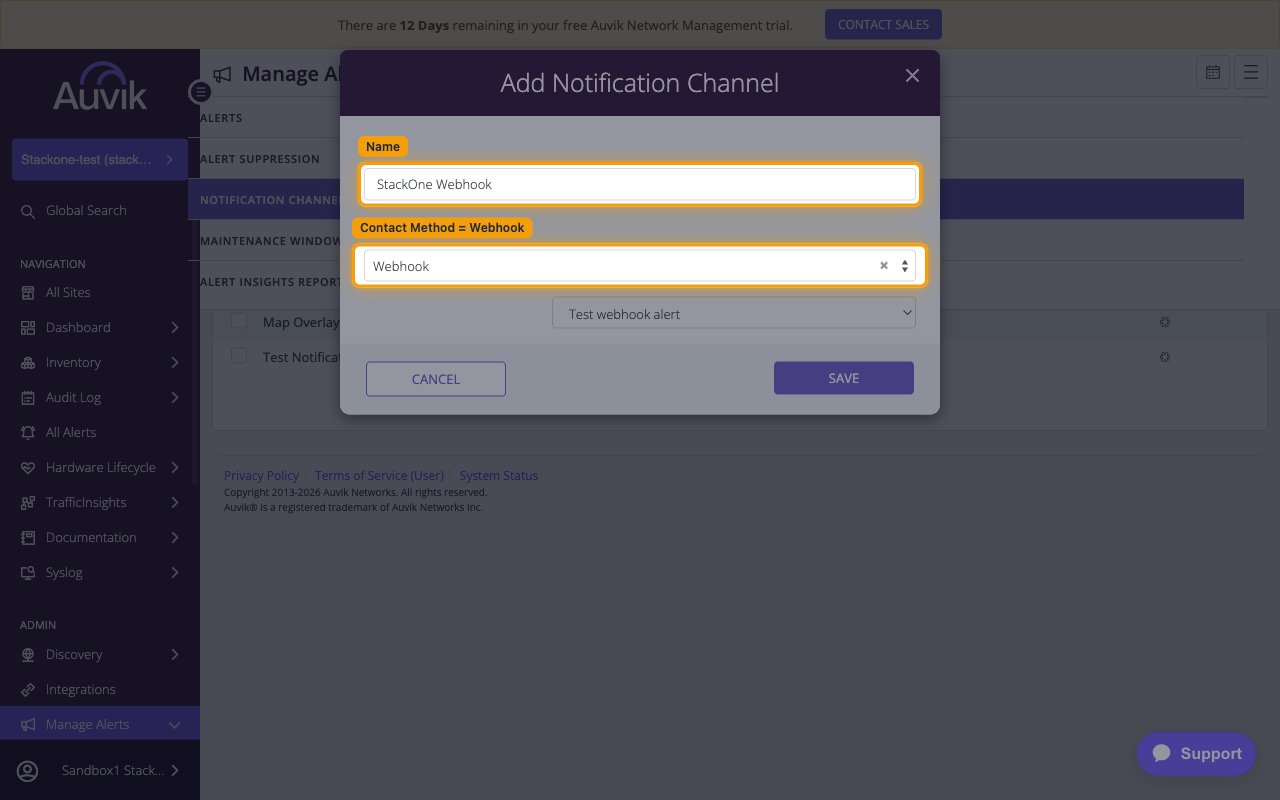
In the Add Notification Channel dialog, enter a Name, set Contact Method to Webhook, then choose the webhook integration you created in the dropdown that appears below it. Click SAVE.
- The integration dropdown only appears once Contact Method is set to Webhook. Pick the integration by the Integration Name you gave it — this is what links the channel to your StackOne URL.
- The Contact Method list also offers All User Emails, Custom Email(s) and Map.
Link your alerts to the channel
This is the step that decides whether anything is delivered. Creating the channel does not attach any alerts to it. Alerts that have never had their channel list edited inherit the channels defined at the root site, but any alert whose channels were changed at some point keeps its own list and ignores the root — so select the channel explicitly on each alert you want delivered.
Find the alert in Manage Alerts
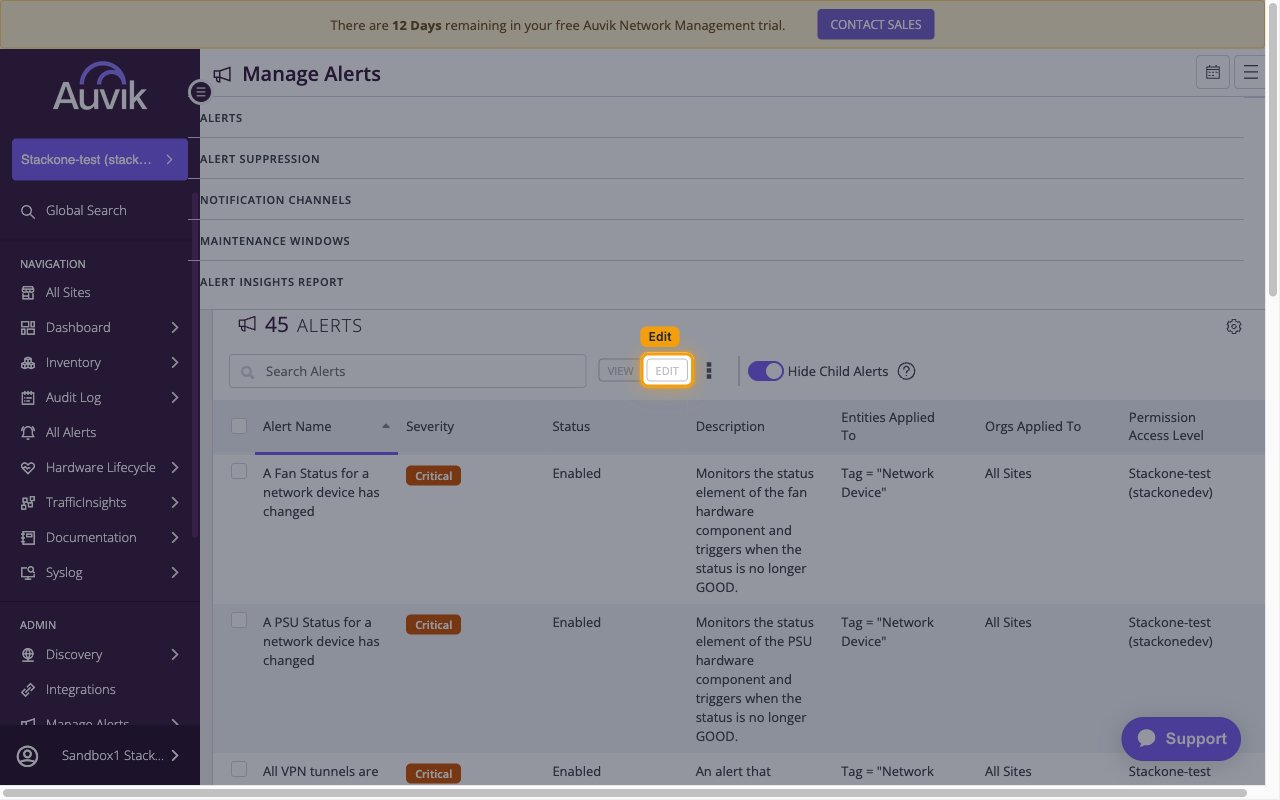
Open Manage Alerts and use Search Alerts to find the alert you want delivered. Select its row, then click EDIT. The list shows each alert’s Alert Name, Severity, Status, Description, Entities Applied To and Orgs Applied To.
Select the channel on the alert
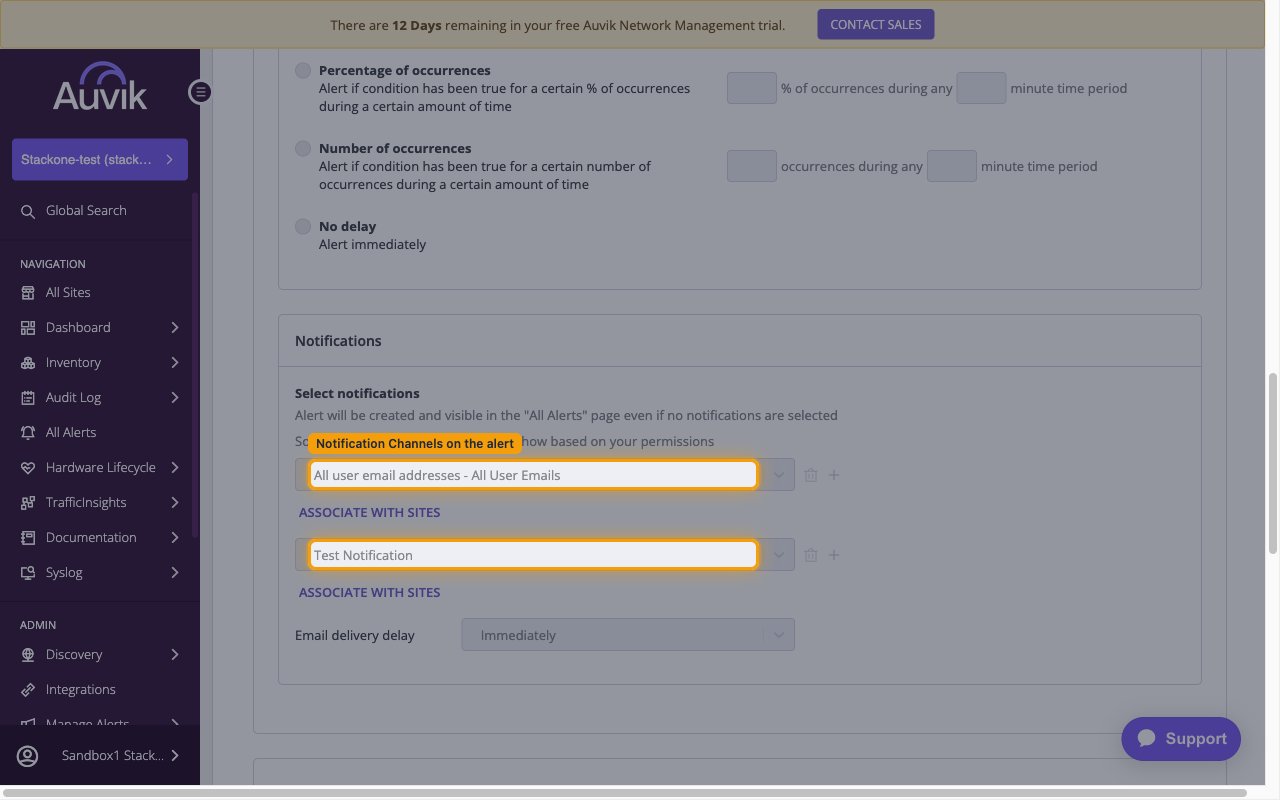
In the alert’s Notifications section each row holds one channel. Use the + beside a row to add another row, then pick your webhook channel in the new row and save the alert.
- Alerts created in Alerts V2 keep their channel selection on the alert itself, so open them from the ALERTS V2 TABLE. The ASSOCIATE WITH ALERTS button on the Notification Channels screen applies to legacy alerts only.
- Adding a channel in a new row leaves any existing channel in place; selecting a different channel in the same row replaces it.
- ASSOCIATE WITH SITES under each row limits that channel to specific sites.
- Auvik notes on this screen that an alert is created and visible in the All Alerts page even if no notifications are selected — so an alert showing in Auvik does not mean it reached StackOne.
Verify the link
Reopen the alert and read its Notifications section. The channels listed there are the alert’s real destinations — if your webhook channel is not listed, the alert will not be delivered.
Available webhook events
Auvik delivers one event type for everything. There is no per-event picker on the Auvik side — you choose which alert definitions are linked to the webhook channel, and every one of them arrives as the same event.
Review the alert event
Alert notifications, delivered both when an alert starts and when it stops.
- Alert Webhook (
alert) — Fired when an alert condition becomes true, and again when it clears. ReadalertStatusStringon the payload to tell the two apart:Triggeredwhen the condition starts,Clearedwhen it ends.
Review what is not delivered
Auvik sends webhooks for alerts only.
- Creating, changing or deleting a device, network, interface or configuration does not produce a webhook, and neither do new statistics.
- A few alert definitions do detect change — such as Firmware Change on Network Element, Default Route Change, Configuration Backup and New Network Device Discovered — but they arrive as ordinary alerts carrying a text description rather than a list of changed fields.
Delivery format
Details of how Auvik delivers alerts to StackOne.
Review the delivery shape
Each request carries a single alert as a flat JSON object — Auvik does not batch several alerts into one delivery. Timestamps on the payload are always UTC, regardless of the time zone set on your Auvik dashboard.
- Alerts that apply to sub-items such as interfaces send one notification per sub-item by default, so a device with many affected interfaces produces many deliveries. The roll-up setting on the alert changes this to a single notification.
- Auvik requires standard English characters in organization names; webhook alerts do not behave as expected if an organization name contains other characters.