

Provision app as a Custom Integration
For BIM 360 account-admin endpoints (/hq/v1/accounts/...), the APS Client ID must be provisioned on the target BIM 360 account as a Custom Integration. Without this step, account-admin actions will return 403 Forbidden.
Sign in to BIM 360 Account Admin
Sign in to the BIM 360 Account Admin portal.
- You must be an account administrator to complete this step.
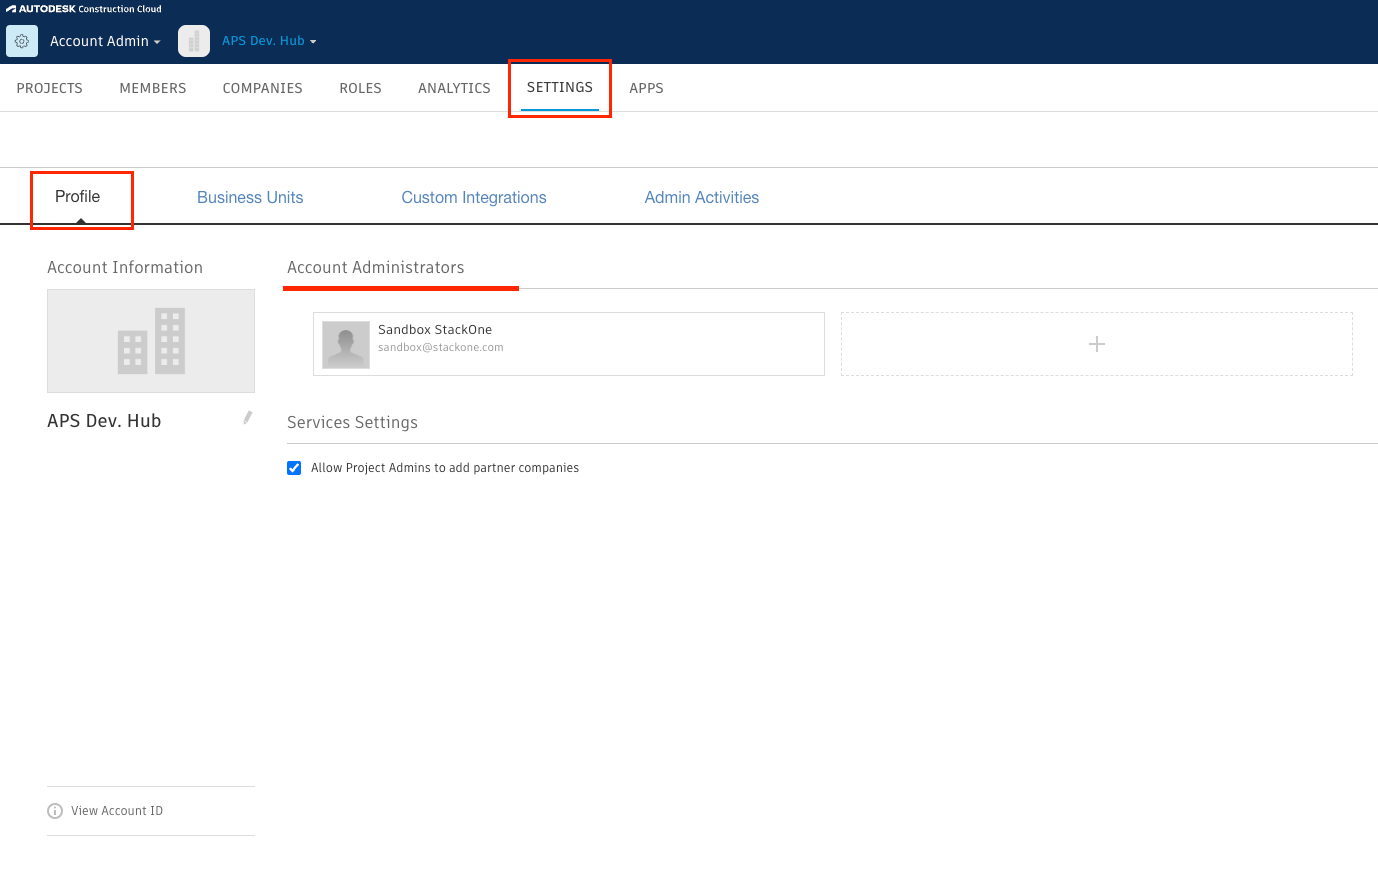
Add the custom integration
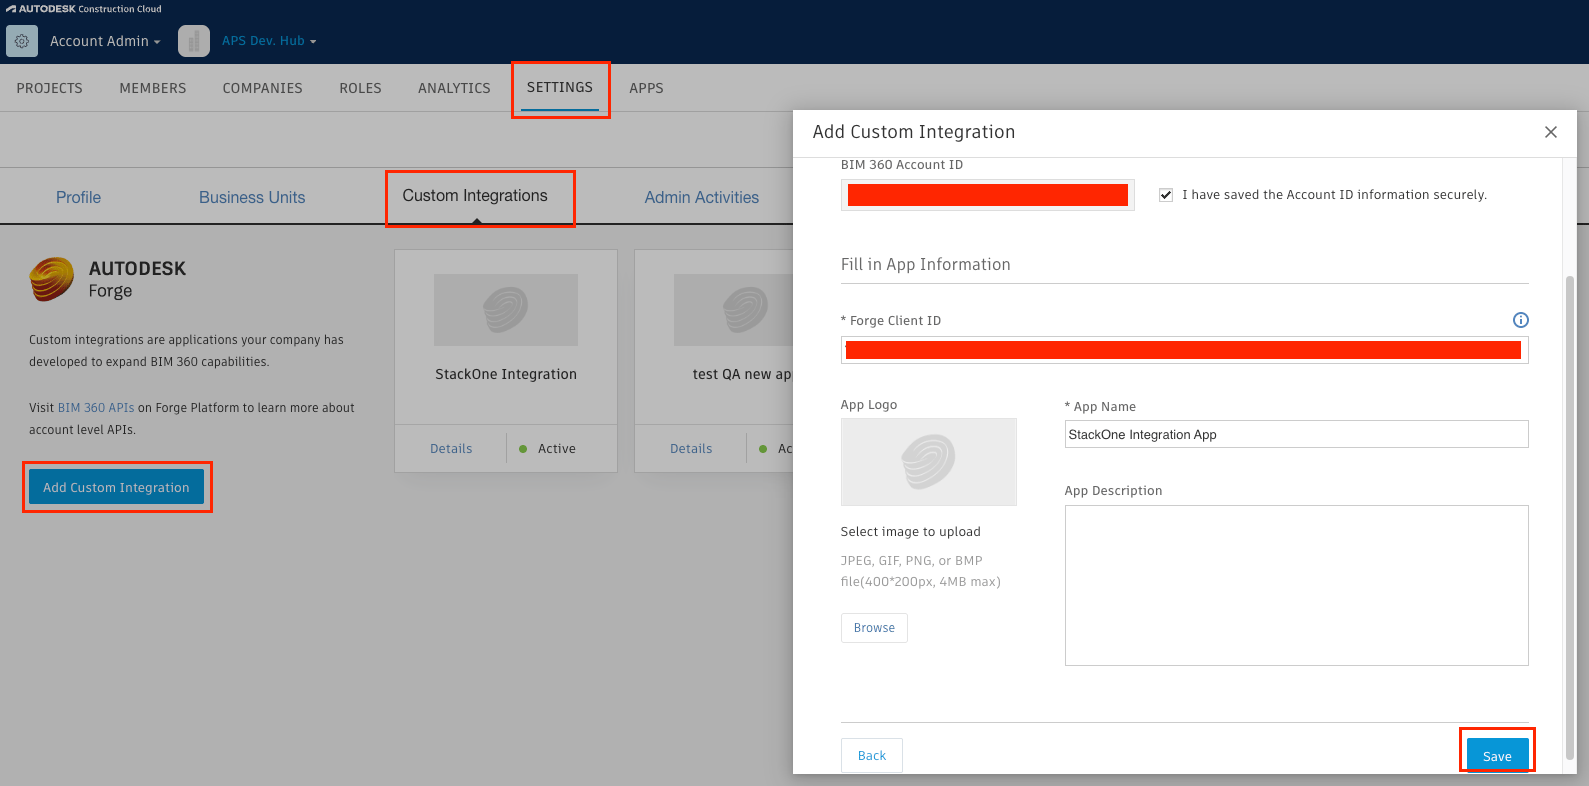
Click Settings in the top navigation bar, then select Custom Integrations.
- Click Add Custom Integration.
- Step 1 — Select Access: check BIM 360 Account Administration and click Next.
- Step 2 — Select I’m the developer or Invite a developer, then click Next.
- Step 3 — If you selected Invite a developer, enter the developer’s email address and click Next. Otherwise, skip this step.
- Step 4 — Paste the Client ID you copied from the APS portal.
- Name the integration (e.g.
StackOne Integration App). - You can also copy the Account ID displayed in this dialog for the next step.
- Click Save.
Copy your account ID
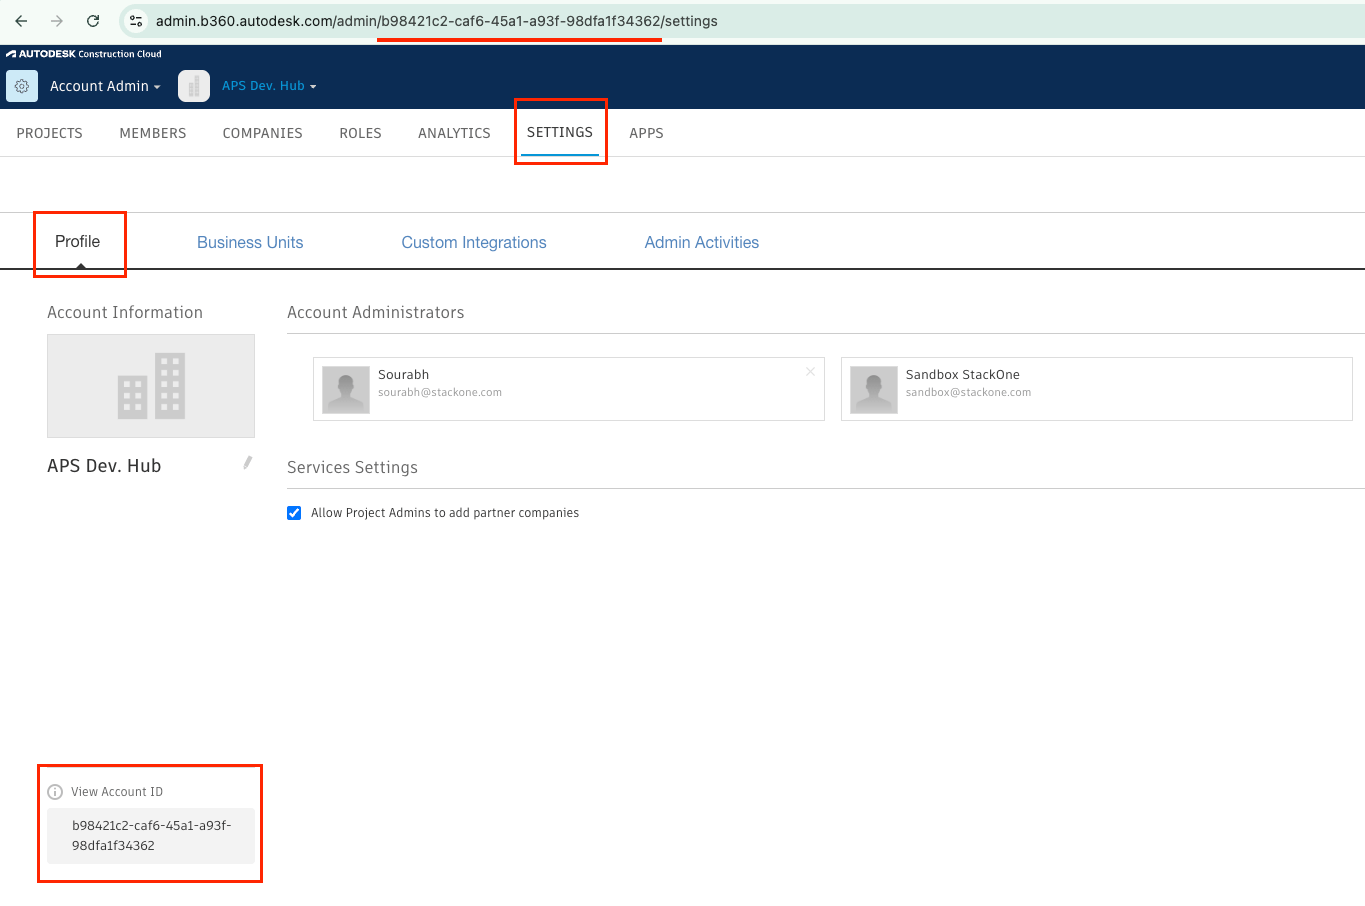
While in the BIM 360 Account Admin portal, copy your account ID — you will need it in the next step.
- Navigate to Settings → Profile → click View Account ID to see your account ID directly.
- Alternatively, look at your browser’s address bar — the account ID is the UUID after
/admin/in the URL (e.g.https://admin.b360.autodesk.com/admin/{accountId}/settings). - Example:
b98421c2-caf6-45a1-a93f-98dfa1f34362
Find your data region
Your data region identifies the Autodesk data centre where your BIM 360 / ACC / Forma account is hosted. Sign in to your BIM 360 Account Admin or ACC portal and check your browser address bar — the domain identifies the region.
- United States —
acc.autodesk.com→US - Canada —
acc.can.autodesk.com→CAN - Europe —
acc.autodesk.eu→EMEA - United Kingdom —
acc.gbr.autodesk.com→GBR - Germany —
acc.deu.autodesk.com→DEU - India —
acc.ind.autodesk.com→IND - Japan —
acc.jpn.autodesk.com→JPN - Australia —
acc.aus.autodesk.com→AUS - See the ACC regions reference for the full list.
Linking the Account from the Hub
Navigate to the Hub
Fill out the fields
- Account ID
- Data Region
Connect
- Click Connect
- If applicable, the provider will redirect you to a sign-in or authorization page. Complete the provider’s authorization flow.
- Once authorization is successful, you will see a confirmation popup
If the account linking is successful, you will see the newly linked account in your Accounts page.