

Generate a Reach 360 API key
Reach 360 authenticates API requests with an API key sent as a bearer token. Generate the key in your
Reach 360 admin area, then paste it — together with your data region — into StackOne Hub.
Open Reach 360
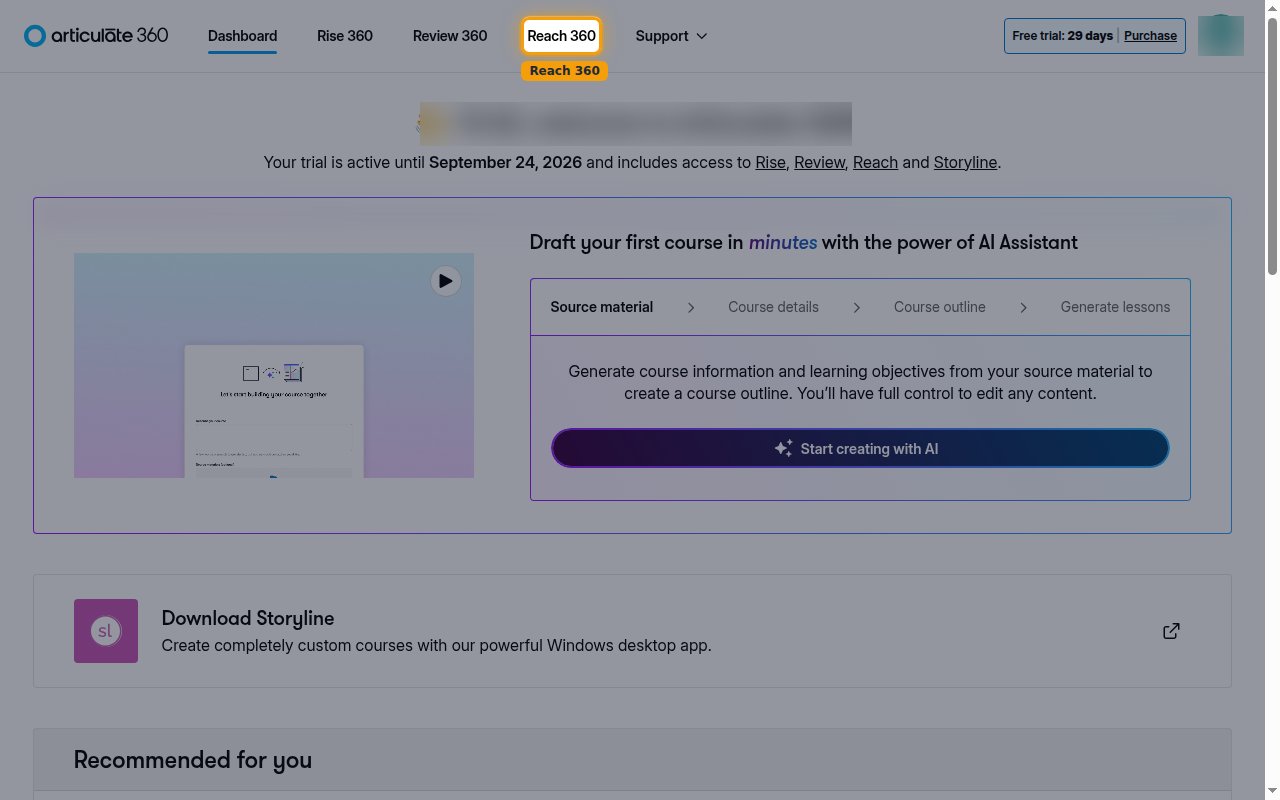
Sign in to Articulate 360, then open Reach 360 from the top navigation.
- Open the Articulate 360 dashboard and click Reach 360 in the top navigation.
- Use an admin account — the API key inherits the permissions of the admin who generates it.
Open API key settings
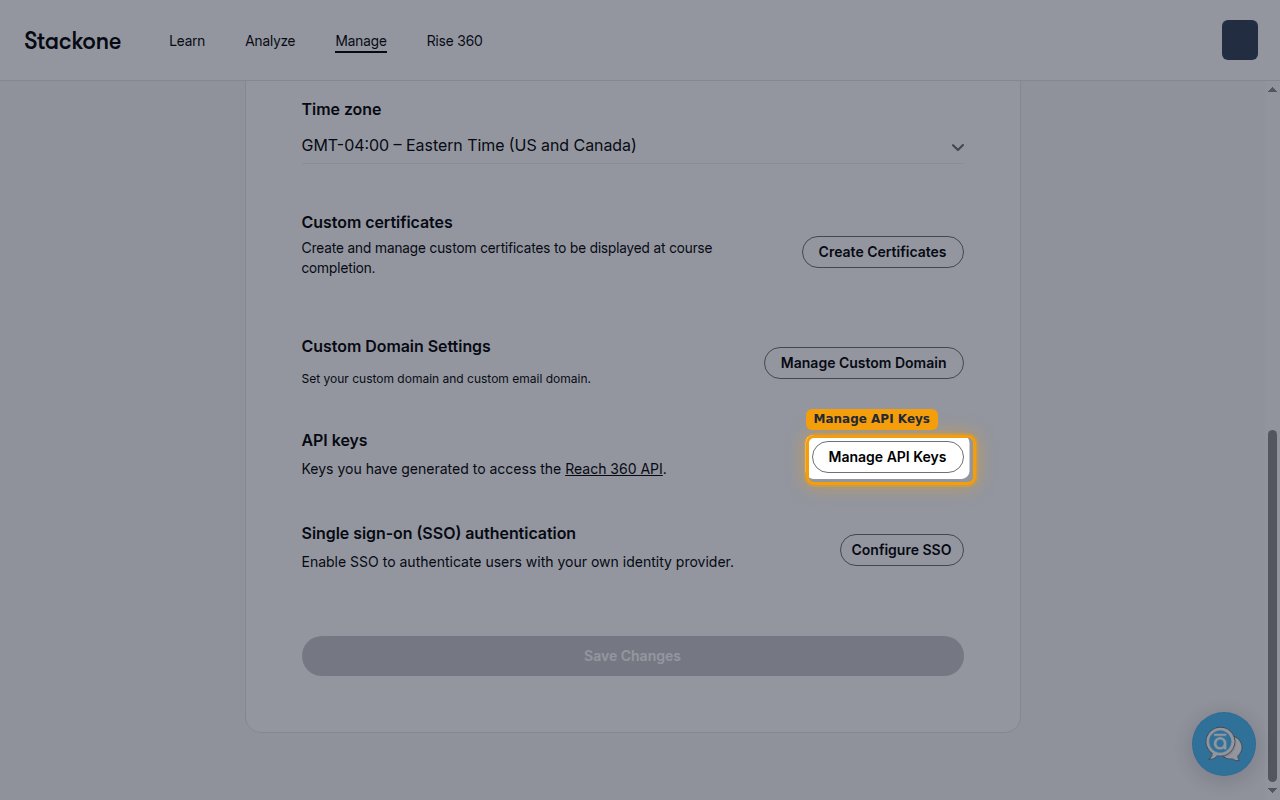
In Reach 360, open Manage and select the Settings tab. Scroll down the Settings page to the API keys section, then click Manage API Keys.
- The API keys section is near the bottom of the Settings page — scroll down if it is not immediately visible.
Generate a new key
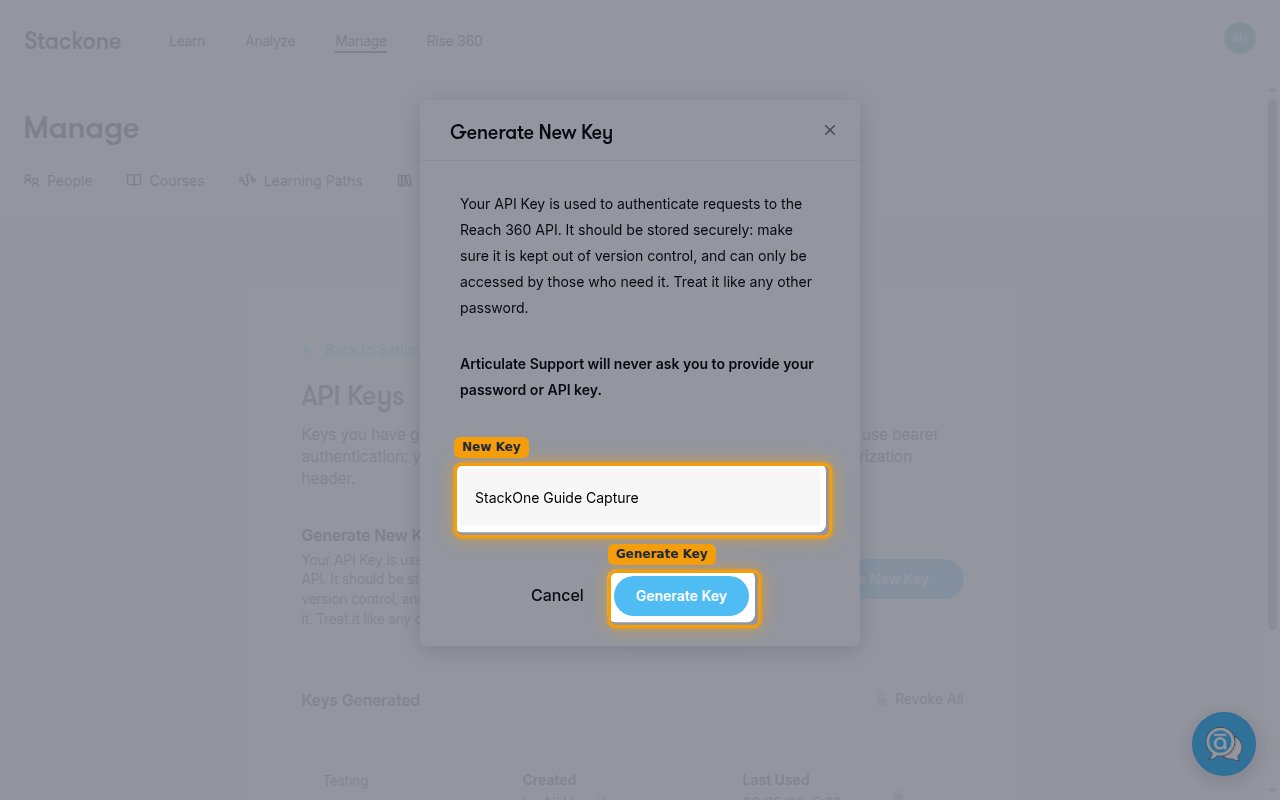
On the API Keys page, click Generate New Key. Enter a name in the New Key field, then click
Generate Key.
- Use a descriptive name so you can identify the integration later (for example
StackOne). - A best practice is to generate one key per integration, so it can be revoked independently.
Copy the API key
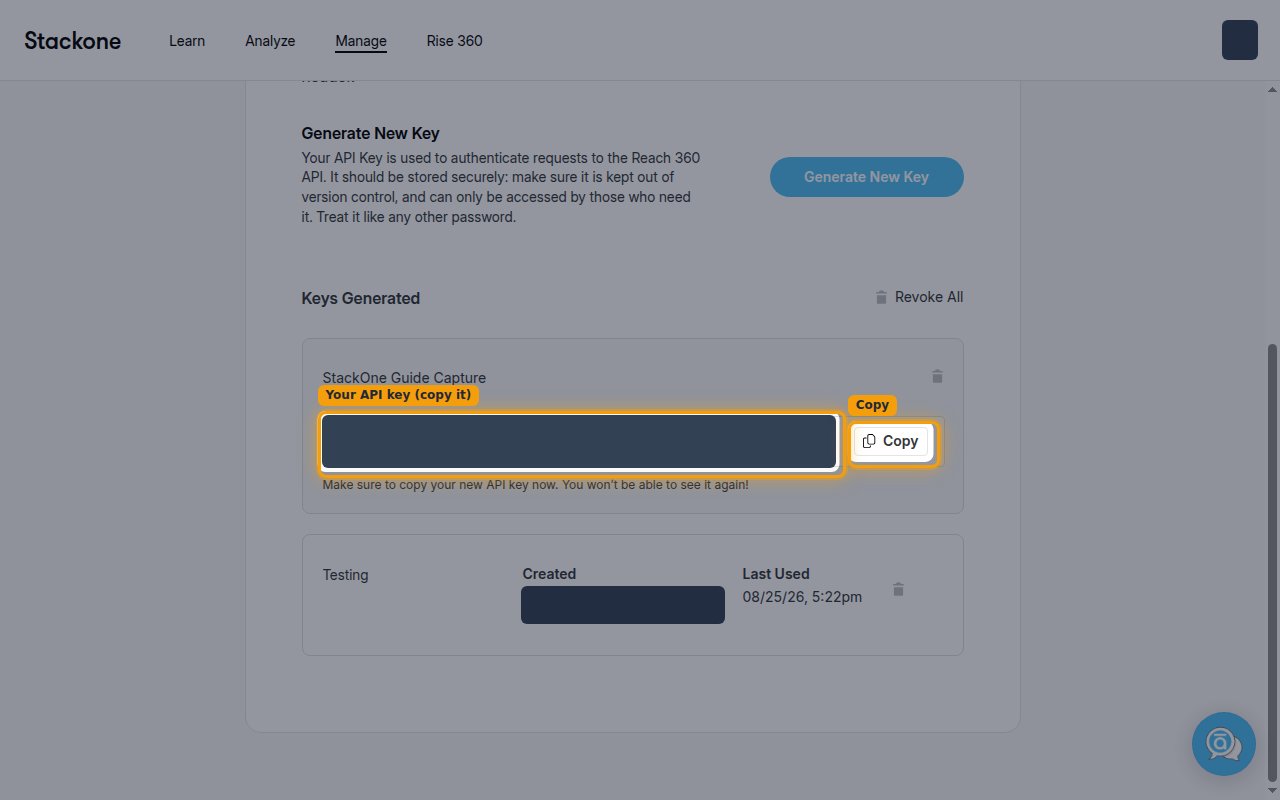
Copy the generated key with the Copy button and store it securely.
- The API key is only displayed once and cannot be retrieved later — the message Make sure to copy your new API key now. You won’t be able to see it again! confirms this. If you leave the page before copying it, revoke the key and generate a new one.
- Articulate Support will never ask you to provide your password or API key.
Add your credentials to StackOne Hub
Enter the values below in StackOne Hub to connect your Reach 360 account.
Choose your data region
Reach 360 is hosted in one of two regions. Select the Region that matches where your Reach 360
account is hosted — it determines the API host StackOne calls.
- Global — for accounts hosted at
https://api.reach360.com(your Reach URL ends inreach360.com). - EU — for accounts hosted at
https://api.reach360.eu(your Reach URL ends inreach360.eu).
Enter your credentials
Complete the connection fields in StackOne Hub:
- Region — select Global or EU to match your Reach 360 account.
- API Key — paste the API key you copied from Reach 360.
Linking the Account from the Hub
Navigate to the Hub
Fill out the fields
- Region
- API Key
Connect
- Click Connect
- If applicable, the provider will redirect you to a sign-in or authorization page. Complete the provider’s authorization flow.
- Once authorization is successful, you will see a confirmation popup
If the account linking is successful, you will see the newly linked account on your Accounts page.
Next Steps
Webhooks setup
Configure receiving Events for Articulate into StackOne.