

Find your API credentials
Your Application ID and API Key are found in the Algolia dashboard, under your application’s API Keys settings.
1
Sign in and select your application
Sign in to your Algolia account.
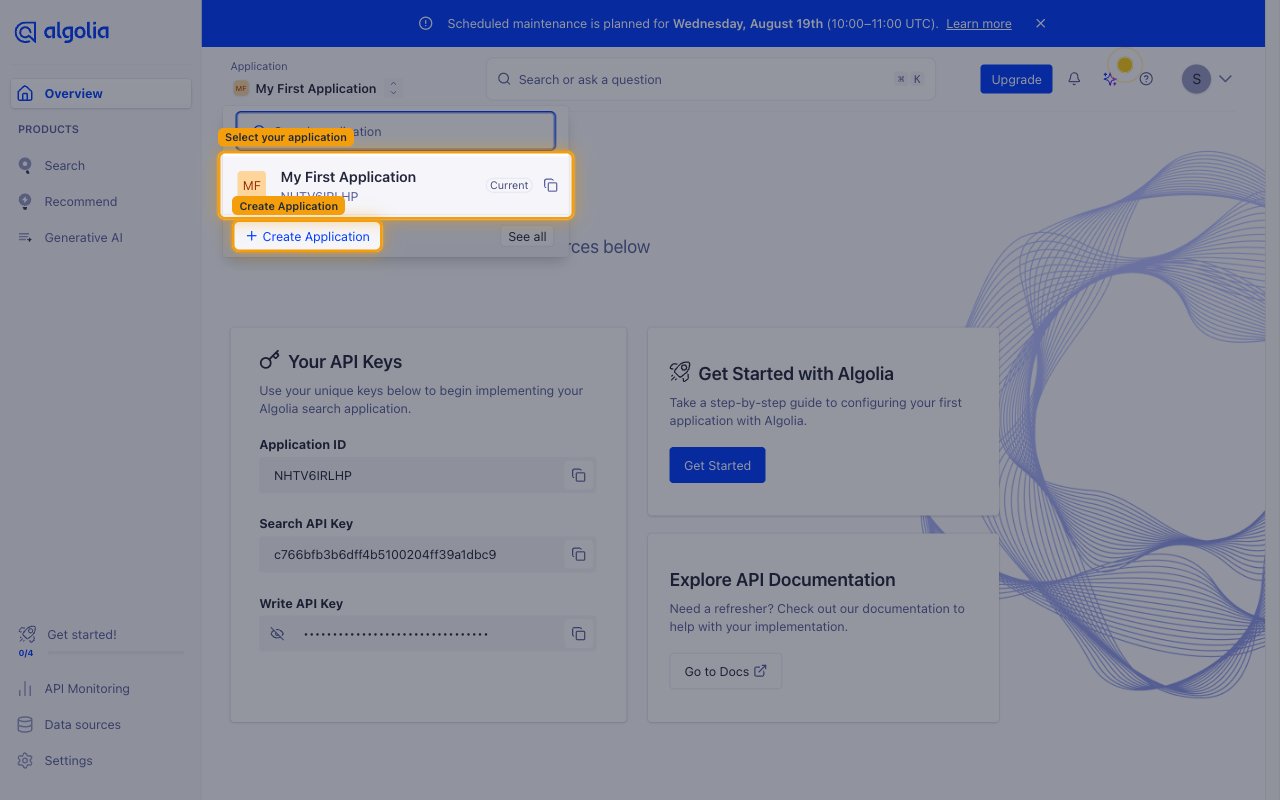
- In the top bar, click the Application selector and choose the application you want to connect.
- If you do not have an application yet, click + Create Application in the dropdown to create one first.
2
Open the API Keys settings
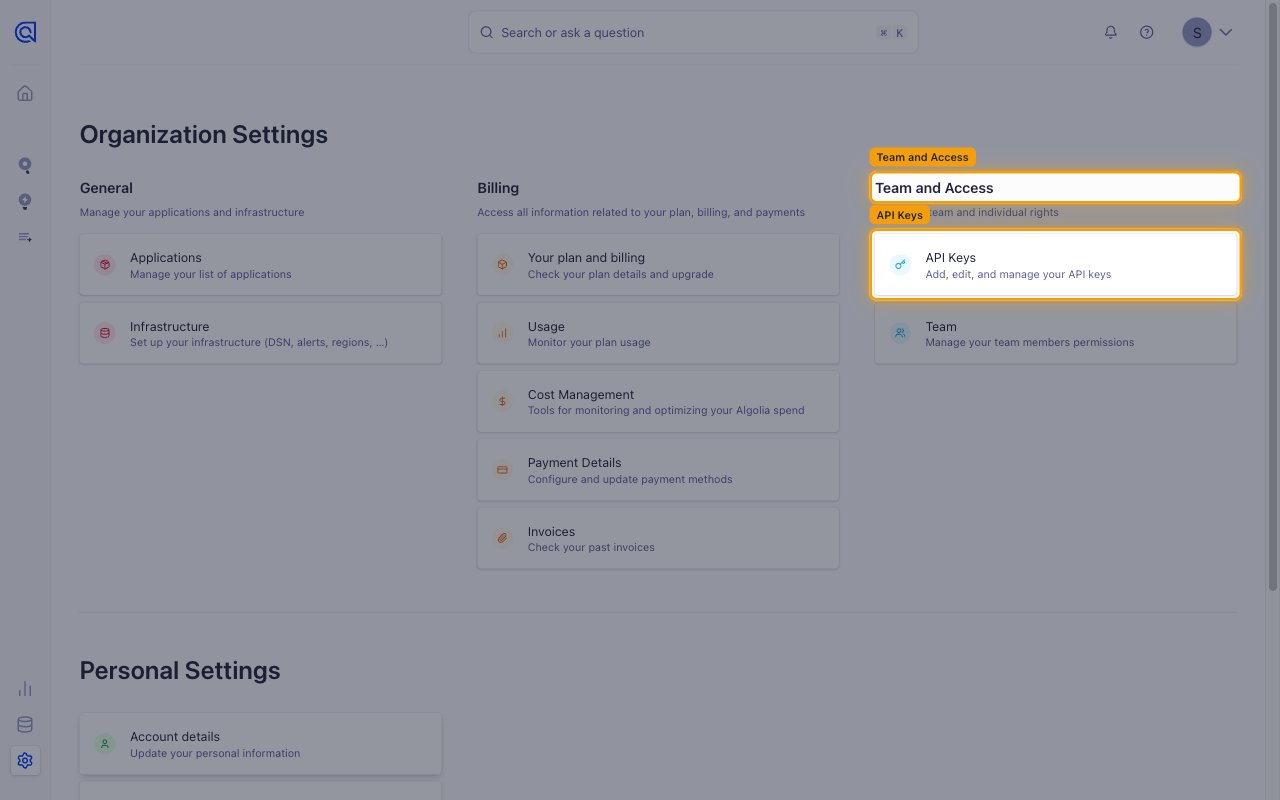
In the left sidebar, click Settings (the gear icon at the bottom).
- On the Organization Settings page, find the Team and Access section.
- Click API Keys.
3
Copy your Application ID
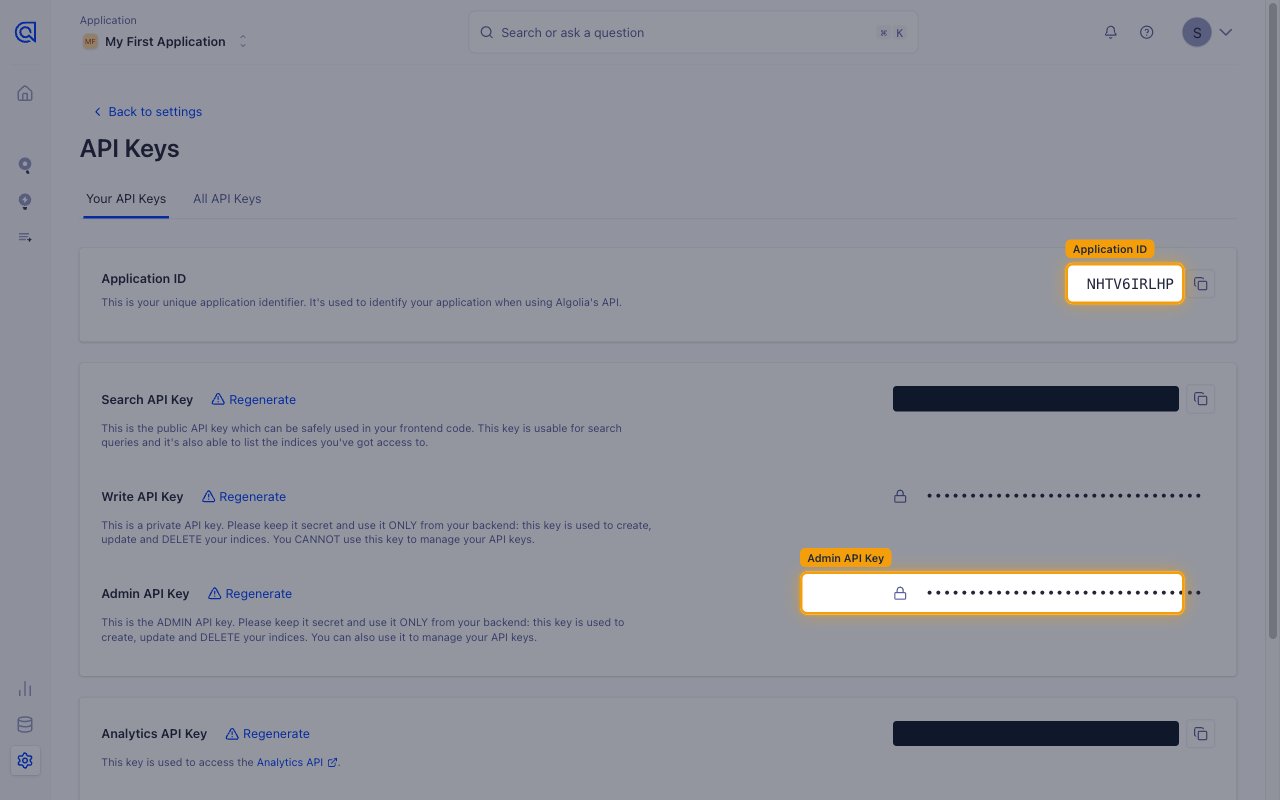
On the API Keys page, open the Your API Keys tab.
- Copy the value shown under Application ID — this is your unique application identifier.
- Paste it into the Application ID field in StackOne Hub.
4
Copy the Admin API Key
For the API Key, use the Admin API Key — it provides full access to all operations and is required for full integration functionality. The Search API Key only supports read and search operations.
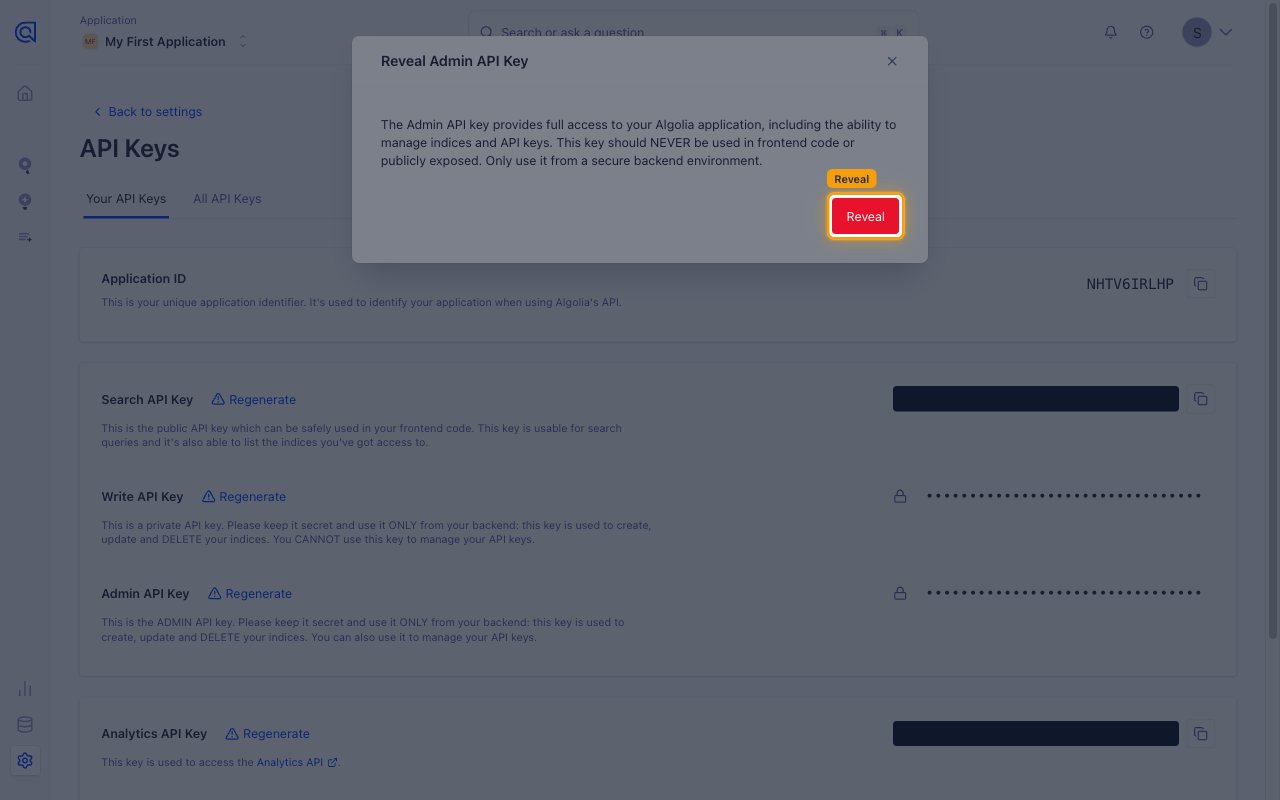
- Click the lock icon next to Admin API Key to reveal it.
- In the Reveal Admin API Key dialog, click Reveal to display the key, then copy it.
- Keep the Admin API Key secret — it should only be used from a secure backend and never exposed publicly.
- Paste it into the API Key field in StackOne Hub.
Linking the Account from the Hub
1
Navigate to the Hub
Use one of the three Linking Account Methods to access the Hub.
2
Fill out the fields
Fill out the following fields using details from your provider:
- Application ID
- API Key
3
Connect
- Click Connect
- If applicable, the provider will redirect you to a sign-in or authorization page. Complete the provider’s authorization flow.
- Once authorization is successful, you will see a confirmation popup
If the account linking is successful, you will see the newly linked account in your Accounts page.