

Find your Airship region (EU or US)
Sign in to your Airship tenant and check your browser’s URL bar to determine your region.
Sign in to Airship
Sign in to your Airship account using the appropriate host for your region.
- US Region — US sign-in
- EU Region — EU sign-in
Confirm your region
Your region is determined by the Airship domain your account is hosted on.
go.urbanairship.com→ USgo.airship.eu→ EU
Retrieve your App Key
Your App Key identifies your Airship project and is required alongside your OAuth client credentials.
Copy your App Key
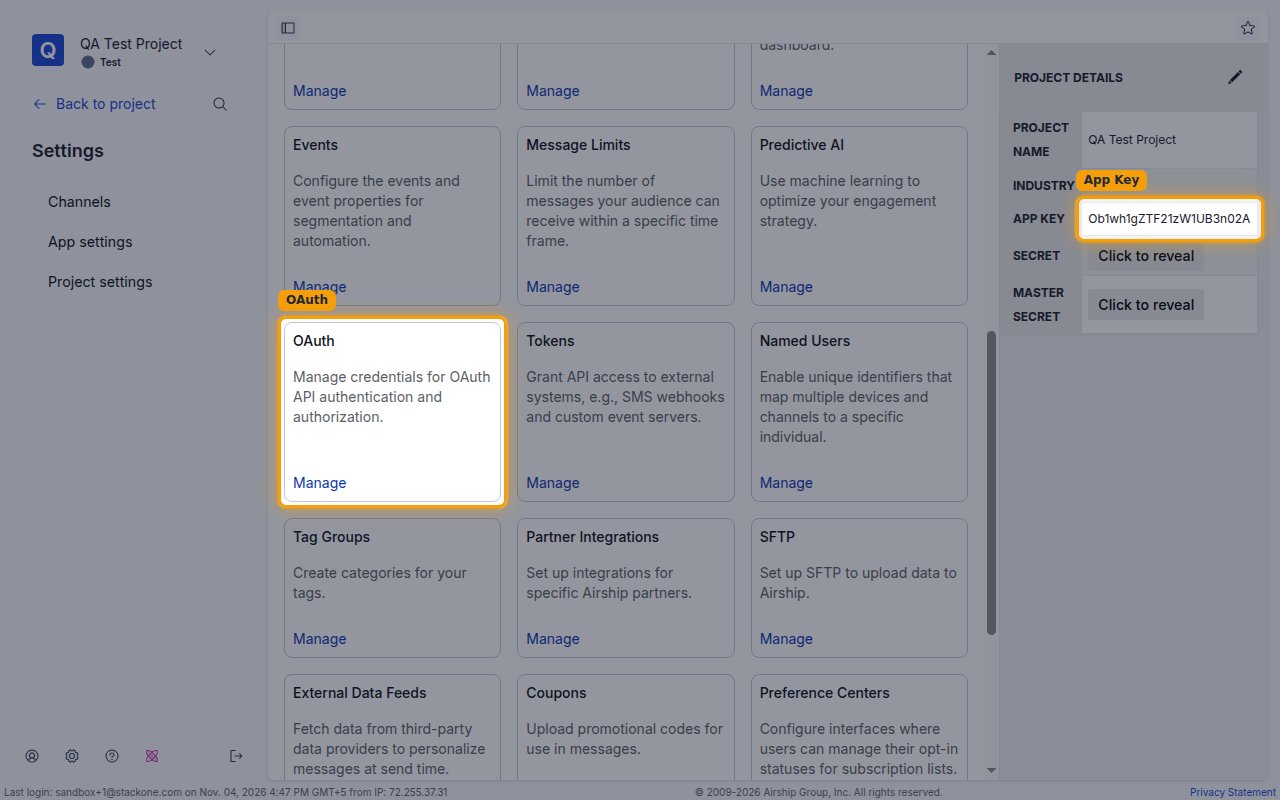
On the project’s Settings page, copy the App Key shown in the Project Details panel.
Create OAuth client credentials
Create client credentials in Airship to obtain a Client ID and Client Secret for the OAuth 2.0 client credentials grant.
Create the credential
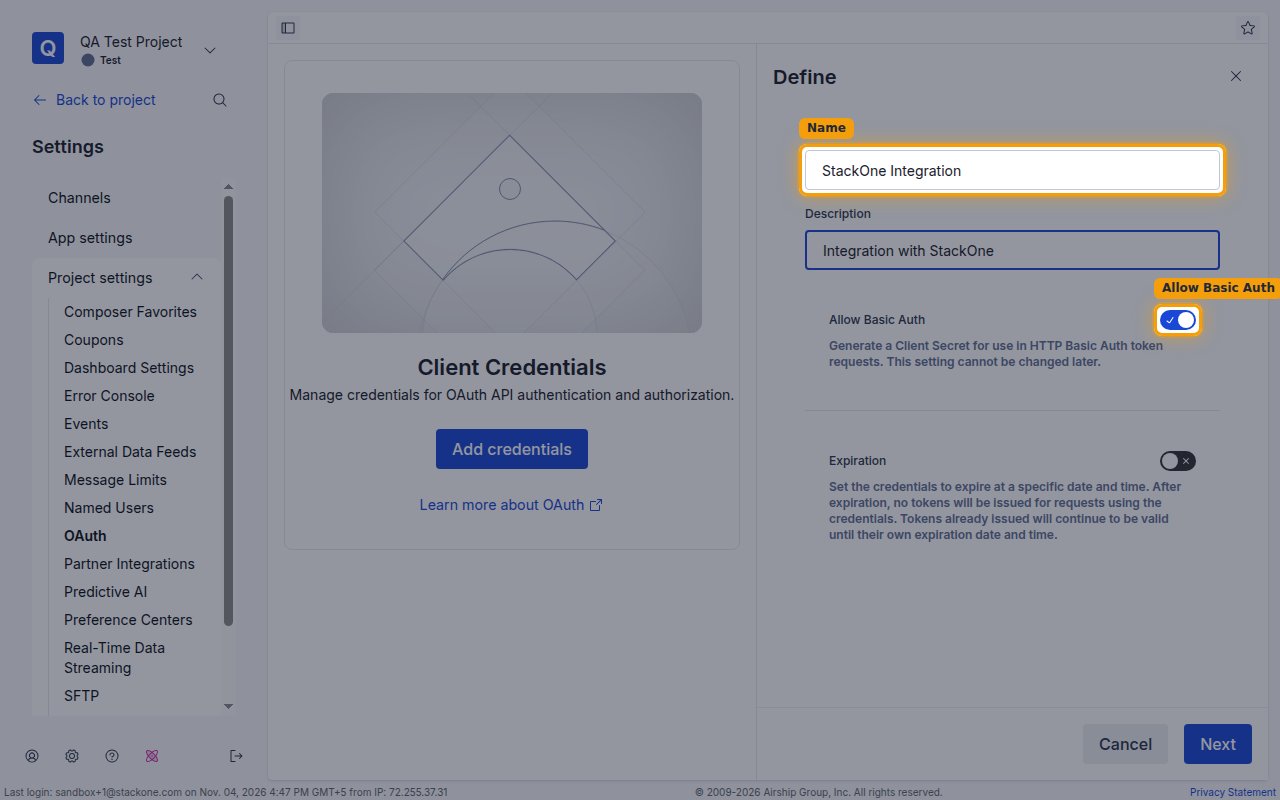
On your project’s Settings page, click OAuth under Project configuration, click Add credentials, then fill in the credential details on the Define screen.
- Name:
StackOne Integration - Description:
Integration with StackOne - Allow Basic Auth: turn this on. It generates a Client Secret for use in HTTP Basic Auth token requests, and this setting cannot be changed later.
- Click Next.
Configure permissions
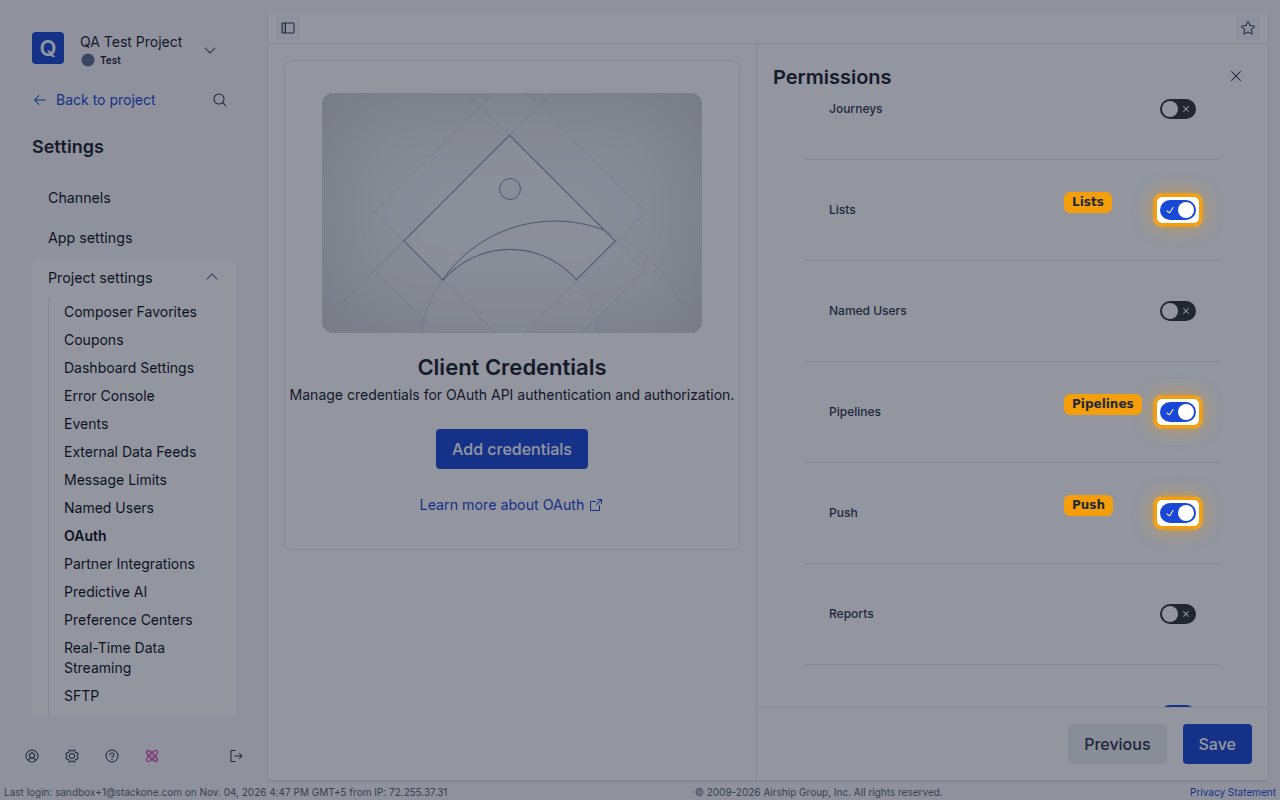
On the Permissions screen, enable the permissions this integration needs:
- Click Save.
Copy your credentials
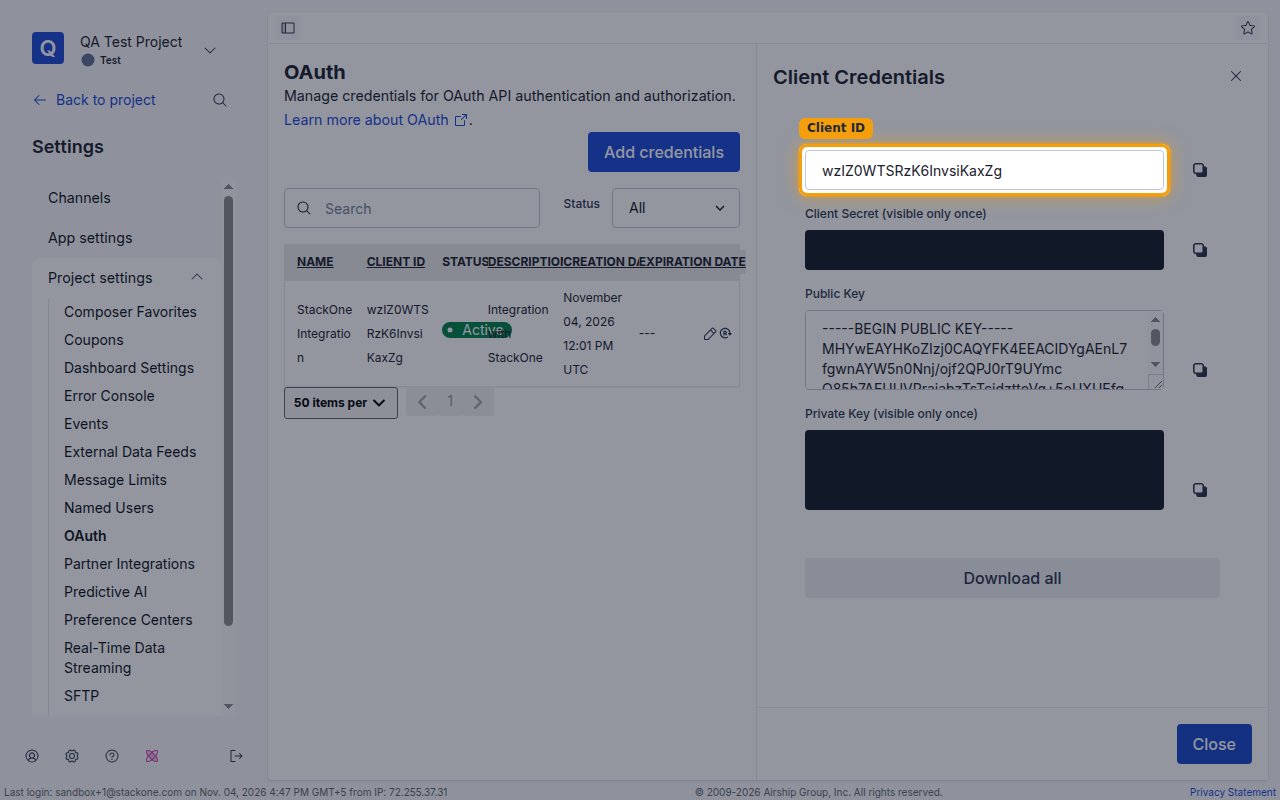
Copy the Client ID and Client Secret across.
- The Client Secret is only displayed once and cannot be retrieved later.
Link the Account
Connect
- Click Connect.
- If applicable, the provider will redirect you to a sign-in or authorization page. Complete the provider’s authorization flow.
- Once authorization is successful, you will see a confirmation popup.
Use Actions