

Find your Server URL
Your Server URL is the address of your self-hosted ADManager Plus web console.
- Copy it from your browser address bar while signed in to ADManager Plus, keeping only the protocol, host and port.
- Paste it into the Server URL field in StackOne Hub, without a trailing slash,
/api/v2or/RestAPI. - Format:
https://{hostname}:{port} - Example:
https://admanager.example.com:8443 - The Native Webhook URL field is filled in by StackOne and is only needed if you send webhook events from ADManager Plus.
Generating an authtoken
An authtoken lets StackOne call the ADManager Plus REST API on behalf of a technician. It is the API key for this connection, so in StackOne Hub it goes in the Authtoken field.
Open My Account
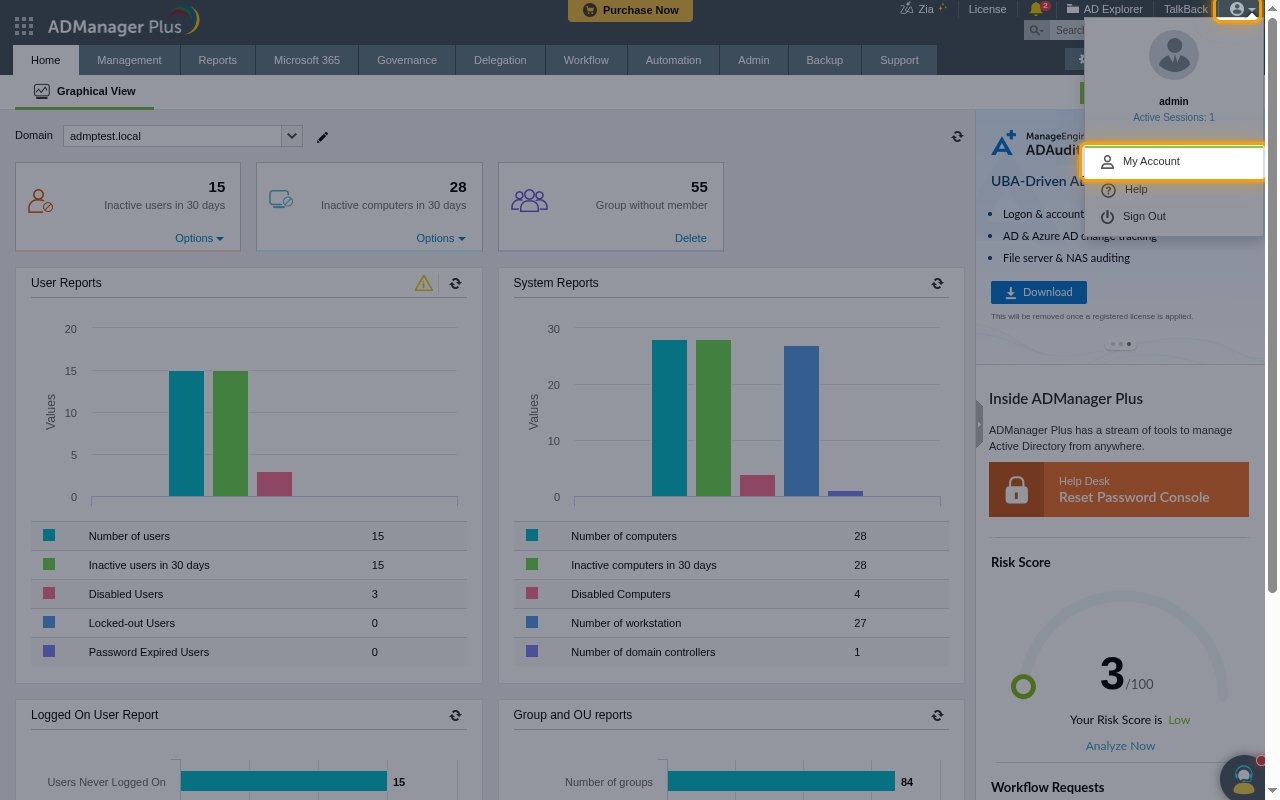
ADManager Plus is self-hosted, so there is no shared sign-in page. Sign in to the web console at your own Server URL (the address described in the Server URL section above), then click the profile icon in the top-right corner and select My Account.
Open Active Authtokens
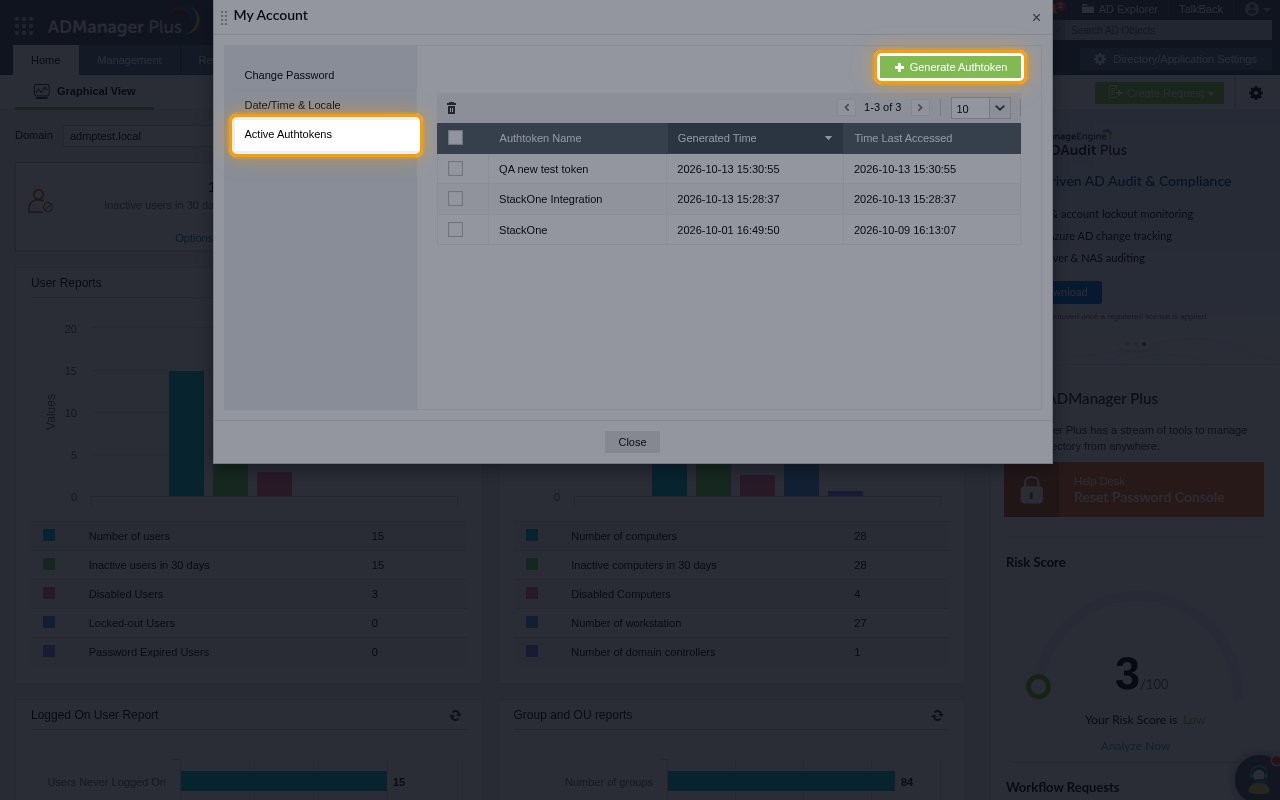
In the My Account window, open the Active Authtokens tab and click Generate Authtoken.
Choose the scope
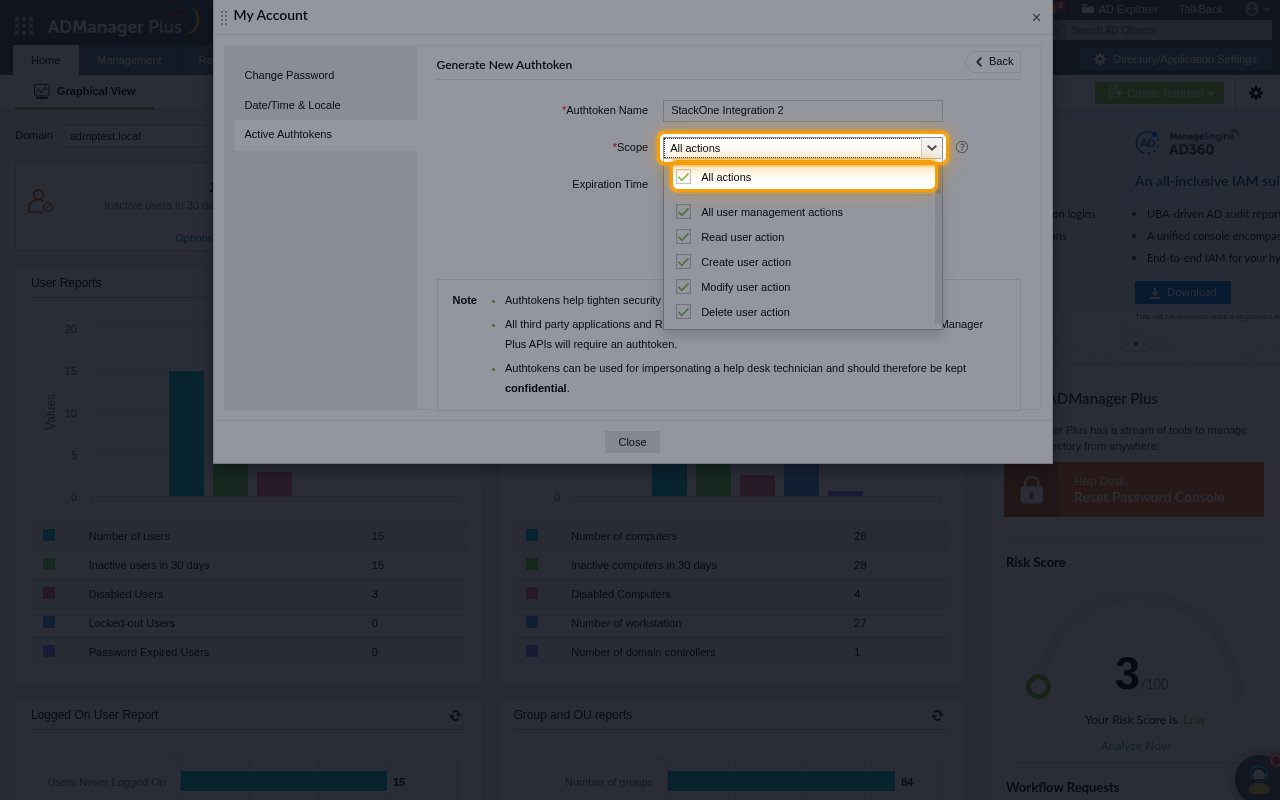
Leave Scope set to All actions so the authtoken covers every action StackOne uses. The list groups actions by object, for example All user management actions with Read user action, Create user action, Modify user action and Delete user action, and the same for computers, groups, OUs, contacts, orchestration templates and admin settings.
- To limit access, untick the groups or individual actions StackOne should not perform. Calls for any action outside the selected scope fail.
- If you limit user access to read-only, also keep Modify user action selected. ADManager Plus checks this scope, not Read user action, when listing users.
Fill in the authtoken details
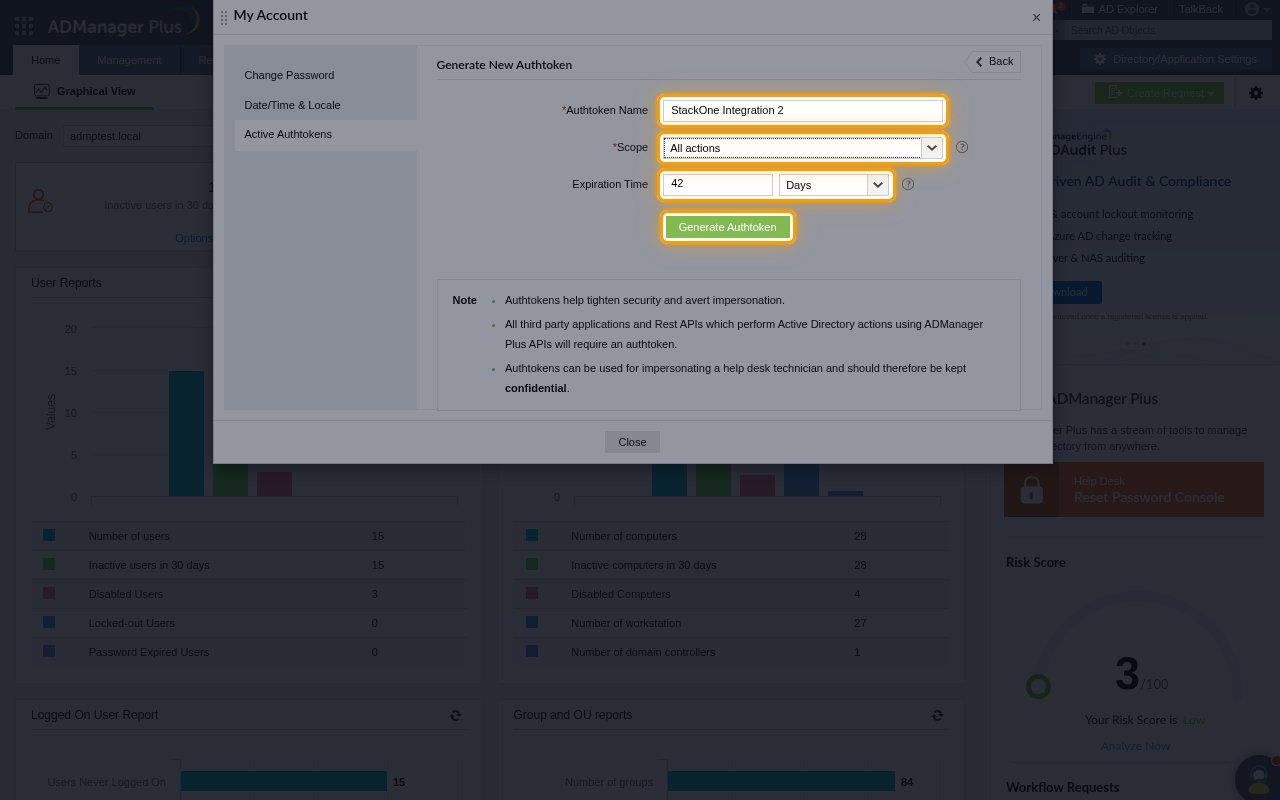
Complete the Generate New Authtoken form.
- Authtoken Name:
StackOne Integration(or any name you prefer) - Scope: All actions, as described in the previous step
- Expiration Time: how long StackOne should keep access. When the authtoken expires, StackOne can no longer connect until you generate a new one.
- Click Generate Authtoken.
Copy the authtoken
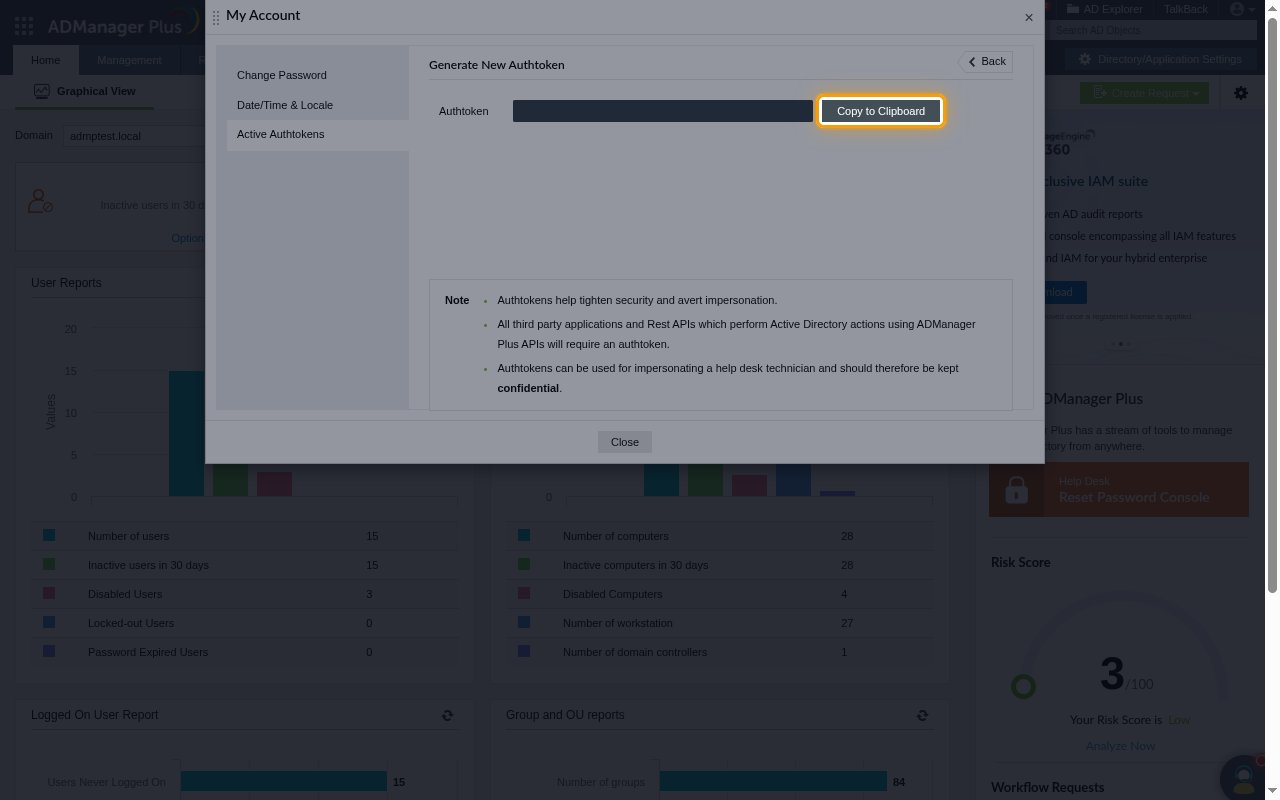
Click Copy to Clipboard and paste the value into the Authtoken field in StackOne Hub.
- The authtoken value is only displayed on this screen and cannot be retrieved later; the Active Authtokens list shows only its name. Store it securely for use later.
- Authtokens can be used for impersonating a help desk technician and should therefore be kept confidential.
Generate it as the built-in admin
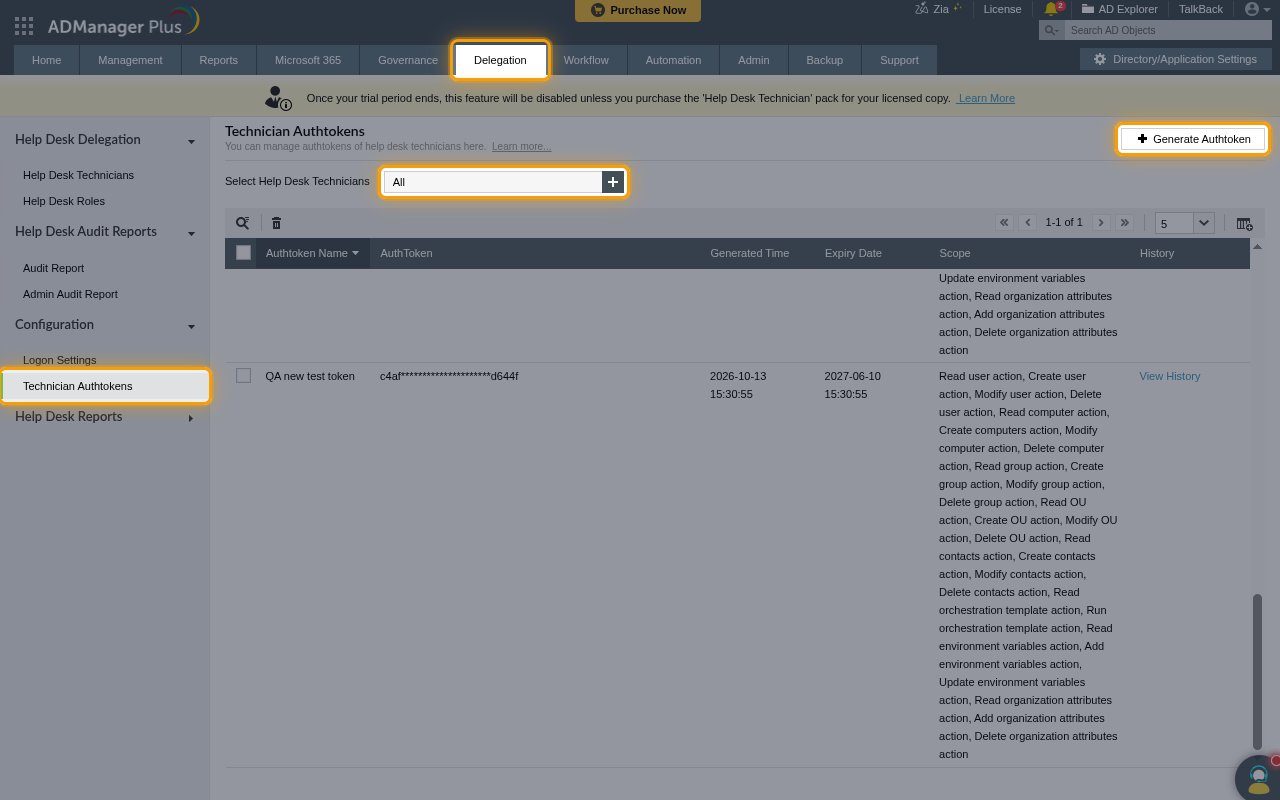
If you are signed in as the built-in admin, you can generate an authtoken for any help desk technician from Delegation > Configuration > Technician Authtokens: choose the technician in Select Help Desk Technicians, then click Generate Authtoken and complete the same form.
- ADManager Plus shows this note on the page: “Once your trial period ends, this feature will be disabled unless you purchase the ‘Help Desk Technician’ pack for your licensed copy.”
Enabling REST API access
ADManager Plus only accepts API calls when REST API access is enabled.
Check the Rest API settings
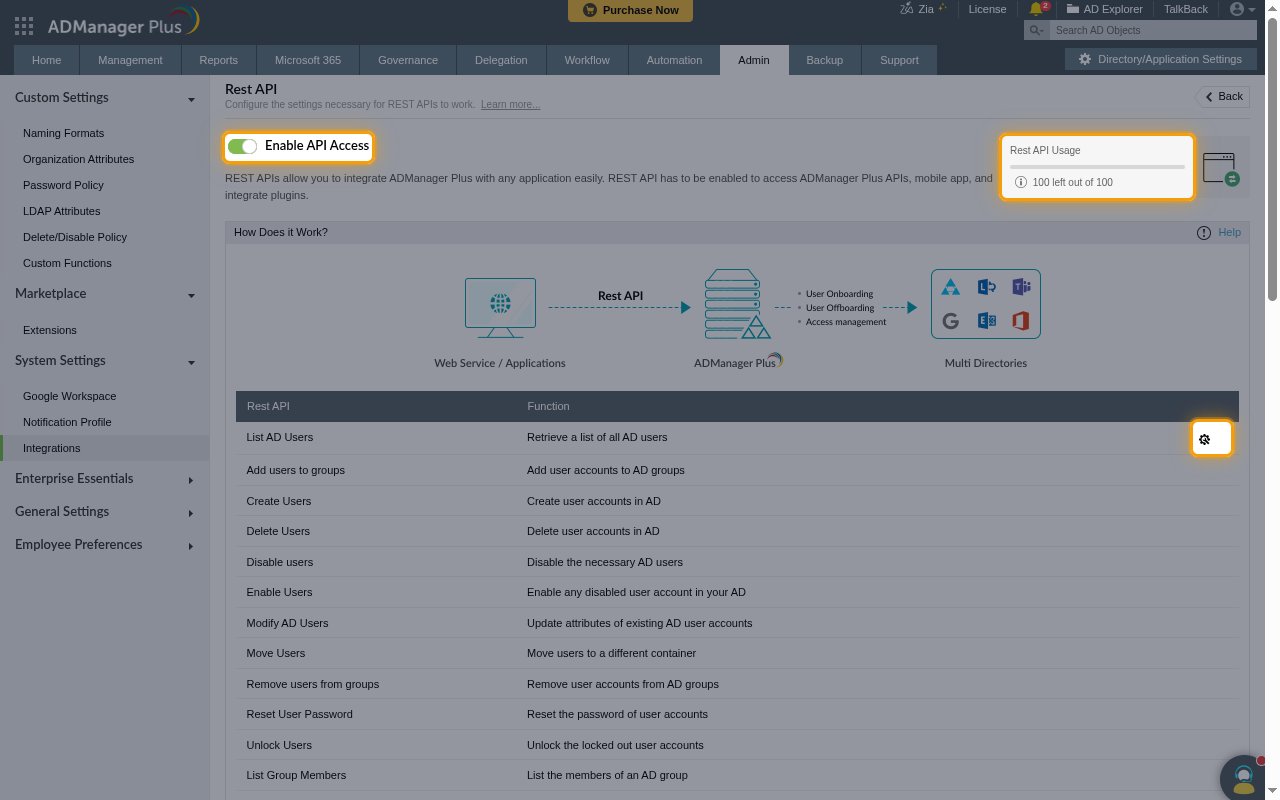
Navigate to Admin > System Settings > Integrations > Rest API.
- Make sure Enable API Access is switched on.
- The Rest API Usage counter shows how many API calls are left in the current period.
Enable extra user columns
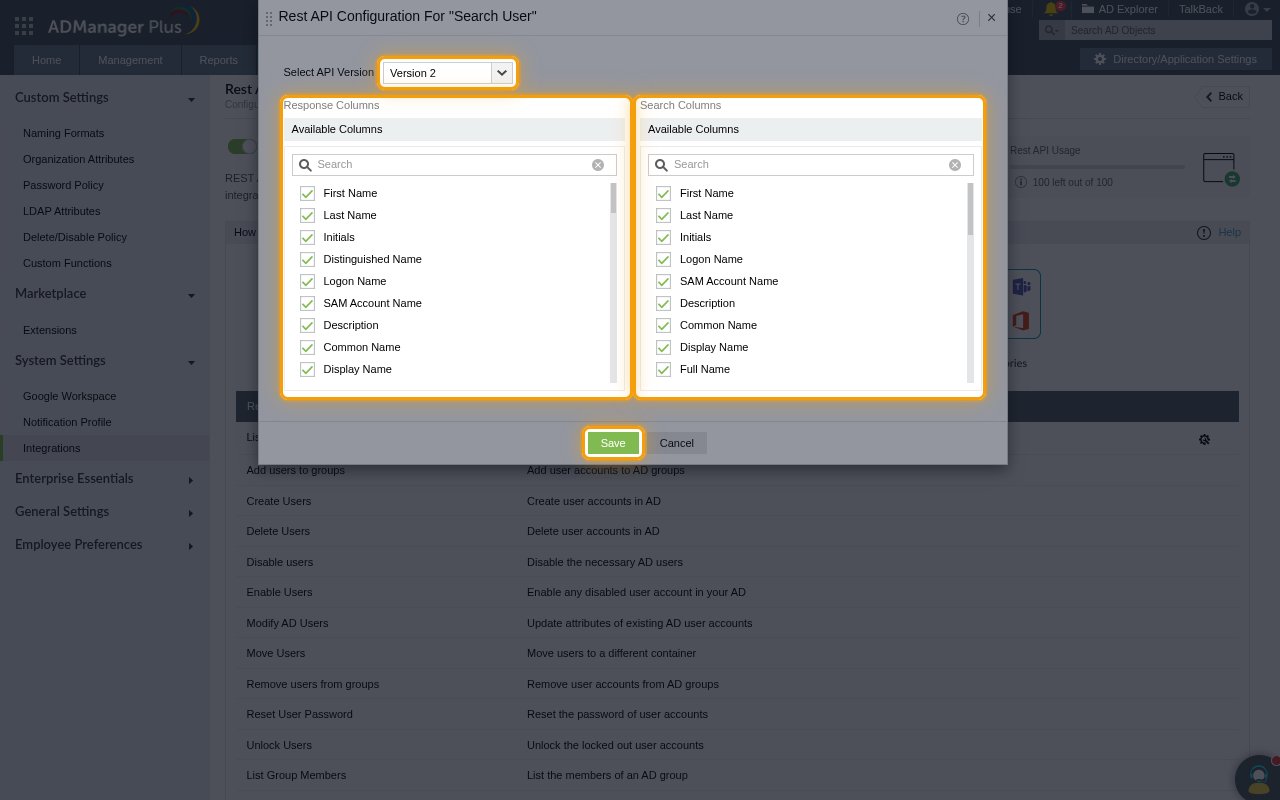
Optional: the default columns are enough for most actions. To return more user attributes, click the configuration icon in the List AD Users row. In Rest API Configuration For “Search User”, keep Select API Version on Version 2, tick the columns you need under Response Columns (returned in results) and Search Columns (usable in filters), then click Save.
- For logon and account status details, enable Title, Manager, Account Status, Last Logon Time, Days Since Last Logon, User Logon Count and Bad Password Count under Response Columns.
- Repeat this for the other API rows if you need extra columns for groups, computers, contacts or OUs.
Linking the Account from the Hub
Navigate to the Hub
Fill out the fields
- Server URL
- Authtoken
Connect
- Click Connect
- If applicable, the provider will redirect you to a sign-in or authorization page. Complete the provider’s authorization flow.
- Once authorization is successful, you will see a confirmation popup
If the account linking is successful, you will see the newly linked account on your Accounts page.
Next Steps
Webhooks setup
Configure receiving Events for AD Manager into StackOne.