

Enable the Public API
The Public API must be enabled by an administrator in 15Five before any keys can be generated.
Sign in to 15Five
Sign in to your 15Five account as a company administrator.
Open Integrations
Click the Settings gear in the bottom-left corner, then choose Integrations from the menu.
Open Public API
Locate Public API in the integrations list and open the Company API keys page.
- If Public API has not been enabled before, click Enable.
- If it is already enabled, click Manage — the button replaces Enable once an API key exists. From the Manage page you can create a new key or copy the access token of an existing key.
Create your API key
Create a new key tied to your administrator user. The key inherits your role permissions.
Click "Create new key"
On the Company API keys page, click Create new key.
Name the key and configure scope
Give the key a short identifying name (for example stackone-prod) so you can recognise it later.
- Important: Leave High Fives only unchecked. When checked, the key returns
403 You do not have permission to perform this actionagainst non-High-Fives endpoints. Only enable it if the integration is restricted to High Fives. - Make sure Enabled is checked.
- Click Save.
Copy the access token
Copy the 32-character access token from the Access token column and store it securely for use later. It is sent as the raw value of the Authorization header (matching the official 15Five curl example).
- Each active key’s access token remains visible on the Company API keys page, so you can re-copy it later from the same screen.
- If StackOne actions return permission errors for an existing key, click Edit on the key and confirm High Fives only is unchecked and Enabled is checked.
- The key inherits the role of the user who created it. Review-cycle endpoints will return empty results unless the creator holds both Company Admin and Review Admin roles.
- Keys expire one year after creation.
Enable optional 15Five features
Several endpoints require product features that are gated by 15Five plan tier or by an internal feature flag. On a free-trial workspace these features are off by default; the corresponding endpoints return 404 Resource not found and no key permissions can override that. Enable the features you need before wiring up the actions below, and fire list_feature_statuses after each change to confirm the flag flipped.
Confirm what is currently enabled
From the 15Five API itself, GET /feature/ returns the internal feature flags. Fire list_feature_statuses from StackOne — a fresh trial typically returns something like {"pulse":"enabled","demographic_attributes":"disabled"}. Any flag reported as disabled will 404 its endpoints regardless of API-key scope.
Reviews (unlocks the /review-cycle/* endpoints)
Required by list_review_cycles, get_review_cycle, list_review_cycle_answers, list_review_cycle_participants, list_review_cycle_performance_measurements, list_review_cycle_reviews. list_review_cycles returns count: 0 even without the feature — the definitive test is whether at least one cycle can be created and shows up in a subsequent list call.
- Reviews should appear as a Reviews entry in the 15Five sidebar when enabled. If you don’t see it in your sidebar, the workspace doesn’t have Reviews enabled yet — contact your 15Five admin. Admins can enable Reviews themselves; they’ll find it listed under Upgrades Available in their own sidebar.
- Enabling Reviews requires the acting admin to hold HR Admin in 15Five (Settings → People → Permissions). If no admin on your side holds HR Admin, contact 15Five support to enable Reviews for you.
- Once Reviews is enabled, create at least one review cycle from Reviews → New Cycle in the 15Five sidebar so the
/review-cycle/{id}/*endpoints return real data instead of empty envelopes.
Objectives / Key Results (unlocks /objective/* and /key-result/*)
Required by create_objective, get_objective, get_objective_history, list_objectives with_parent_id, update_objective, create_key_result, update_key_result, update_key_result_value. On workspaces where Objectives isn’t enabled these endpoints uniformly return 404 Resource not found from the provider.
- Objectives should appear as an Objectives entry in the 15Five sidebar when enabled. If you don’t see it in your sidebar, the workspace doesn’t have Objectives enabled yet — contact your 15Five admin or account manager.
- Unlike Reviews, Objectives is NOT self-serve — it requires a plan-tier upgrade. Even admins won’t see it under Upgrades Available; only 15Five support or your account manager can enable the Objectives / OKR module on your workspace.
- Once enabled, verify by creating a test objective in the UI, then re-fire
create_objectivefrom StackOne.
People Attributes (unlocks /attribute/* and /attribute_value/*)
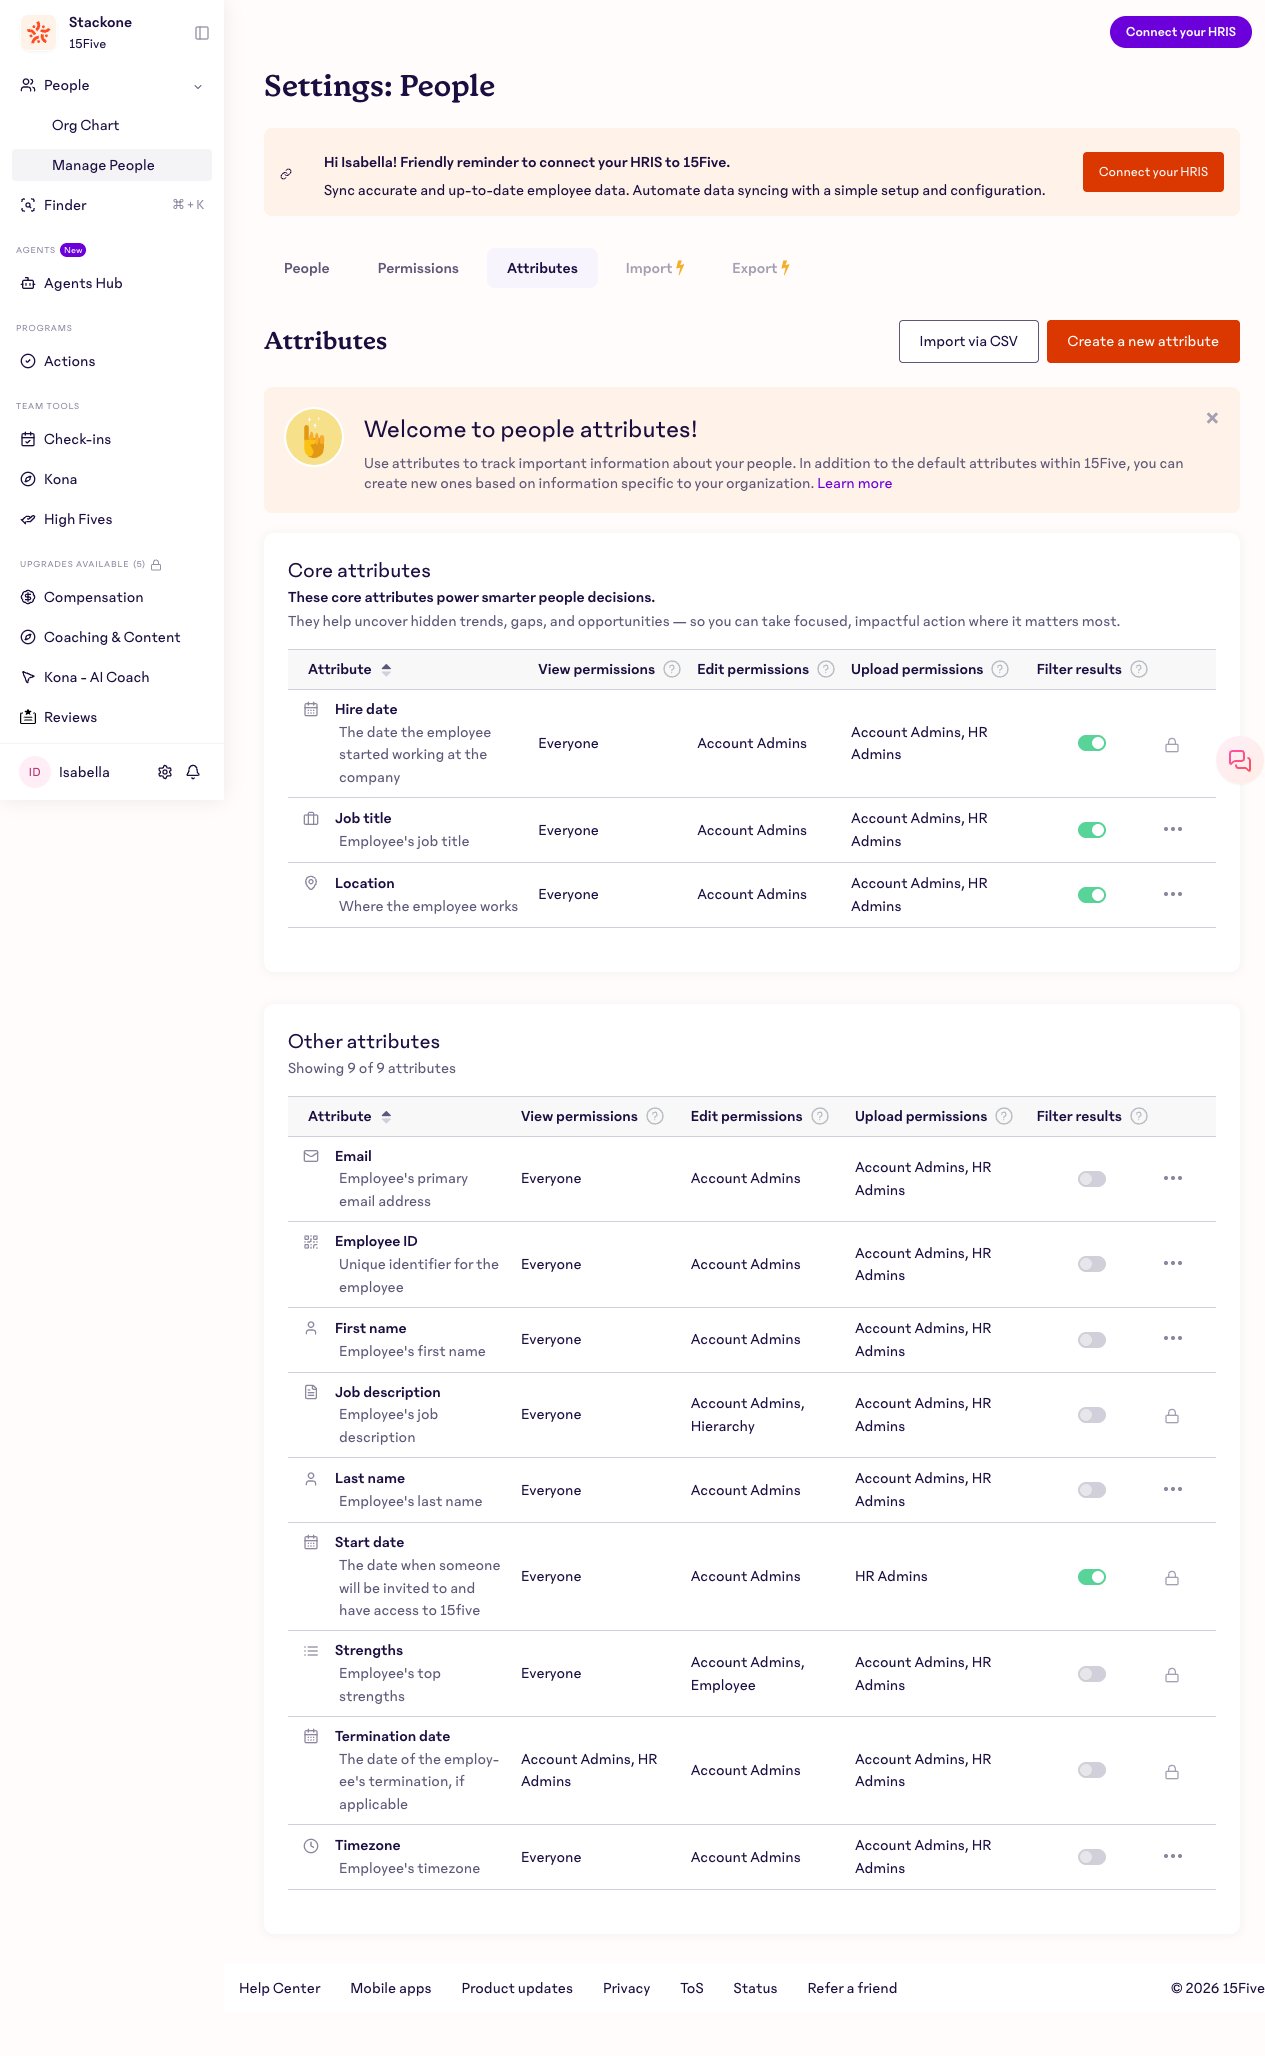
Required by list_people_attributes, get_people_attribute, create_people_attribute, list_people_attribute_values, get_people_attribute_value, create_people_attribute_value. Note that the Settings → People → Attributes tab in the UI is a separate surface from the API flag — the tab can render while the API returns 404 because 15Five gates them independently.
- Fire
list_feature_statuses. Ifdemographic_attributesisdisabled, the tab may still appear in the UI but the API endpoints will 404. - Contact 15Five support to enable the
demographic_attributesflag on the workspace. - Once enabled, the same endpoints return 200 with a real payload — no code change or new API key needed.
What is not gated
These features are on by default on every trial workspace and do not need enablement:
- Users, Groups, Group Types, Vacations, Priorities, High Fives.
- Check-ins, Pulses, Questions, Answers.
- Security audit events.
- The
pulsefeature flag is enabled by default.
Linking the Account from the Hub
Navigate to the Hub
Fill out the fields
- API Key
Connect
- Click Connect
- If applicable, the provider will redirect you to a sign-in or authorization page. Complete the provider’s authorization flow.
- Once authorization is successful, you will see a confirmation popup
If the account linking is successful, you will see the newly linked account in your Accounts page.