

Creating a Webex bot
A bot acts as its own Webex identity. In group spaces it can only read messages that @mention it, and it cannot use admin or meeting APIs.
1
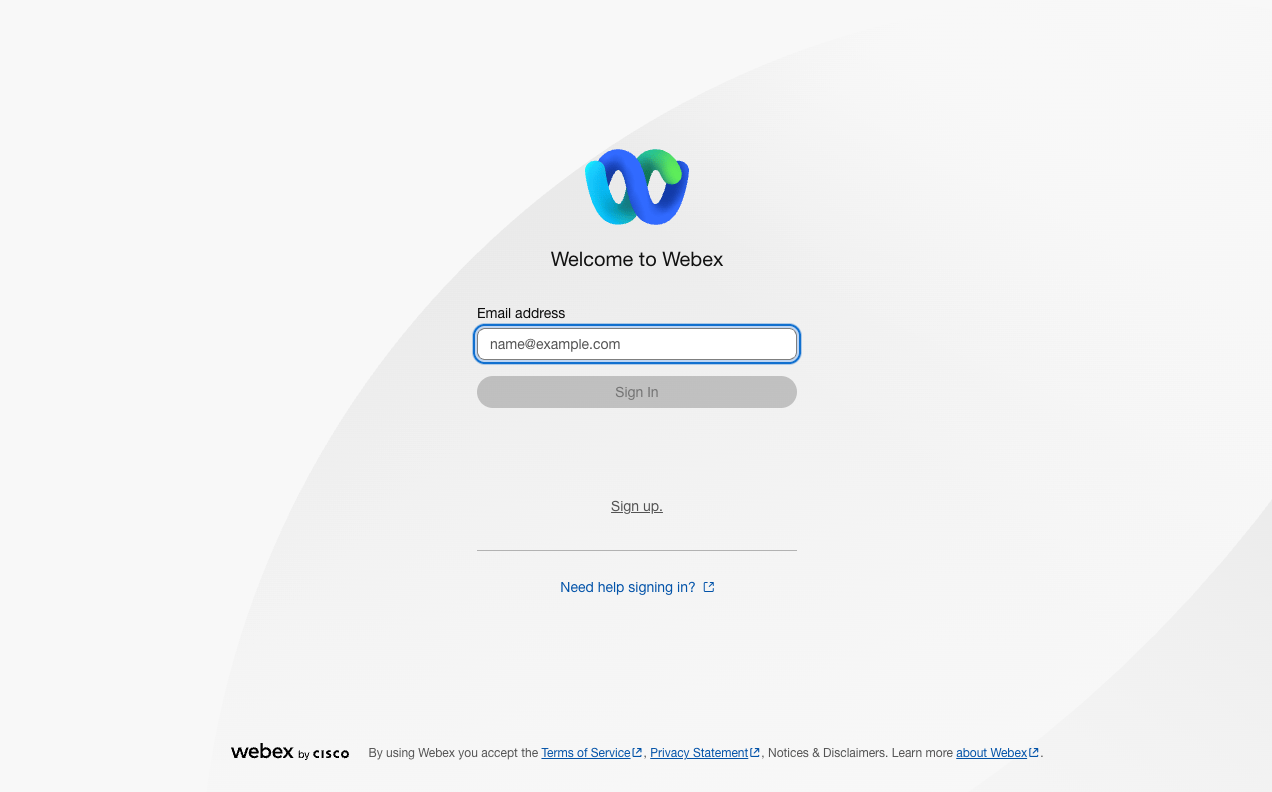
Sign in to Webex for Developers
Sign in to your Webex for Developers account with the Webex account that will own the bot.
- Enter your Email address.
- Click Sign In.
2
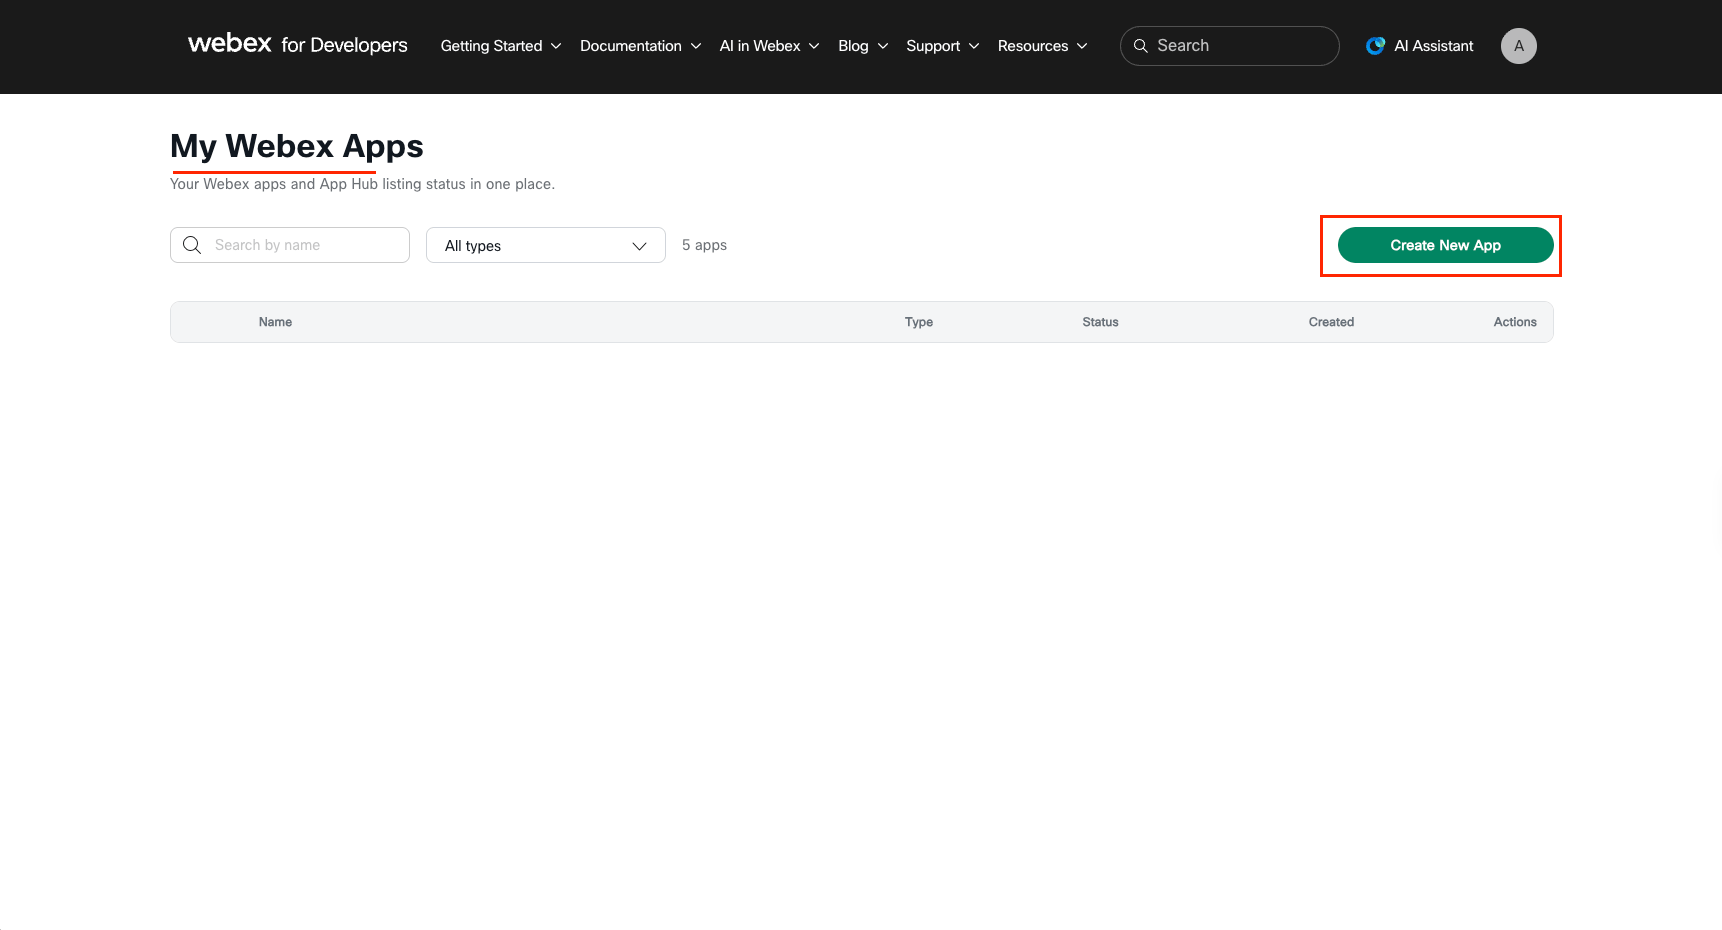
Create a new app
3
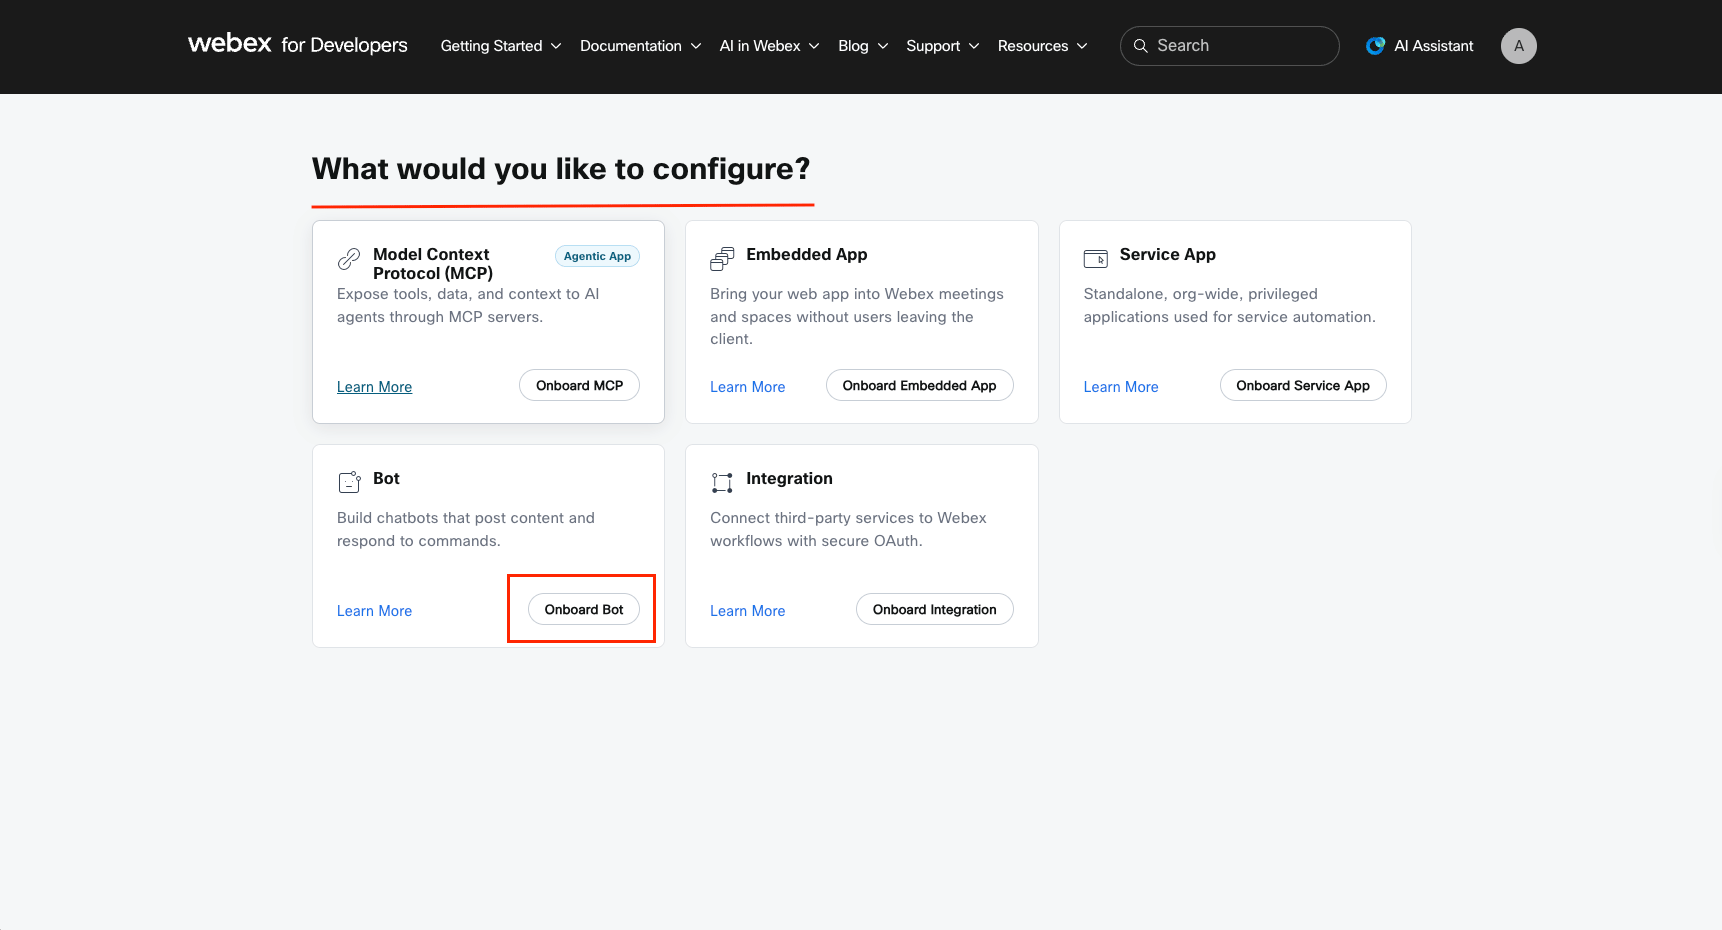
Choose the bot app type
On What would you like to configure?, find the Bot card.
- Click Onboard Bot.
4
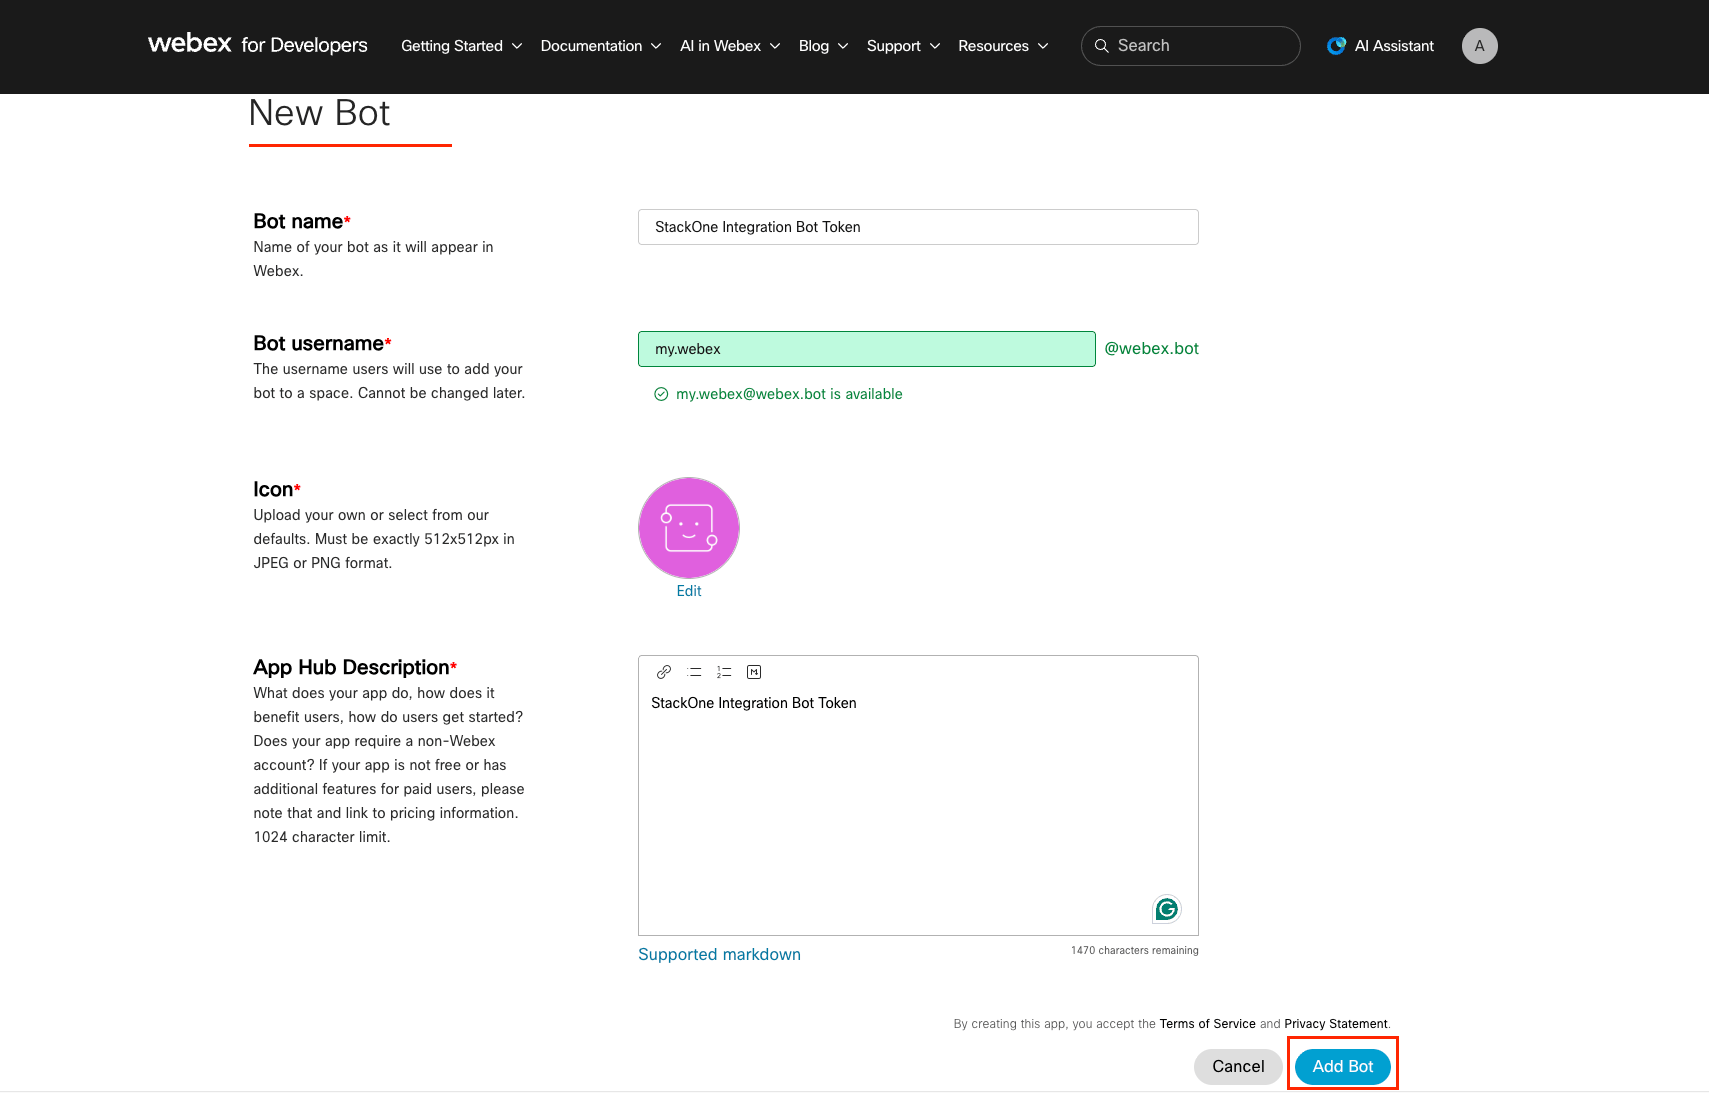
Fill in the bot details
Complete the New Bot form. Users see these details in Webex.
- Bot name: the name your bot shows in Webex
- Bot username: the username people use to add the bot to a space (it cannot be changed later)
- Icon: upload your own or keep a default
- App Hub Description: a short description of what the bot does
- Click Add Bot.
5
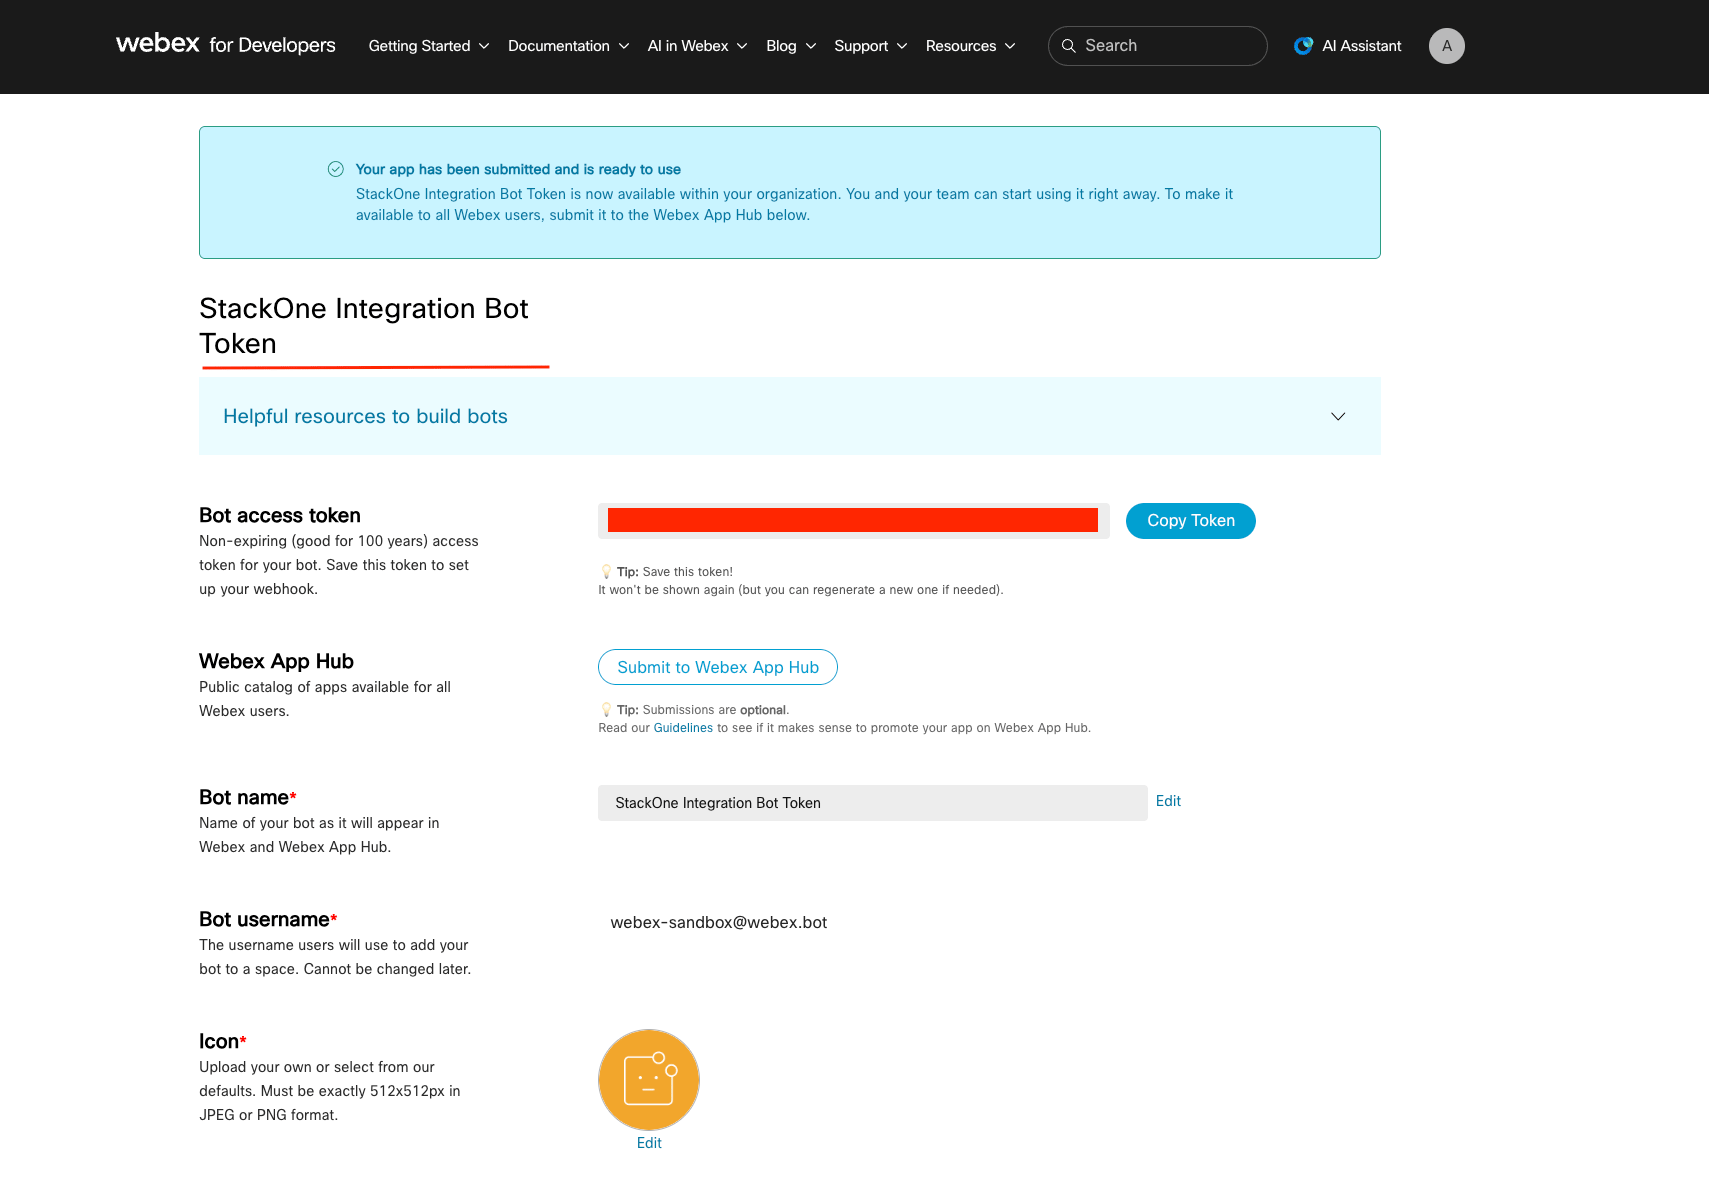
Copy the bot access token
The bot’s page opens with Your app has been submitted and is ready to use.
- Under Bot access token, click Copy Token, then paste it into the Bot Access Token field when you connect your account.
- The token is shown only once. If you lose it, open the bot in My Webex Apps and regenerate it.
- Add the bot to the spaces you want StackOne to work in. A bot only sees spaces it is a member of.
Link the Account
1
Connect
- Click Connect.
- If applicable, the provider will redirect you to a sign-in or authorization page. Complete the provider’s authorization flow.
- Once authorization is successful, you will see a confirmation popup.
2
Use Actions
Connect an AI platform to the linked account’s actions. See AI Platforms.Other ways to call actions are listed in Protocols & SDKs.
Next Steps
Webhooks setup
Configure receiving Events for Webex into StackOne.