

Prerequisites
The connector should already be set up, with a Connector Profile and a Linked Account. See Getting Started on the Unbounce connector page.Retrieve the StackOne Native Webhook URL
Unbounce posts every form submission to a single URL that identifies your StackOne connection, so copy it before you configure any pages.
Copy the Native Webhook URL
Open the Unbounce connection in StackOne Hub (or the StackOne Connector profile if you are connecting with OAuth 2.0) and copy the read-only Native Webhook URL value.
- The same URL is used for every landing page and every sub-account on the connection.
- The URL carries a secure key that identifies your StackOne connection, so treat it like a password.
Add a webhook to each landing page
Unbounce webhooks are scoped to one landing page. Repeat this section on every page you want lead submissions from.
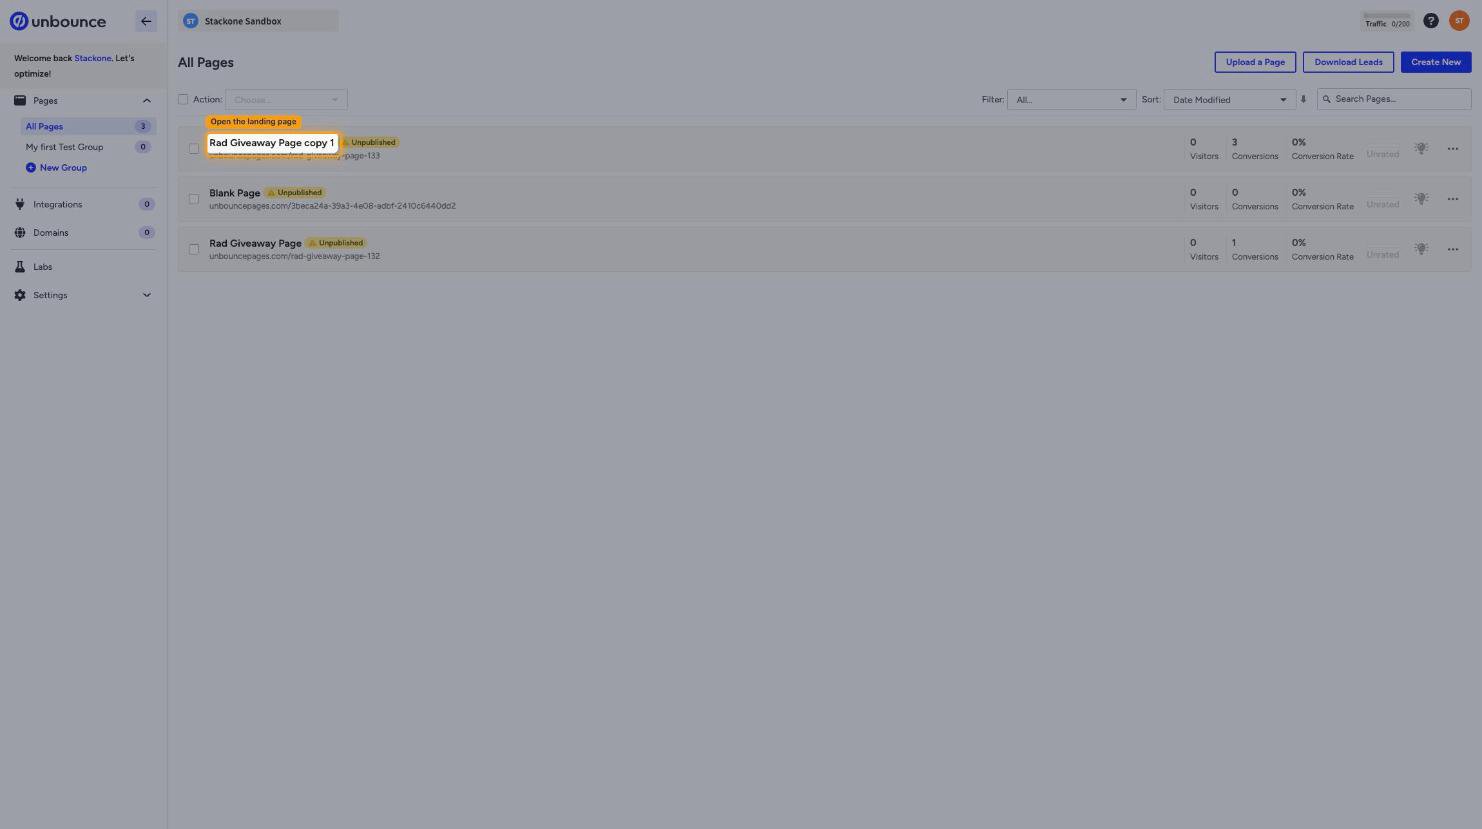
Open the landing page
Sign in to the Unbounce dashboard, click Pages in the left menu, click All Pages, then click the name of the landing page.
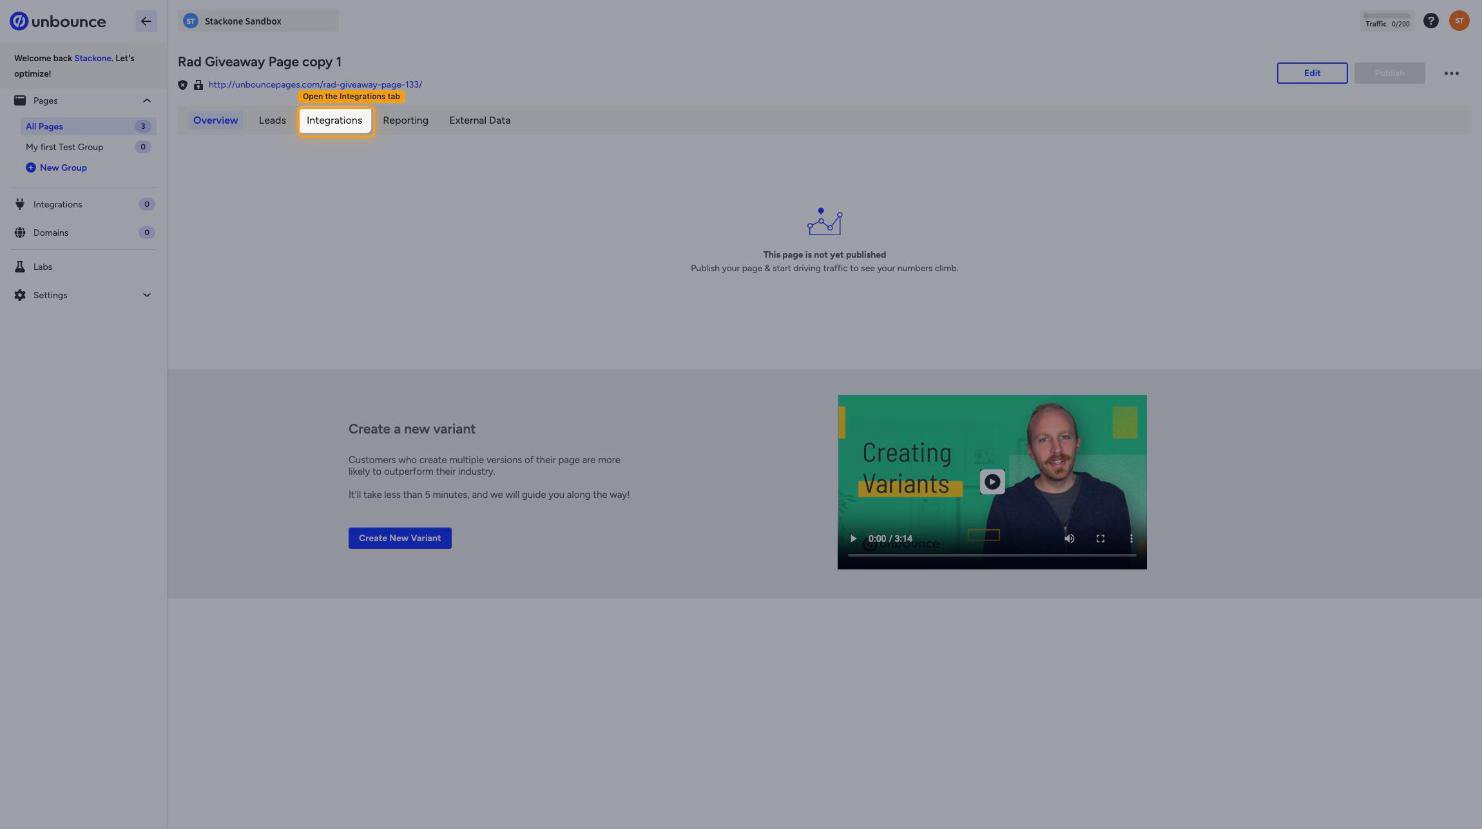
Open the Integrations tab
On the page’s overview screen, click the Integrations tab, alongside Overview, Leads, Reporting, and External Data.
- This is the page-level Integrations tab. The Integrations entry in the left menu lists third-party services such as Salesforce and Marketo and does not contain webhooks.
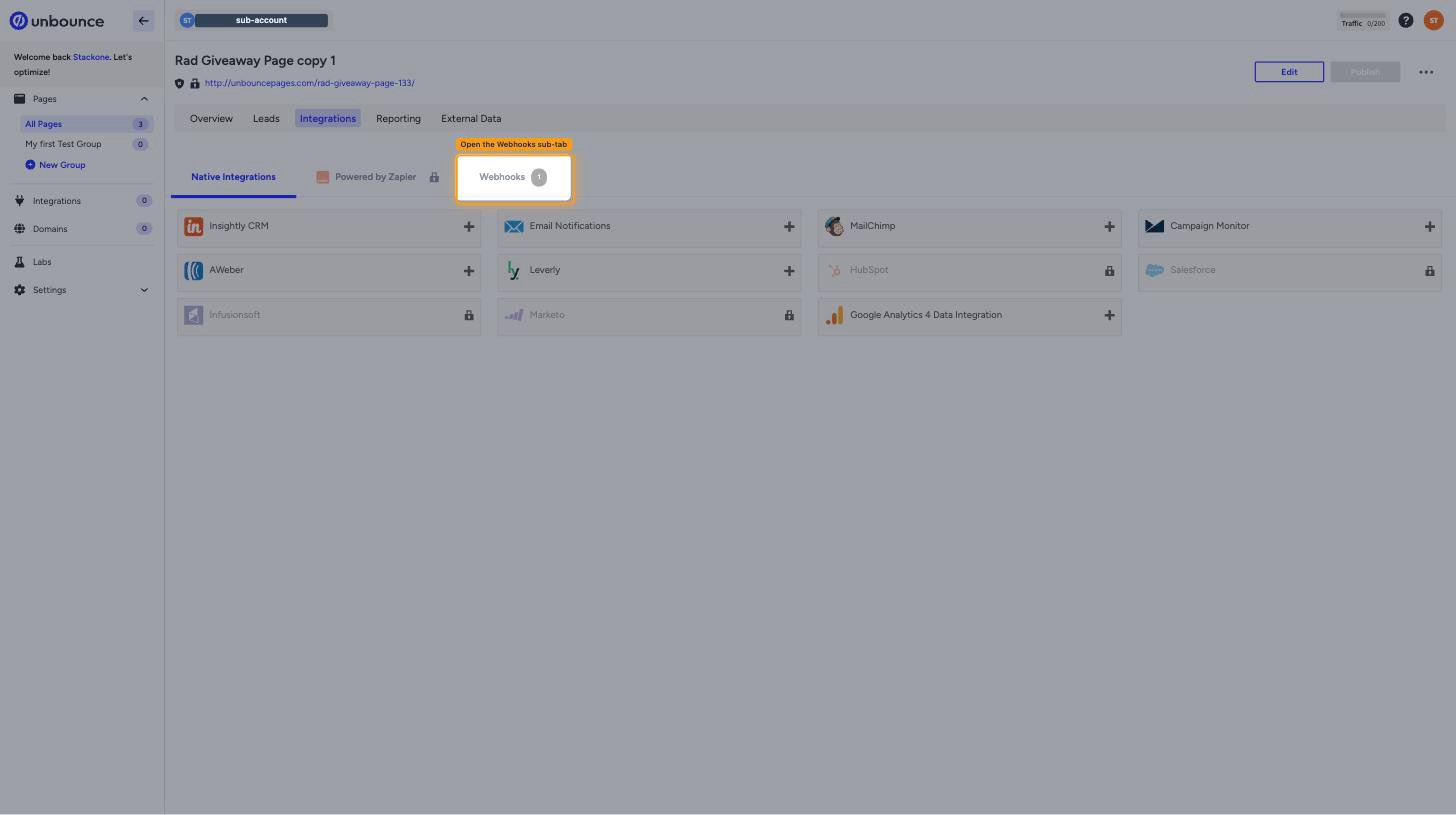
Open the Webhooks sub-tab
Click Webhooks, next to Native Integrations and Powered by Zapier. The panel is titled “Webhook: Post to URL”.
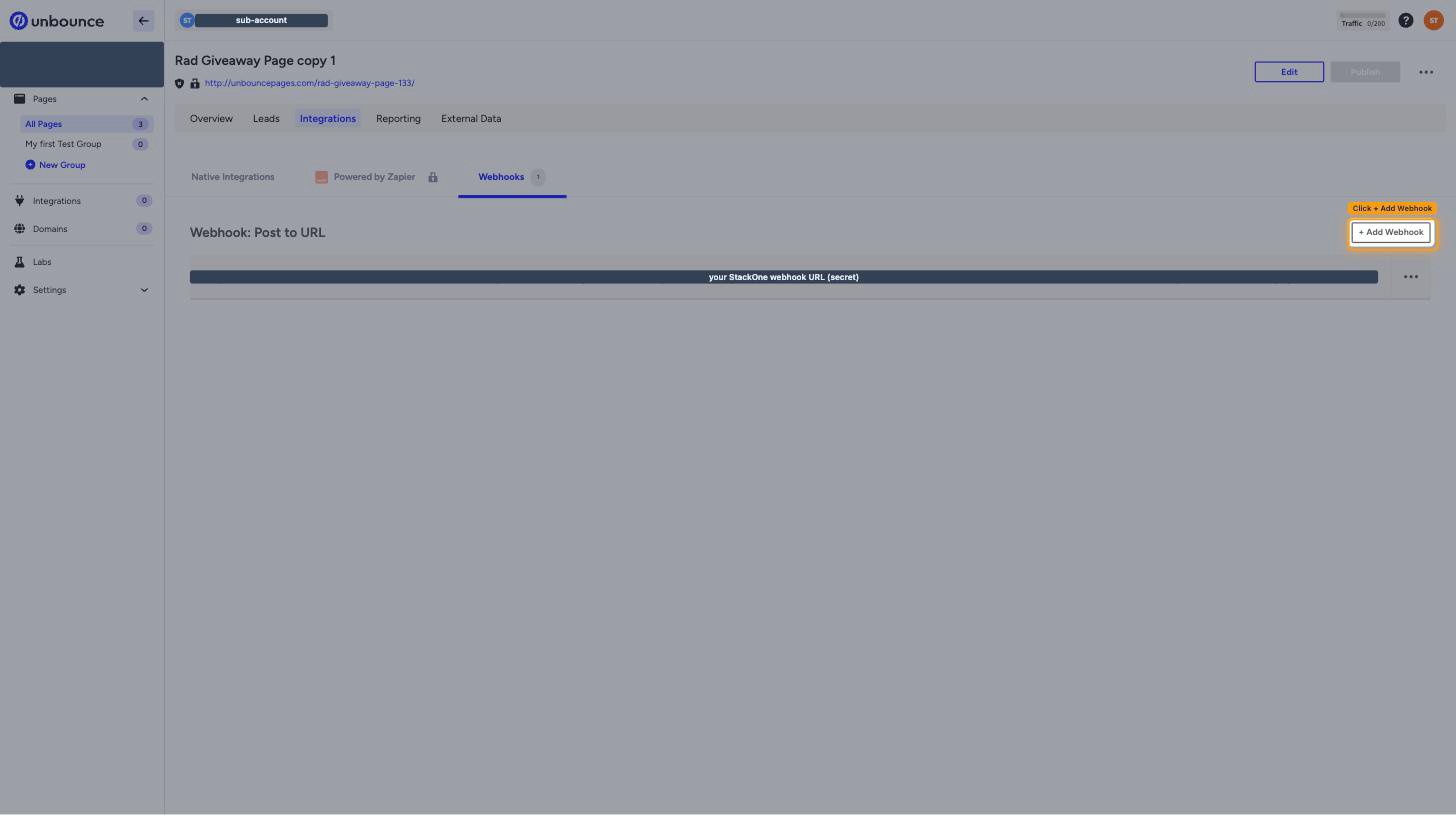
Add the webhook
Click + Add Webhook to open the Add a Webhook dialog.
Enter the URL and select JSON
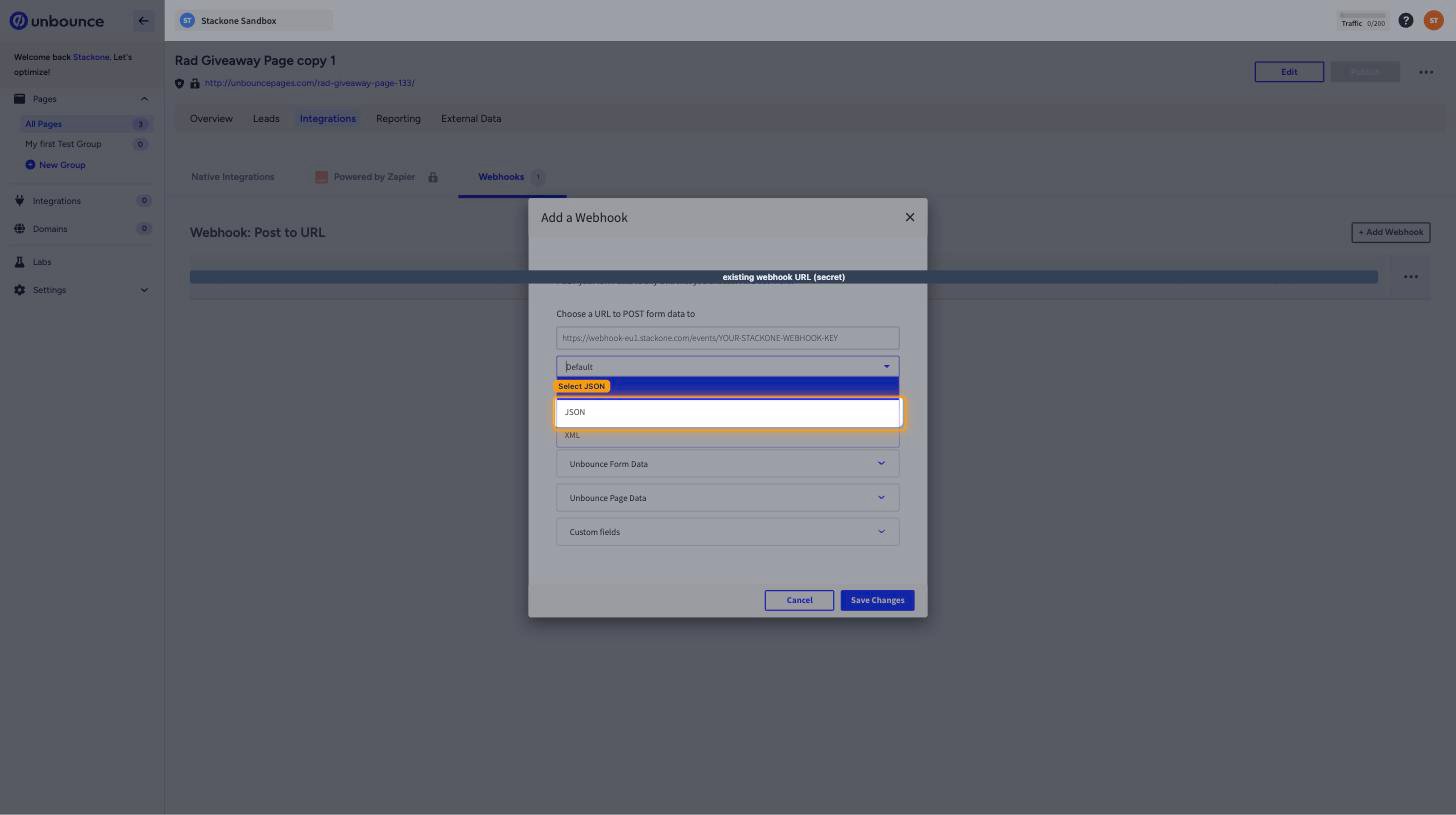
Paste the Native Webhook URL into Choose a URL to POST form data to, then change the encoding dropdown from Default to JSON.
- The encoding dropdown offers Default, JSON, and XML.
- Default sends form-encoded data. Select JSON so the payload arrives as a JSON object.
- Custom Headers is not required — StackOne authenticates the delivery using the key inside the URL.
Leave the field mapping unchanged
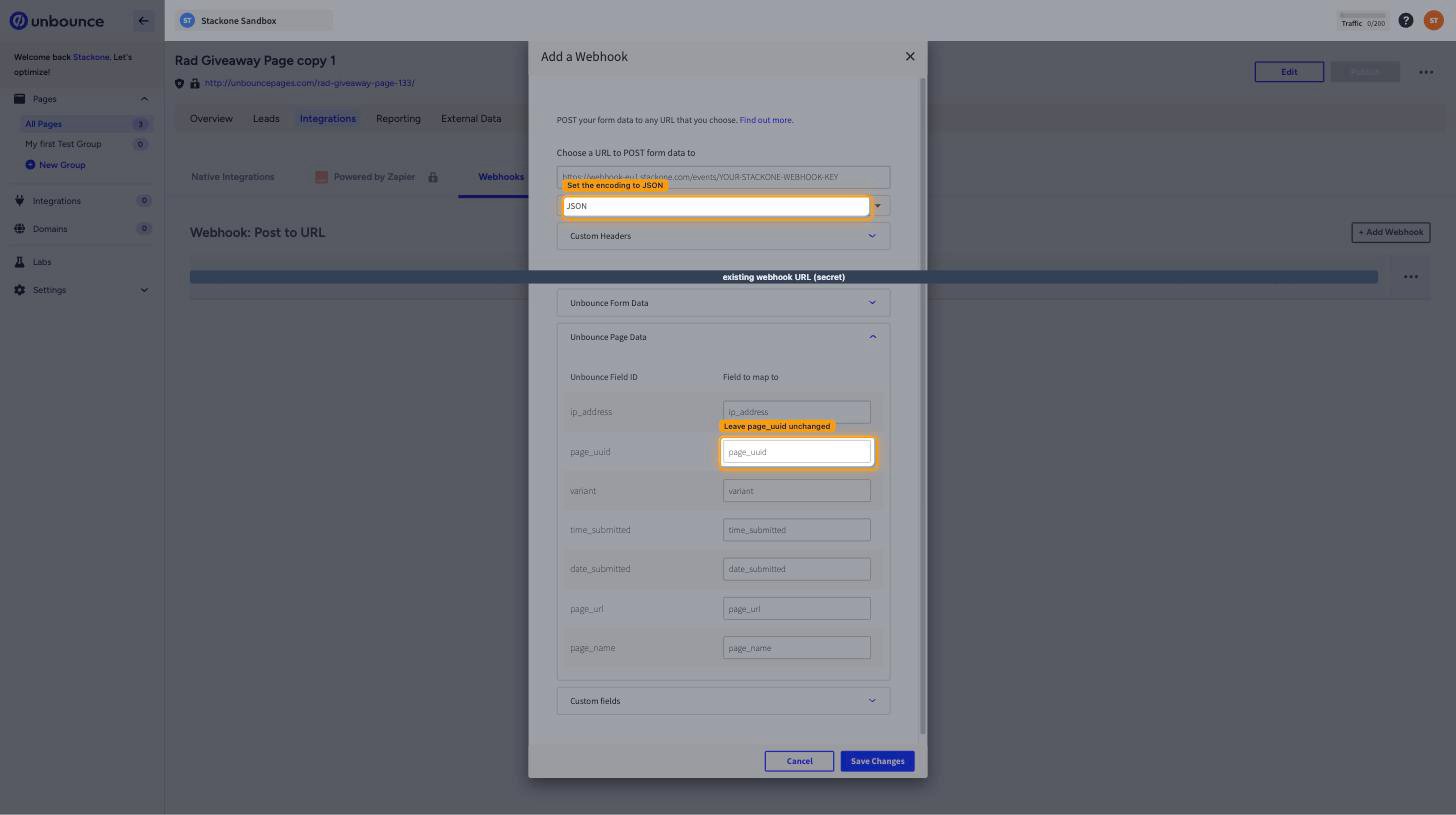
Under Map Fields, leave Unbounce Form Data, Unbounce Page Data, and Custom fields exactly as they are.
- Expanding Unbounce Page Data shows an Unbounce Field ID column and a Field to map to column holding
ip_address,page_uuid,variant,time_submitted,date_submitted,page_url, andpage_name. - Do not rename or clear
page_uuid. StackOne identifies the landing page from it, and changing it stops events being recognised. - Unbounce Form Data holds the fields defined on the page’s form. Leave them mapped so the submitted values arrive on the event.
Save the webhook
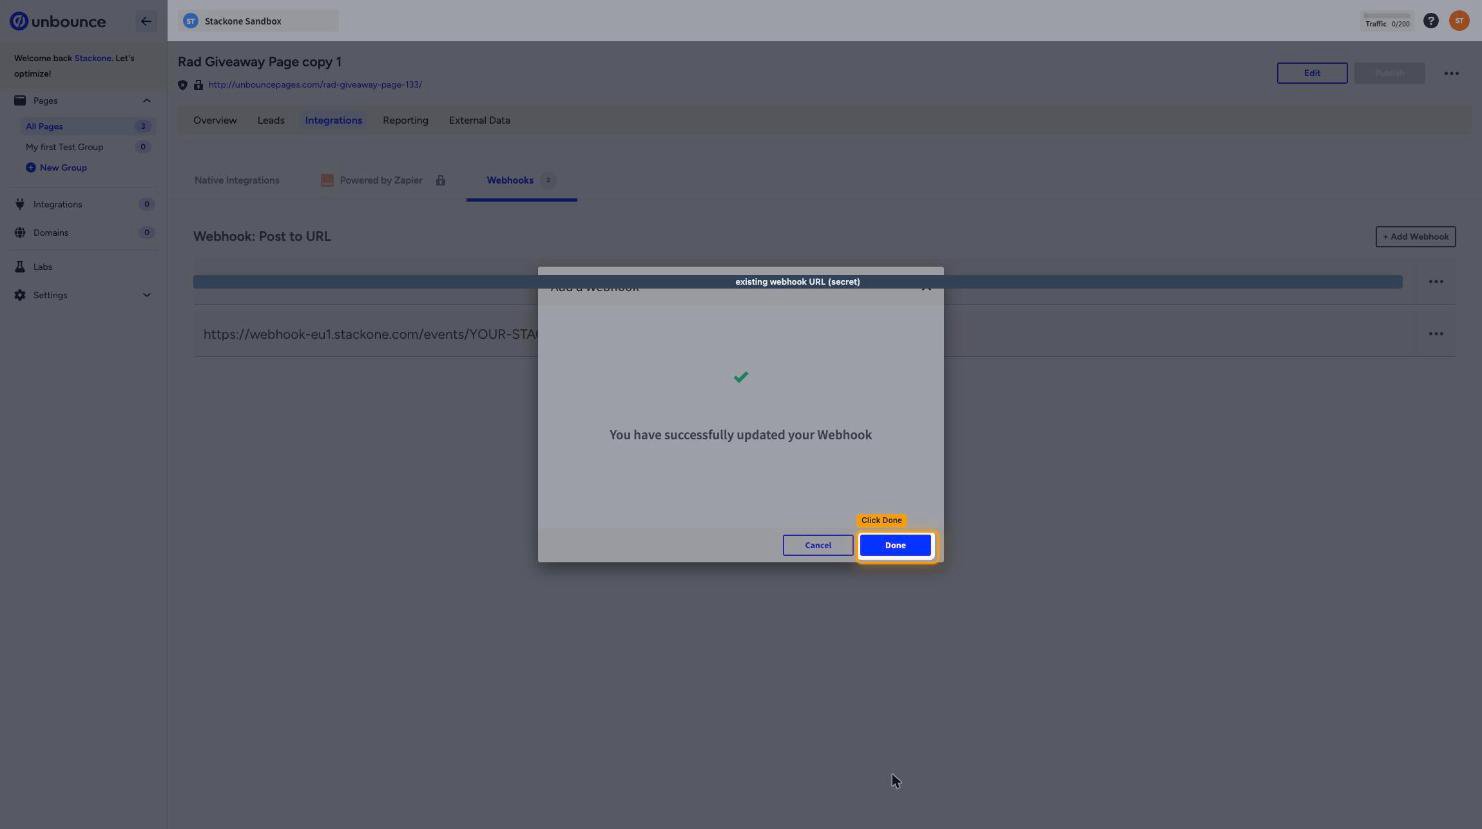
Click Save Changes. Unbounce confirms with “You have successfully updated your Webhook” — click Done.
- Unbounce sends no test request when you save, so the first delivery happens on the next form submission.
- To change or remove a webhook later, use the … menu on its row and choose Edit Webhook or Delete Webhook.
Confirm a delivery
Unbounce records the outcome of every webhook delivery against the lead that triggered it.
Check Integration Details on a lead
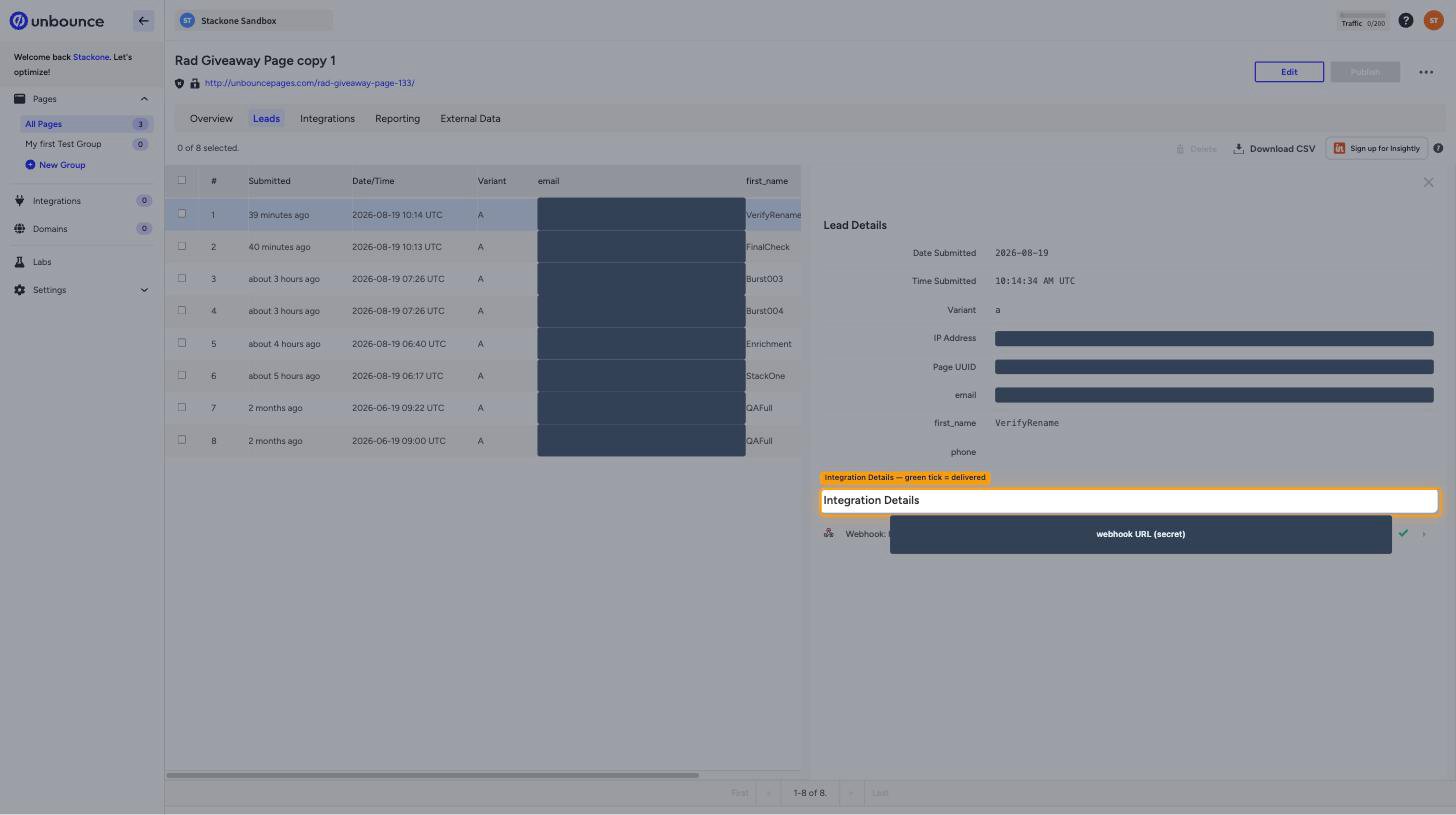
Open the page’s Leads tab, click a lead row, and look at Integration Details in the Lead Details panel. A green tick beside the webhook means Unbounce delivered it.
- The Lead Details panel also shows Date Submitted, Time Submitted, Variant, IP Address, and Page UUID for that submission.
- Use this to tell a delivery failure apart from a routing problem — if the tick is green, Unbounce sent the event.
Available webhook events
Unbounce has exactly one native webhook, the page-level Form Submit Webhook. There is no page, domain, or account event.
Lead events
Events related to leads captured by a landing page form.
- Page Lead Created (
page_lead_created) — Fired when a visitor submits a form on the landing page, which is how Unbounce records a lead.
Delivery format
Details of how Unbounce delivers events to StackOne.
One event per submission
Unbounce sends one POST per form submission, carrying ip_address, page_uuid, variant, time_submitted, date_submitted, page_url, and page_name, plus the values of the form fields defined on the page.
- Unbounce sends no signature header and performs no verification handshake — the secure key inside the Native Webhook URL is what identifies the connection.
- The payload carries no lead id. Use the List Page Leads action, filtered on the
ip_address,variant, and submission minute from the event, to resolve the lead record. time_submittedreports minutes only, so the event is timestamped with StackOne’s receipt time. The values Unbounce reported stay available on the event.
Source IPs
If your endpoint is behind an IP allowlist, Unbounce sends webhook requests from 54.241.34.25 and 50.19.99.184.