

Generating a personal access token
Typeform authenticates API requests with a personal access token generated from your account settings. The token does not expire, and the scopes you pick cannot be changed afterward.
Open your account settings
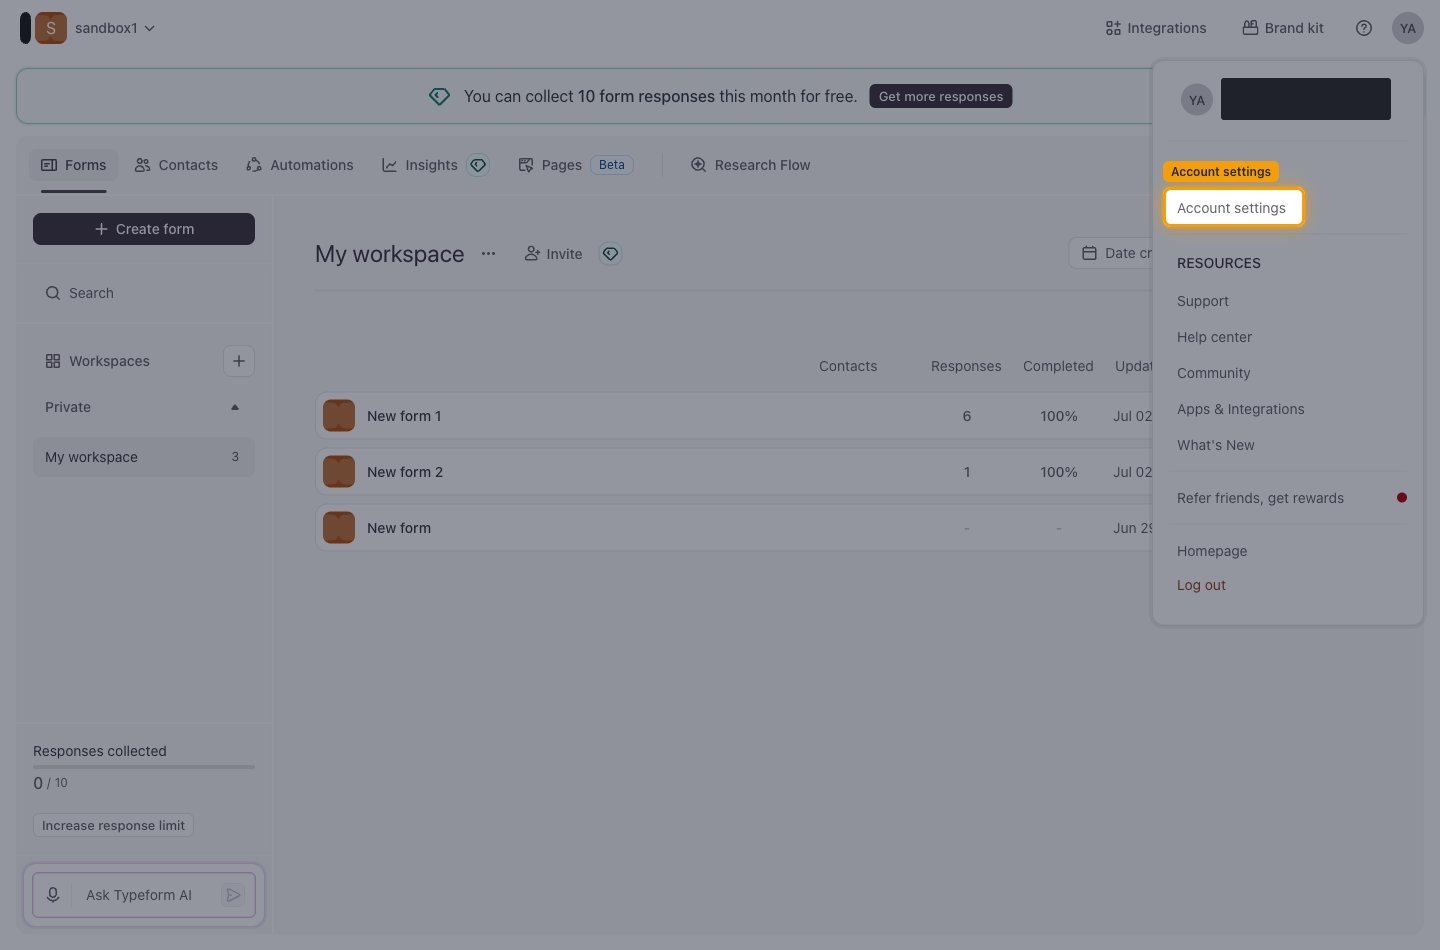
Sign in to your Typeform account, then open your account from the top-right corner.
- Click your avatar in the top-right corner.
- Under ACCOUNT, click Account settings.
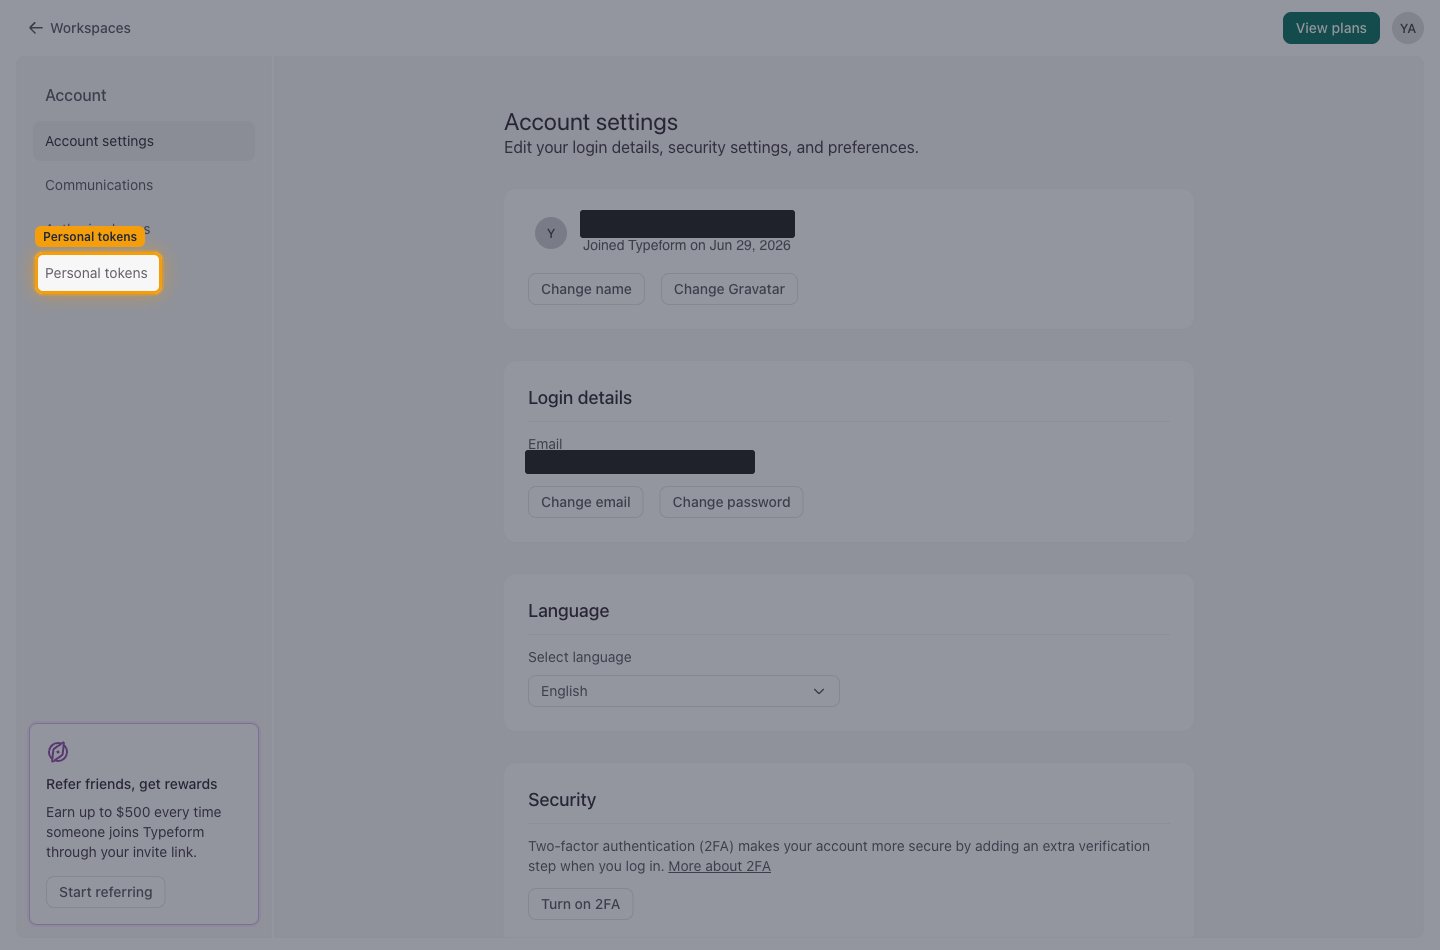
Open the Personal tokens page
In the Account menu on the left, click Personal tokens.
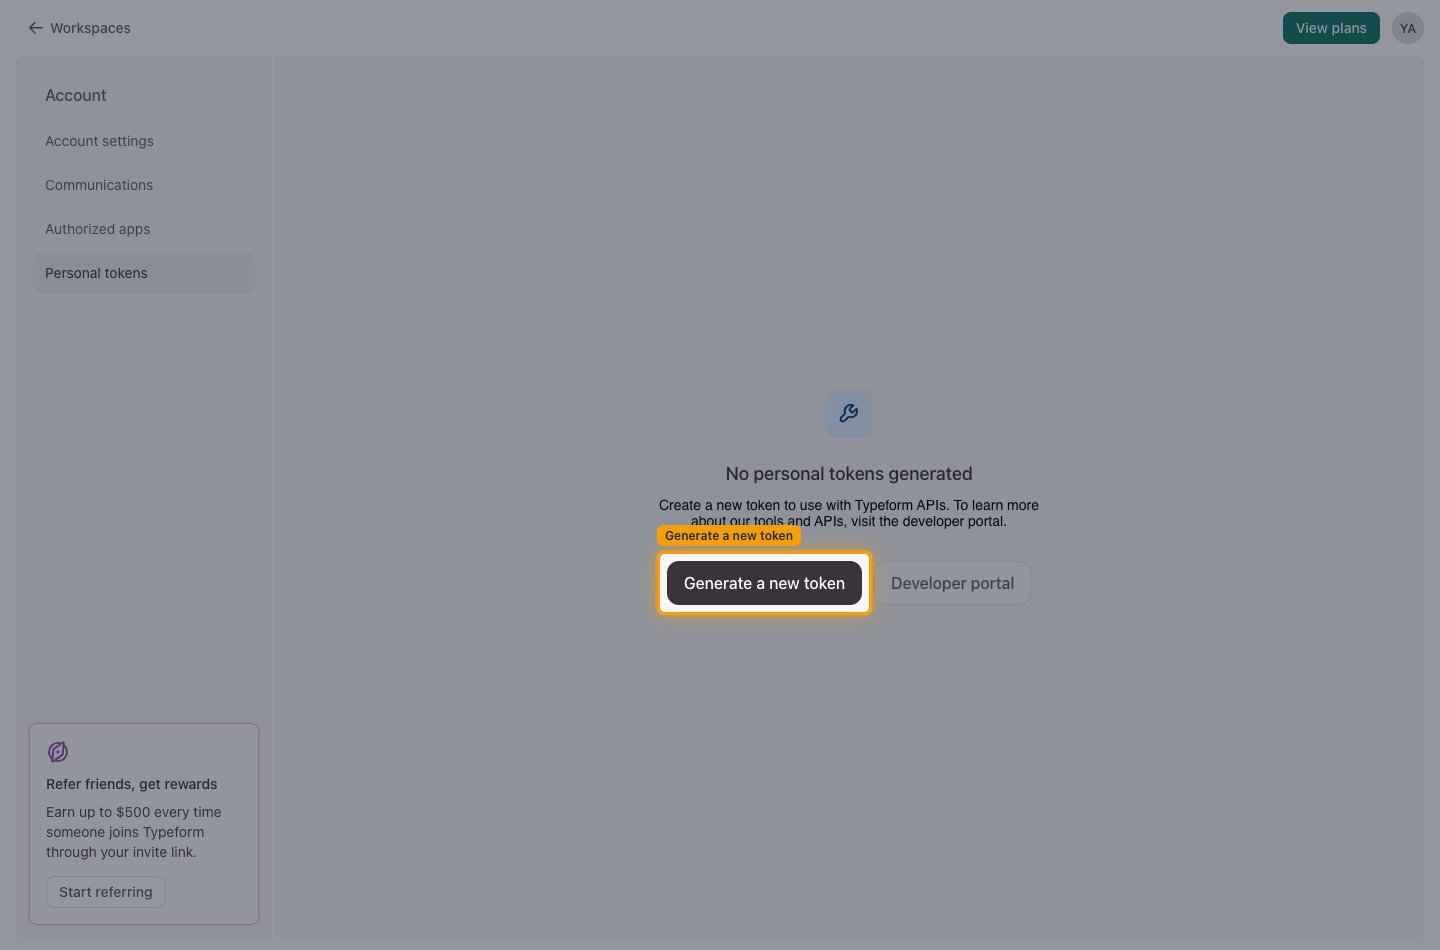
Name the token
Click Generate a new token to open the Generate a new token dialog, then name it.
- Token name:
StackOne Integration
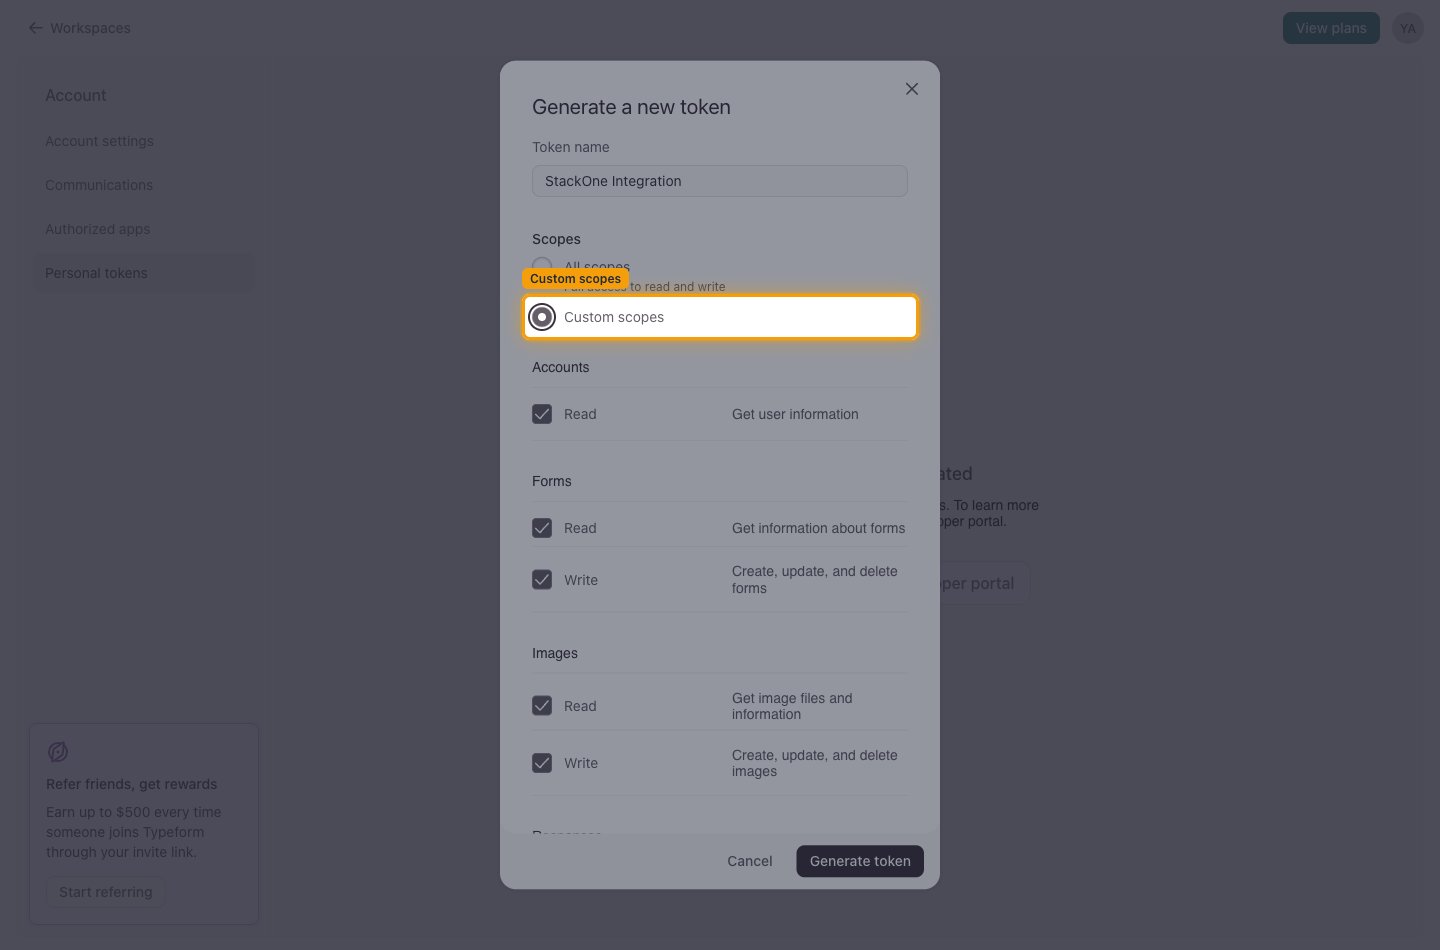
Choose the scopes
Under Scopes, choose how much access the token carries. Select All scopes for Full access to read and write, or select Custom scopes to limit the token and enable just the Read and Write permissions your integration needs. Each resource — Accounts, Forms, Images, Responses, Themes, Webhooks and Workspaces — has its own checkboxes, and selecting Custom scopes enables all of them.
Copy the token
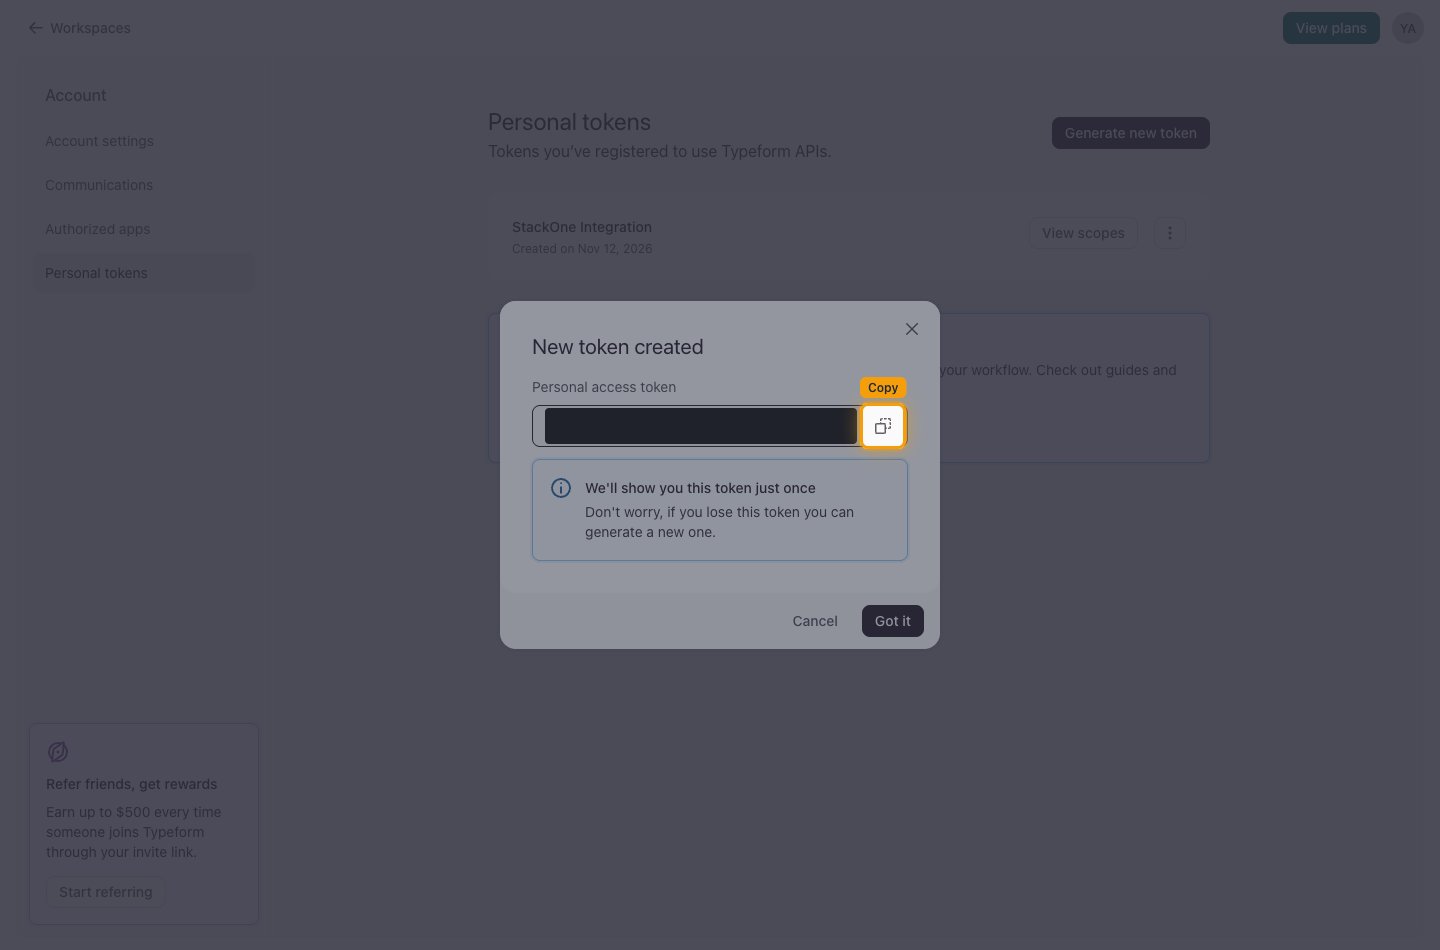
Click Generate token, then copy the Personal access token into StackOne Hub.
- We’ll show you this token just once — the token is only displayed once and cannot be retrieved later.
- If you lose the token, generate a new one and update the connection.
Find your form IDs for webhook events
Typeform registers webhooks on individual forms, so the forms to subscribe to are named when the account is connected. Leave Webhook Form ID empty if you are not using webhook events.
Copy each form ID
Open a form in the Typeform builder and copy the ID from the address bar.
- Format:
https://admin.typeform.com/form/{form_id}/create - Example: in
https://admin.typeform.com/form/abc123/createthe form ID isabc123
Enter the form IDs
Copy the form IDs into StackOne Hub, separated by commas — a webhook is created on each form listed. The token needs the Webhooks Write scope for this.
Link the Account
Connect
- Click Connect.
- If applicable, the provider will redirect you to a sign-in or authorization page. Complete the provider’s authorization flow.
- Once authorization is successful, you will see a confirmation popup.
Use Actions