Register Your Application in Microsoft Entra ID
To connect SharePoint with StackOne, you need to register an application in Microsoft Entra ID to obtain OAuth 2.0 credentials.
Sign in to Microsoft Entra Admin Center
Sign in to the Microsoft Entra admin center as at least an Application Developer. If you have access to multiple tenants, use the Settings (gear) icon in the top-right corner to select the correct directory.
Create a New App Registration
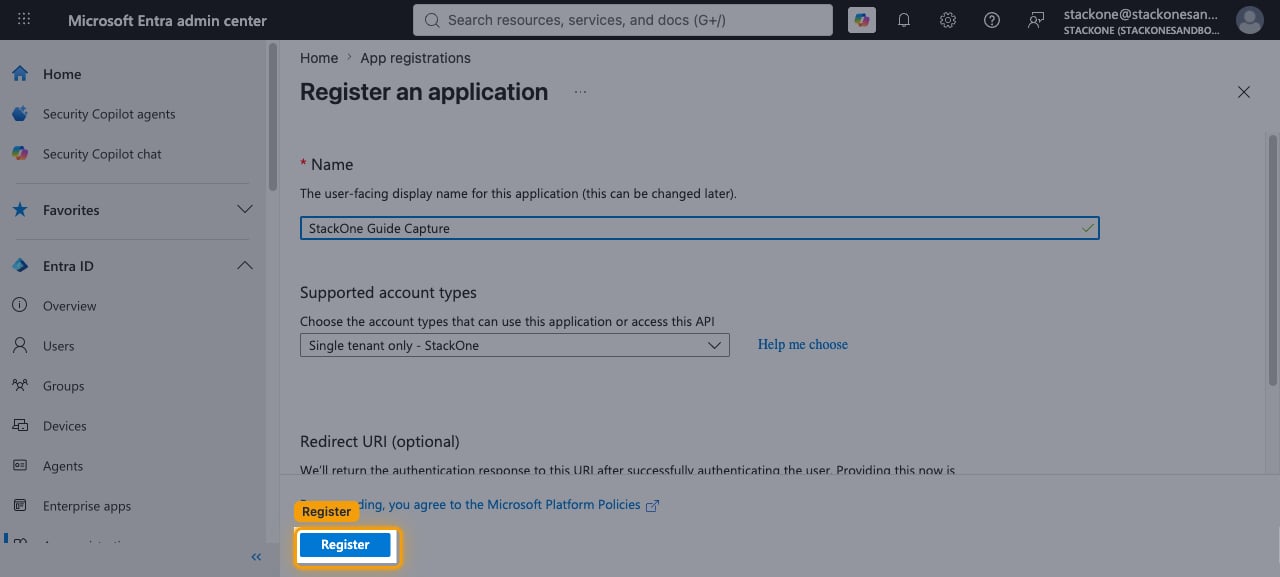
In the left sidebar, click Entra ID, then select App registrations and click New registration. If you do not see it, use the search bar at the top of the page to search for App registrations.
- Enter a meaningful Name for your app (e.g., StackOne SharePoint Integration).
- Under Supported account types, select the option that matches your organization (typically Accounts in this organizational directory only for single-tenant access).
- Leave the Redirect URI (optional) section blank for now.
- Click Register.
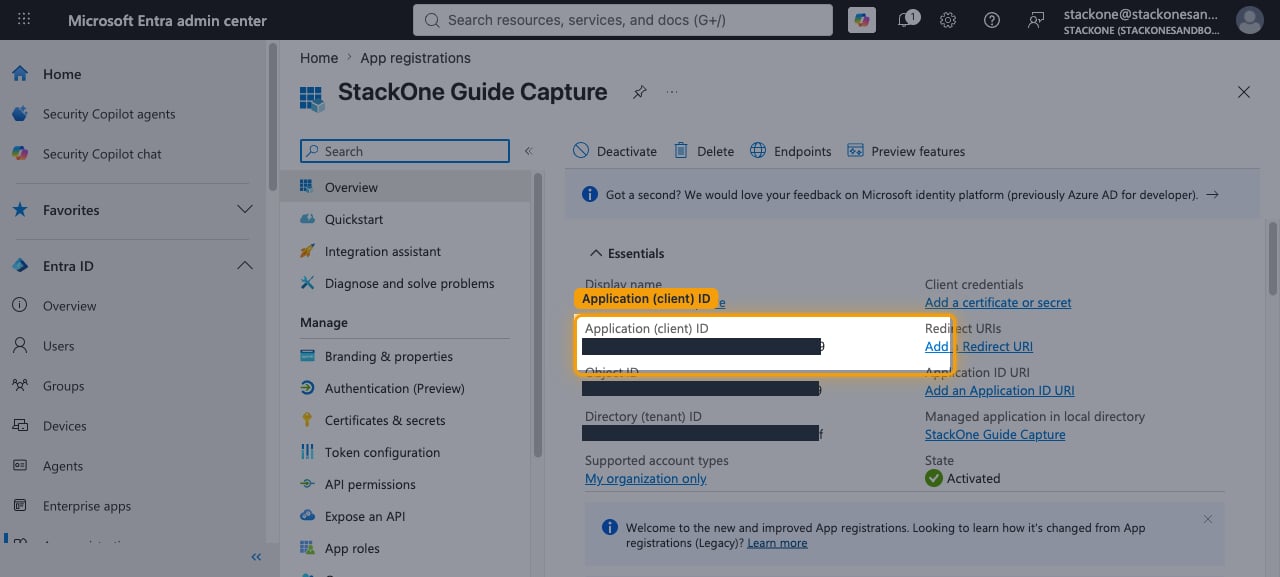
Copy the Application (Client) ID
After registration, you are directed to the application’s Overview page. In the Essentials section, copy the Application (client) ID value. Enter this value in the Client ID field in the StackOne connection form.
Configure Redirect URI
Set up the OAuth 2.0 callback URL to enable the authentication flow between StackOne and SharePoint.
Navigate to Authentication Settings
From your app’s left menu under Manage, select Authentication (Preview).
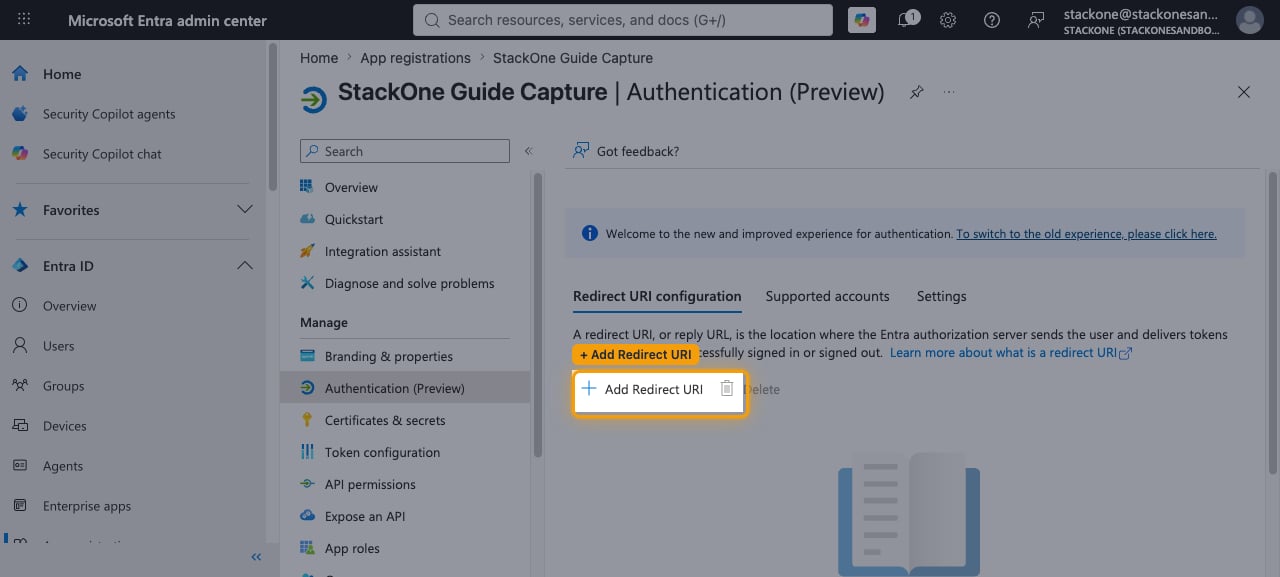
Add a Redirect URI
On the Redirect URI configuration tab, click + Add Redirect URI. On the Select a platform to add redirect URI panel that opens, select Web under Web applications.
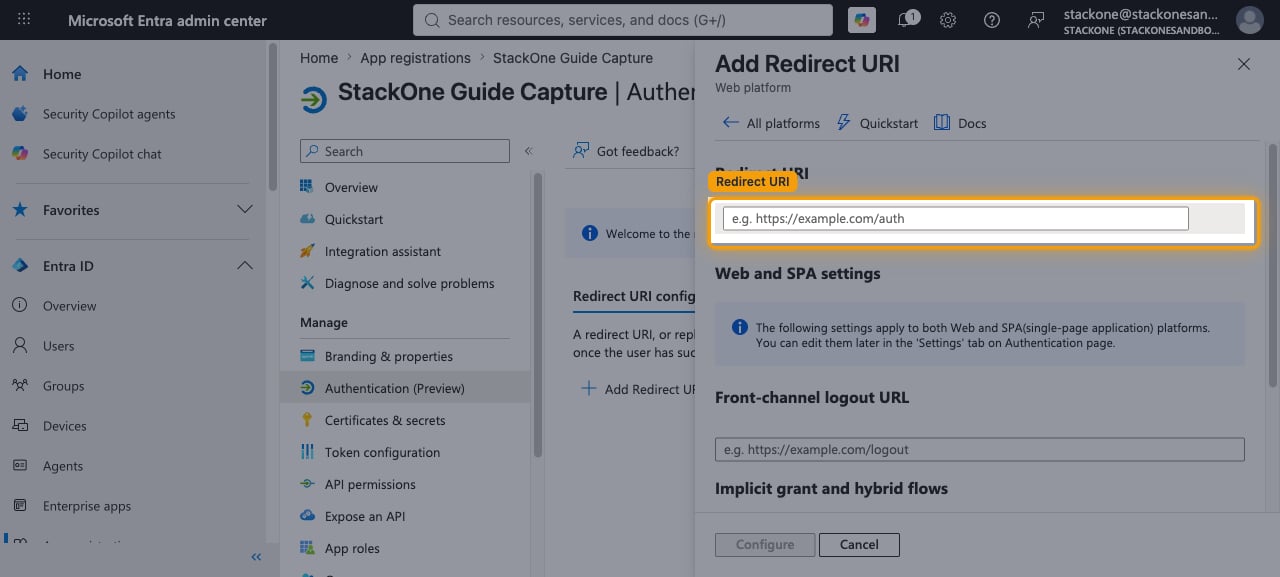
Set the Redirect URI
In the Redirect URI field that appears, enter the StackOne OAuth callback URL and click Configure.
- Redirect URI —
https://api.stackone.com/connect/oauth2/sharepoint/callback
Configure API Permissions
Grant your application the Microsoft Graph API permissions required to access SharePoint data. API access is controlled by the permissions granted here — not by the scopes in the OAuth token.
Open API Permissions
From the left menu under Manage, select API permissions.
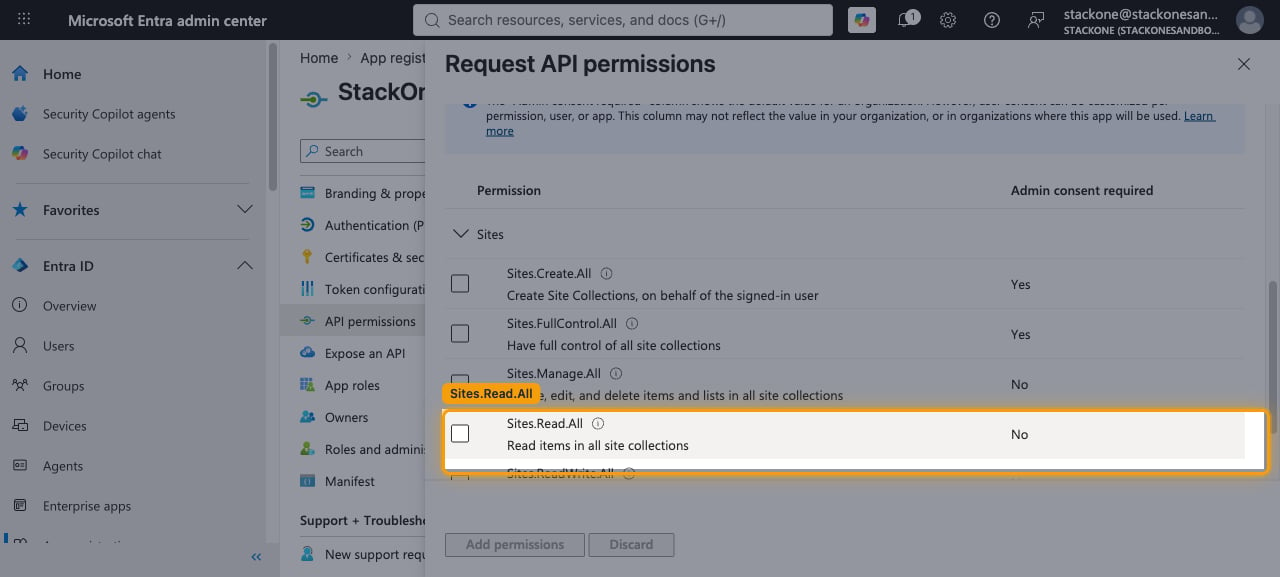
Add Microsoft Graph Permissions
Click + Add a permission, then select Microsoft Graph from the Microsoft APIs tab.
- Select Delegated permissions.
- Search for Sites and expand the Sites group.
- For read-only access, check Sites.Read.All and Files.Read.All.
- For read-write access, also check Sites.ReadWrite.All and Files.ReadWrite.All.
- Click Add permissions.
Grant Admin Consent
Click Grant admin consent for [tenant name] and select Yes to consent on behalf of all users in your tenant. After granting, verify that the Status column shows consent granted for each permission. Without admin consent, API calls will return 403 Forbidden errors.

Generate Client Secret
Create a client secret that StackOne uses to authenticate requests on behalf of your application.
Navigate to Certificates & Secrets
From the left menu under Manage, select Certificates & secrets.
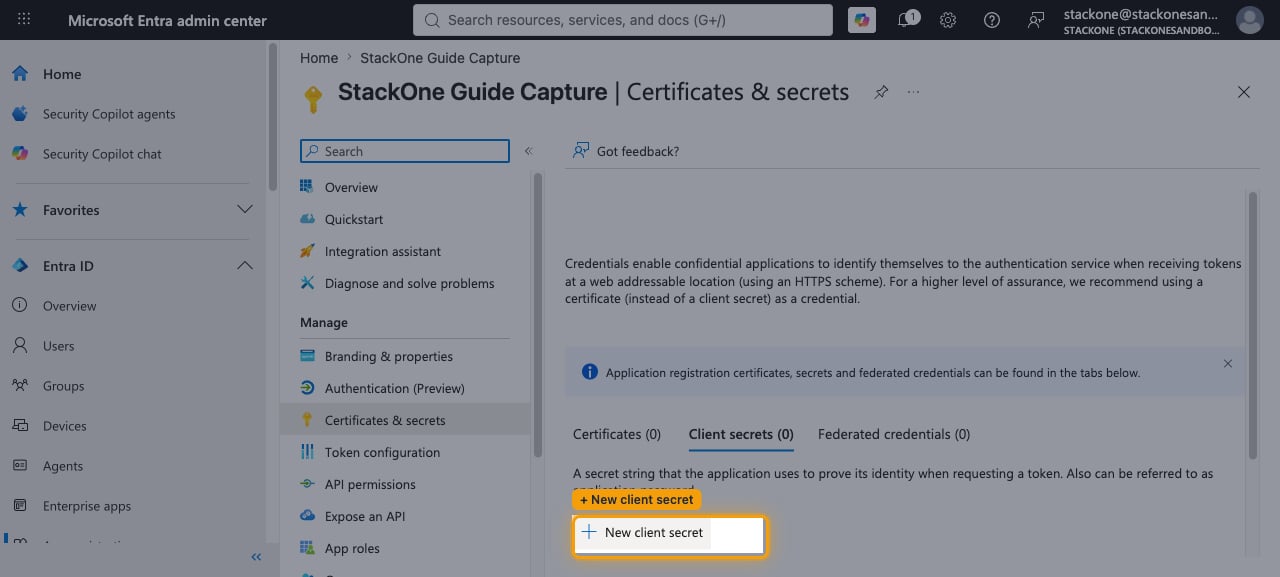
Create a New Client Secret
Under the Client secrets tab, click + New client secret.
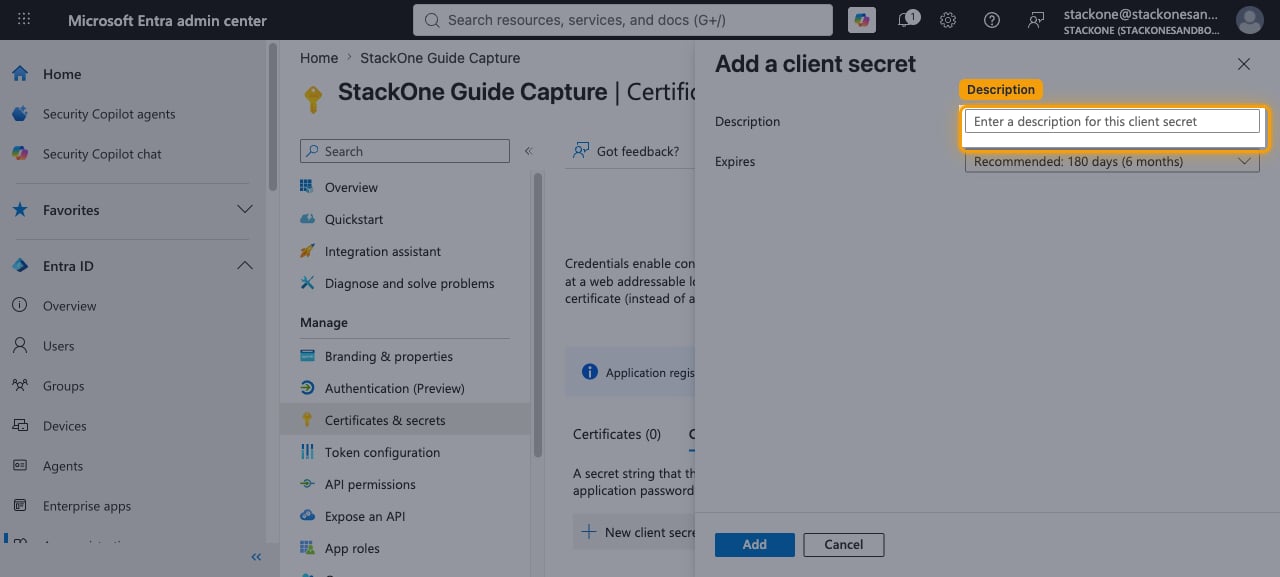
- Enter a Description (e.g., StackOne Integration Secret).
- Select an Expires period from the dropdown.
- Click Add.
Copy the Client Secret Value
Immediately copy the Value of the newly created client secret and enter it in the Client Secret field in the StackOne connection form. This value is only shown once and cannot be retrieved again.
Configure Scopes (Optional)
The Scopes field in the StackOne connection form is optional. If left blank, it defaults to https://graph.microsoft.com/.default offline_access, which requests every permission granted to the app registration. When supplying custom scopes, separate them with spaces and always include offline_access (required for refresh tokens) — for example Sites.Read.All Files.Read.All offline_access for read-only, or Sites.ReadWrite.All Files.ReadWrite.All offline_access for read-write.
Creating the StackOne Connector Profile
To create the Connector Profile in StackOne for SharePoint:Navigate to Connector Profiles
Create New Connector Profile
- Click + Connector Profile
- Search for and select SharePoint
- Select Type as OAuth 2.0
- Fill out the fields using details retrieved from your provider:
- Client ID
- Client Secret
- Scopes (Optional)
- (Optional) Select Actions to be enabled for this Connector Profile
- Click Create profile