Before you begin
Make sure you have access to a ServiceNow instance before starting.
Check prerequisites
You need an existing ServiceNow instance and an account with sufficient permissions.
- An active ServiceNow instance. If you do not have one, request a free Personal Developer Instance from the ServiceNow Developer Program or contact your ServiceNow administrator for access.
- An account with the admin role (or roles that can manage REST API Key records and REST API Access Policies).
- The token-based authentication plugin (com.glide.tokenbased_auth) must be installed. If the REST API Key module does not appear in the next section, contact your ServiceNow administrator to install it.
- Your instance URL, in the format
https://{your-instance}.service-now.com(for example,https://dev12345.service-now.com).
Generate an API Key
Create a REST API Key in ServiceNow. The generated Token is the value you will paste into StackOne Hub.
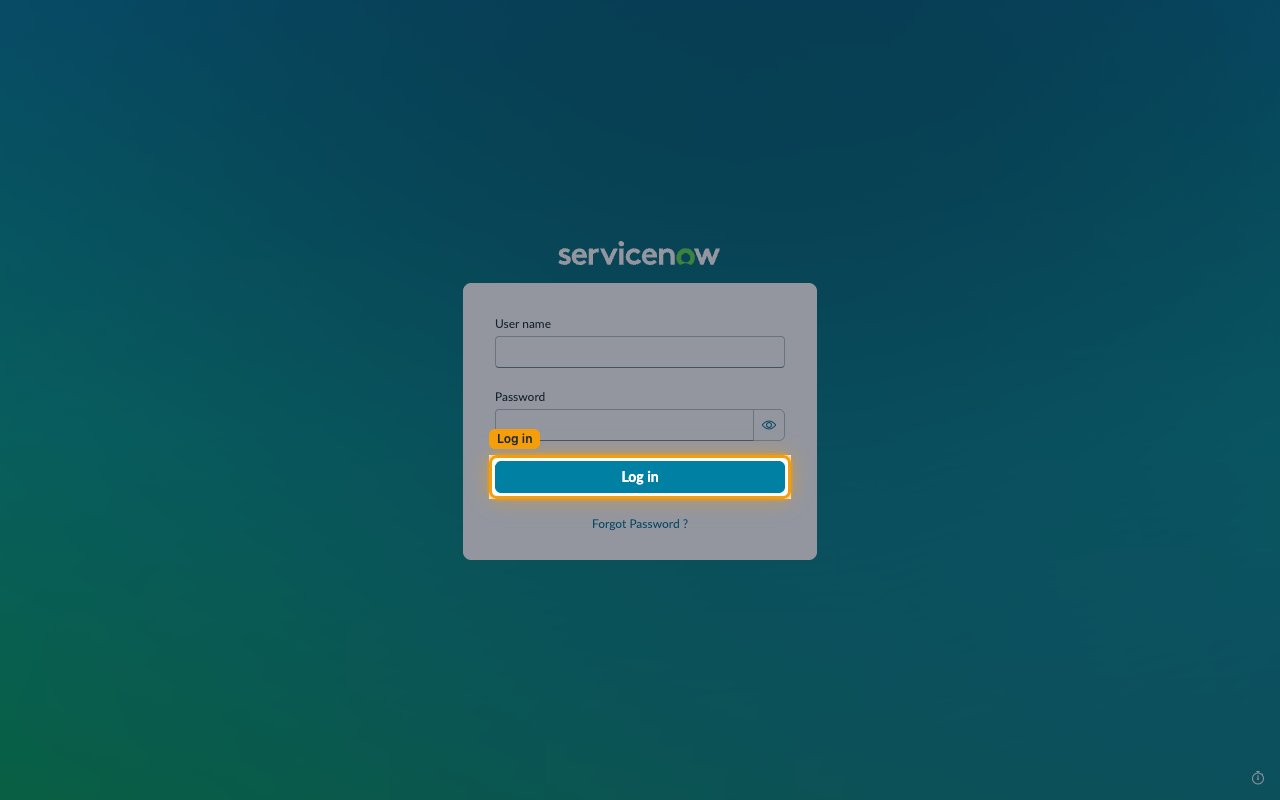
Sign in to your ServiceNow instance
Open your instance URL and log in.
- Go to
https://{your-instance}.service-now.com - Enter your User name and Password, then click Log in
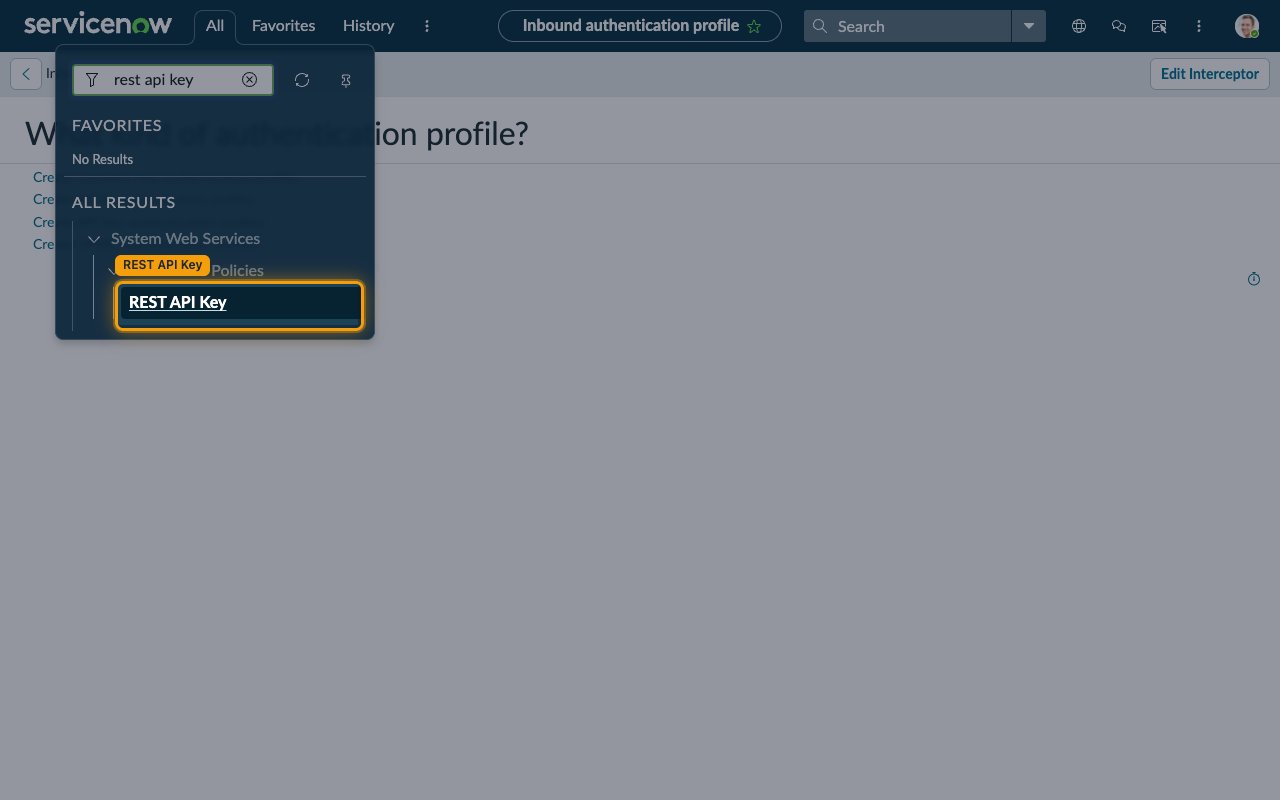
Open REST API Key
Click All in the top navigation bar, then type rest api key in the Filter box. Click REST API Key under System Web Services. If this module does not appear, the token-based authentication plugin is not active on your instance.
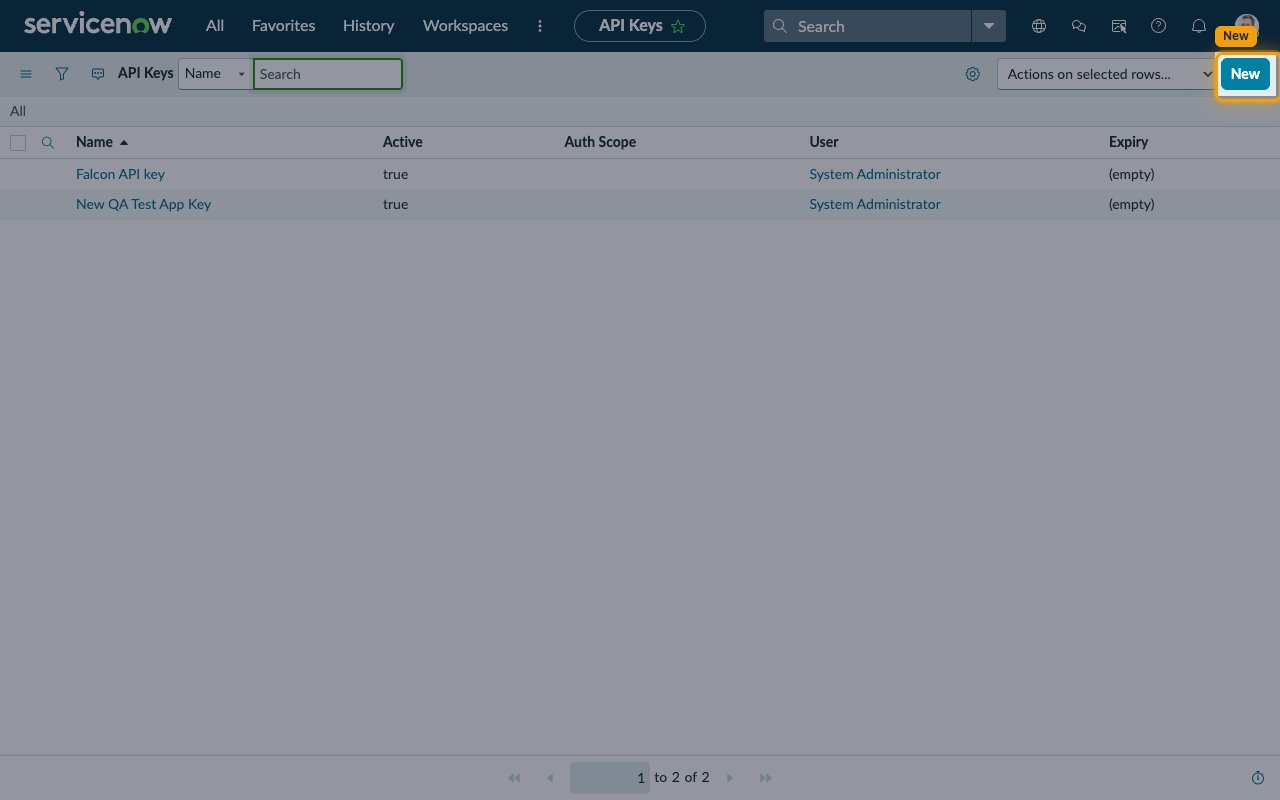
Create a new API key
In the API Keys list, click New.
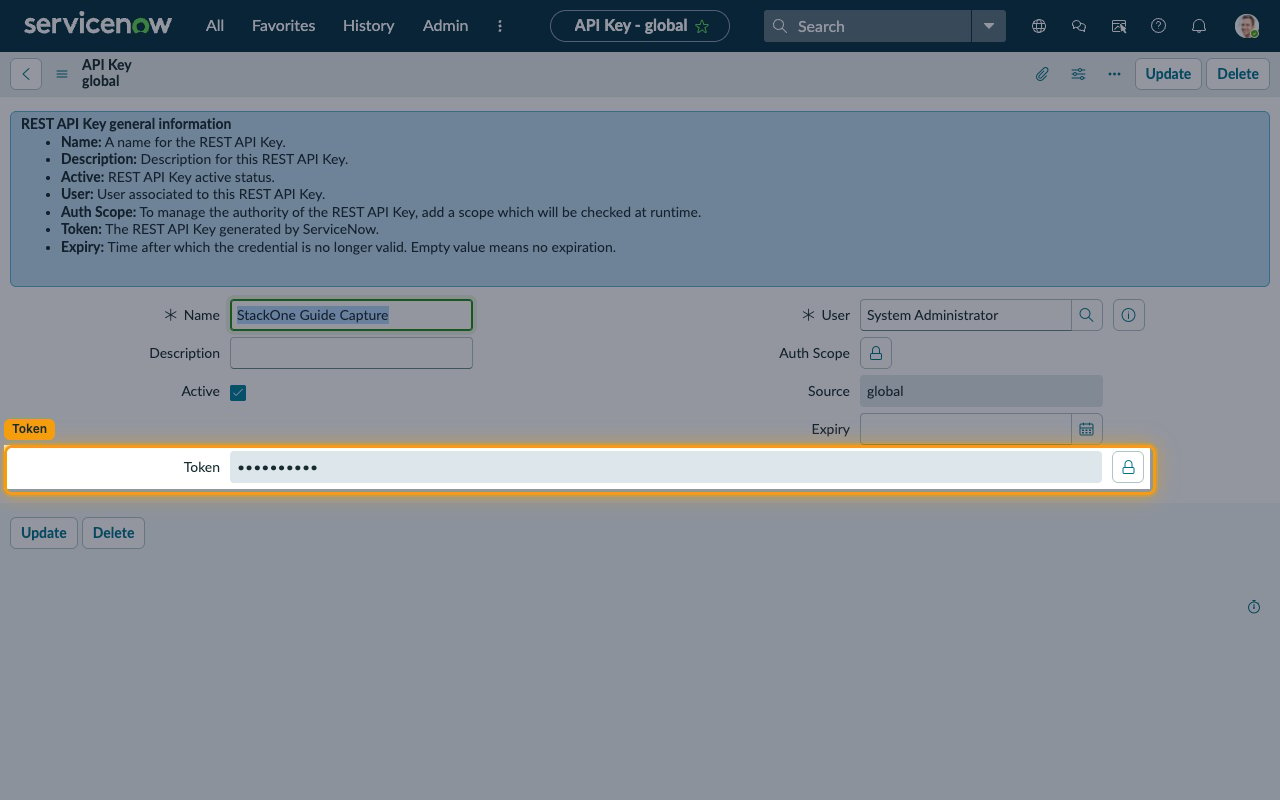
Fill in the REST API Key form
Complete the form fields, then click Submit. ServiceNow generates the Token automatically on save.
- Name: enter a descriptive name (for example,
StackOne Integration) - User: required — select the user the key acts as; this user needs roles that grant Table API access (such as admin or itil)
- Active: leave checked
- Description: optional
- Auth Scope: leave empty unless you need to restrict the key to specific scopes
- Expiry: leave empty for no expiration, or set a future date

Copy the generated Token
From the API Keys list, reopen the record you just created. The Token field contains the generated key, displayed masked. Click the lock icon next to the Token field to reveal the value, then copy it and store it securely — this is the value you will paste into the API Key field in StackOne Hub.
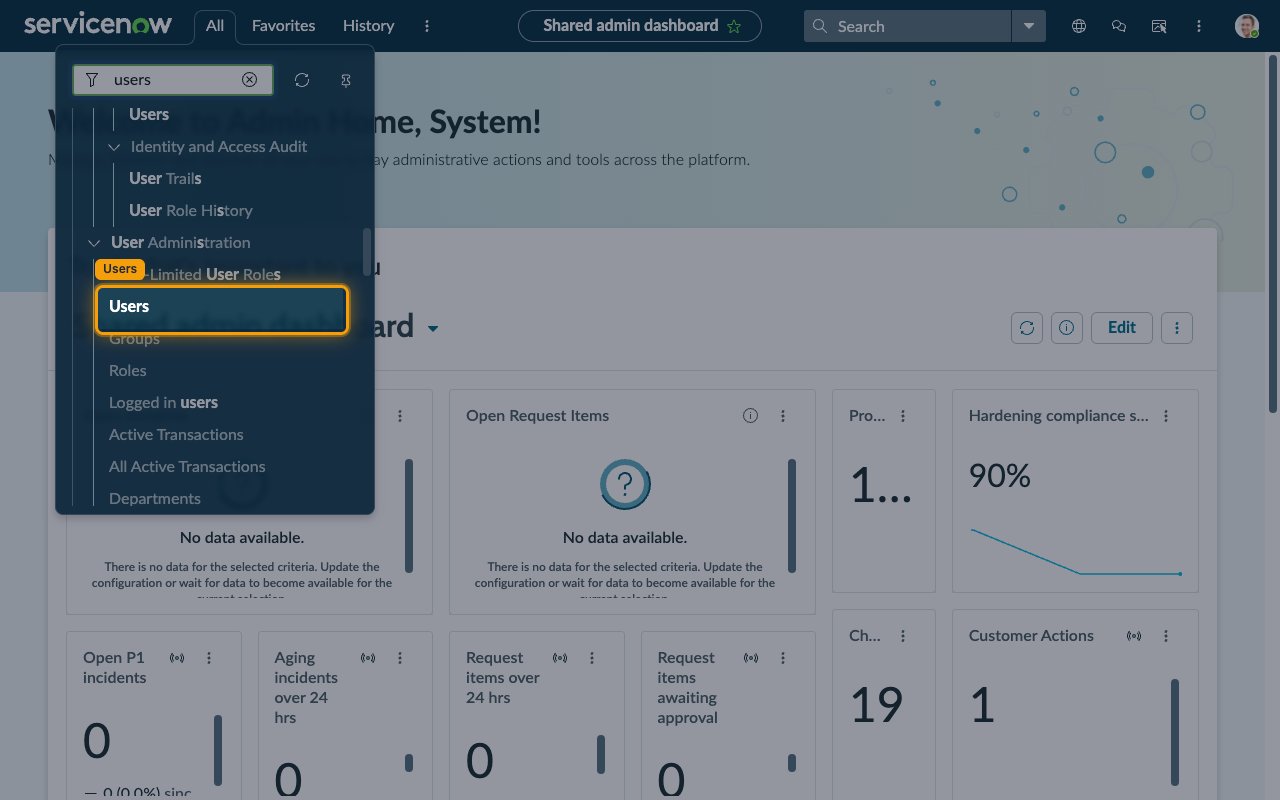
Verify user permissions
Click All in the top navigation bar, type users in the Filter box, then click Users under User Administration. Open the user you selected for the API key and confirm it has the roles required for Table API access (such as admin, itil, or rest_service). Add missing roles if necessary.
Allow API Key Auth on the Table API
The Table API access policy must explicitly accept API Key authentication. Without this, every request returns HTTP 401 even with a valid key.
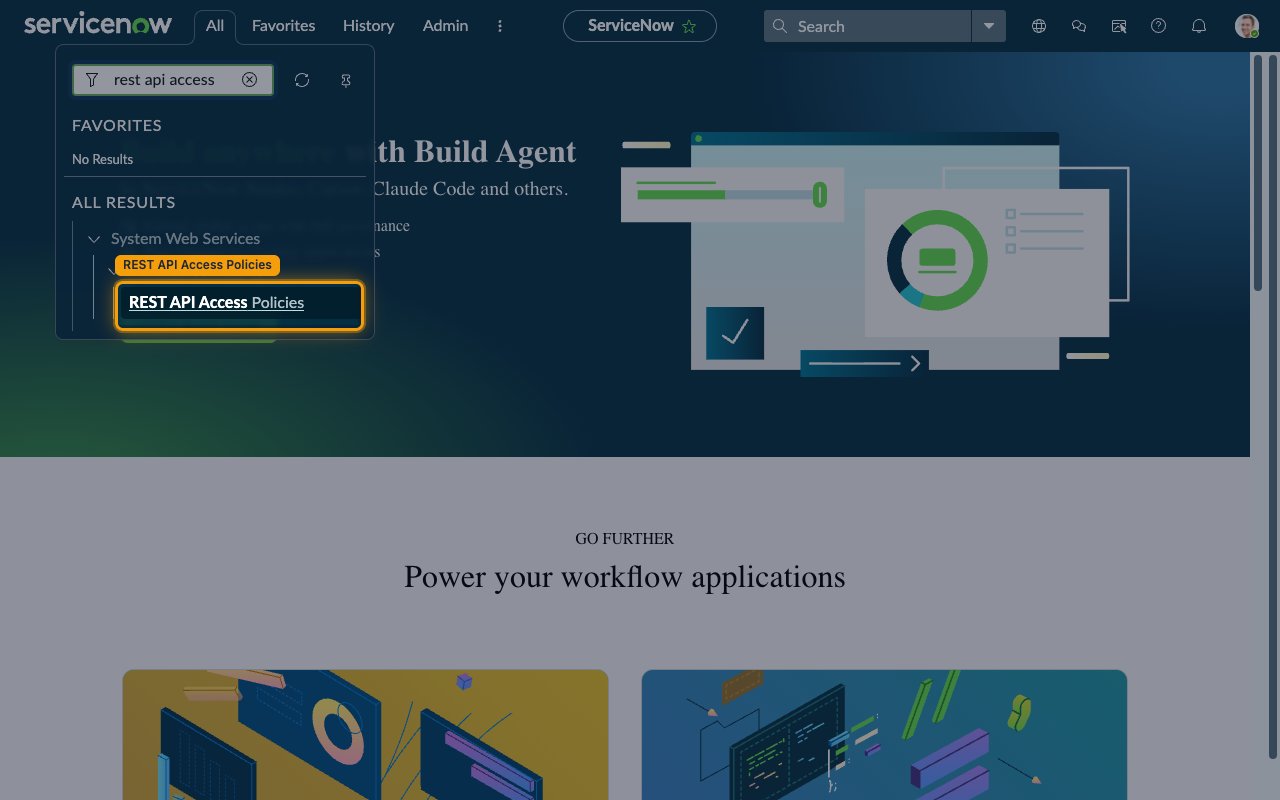
Open REST API Access Policies
Click All in the top navigation bar, type rest api access in the Filter box, then click REST API Access Policies under System Web Services > API Access Policies.
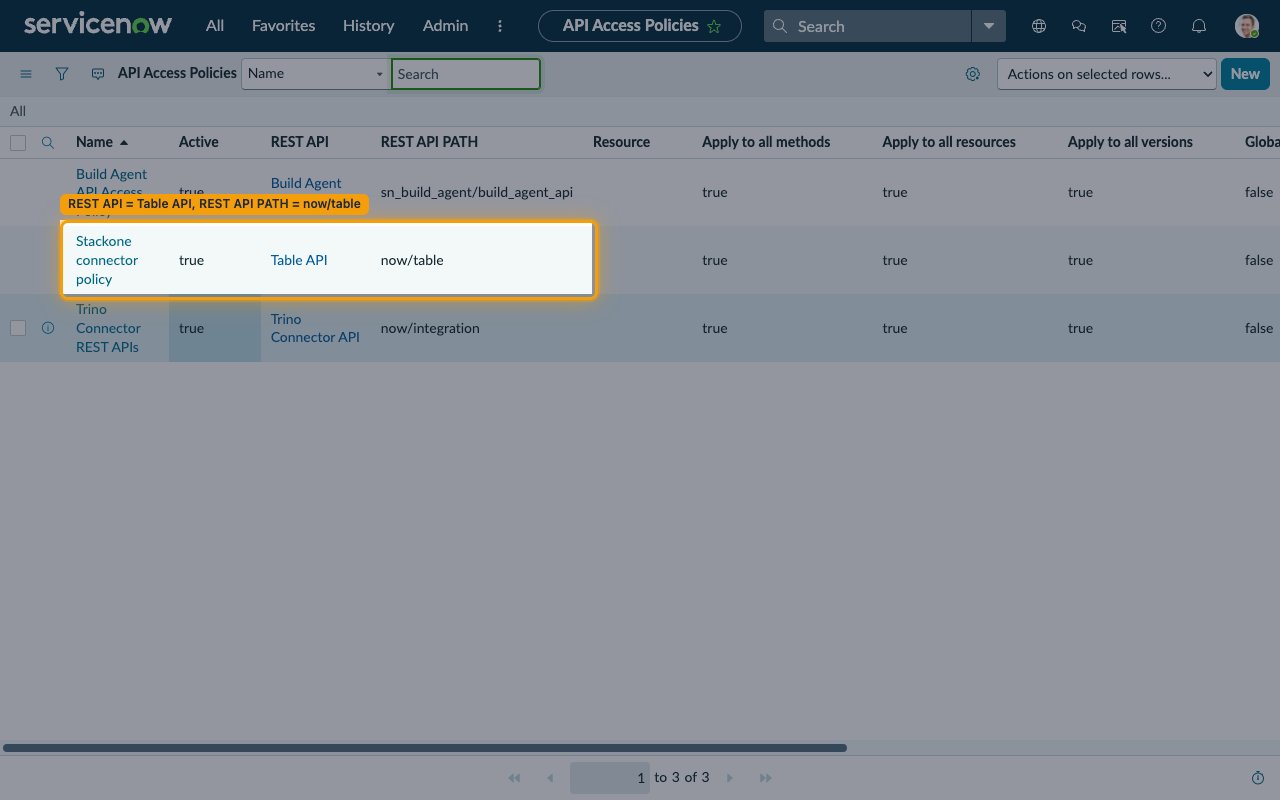
Identify the Table API policy
In the API Access Policies list, look for the policy where REST API = Table API and REST API PATH = now/table. Policy names vary by release and instance — depending on your ServiceNow release and instance configuration, this may be a single Table API policy or separate Table GET API Access Policy and Table POST API Access Policy records. If your instance has a single Table API policy, apply the next step to that one policy; if it has separate GET and POST policies, repeat the next step on each. If no Table API policy exists at all, skip ahead to the step for creating a new policy.
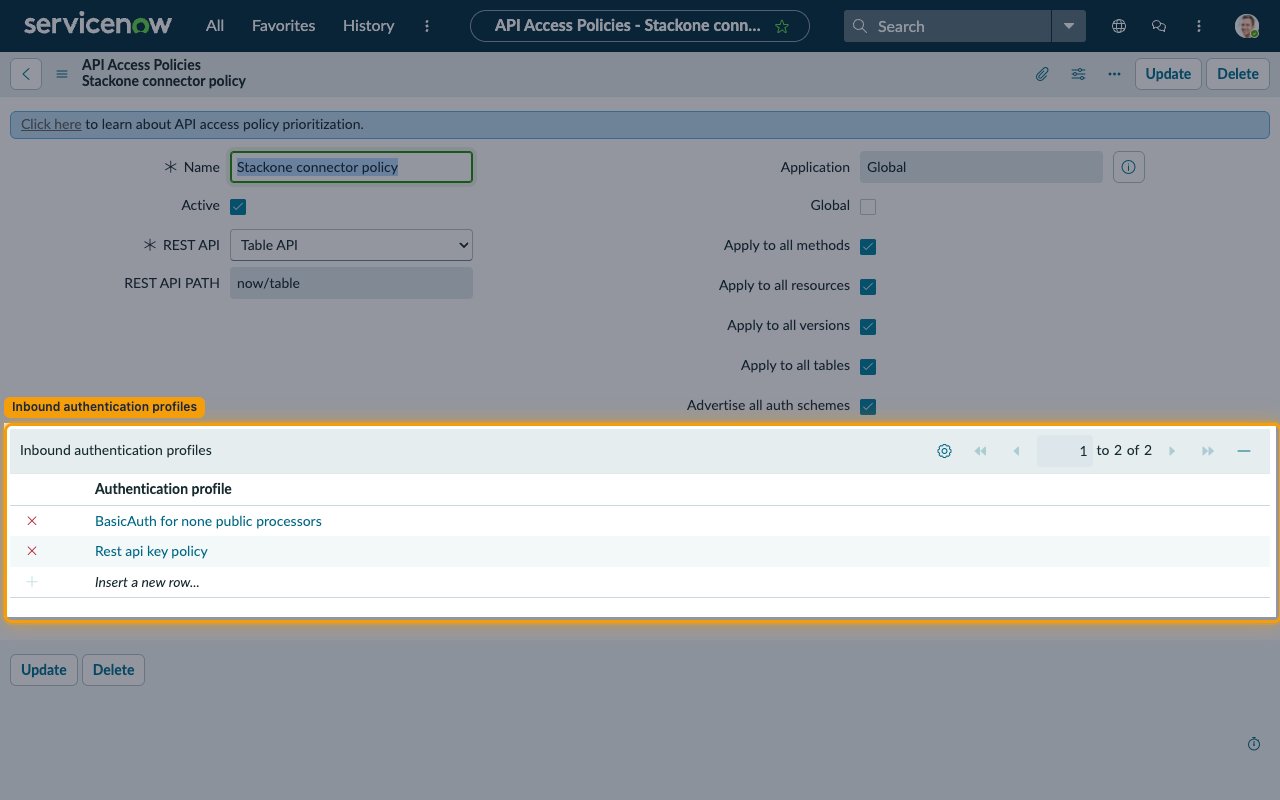
Attach the Rest api key policy profile
Open the Table API policy record, scroll to the Inbound authentication profiles related list, click Insert a new row…, select Rest api key policy, then click Update.
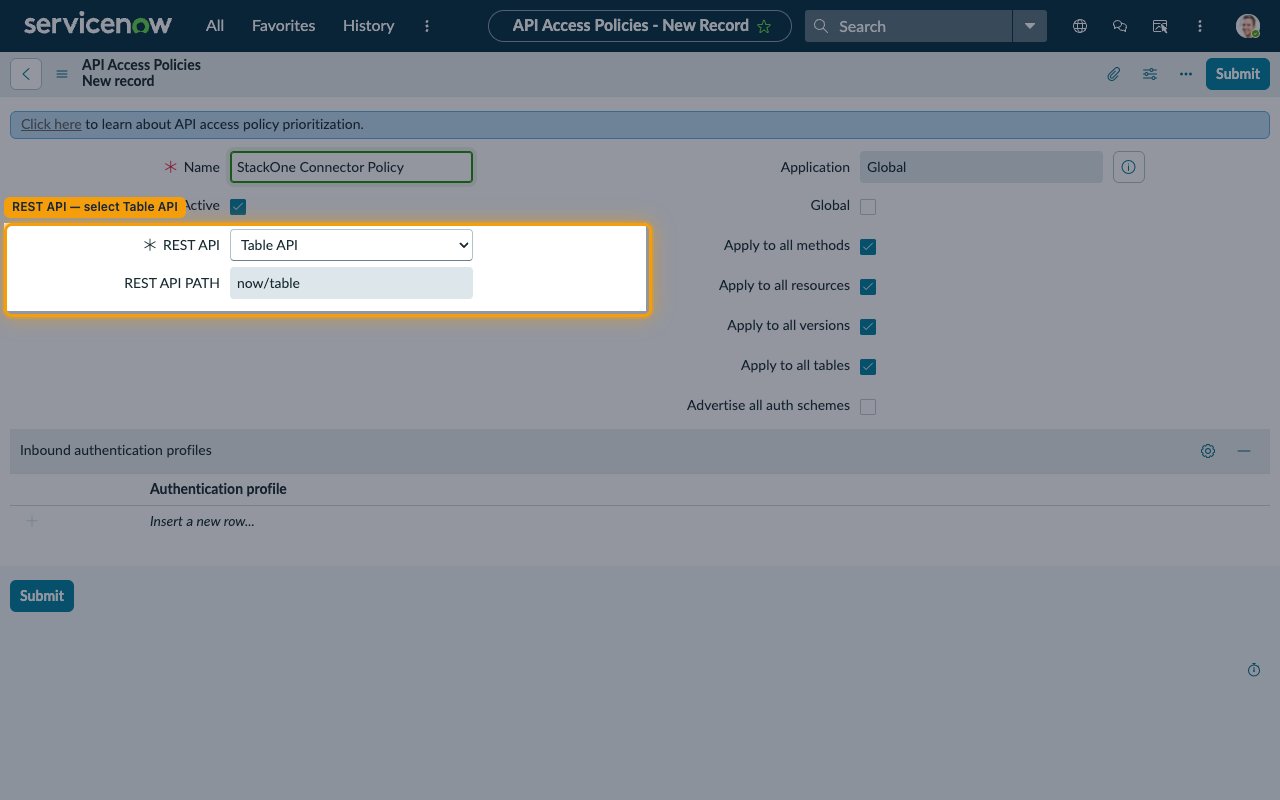
Create a new policy only if none exists
If the list has no Table API policy at all, click New and fill in the form.
- Name: enter a descriptive name (for example,
StackOne Connector Policy) - Active: leave checked
- Global: leave unchecked unless the policy should apply across all application scopes
- REST API: select Table API (REST API PATH auto-fills to
now/table) - Apply to all methods, Apply to all resources, Apply to all versions, Apply to all tables: check all four
- Under Inbound authentication profiles, click Insert a new row… and add Rest api key policy
- Click Submit
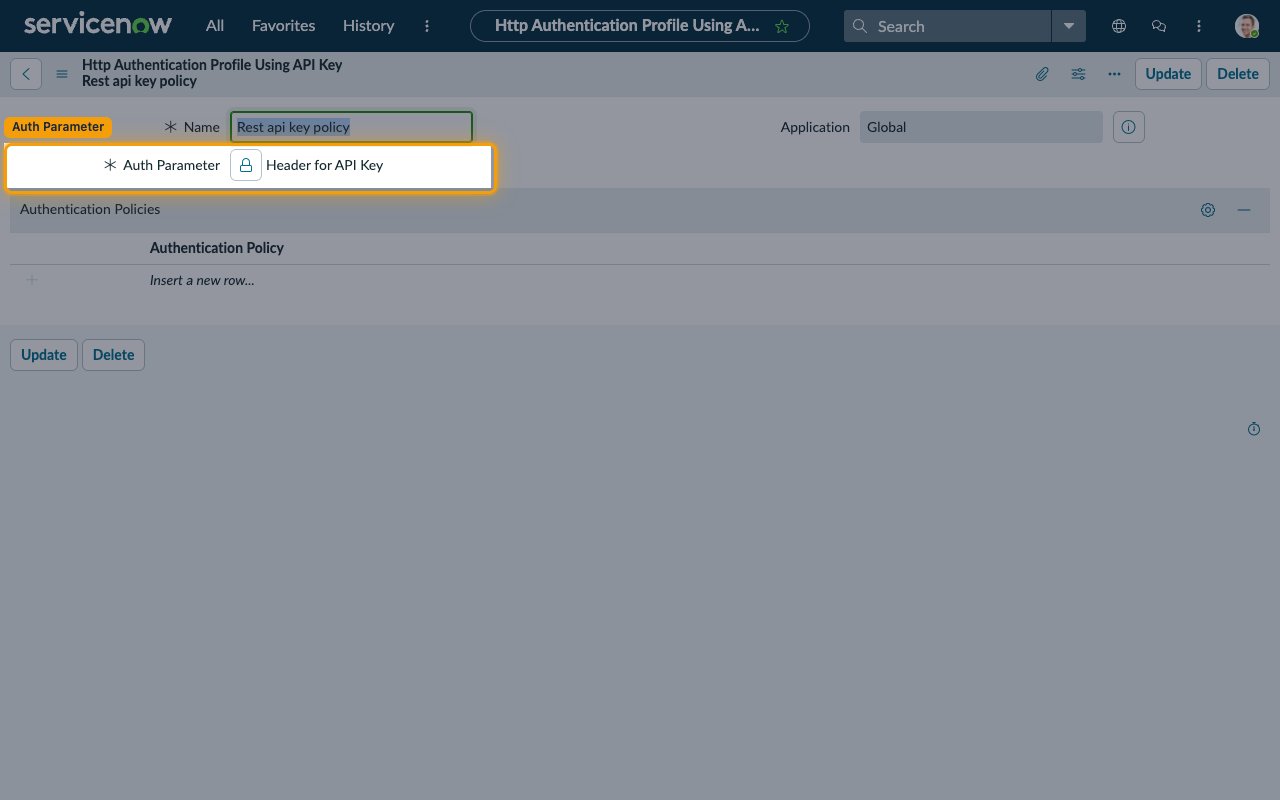
Verify the Rest api key policy profile exists
Click All in the top navigation bar, type inbound auth in the Filter box, then click Inbound Authentication Profile under System Web Services > API Access Policies. In the Authentication Profiles list, confirm the row Rest api key policy shows Active = true. Opening the record shows Auth Parameter = Header for API Key, which makes ServiceNow read the key from the x-sn-apikey request header used by StackOne.
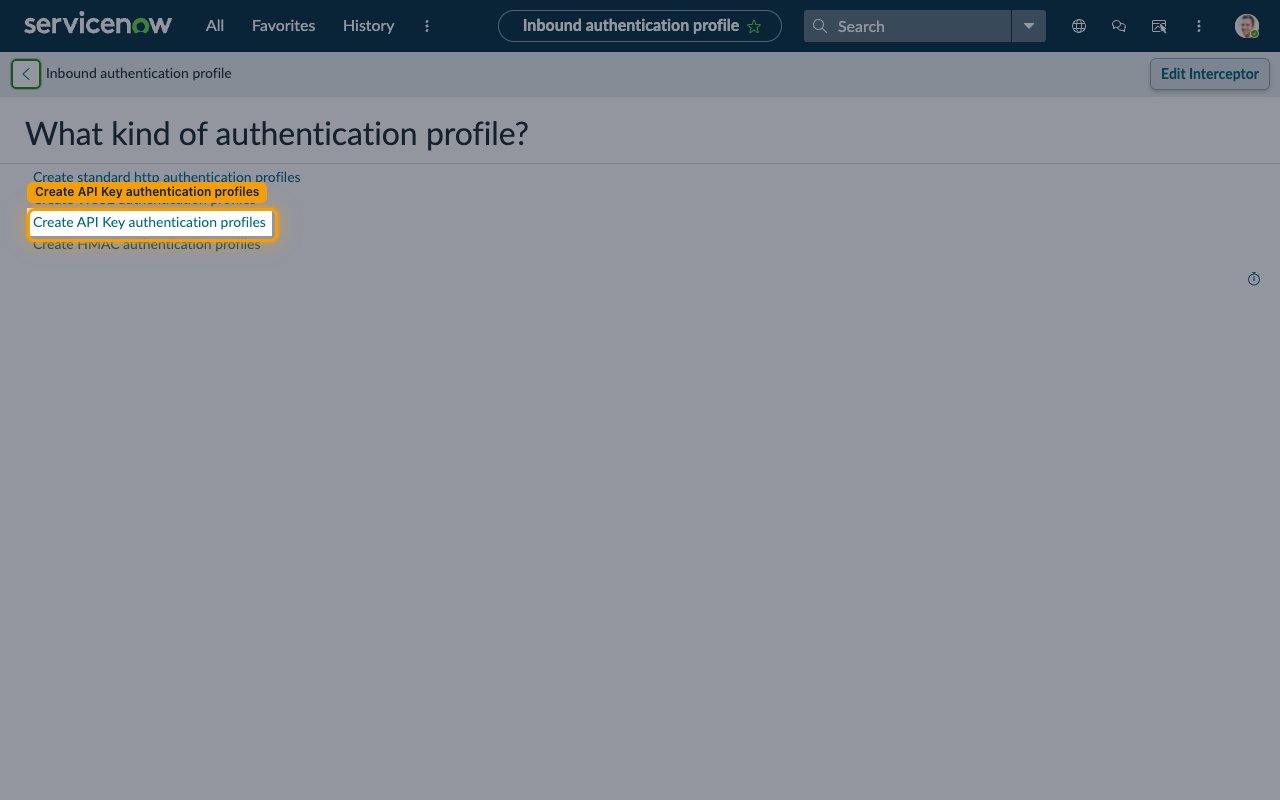
Create the profile only if missing
On hardened instances the profile may have been removed. From the Authentication Profiles list, click New. When the form asks What kind of authentication profile?, select Create API Key authentication profiles, name it (for example, Rest api key policy), and click Submit.
Verify with a test request
A 200 response confirms the whole chain — access policy, inbound profile, API key, and user roles — is correct.
- Run:
curl -H 'x-sn-apikey: <YOUR_TOKEN>' -H 'Accept: application/json' 'https://{your-instance}.service-now.com/api/now/table/incident?sysparm_limit=1' - Expect HTTP 200 with a JSON body containing a
resultarray - If you see HTTP 401 with
User is not authenticated: confirm the Table API policy is Active with Rest api key policy attached (or Advertise all auth schemes checked), and that the Rest api key policy profile itself shows Active = true in the Authentication Profiles list
Enter your credentials in StackOne
Collect the two values below and enter them in StackOne Hub.
Fill in the connection fields
Each field in StackOne Hub maps to a value from the steps above.
- Instance Name — the subdomain of your ServiceNow URL, without
.service-now.com. Format:{your-instance}. Example:dev12345(fromhttps://dev12345.service-now.com) - API Key — the Token value you copied from the REST API Key record
- Native Webhook URL — read-only; StackOne fills this automatically for webhook events, no action needed
Linking the Account from the Hub
Navigate to the Hub
Fill out the fields
- Instance Name
- API Key
Connect
- Click Connect
- If applicable, the provider will redirect you to a sign-in or authorization page. Complete the provider’s authorization flow.
- Once authorization is successful, you will see a confirmation popup
If the account linking is successful, you will see the newly linked account in your Accounts page.
Next Steps
Webhooks setup
Configure receiving Events for ServiceNow into StackOne.