

Creating and authorizing an API app
The app belongs to the Planday portal you create it in, and its Token gives access to that portal only, within the scopes ticked on the app.
1
Create the app
Sign in to your Planday account, then open Settings > API access under Integrations in the left sidebar.
- Click Create app.
- Title:
StackOne Integration
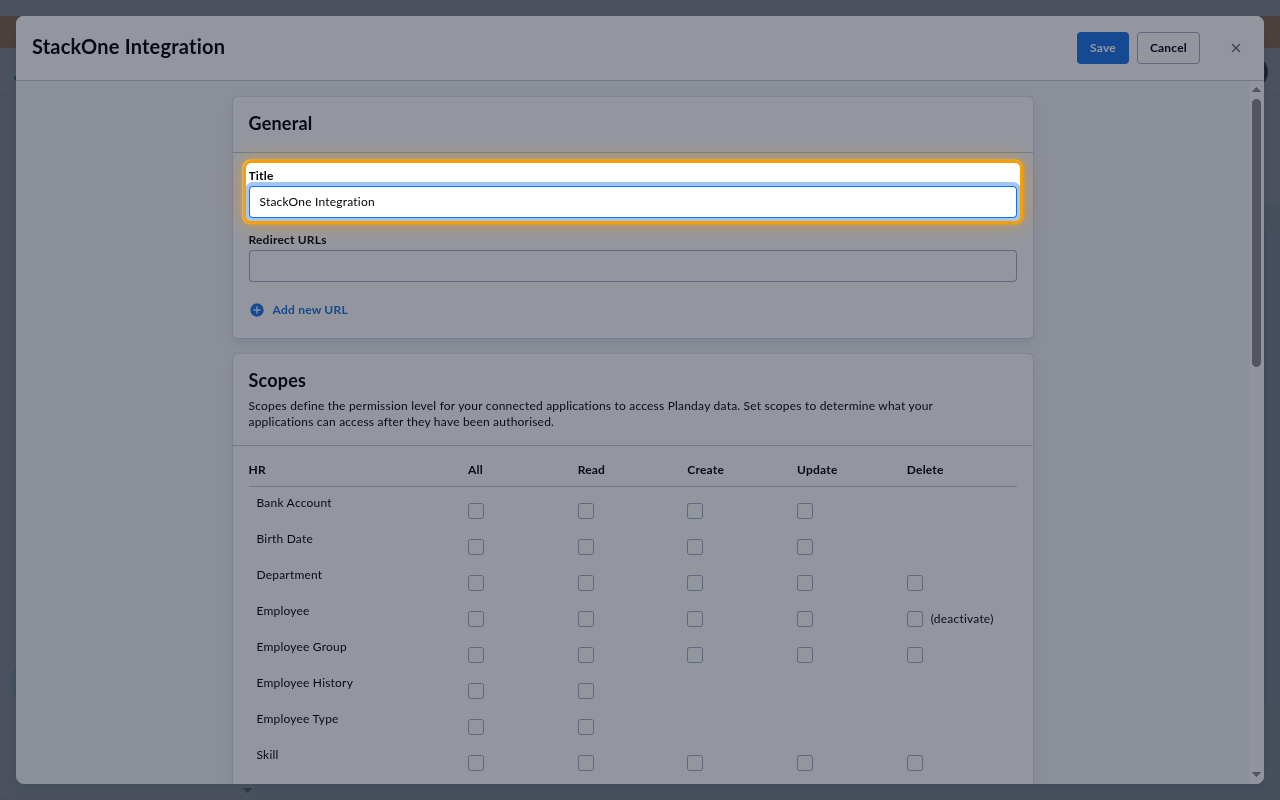
2
Select the scopes and save the app
Enables actions: Approve Absence Request, Approve Shift, Assign Shift To Employee, Change Employee Username, Create Absence Adjustment, Create Accrued Account Type, Create Department, Create Employee, Create Employee Group, Create Or Update Employee Period Salary, Create Or Update Revenue, Create Position, Create Shift, Create Shift Type, Create Skill, Create Transaction, Deactivate Employee, Decline Absence Record, Delete Account Type, Delete Department, Delete Employee Group, Delete Position, Delete Revenue, Delete Shift, Delete Skill, Deny Absence Request, Get Absence Records, Get Absence Request Draft, Get Account Balance, Get Accrued Account Type, Get Department By ID, Get Employee By ID, Get Employee Field Definition, Get Employee Group By ID, Get Employee Pay Rates For All Groups, Get Employee Pay Rates In Employee Group, Get Employee Period Salary, Get Employee Salary Allocation, Get Payroll Data, Get Position By ID, Get Revenue Records, Get Shift By ID, Invite Employee, List Absence Accounts, List Absence Adjustments, List Absence Requests, List Absence Types, List Account Transactions, List Account Types, List Available Positions, List Available Sections, List Available Shifts, List Countries, List Deactivated Employees, List Departments, List Employee Account Balances, List Employee Groups, List Employee Shifts For Today, List Employee Types, List Of Employees, List Punch Clock Records, List Revenue Units, List Revenue Units For Department, List Salary Types, List Shift Types, List Skills, List Supervisors, Publish Draft Shifts, Reactivate Employee, Submit Absence Request, Update Accrued Account Type, Update Department, Update Employee, Update Employee Group, Update Employee Group Pay Rates, Update Position, Update Shift, Update Shift Type, Update Skill
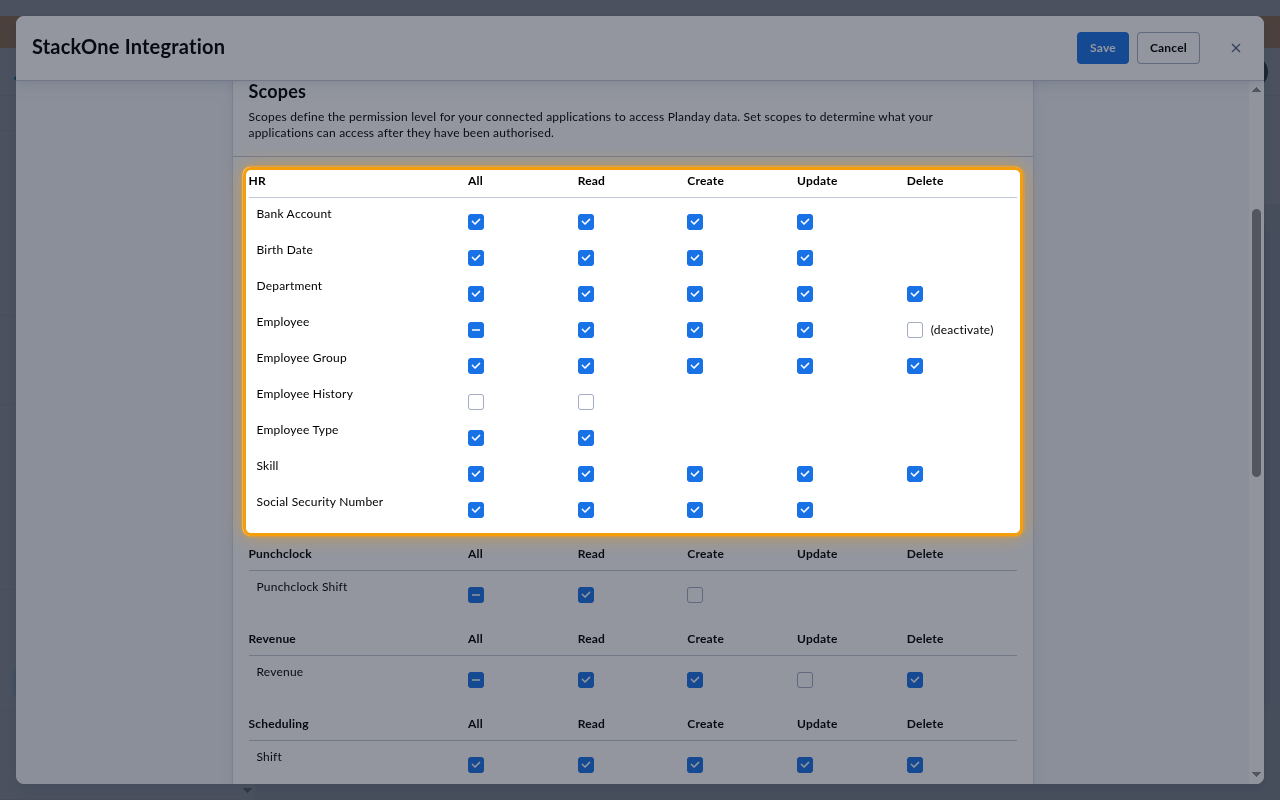
In the Scopes section, each scope is one box: its resource row and its Read, Create, Update or Delete column. revenue:set is the Create box on the Revenue row.
- Tick the box for every scope listed.
- To read and write employee bank accounts, birth dates and social security numbers in List of Employees, Get Employee by ID, Create Employee and Update Employee, also tick
bankaccount:read,bankaccount:create,bankaccount:update,birthdate:read,birthdate:create,birthdate:update,ssn:read,ssn:createandssn:updateon the Bank Account, Birth Date and Social Security Number rows. - Click Save.
3
Authorize the app
On the API access page, the StackOne Integration tile has an Application ID but no Token until the app is authorized.
- Click Authorise on the StackOne Integration tile.
- Review the Would like to list on Allow access to your Planday account.
- Click Authorize.
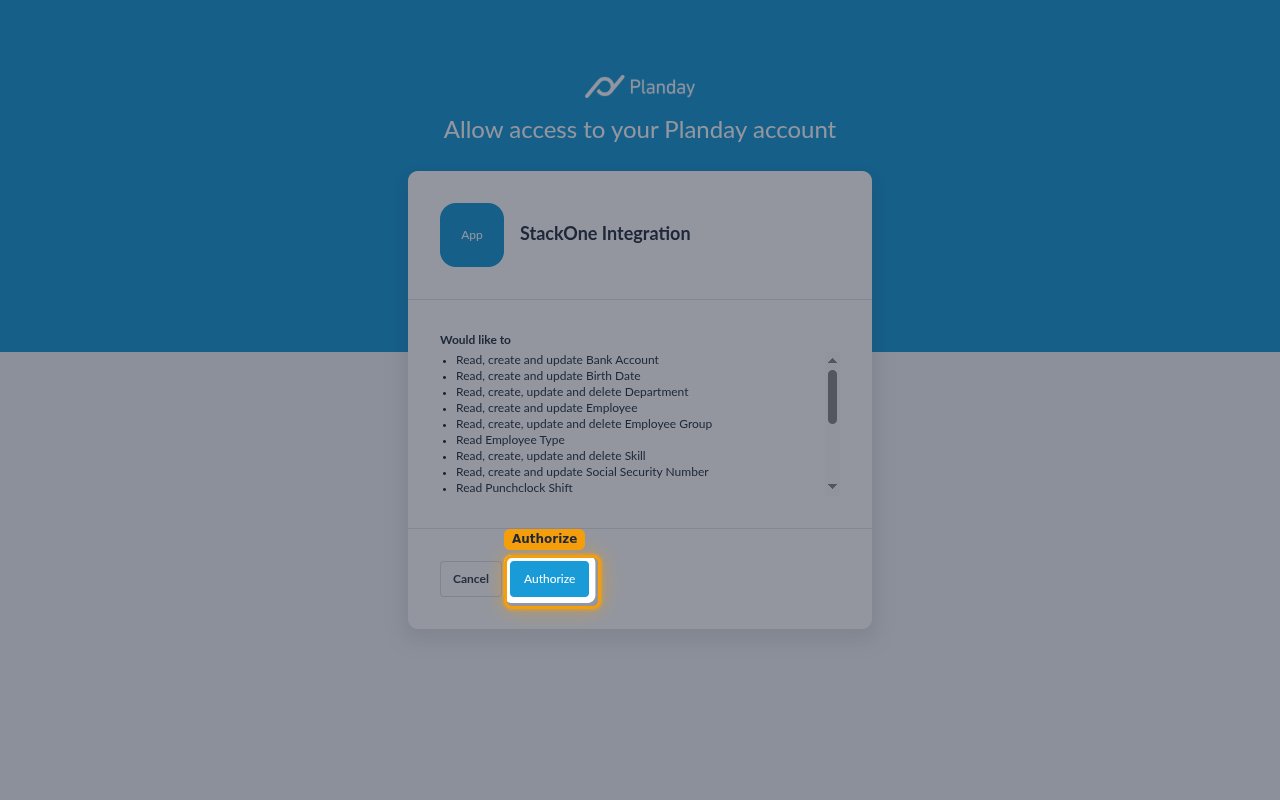
4
Copy the credentials
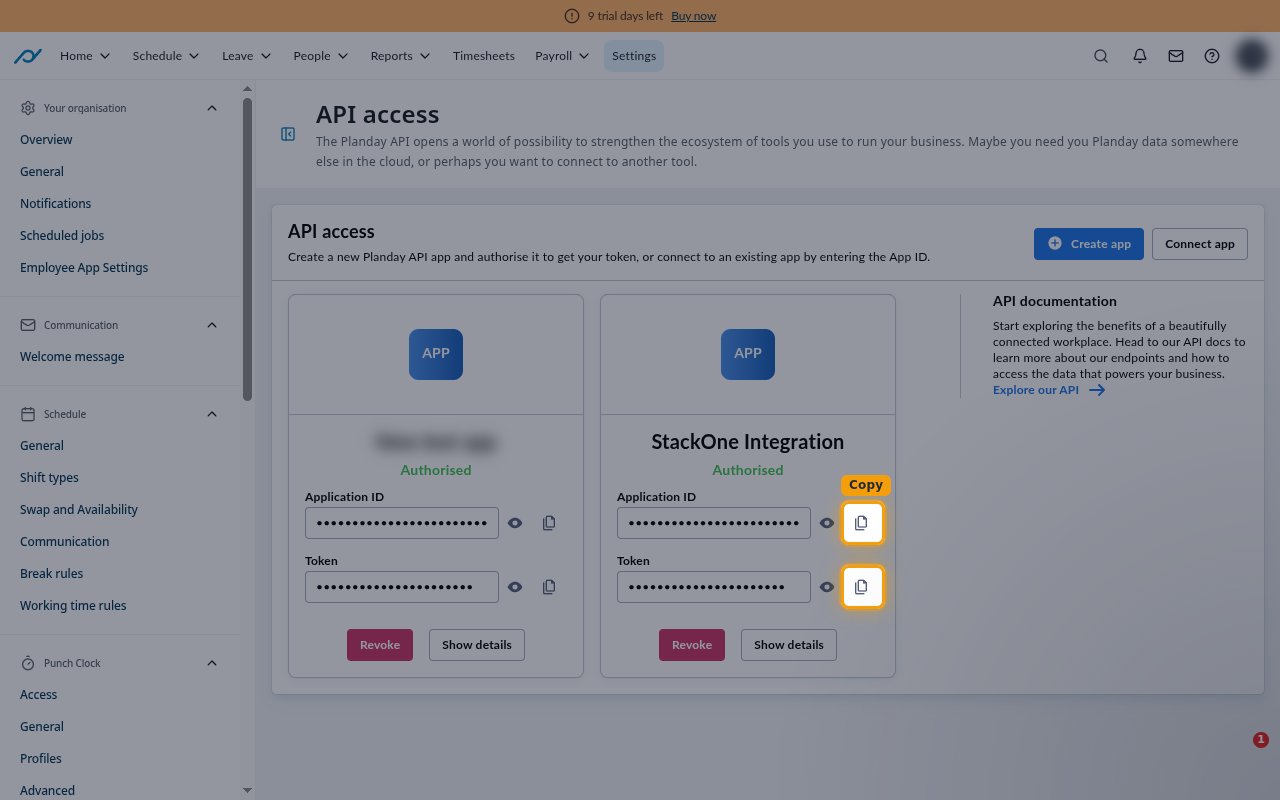
The StackOne Integration tile now reads Authorised and shows a Token below the Application ID.
- Click the copy icon beside Application ID and copy the Application ID across.
- Click the copy icon beside Token and copy the Token across.
Link the Account
1
Connect
- Click Connect.
- If applicable, the provider will redirect you to a sign-in or authorization page. Complete the provider’s authorization flow.
- Once authorization is successful, you will see a confirmation popup.
2
Use Actions
Connect an AI platform to the linked account’s actions. See AI Platforms.Other ways to call actions are listed in Protocols & SDKs.