

Register an OAuth 2 application
OpenStreetMap uses OAuth 2.0 for all editing and private-data operations. Create an OAuth 2 application in your OpenStreetMap account, select the permissions your integration needs, and copy the generated Client ID and Client Secret into StackOne.
Sign in to OpenStreetMap
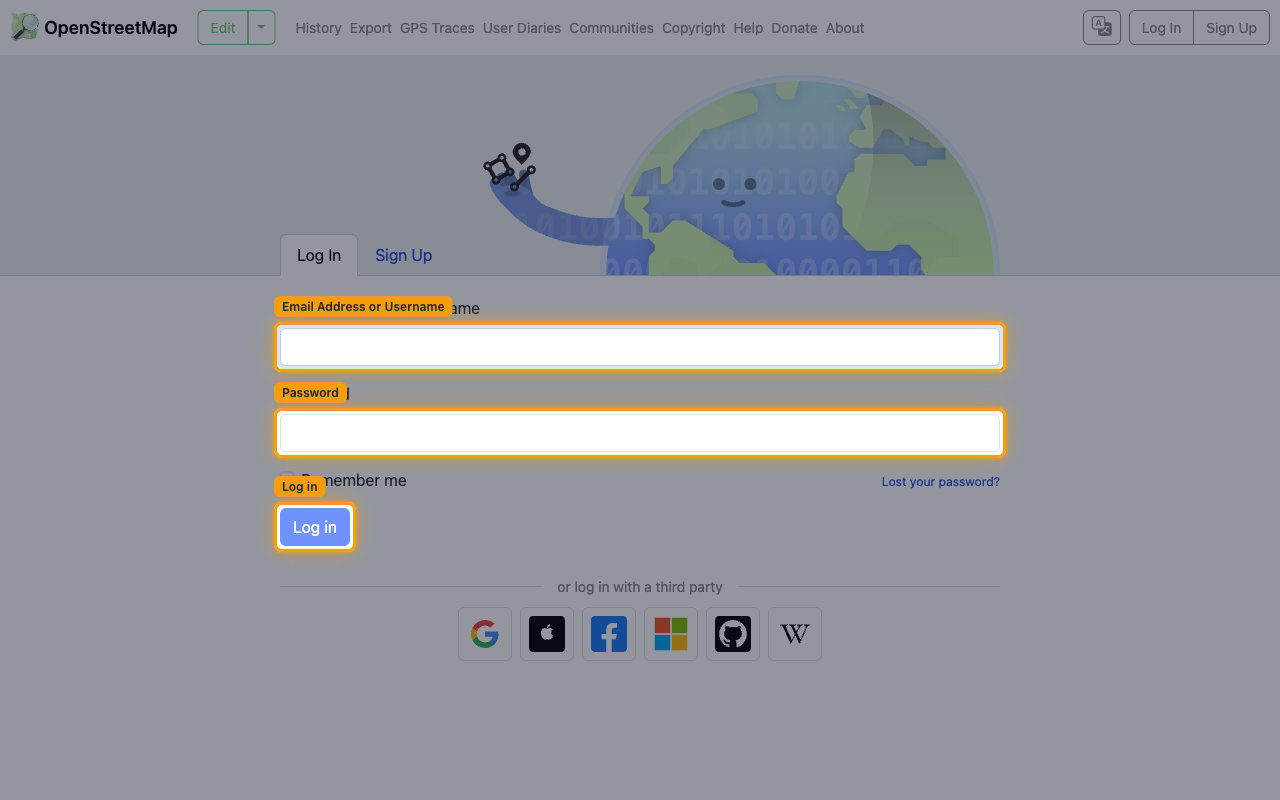
Sign in to the OpenStreetMap site for the environment you are connecting. Enter your Email Address or Username and Password and click Log in (or use one of the third-party sign-in providers).
- Production — OpenStreetMap sign-in
- Sandbox — OpenStreetMap dev sandbox sign-in
- Create the application in the same environment you will connect — the Sandbox has its own accounts and its own app registrations, separate from Production.
Open the OAuth 2 Applications page
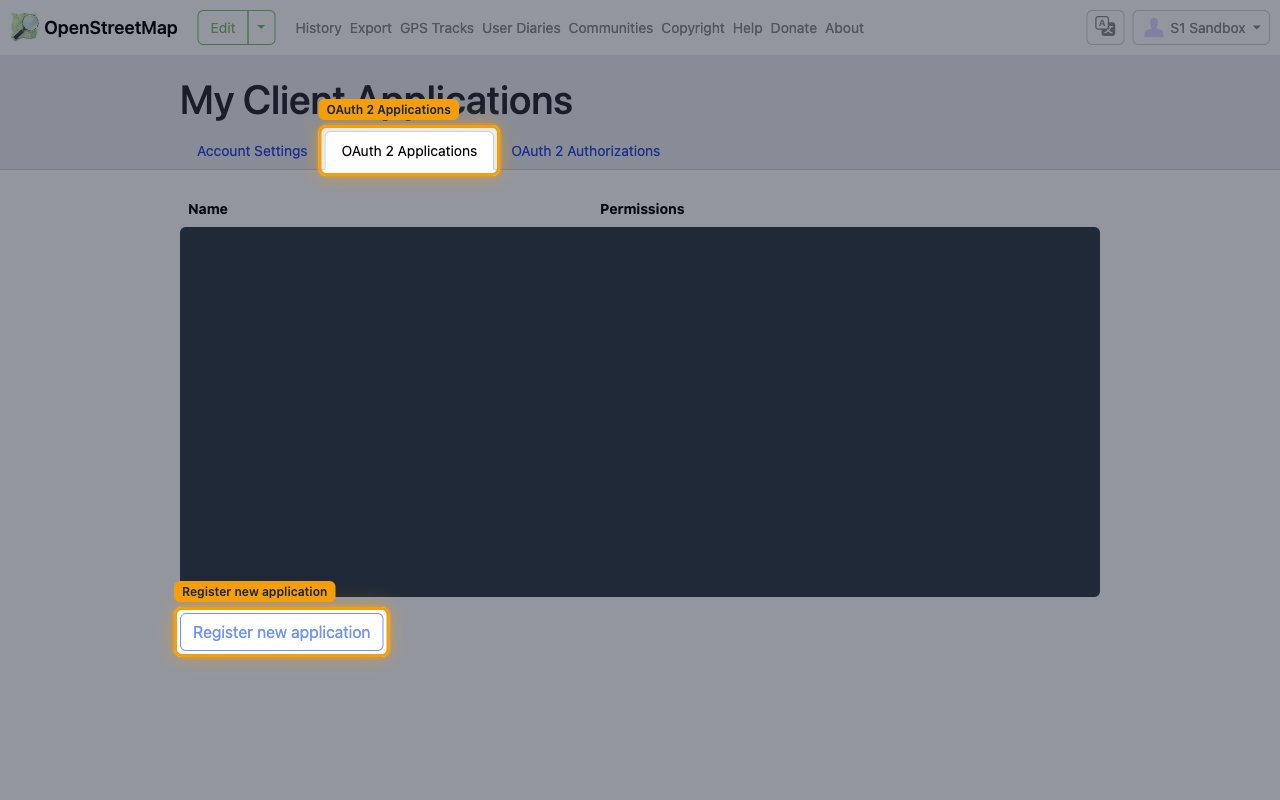
Open your account’s OAuth 2 Applications page and start a new registration. Click your
user icon in the top-right corner, choose your account, then open the OAuth 2
Applications tab and click Register new application.
*Note: you can also open the page directly —
Production or
Sandbox.*
Configure the application
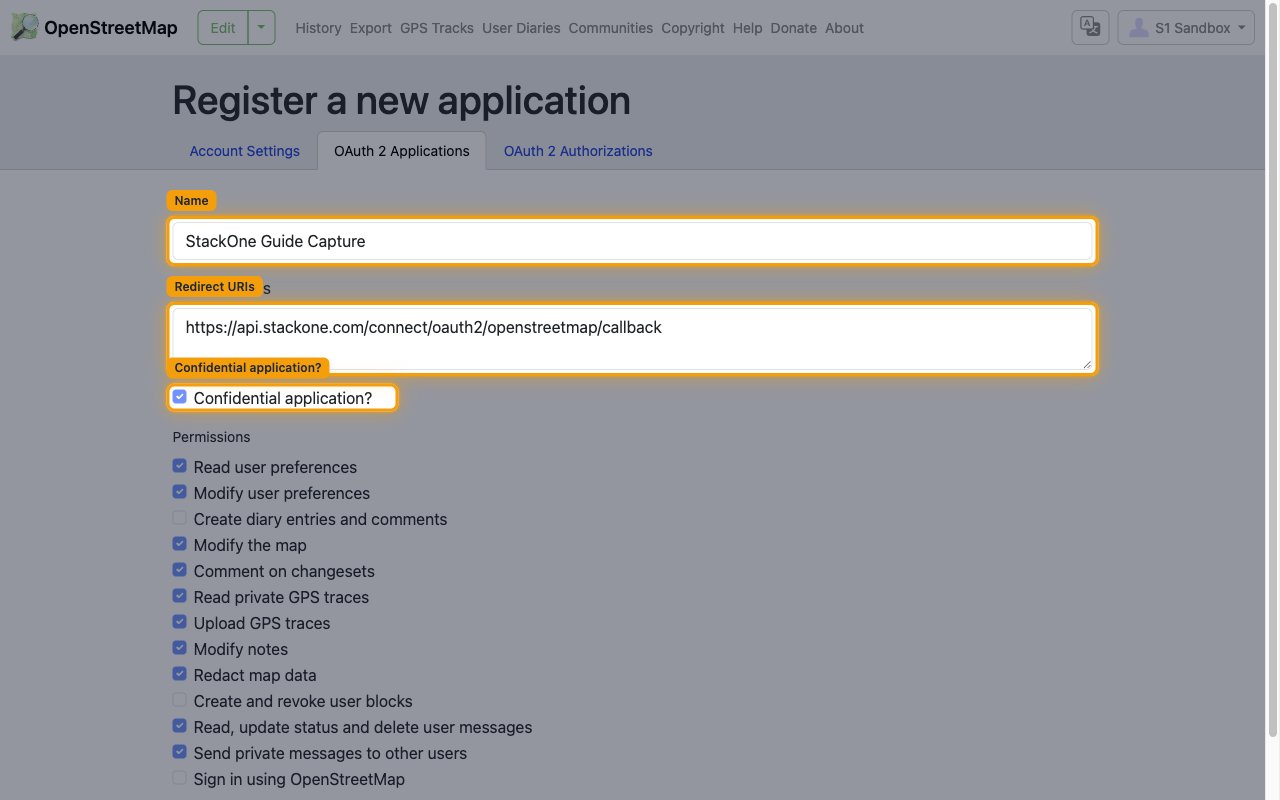
On the Register a new application page, fill in the application details:
- Name — a name for your application, for example
StackOne. - In Redirect URIs, enter StackOne’s callback URL exactly:
https://api.stackone.com/connect/oauth2/openstreetmap/callback - Leave Confidential application? ticked — StackOne is a confidential (server-side) client.
Select permissions and create the application
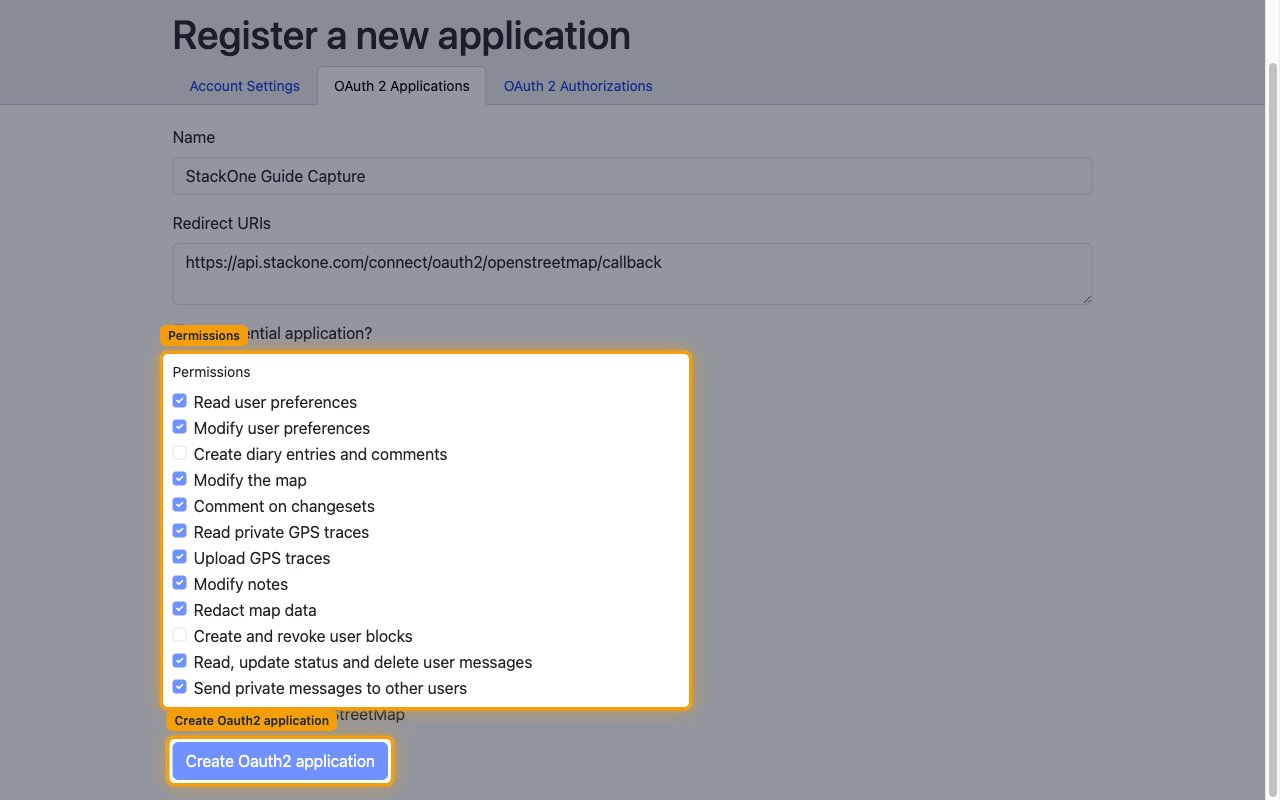
In the Permissions section, tick the permissions that match the StackOne actions you plan to use, then click Create Oauth2 application. Only the scopes shown in the Scopes Selected panel are required for your selected actions — grant the full list below only if you want every StackOne action available:
- Read user preferences (
read_prefs) and Modify user preferences (write_prefs) — user preference actions - Modify the map (
write_api) and Comment on changesets (write_changeset_comments) — element, changeset, and changeset-comment write actions - Read private GPS traces (
read_gpx) and Upload GPS traces (write_gpx) — GPS trace actions - Modify notes (
write_notes) — note write actions; Redact map data (write_redactions) — optional, only for moderator/Data Working Group redaction actions - Read, update status and delete user messages (
consume_messages) and Send private messages to other users (send_messages) — private message actions
Save and copy your credentials
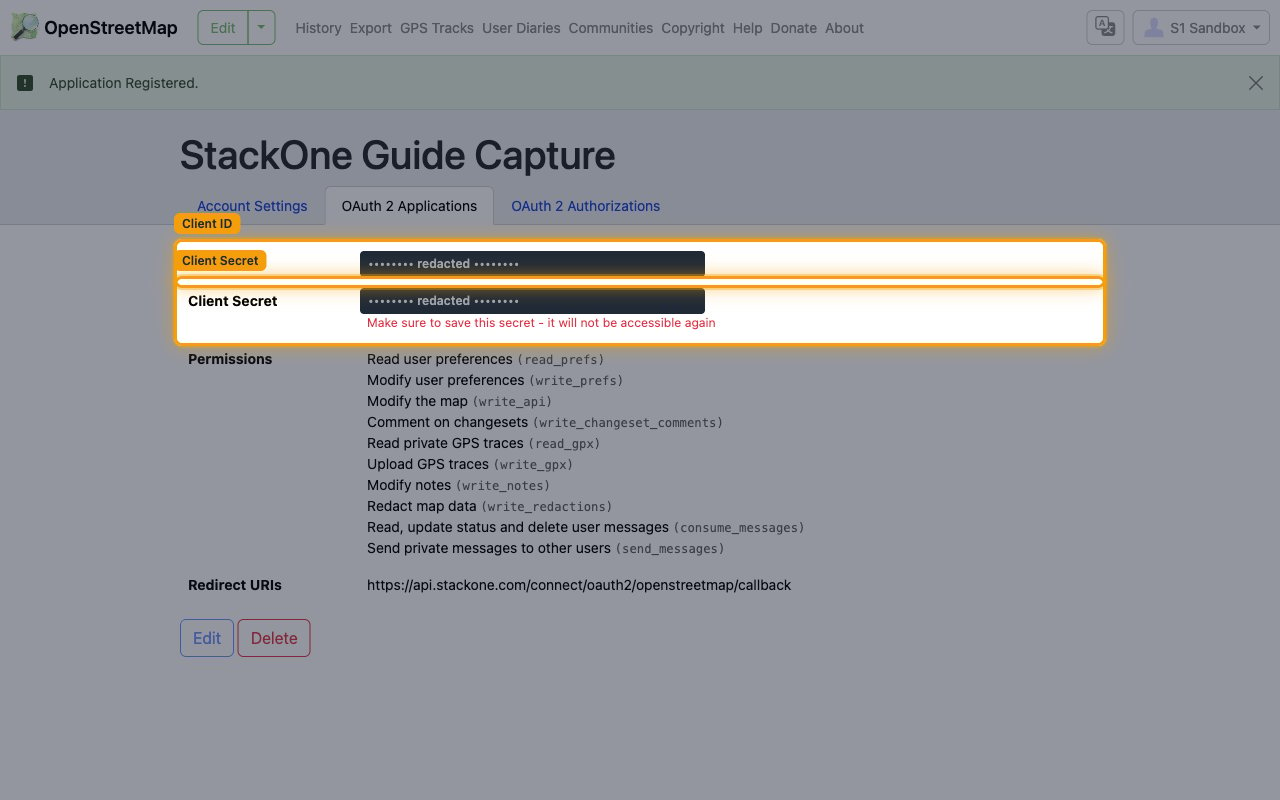
After you create the application, OpenStreetMap shows its Client ID and Client Secret. Copy both values into the StackOne Connector profile.
- Copy the Client ID value and paste it into the Client ID field in the StackOne Connector profile.
- Copy the Client Secret value and paste it into the Client Secret field in the StackOne Connector profile.
- The Client Secret is only displayed once — the page warns Make sure to save this secret - it will not be accessible again. Copy it before leaving the page.
- The Scopes field in the StackOne Connector profile is optional — leave it blank to request the full set of permissions, or enter a space-separated list to request only specific scopes.
Creating the StackOne Connector Profile
To create the Connector Profile in StackOne for OpenStreetMap:Open the connector
Choose actions and events
- Click Add Profile.
- If the connector offers more than one authentication method, set the Auth Method filter to OAuth 2.0.
- Select the actions, and any events, to enable for this Connector Profile.
- Click Continue.
Set up authentication
- Select Authentication Type as OAuth 2.0.
- Fill out the fields using details retrieved from your provider:
- Client ID
- Client Secret
- Scopes (Optional)
- Click Create Profile.