

Find your project identifiers
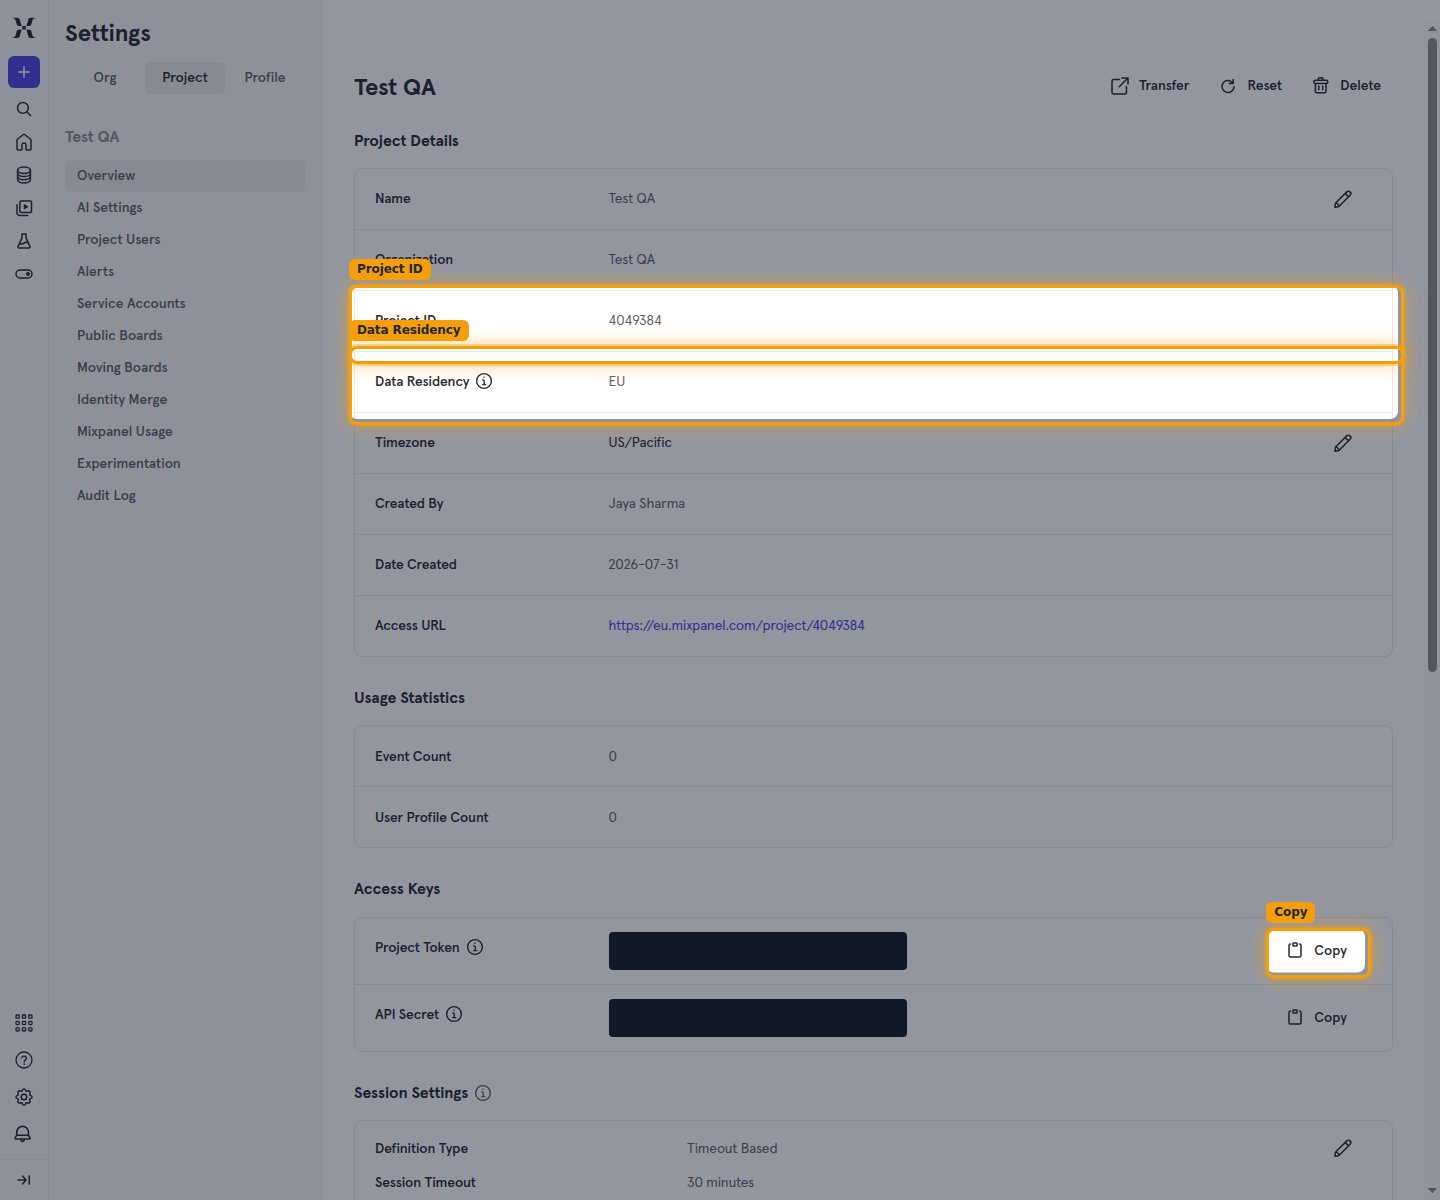
Your Project Token, Project ID, and Data Residency are all shown together on your project’s Overview page.
1
Open the project overview
Open the Settings (gear) menu, point at Settings, and click Project Settings. The Overview page opens by default.
2
Copy your Project Token
In the Access Keys card, click Copy next to the Project Token field.
3
Copy your Project ID
In the Project Details card, find the Project ID. Copy the Value across.
- Format: a numeric identifier
- Example:
4011905
4
Select your data residency region
In the same Project Details card, the Data Residency row shows your project’s data center region. Select the matching value.
- US Data Residency — default for most accounts (
mixpanel.com). - EU Data Residency — for projects with EU data residency enabled (
eu.mixpanel.com).
Link the Account
1
Connect
- Click Connect.
- If applicable, the provider will redirect you to a sign-in or authorization page. Complete the provider’s authorization flow.
- Once authorization is successful, you will see a confirmation popup.
2
Use Actions
Connect an AI platform to the linked account’s actions. See AI Platforms.Other ways to call actions are listed in Protocols & SDKs.
Next Steps
Webhooks setup
Configure receiving Events for Mixpanel into StackOne.