

Choose your API base URL
Airbyte answers API calls at a different address for each kind of deployment, so StackOne needs the one that matches yours. If you open the Airbyte UI at cloud.airbyte.com, you are on Airbyte Cloud. If you open it at an address your own team runs, your deployment is self-managed.
Enter the matching value in the API Base URL field in StackOne Hub, with no trailing slash.
- Airbyte Cloud: enter
https://api.airbyte.com/v1. - Self-managed: enter
https://your-airbyte-host/api/public/v1, replacingyour-airbyte-hostwith the host you use to open the Airbyte UI.
Create an application
Applications hold the client ID and client secret the connector exchanges for access tokens. The application acts as the user who created it and inherits that user’s permissions.
Open the Applications page
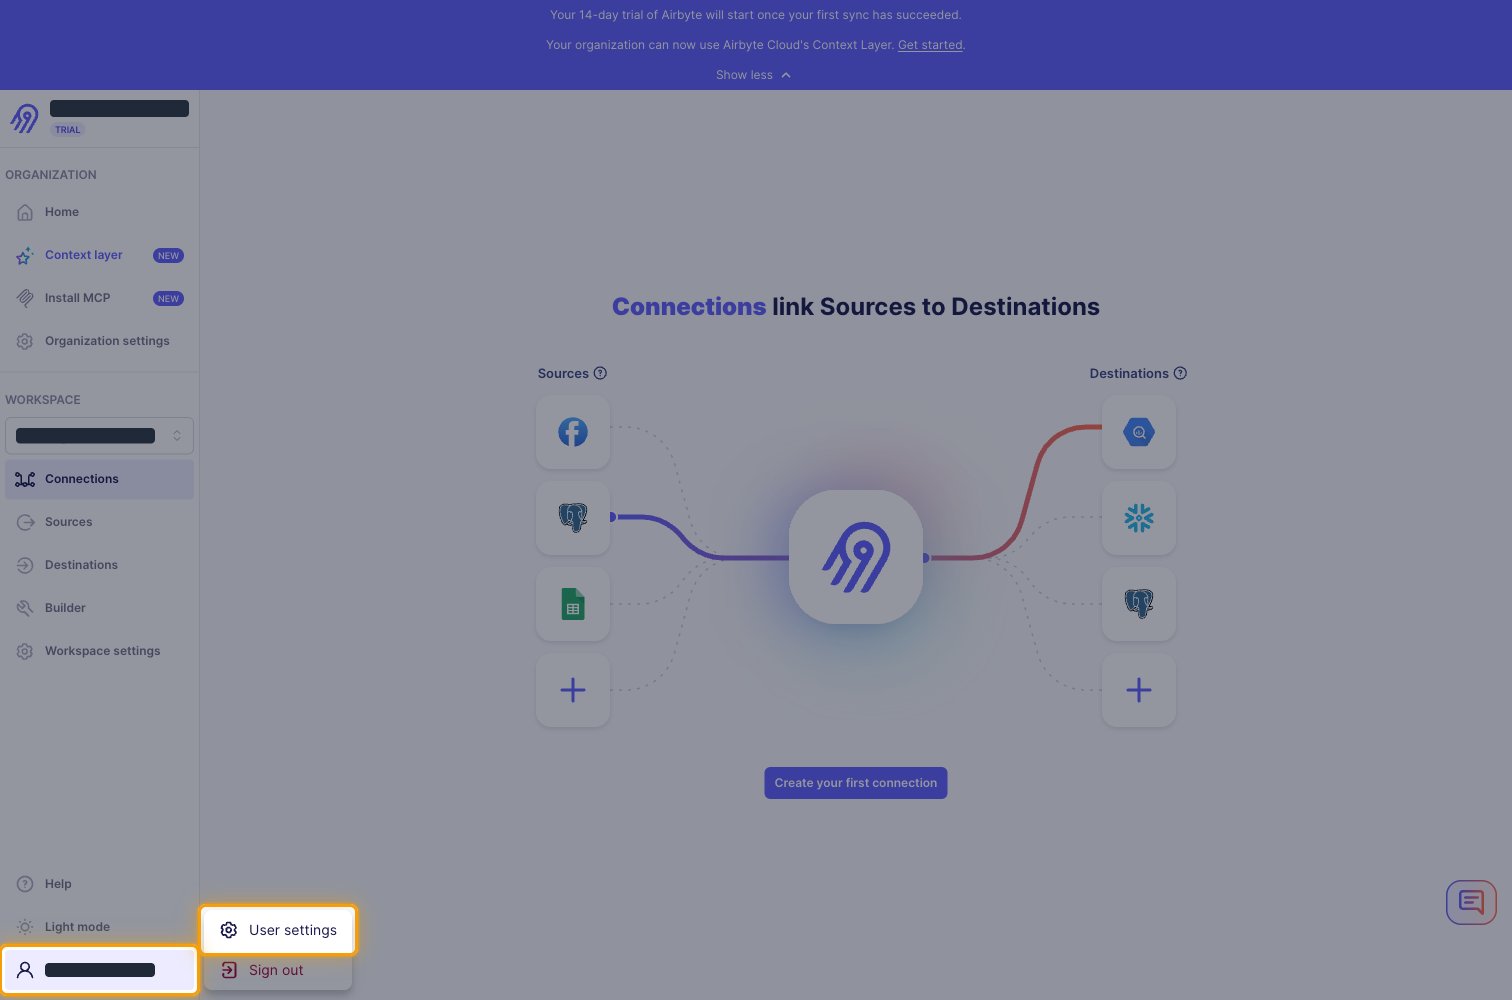
Sign in to Airbyte Cloud, click your name at the bottom of the left sidebar, and choose User settings. Airbyte opens Profile, so select Applications from the Account list.
Create the application
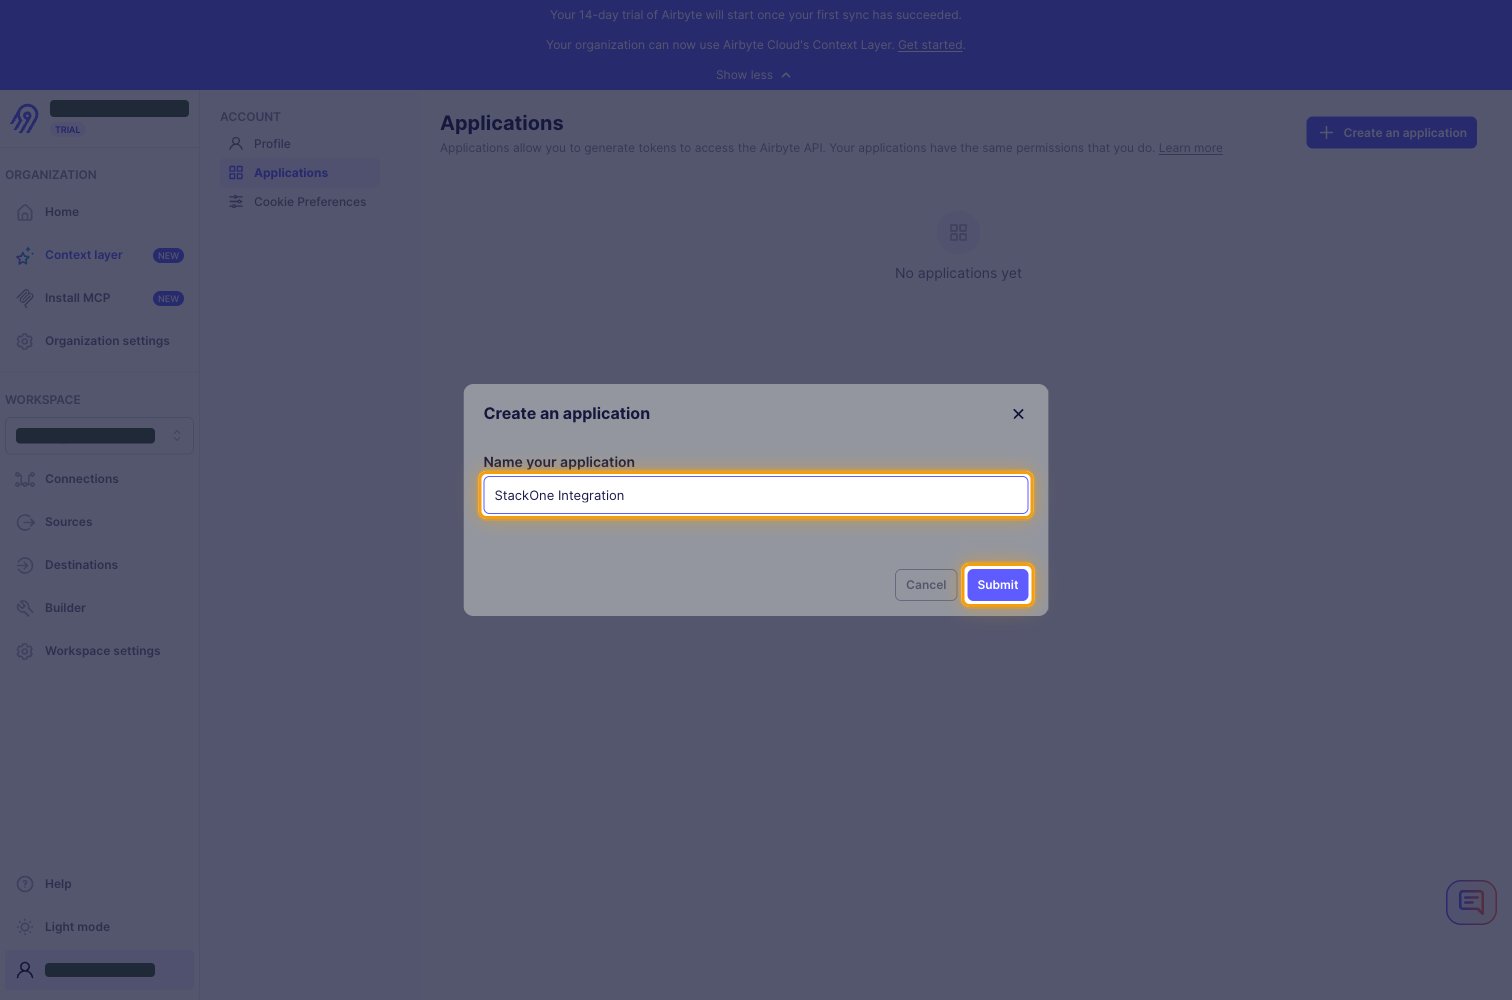
Click Create an application in the top right. Under Name your application, enter StackOne Integration, then click Submit.
- Self-managed (Core) deployments already have one application ready under Applications, so skip this step.
Copy the credentials
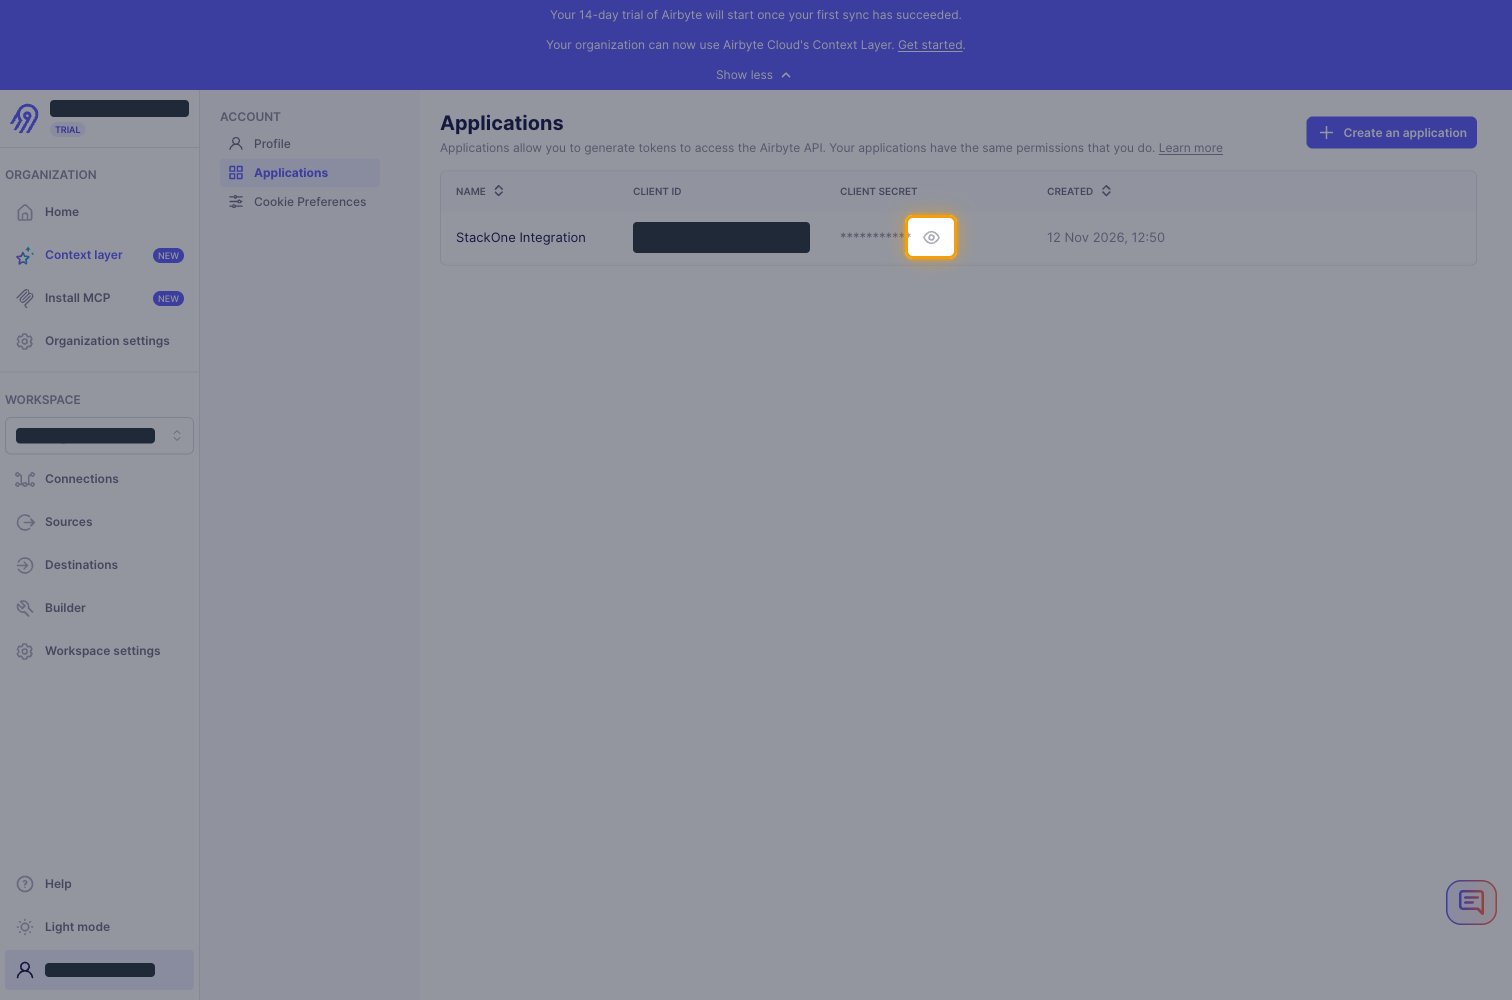
Your application appears in the table under Client ID and Client Secret. Copy the client ID into the Client ID field in StackOne Hub. Click the eye icon beside the masked client secret to reveal it, then copy it into the Client Secret field. You can reveal the secret again whenever you need it.
Optional - add a SCIM token for user groups
User groups are read from Airbyte’s SCIM API. SCIM is an add-on to single sign-on that Airbyte turns on for your organization on request, so contact Airbyte before you start. Leave the SCIM Token and SCIM Base URL fields empty if you do not use SCIM.
- The SSO tab appears under Organization settings only on the Plus, Pro, and Enterprise Flex plans. On Core and Standard the tab is absent and SCIM is unavailable.
- SCIM itself needs the Pro or Enterprise Flex plan, with SCIM enabled for your organization by Airbyte.
Open the SCIM section
In Airbyte, click Organization settings in the left sidebar, then open the SSO tab and find the SCIM section.
Enable SCIM
Choose your Identity provider, then click Enable SCIM. Airbyte shows a SCIM base URL and a Bearer token.
Copy the values into StackOne Hub
Copy the SCIM base URL into the SCIM Base URL field and the Bearer token into the SCIM Token field in StackOne Hub. Airbyte shows the bearer token only once, and keeps showing the base URL afterwards. If you lose the token, click Generate new token to issue a replacement.
Link the Account
Connect
- Click Connect.
- If applicable, the provider will redirect you to a sign-in or authorization page. Complete the provider’s authorization flow.
- Once authorization is successful, you will see a confirmation popup.
Use Actions