The Auth Configs section of the StackOne dashboard allows you to manage connectors for a StackOne Project. On the Connectors page, you can:Documentation Index
Fetch the complete documentation index at: https://docs.stackone.com/llms.txt
Use this file to discover all available pages before exploring further.
- View the list of all connectors for all the categories supported by StackOne (e.g.,
HRIS,ATS,IAM,CRM,Marketing,LMS, and more). Some connectors and categories are only available based on your plan or contract. If you do not see a category or connector that you would like, contact your support manager. - Enable, configure, and disable connectors.
- Quickly access linked accounts and logs related to the connectors
- Delete auth configurations
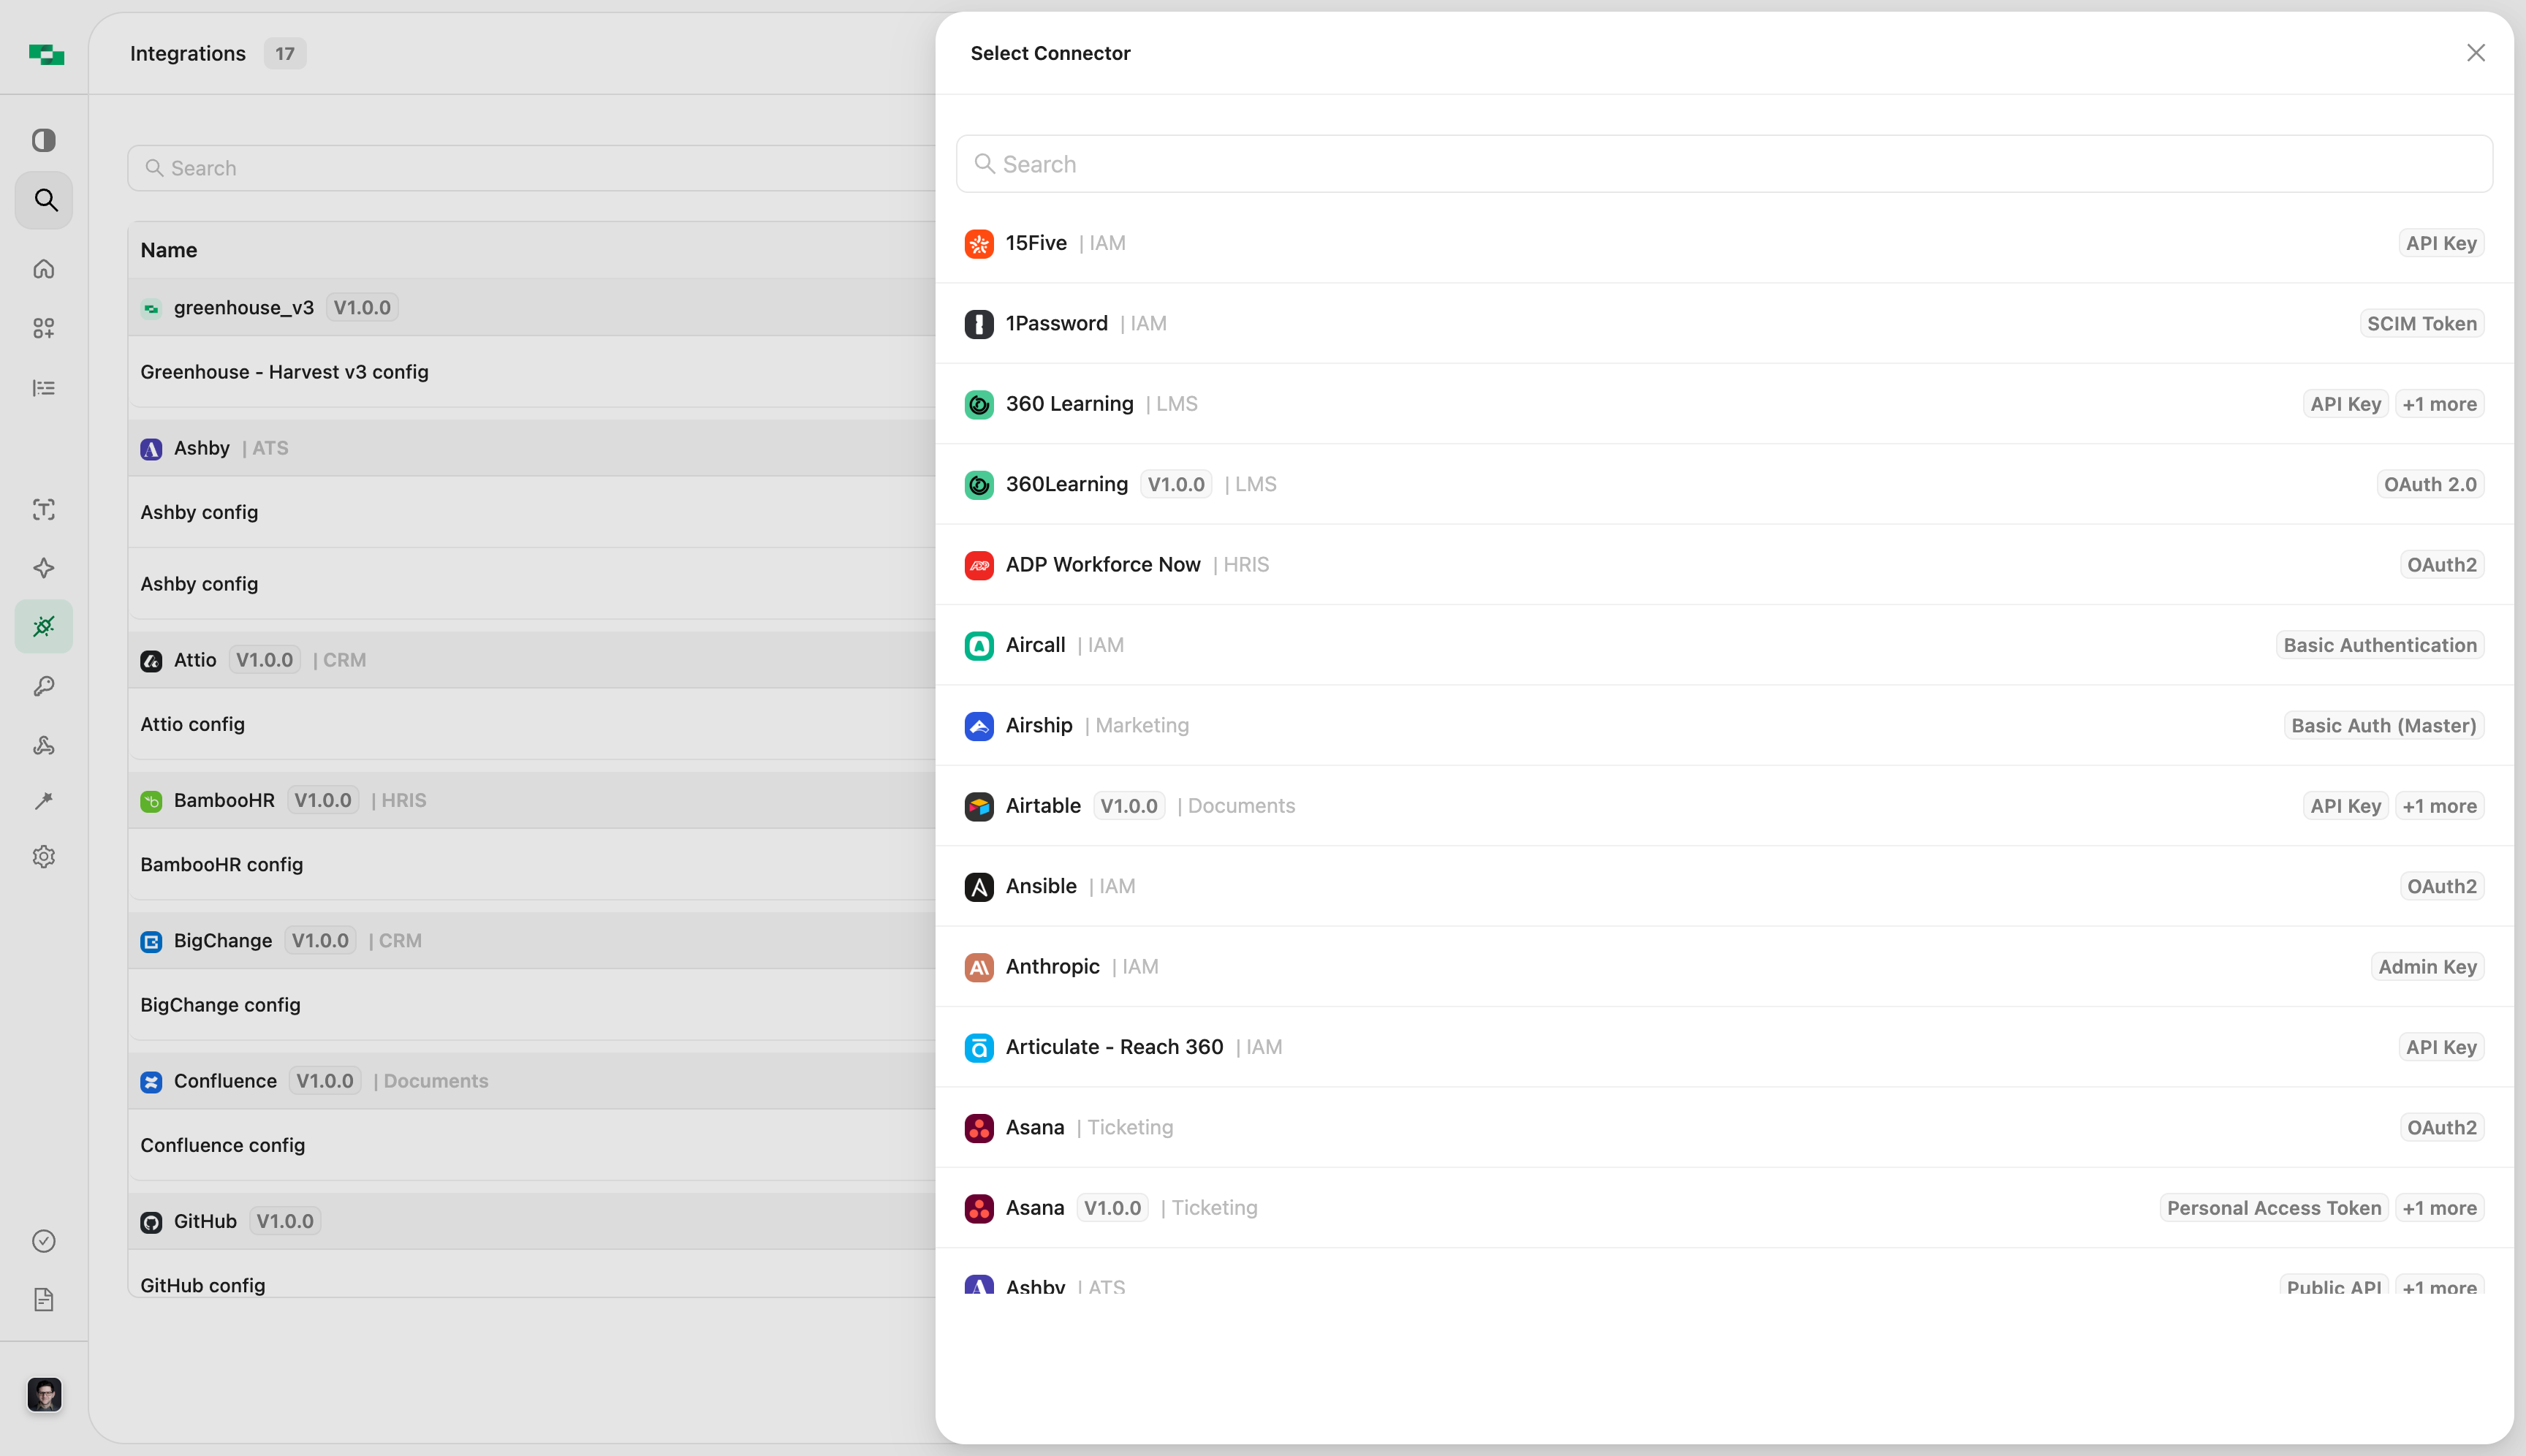
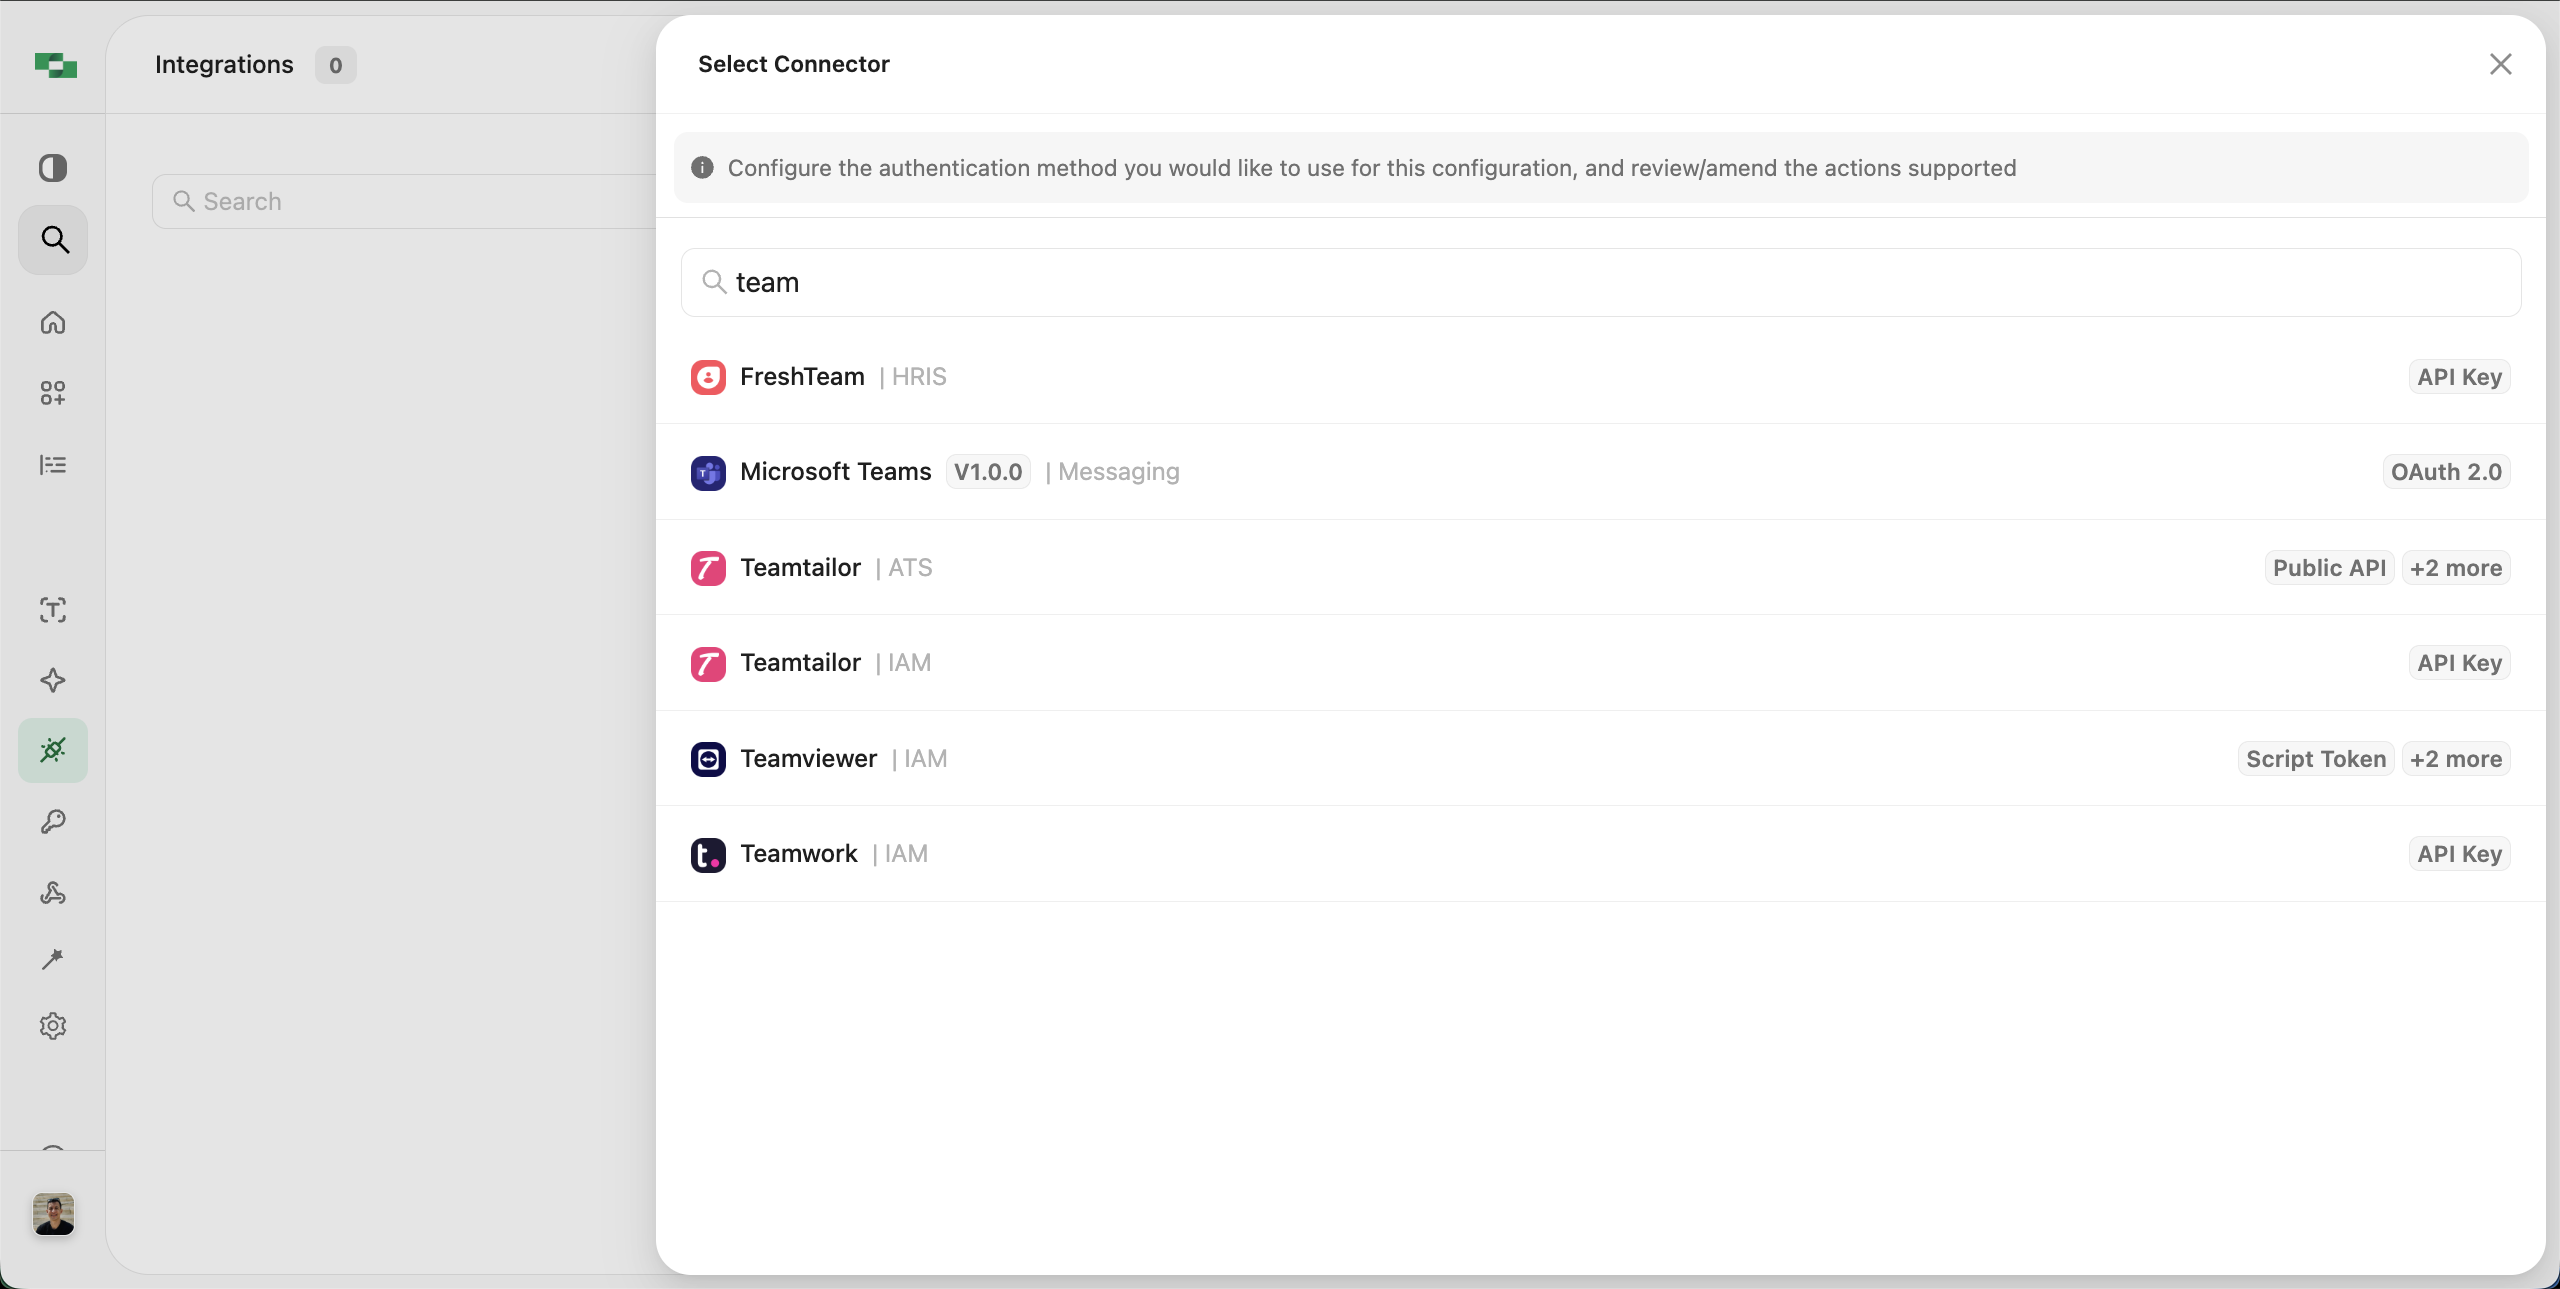
Configuring your first connector
To configure your first connector, navigate to the Auth Configs section and click on the+ button.
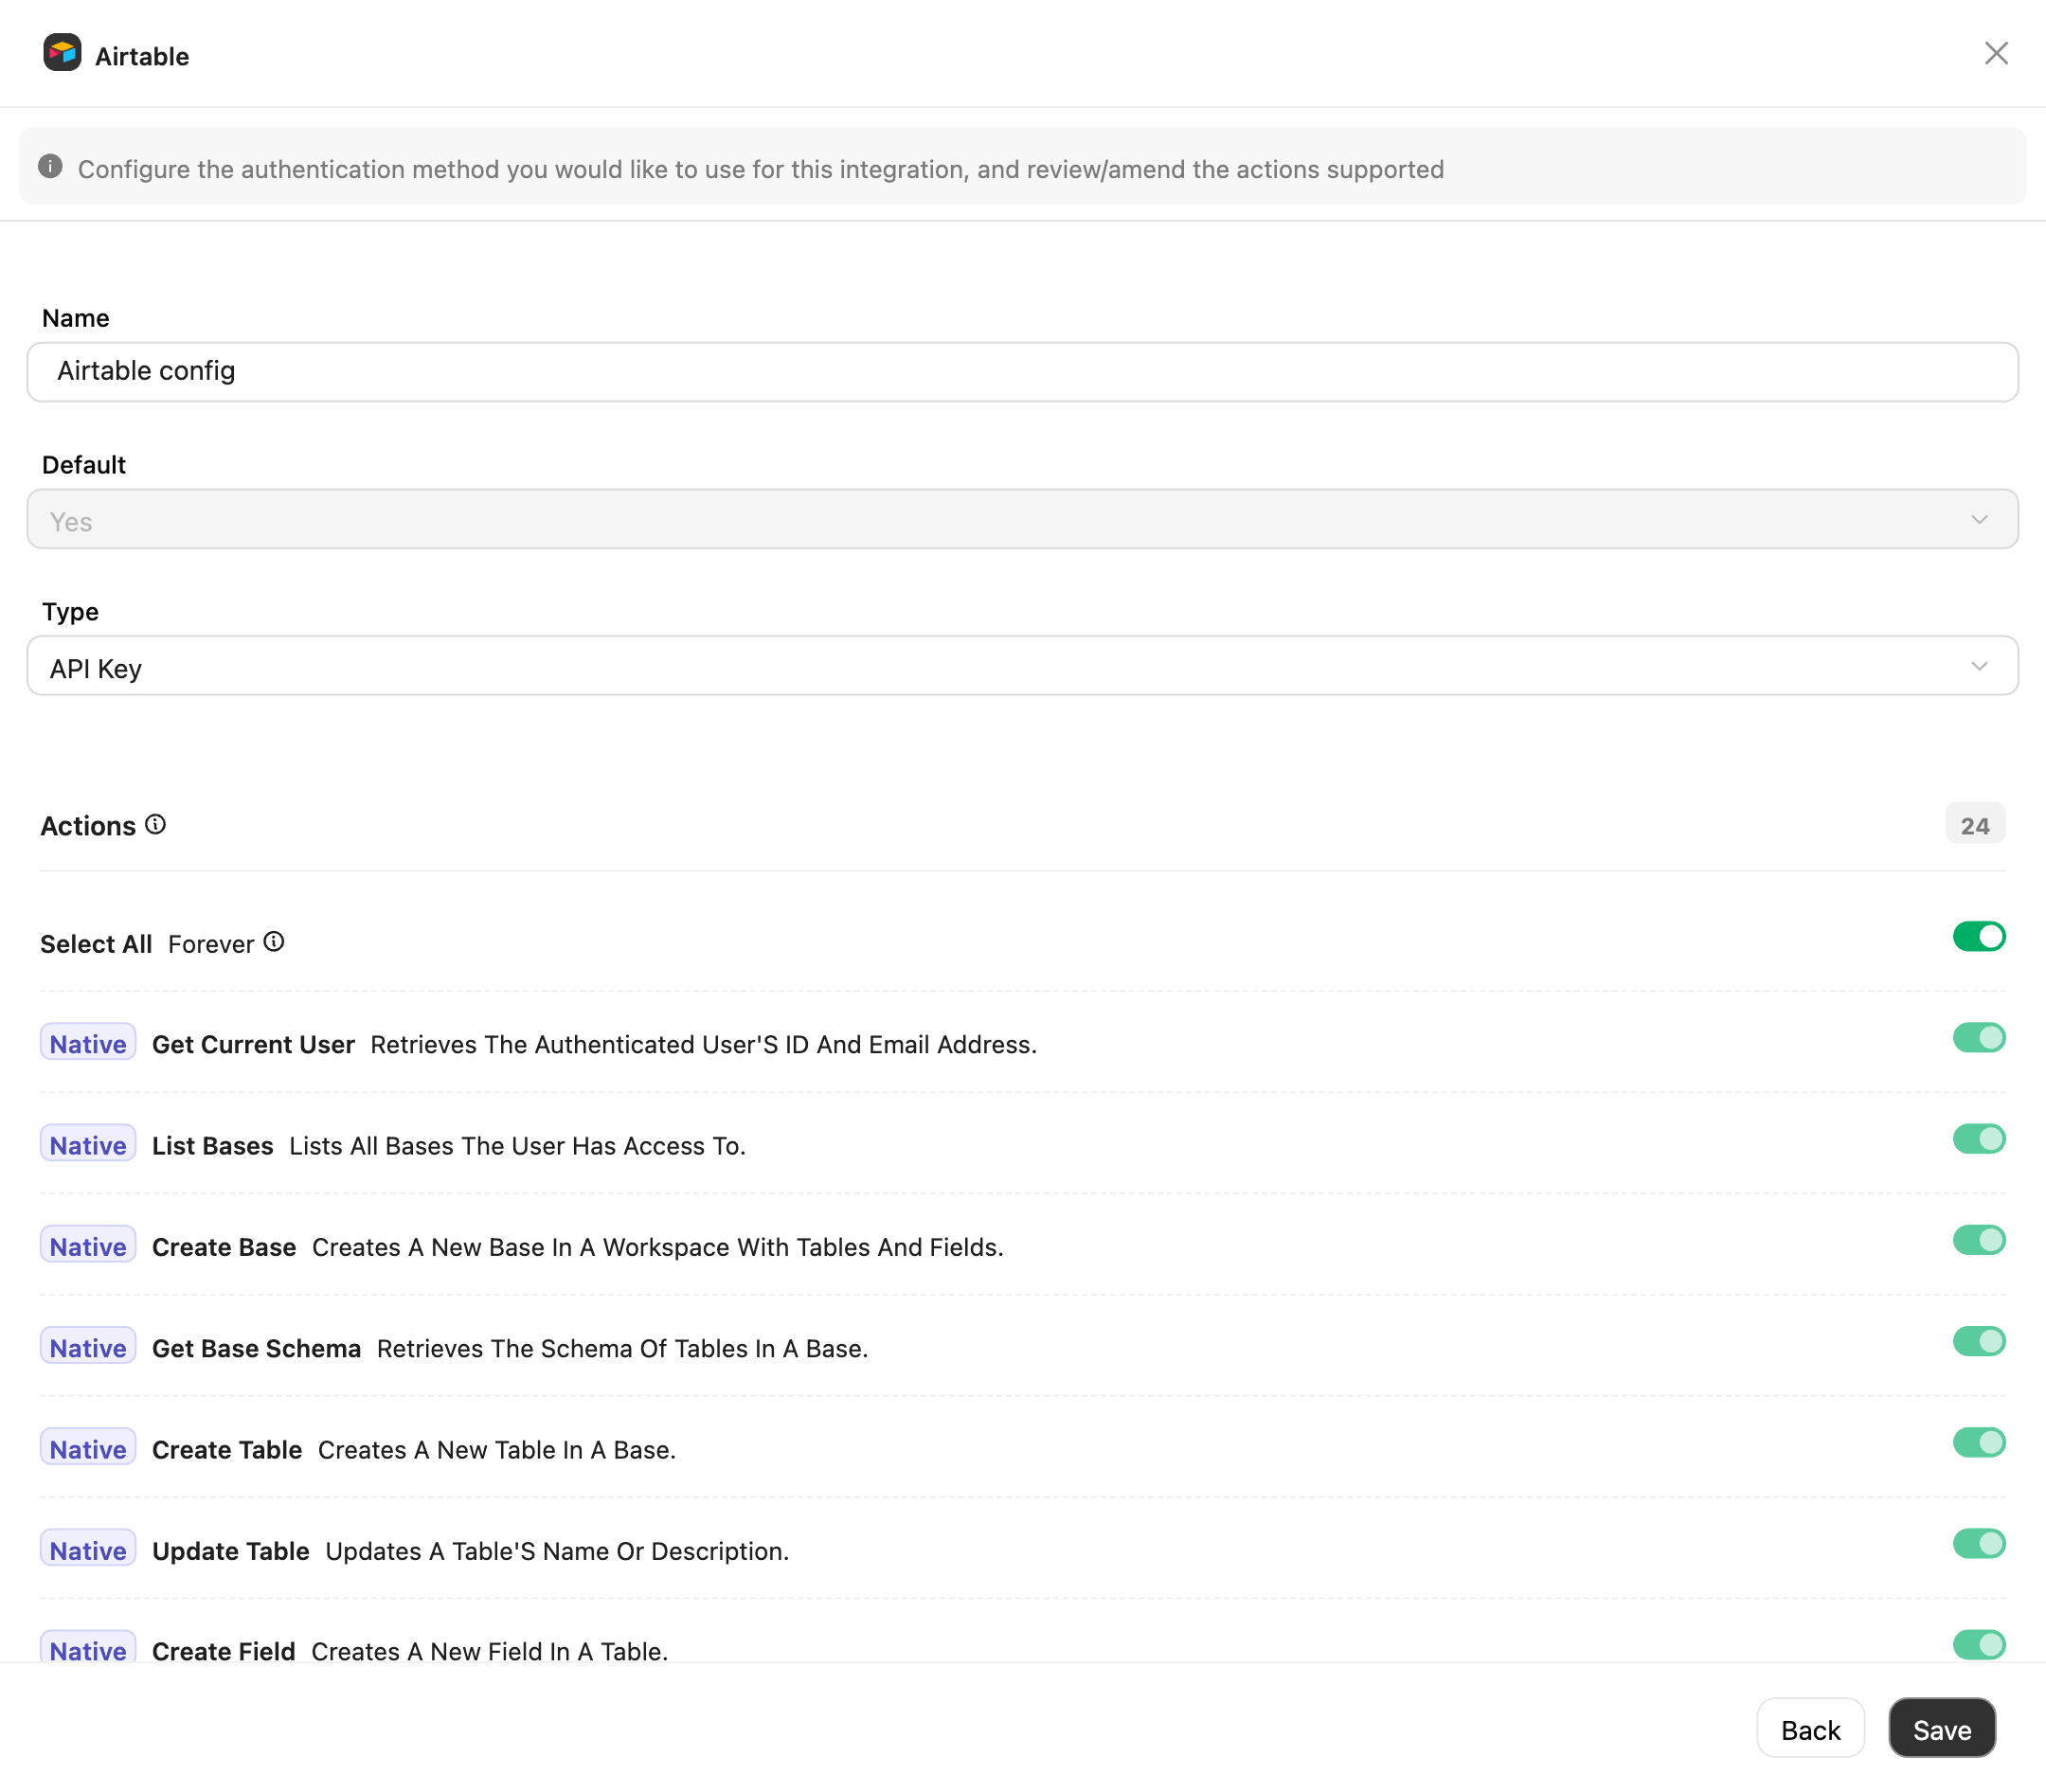
Save button. You will notice a “Default Configuration” dropdown that allows you to mark an auth config as the default configuration for that connector in the project. You can change the default configuration later once you have configured multiple auth configs for the same connector.
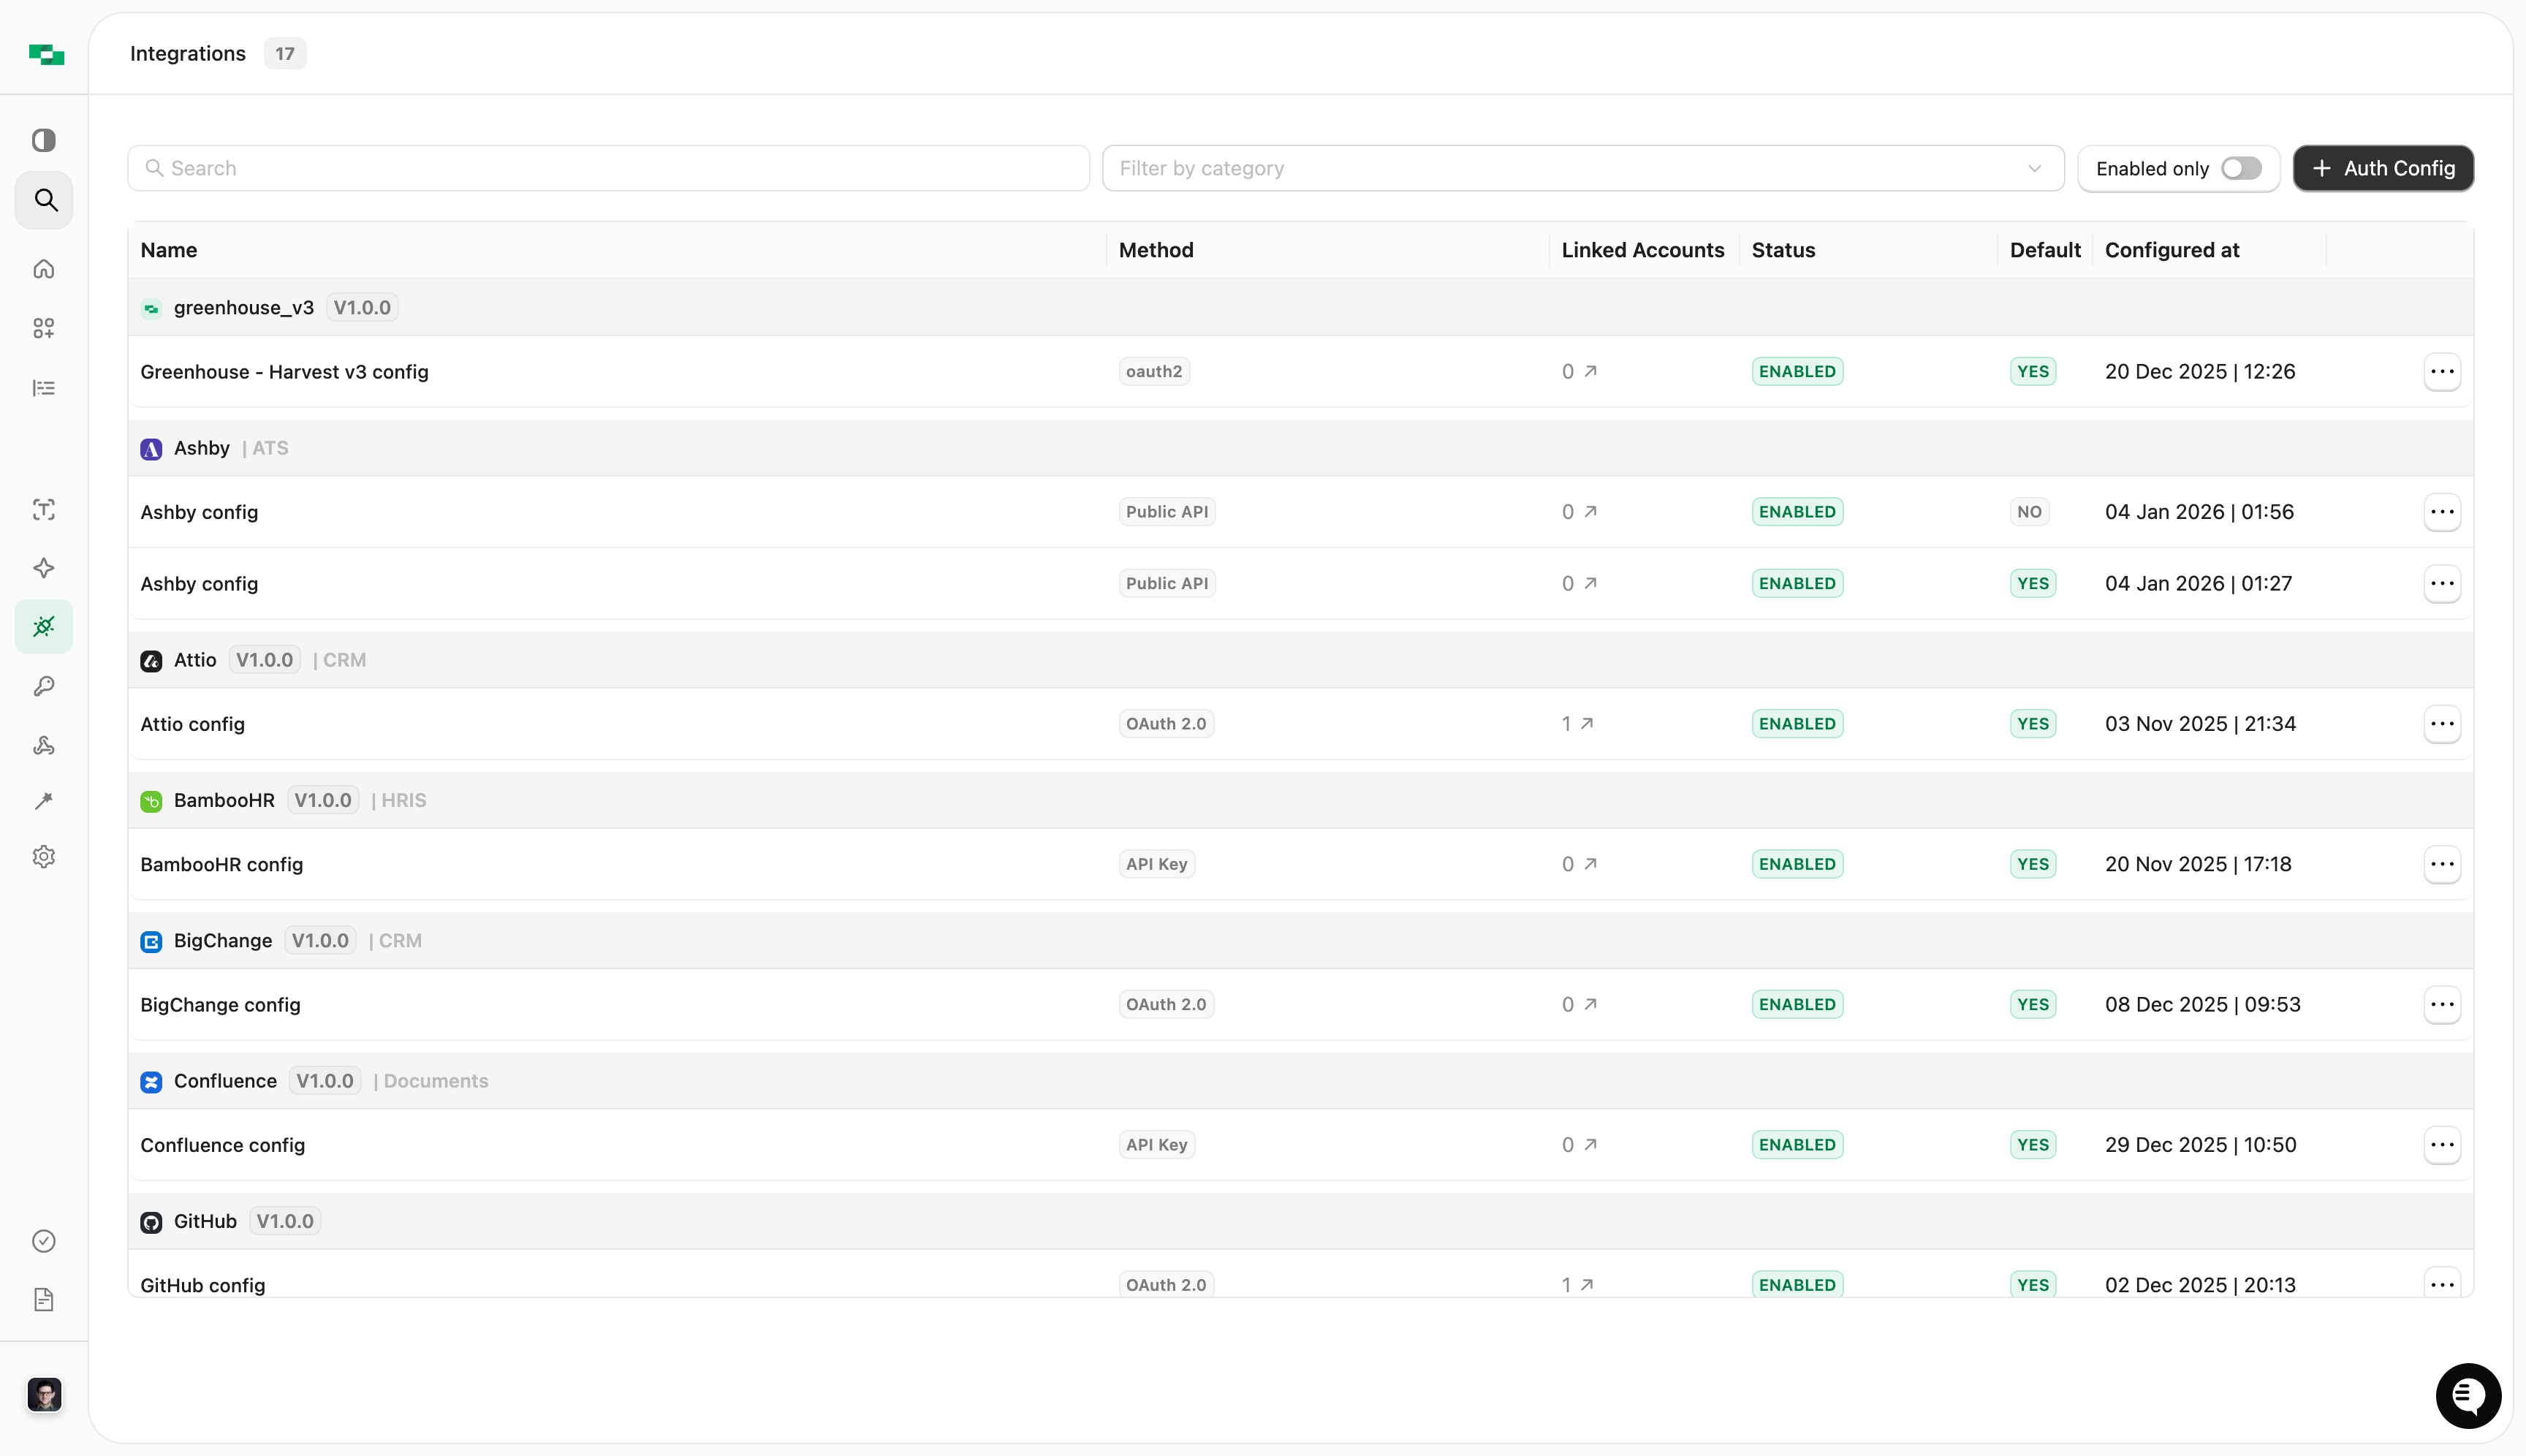
Once you have configured the connector, you will see it in the list of connectors.
Managing connectors
Enabling and disabling connectors
Setting up a connector for the first time will automatically set its state asenabled, meaning it will be displayed in the StackOne Hub and you will be able to retrieve a Connect Session token with the associated provider key.
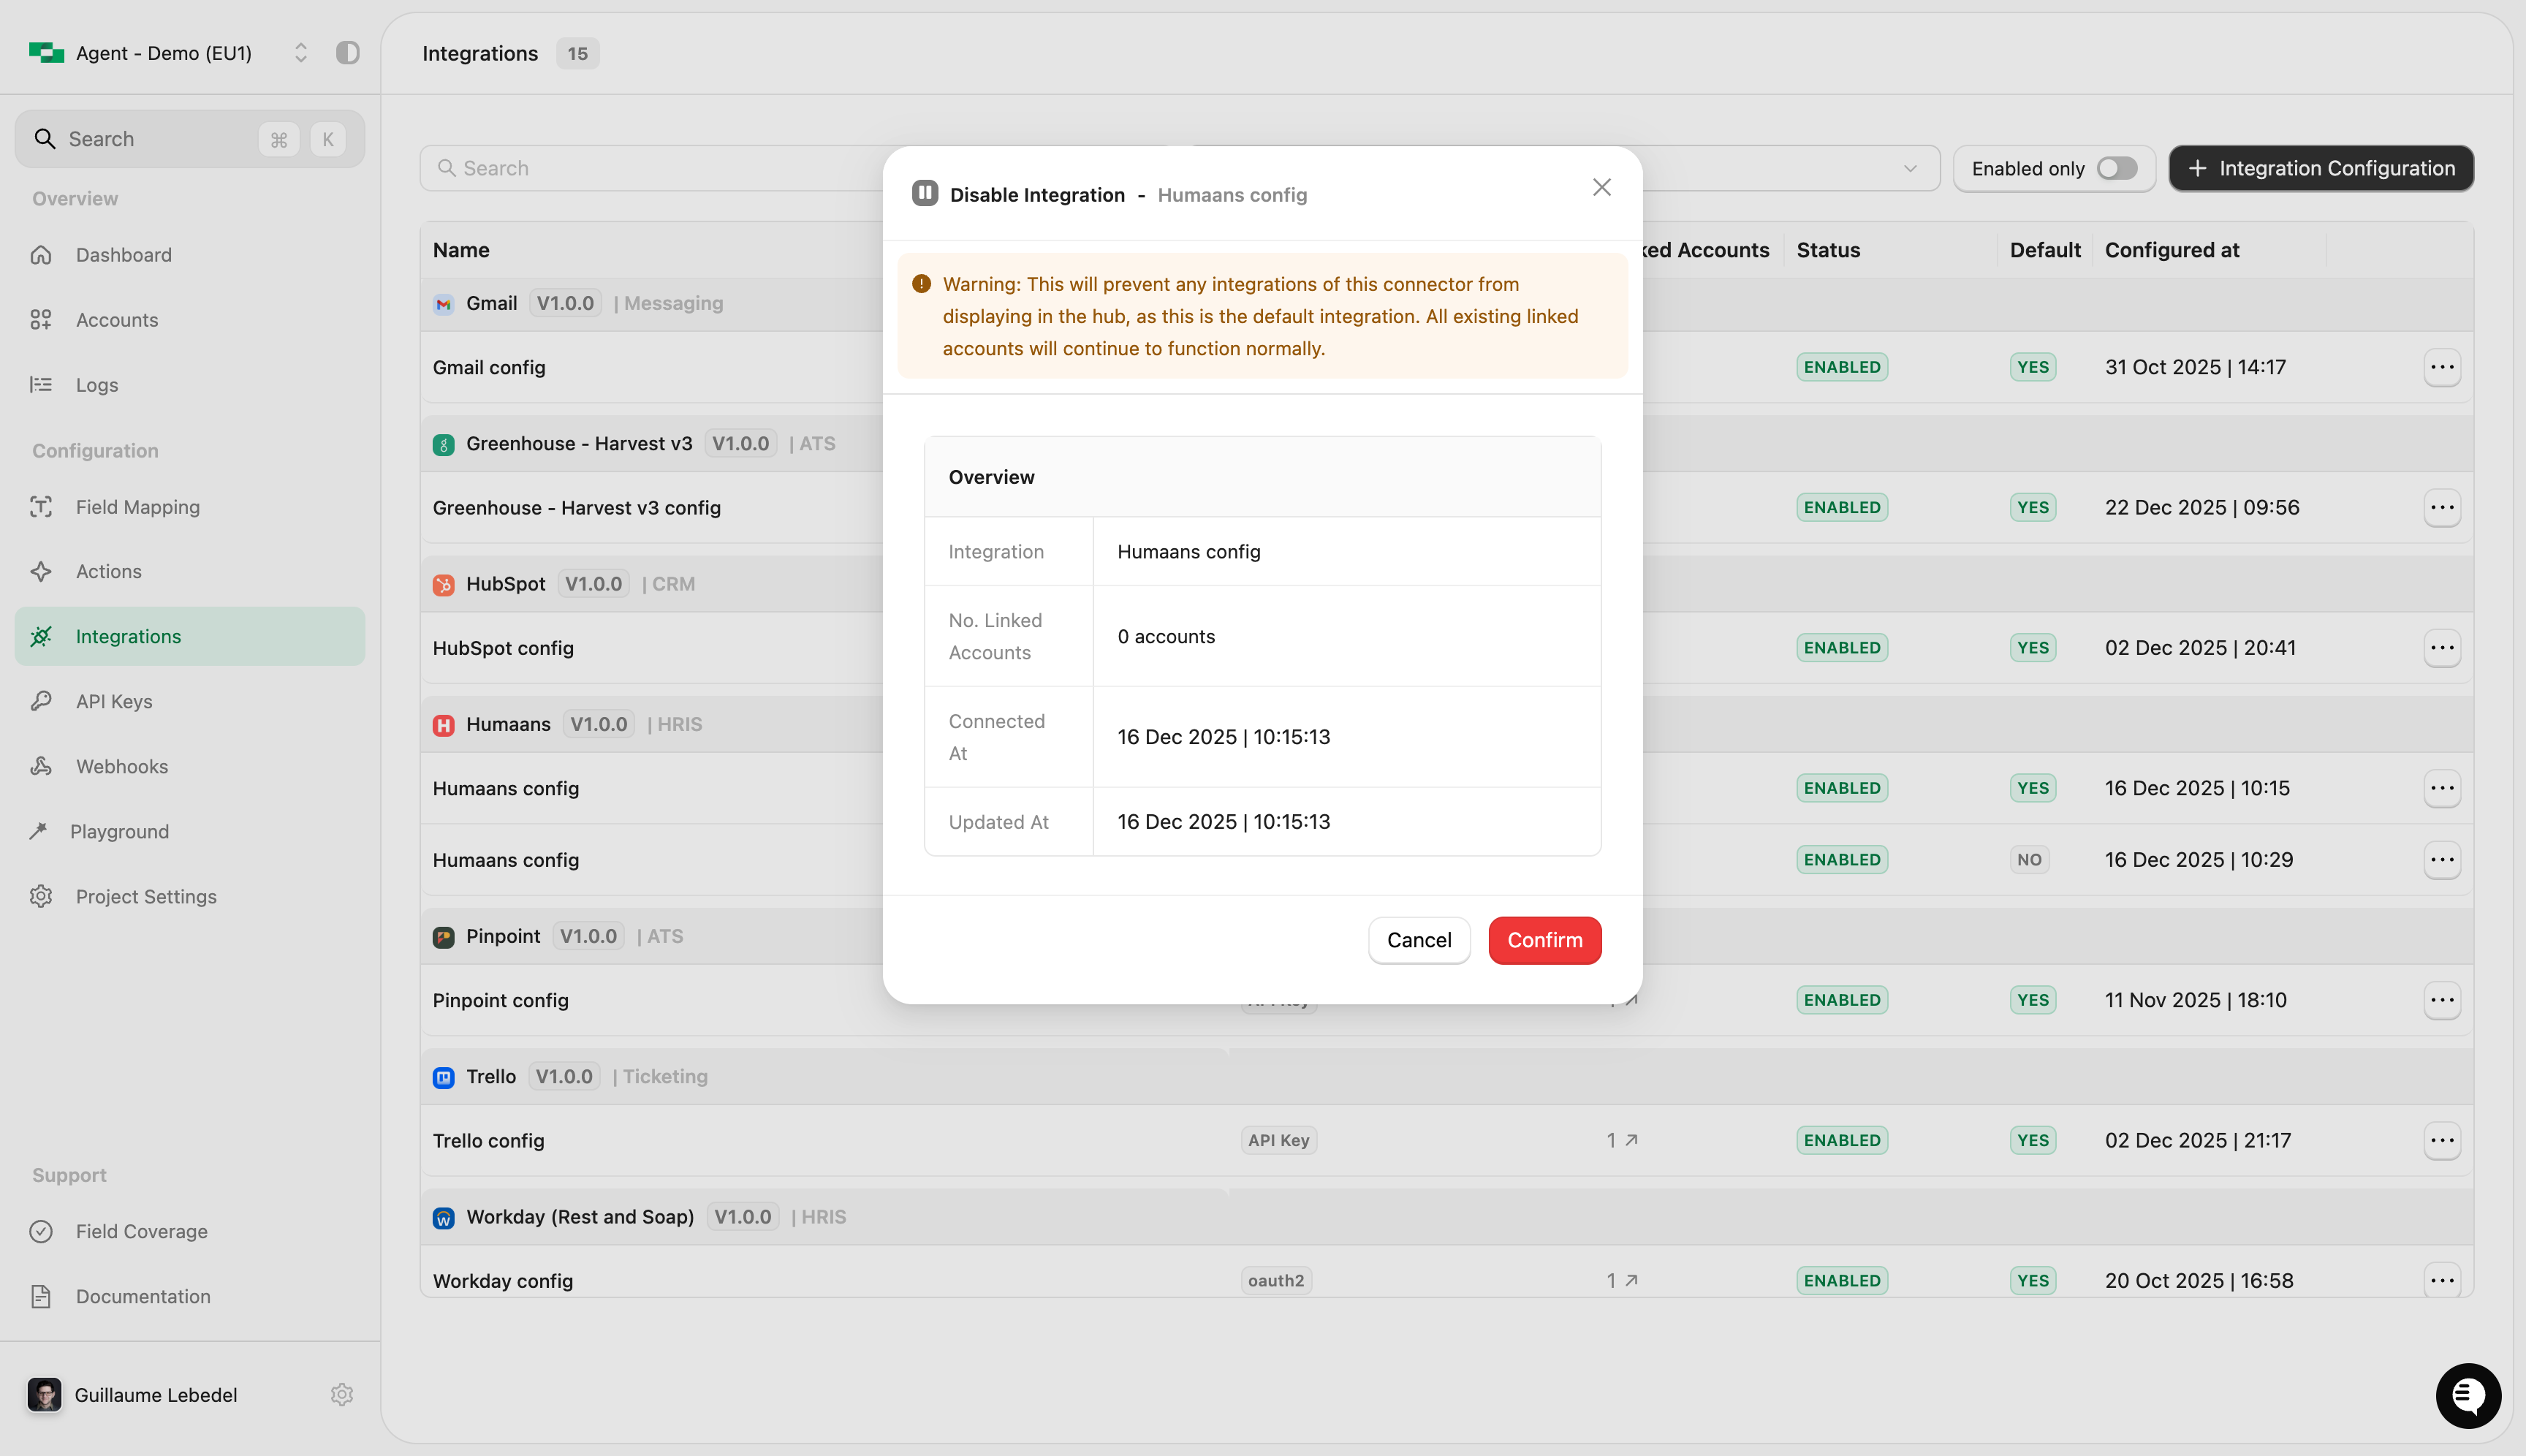
When disabling a connector, a warning will appear. Note that disabling a connector with linked accounts will make all those accounts go into an inactive status, and API requests to these accounts will not be permitted. You can switch any connector back to an enabled state just as easily, which will reset all associated linked accounts to an active status.
Connector settings are scoped to a specific project. If you need a connector to be configured on multiple StackOne projects, you will have to configure it for each individual project.
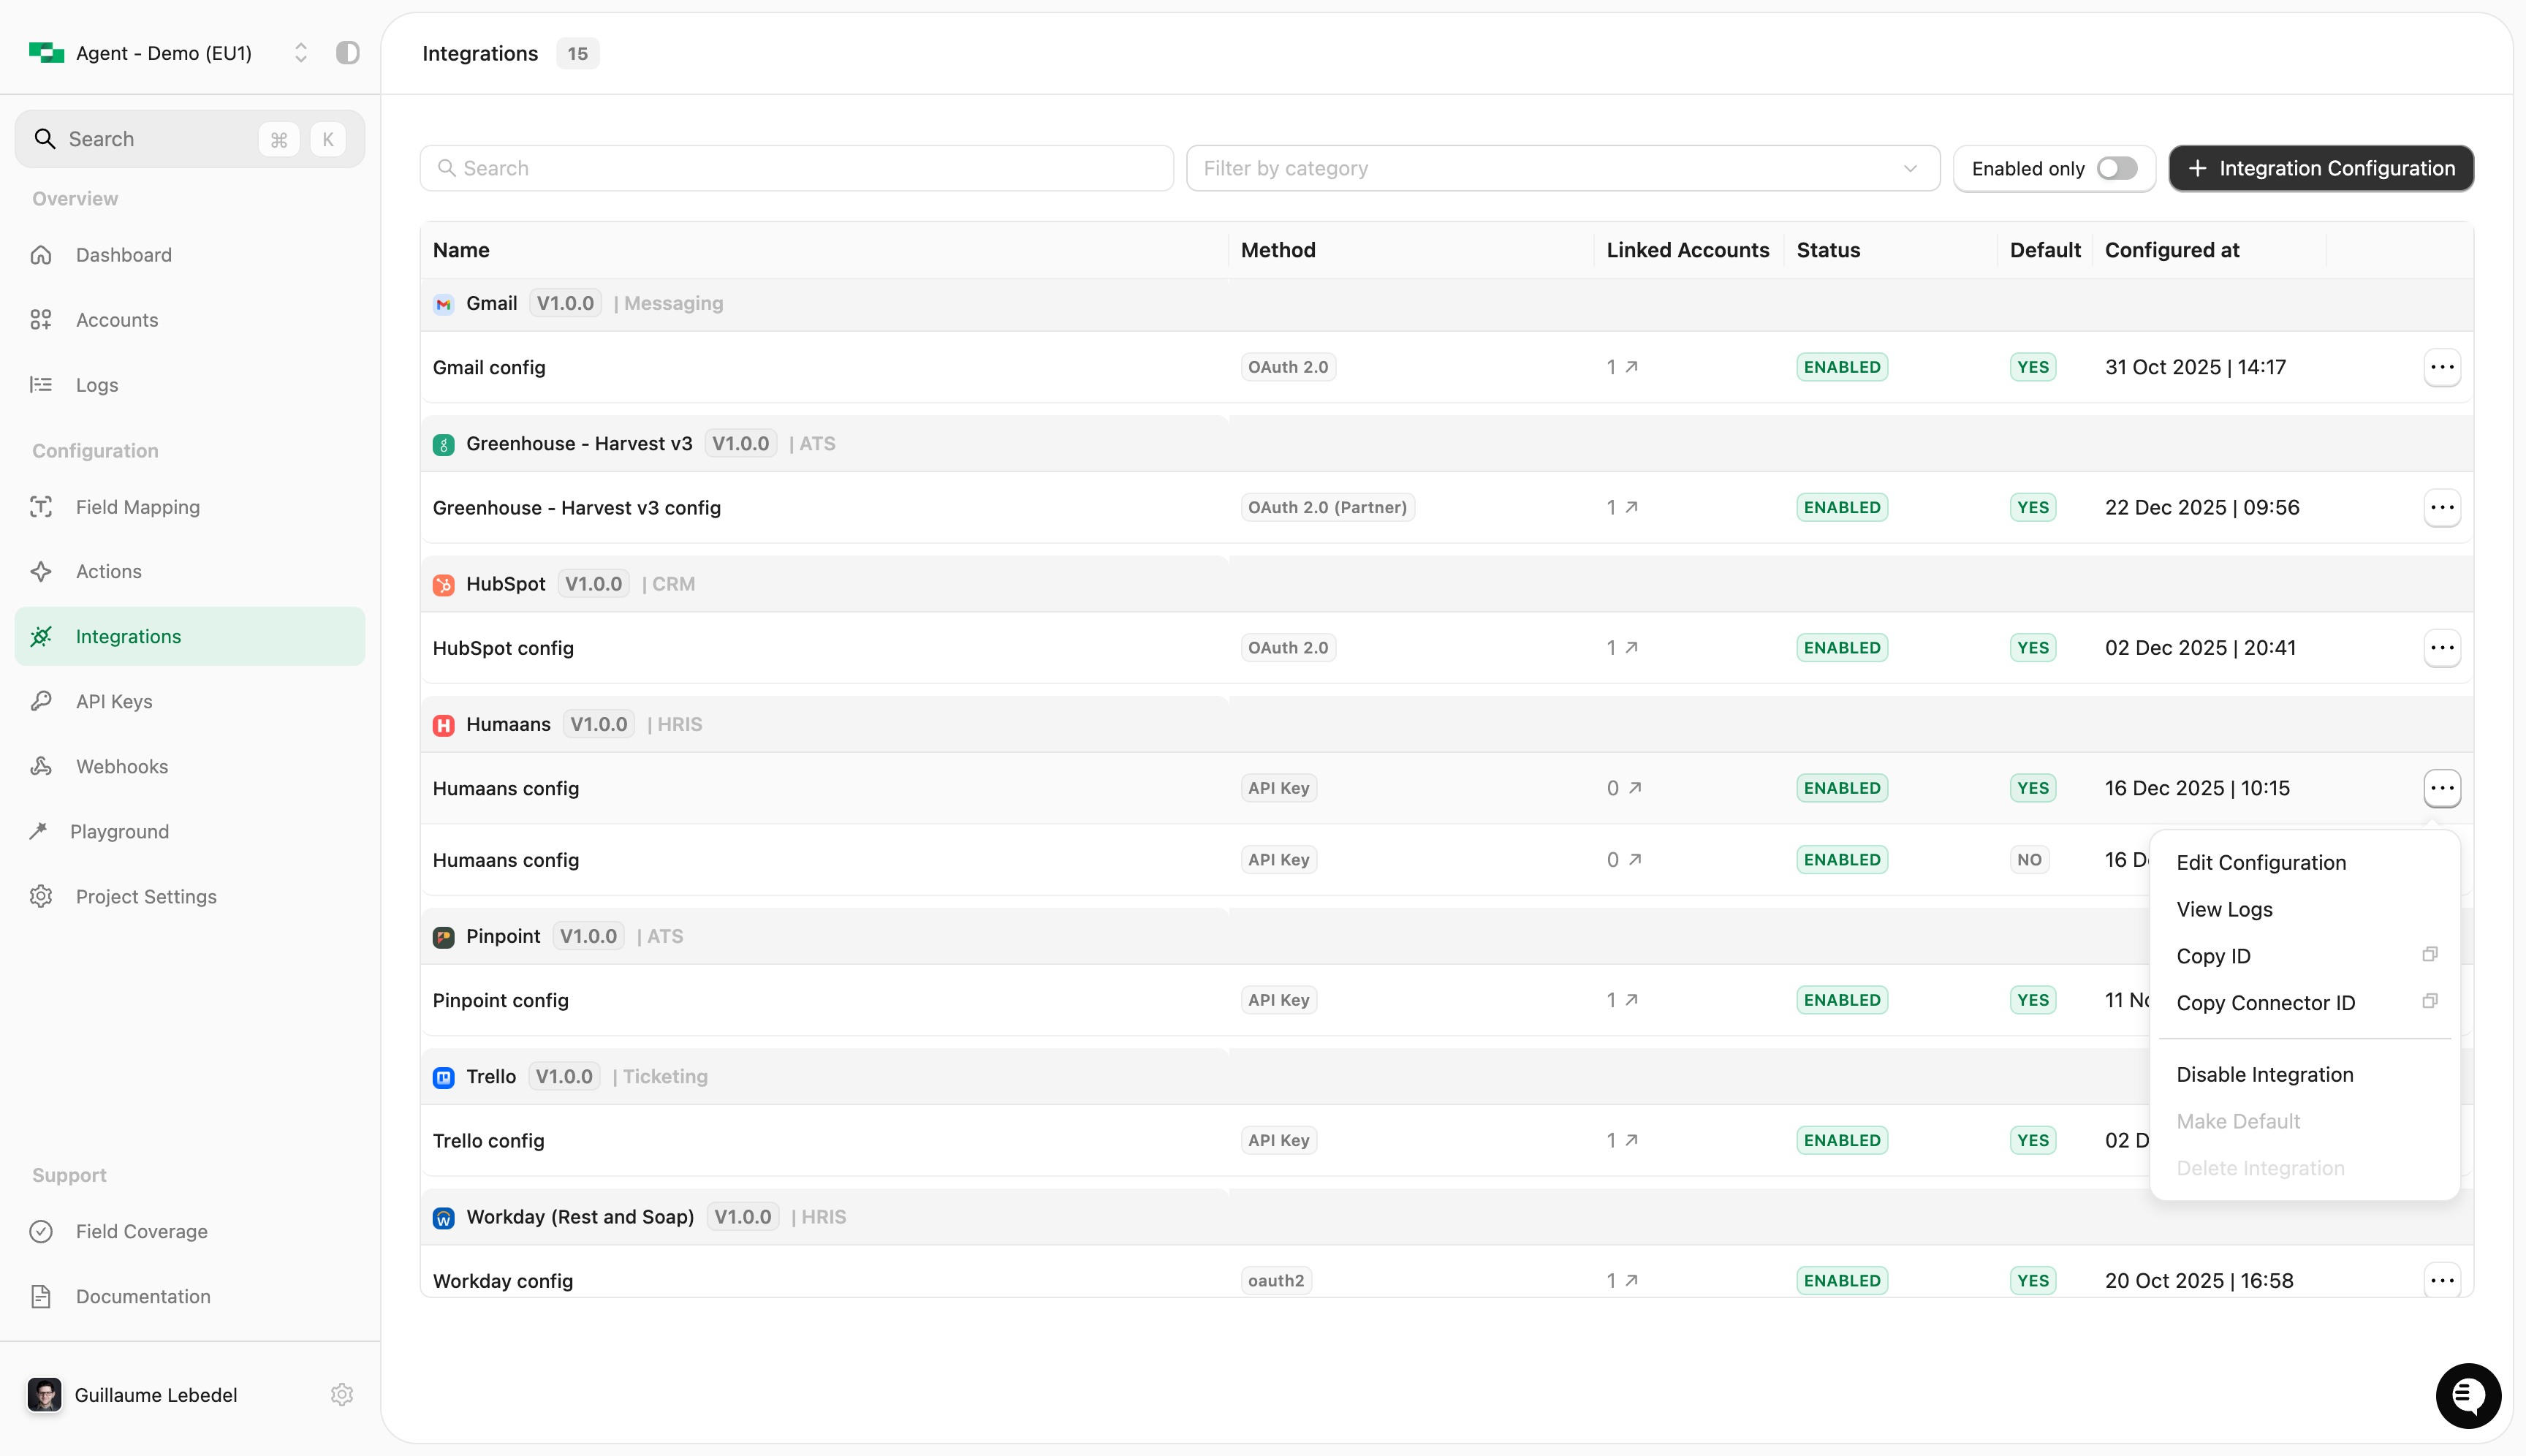
Ellipsis menu options
The ellipsis menu on each connector row provides the following options:- Edit - Modify the auth configuration
- View logs - See logs for this connector
- Copy connector ID - Copy identifiers for API use
- Disable - Temporarily disable the connector
- Delete - Remove the auth config (only available if no linked accounts exist and it’s not the sole default)
- Make default - Set as the default auth config for this connector (only shown for non-default configs when multiple exist)
Editing an existing auth config
To modify an existing auth configuration (such as updating the allowed actions, changing OAuth client details, updating scopes), click the Edit option from the ellipsis menu.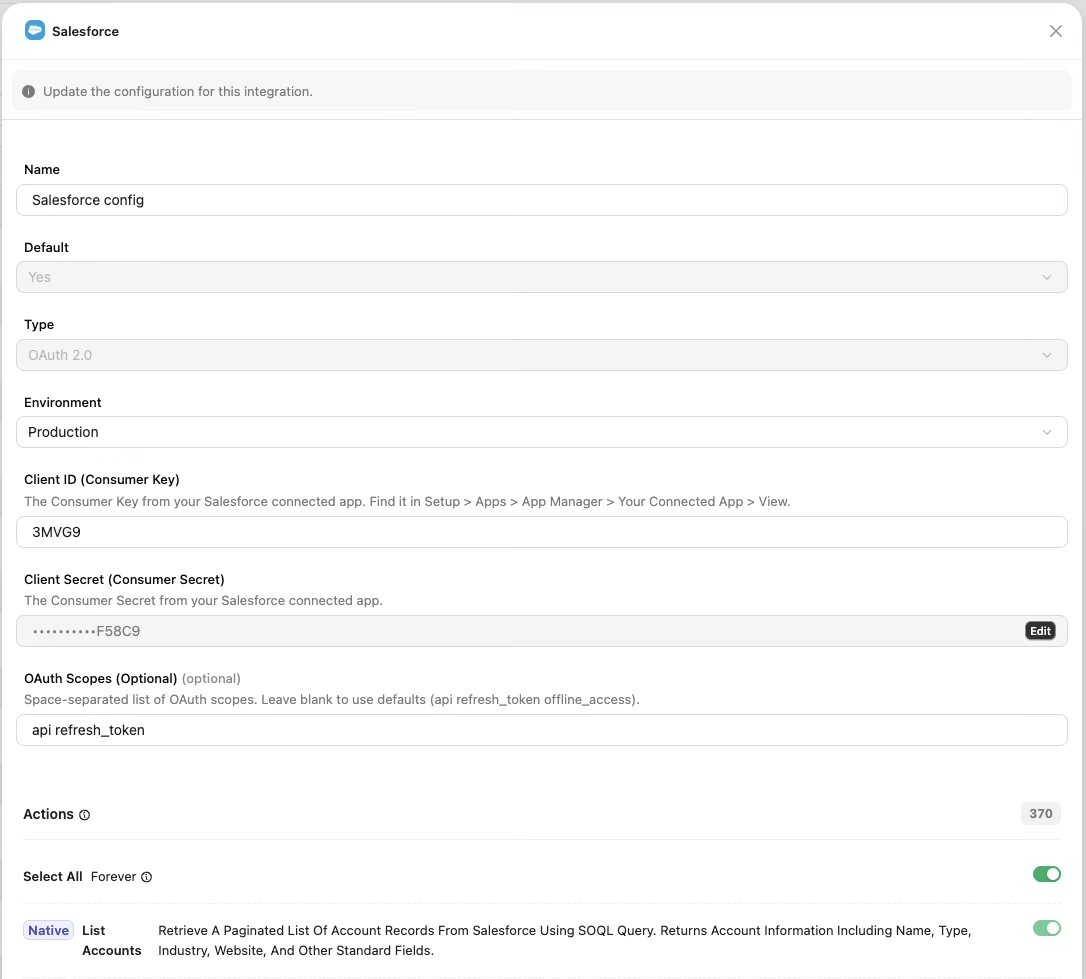
- Update the configuration name - Change the name of the auth config to help distinguish between different configurations for the same connector
- Update allowed actions - Add or remove allowed actions for the connector
- Update OAuth credentials - Change Client ID, Client Secret, or other OAuth parameters
- Adjust scopes - Add or remove permission scopes for OAuth integrations
You cannot change the authentication type (e.g., from API Key to OAuth) when editing an existing auth config. To switch authentication types, you must delete the current config and create a new one with the desired auth type.
Deleting an auth config
You’ll only be able to delete an auth config if there are no linked accounts for it, and if it’s either the only config for the connector or a non-default config for the connector.Authentication types
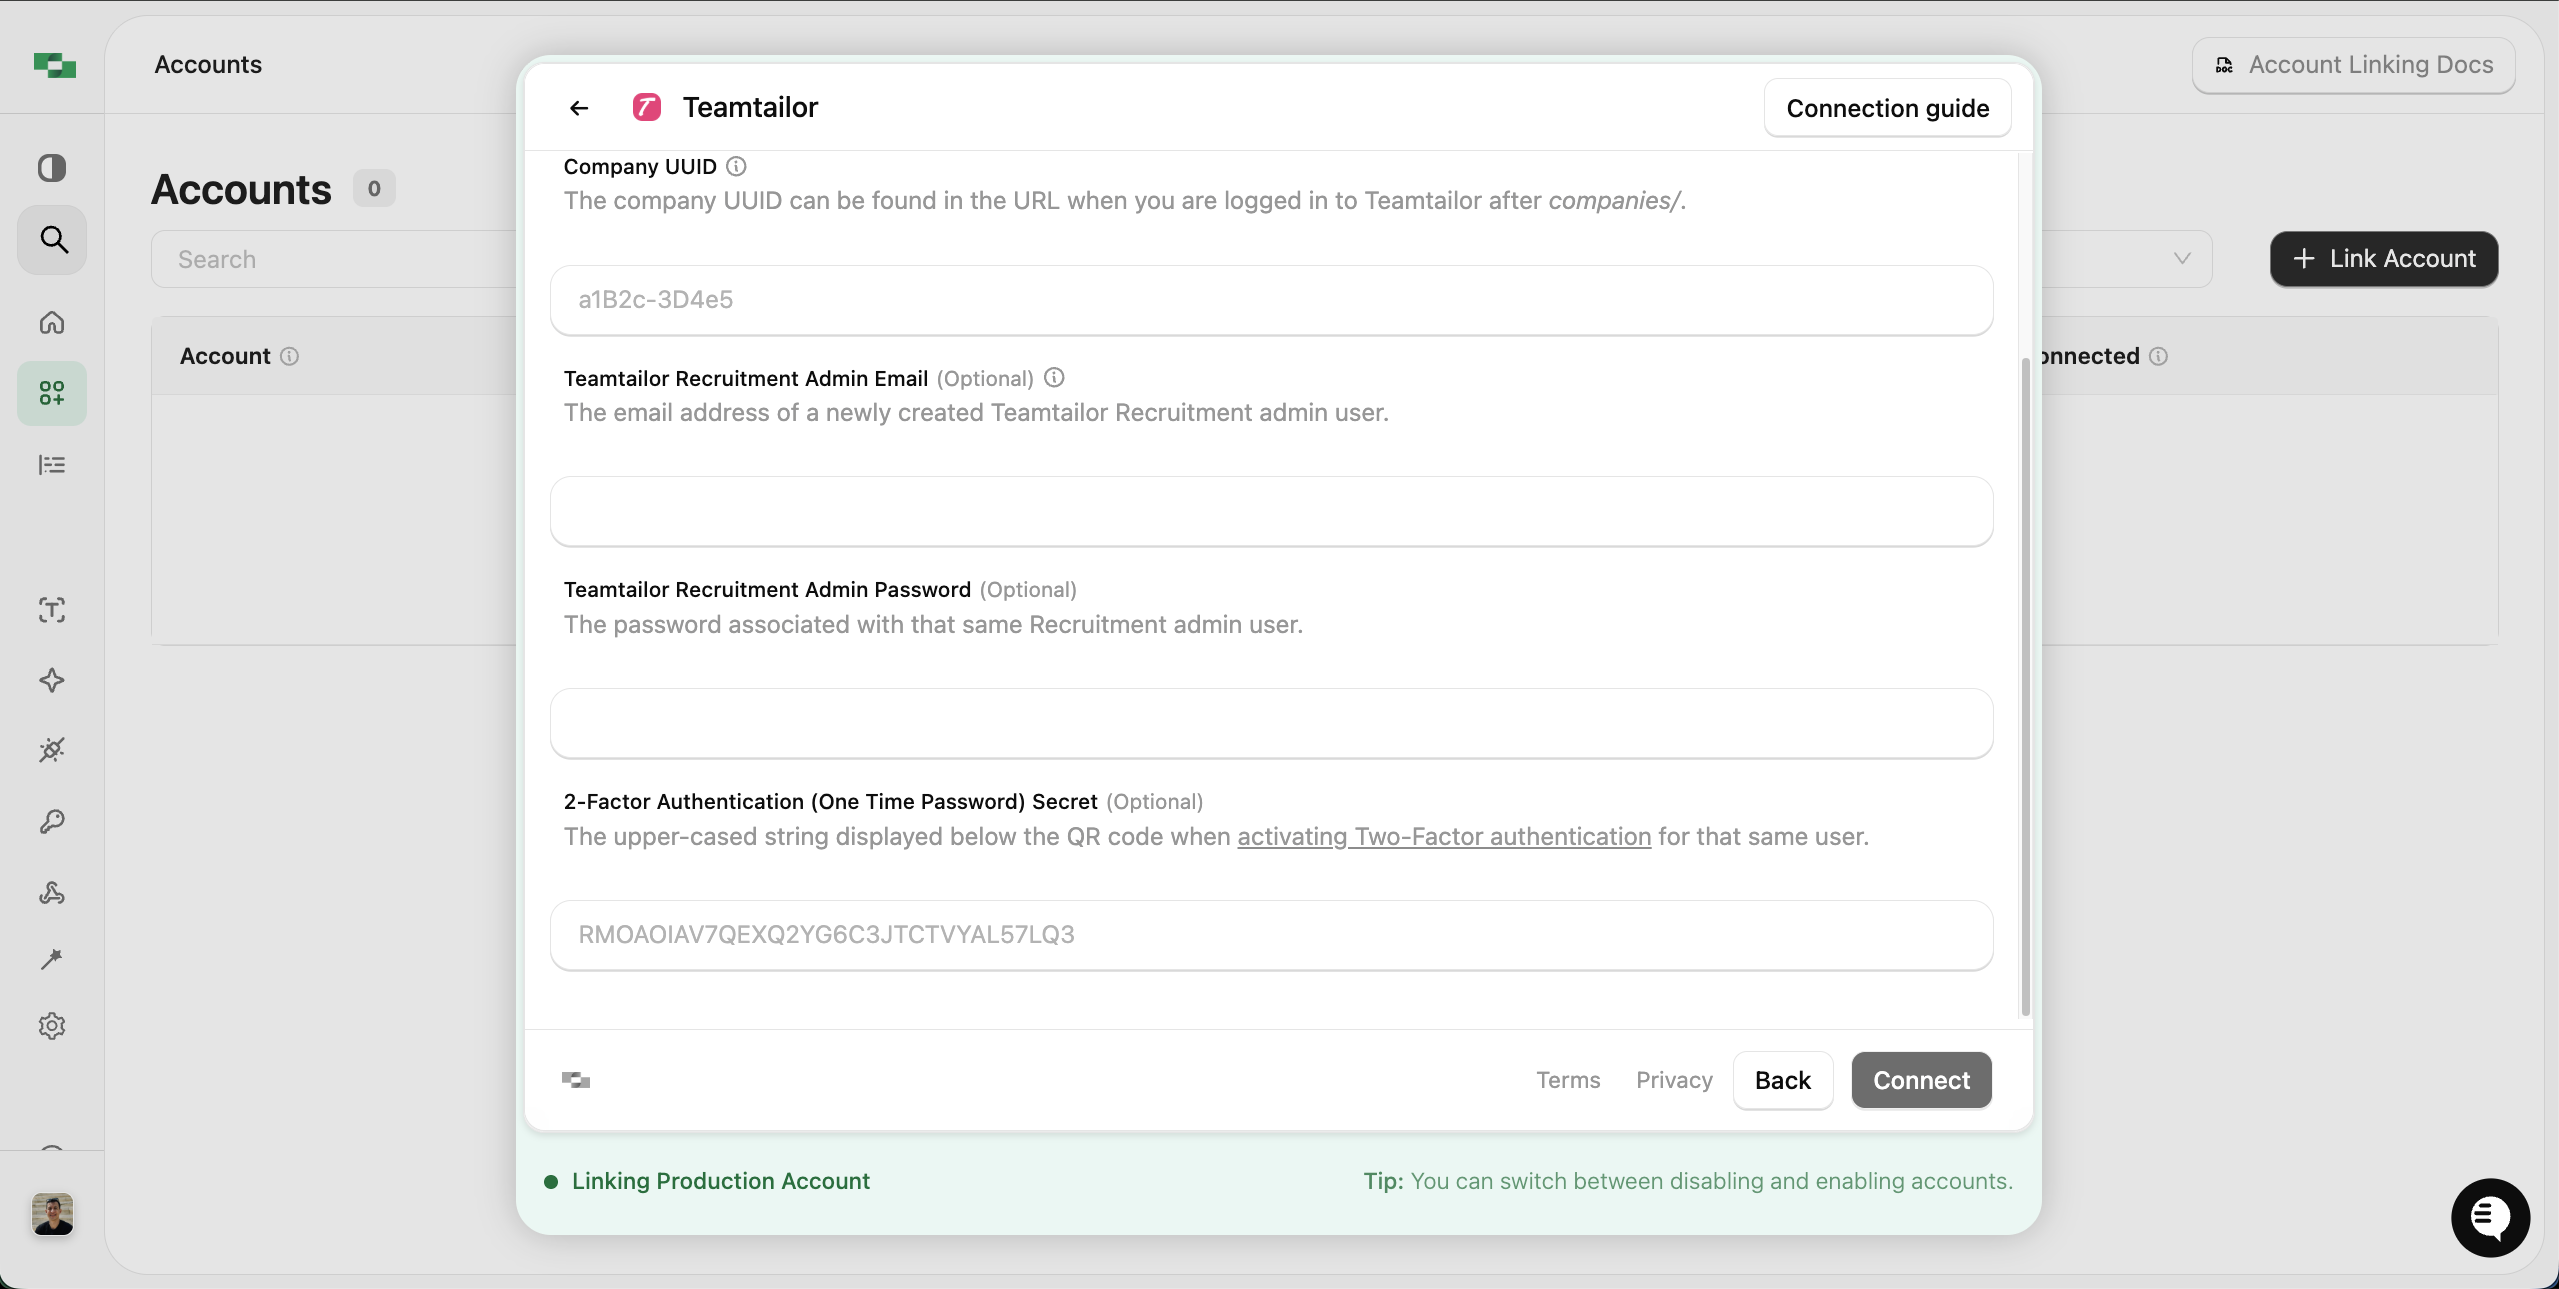
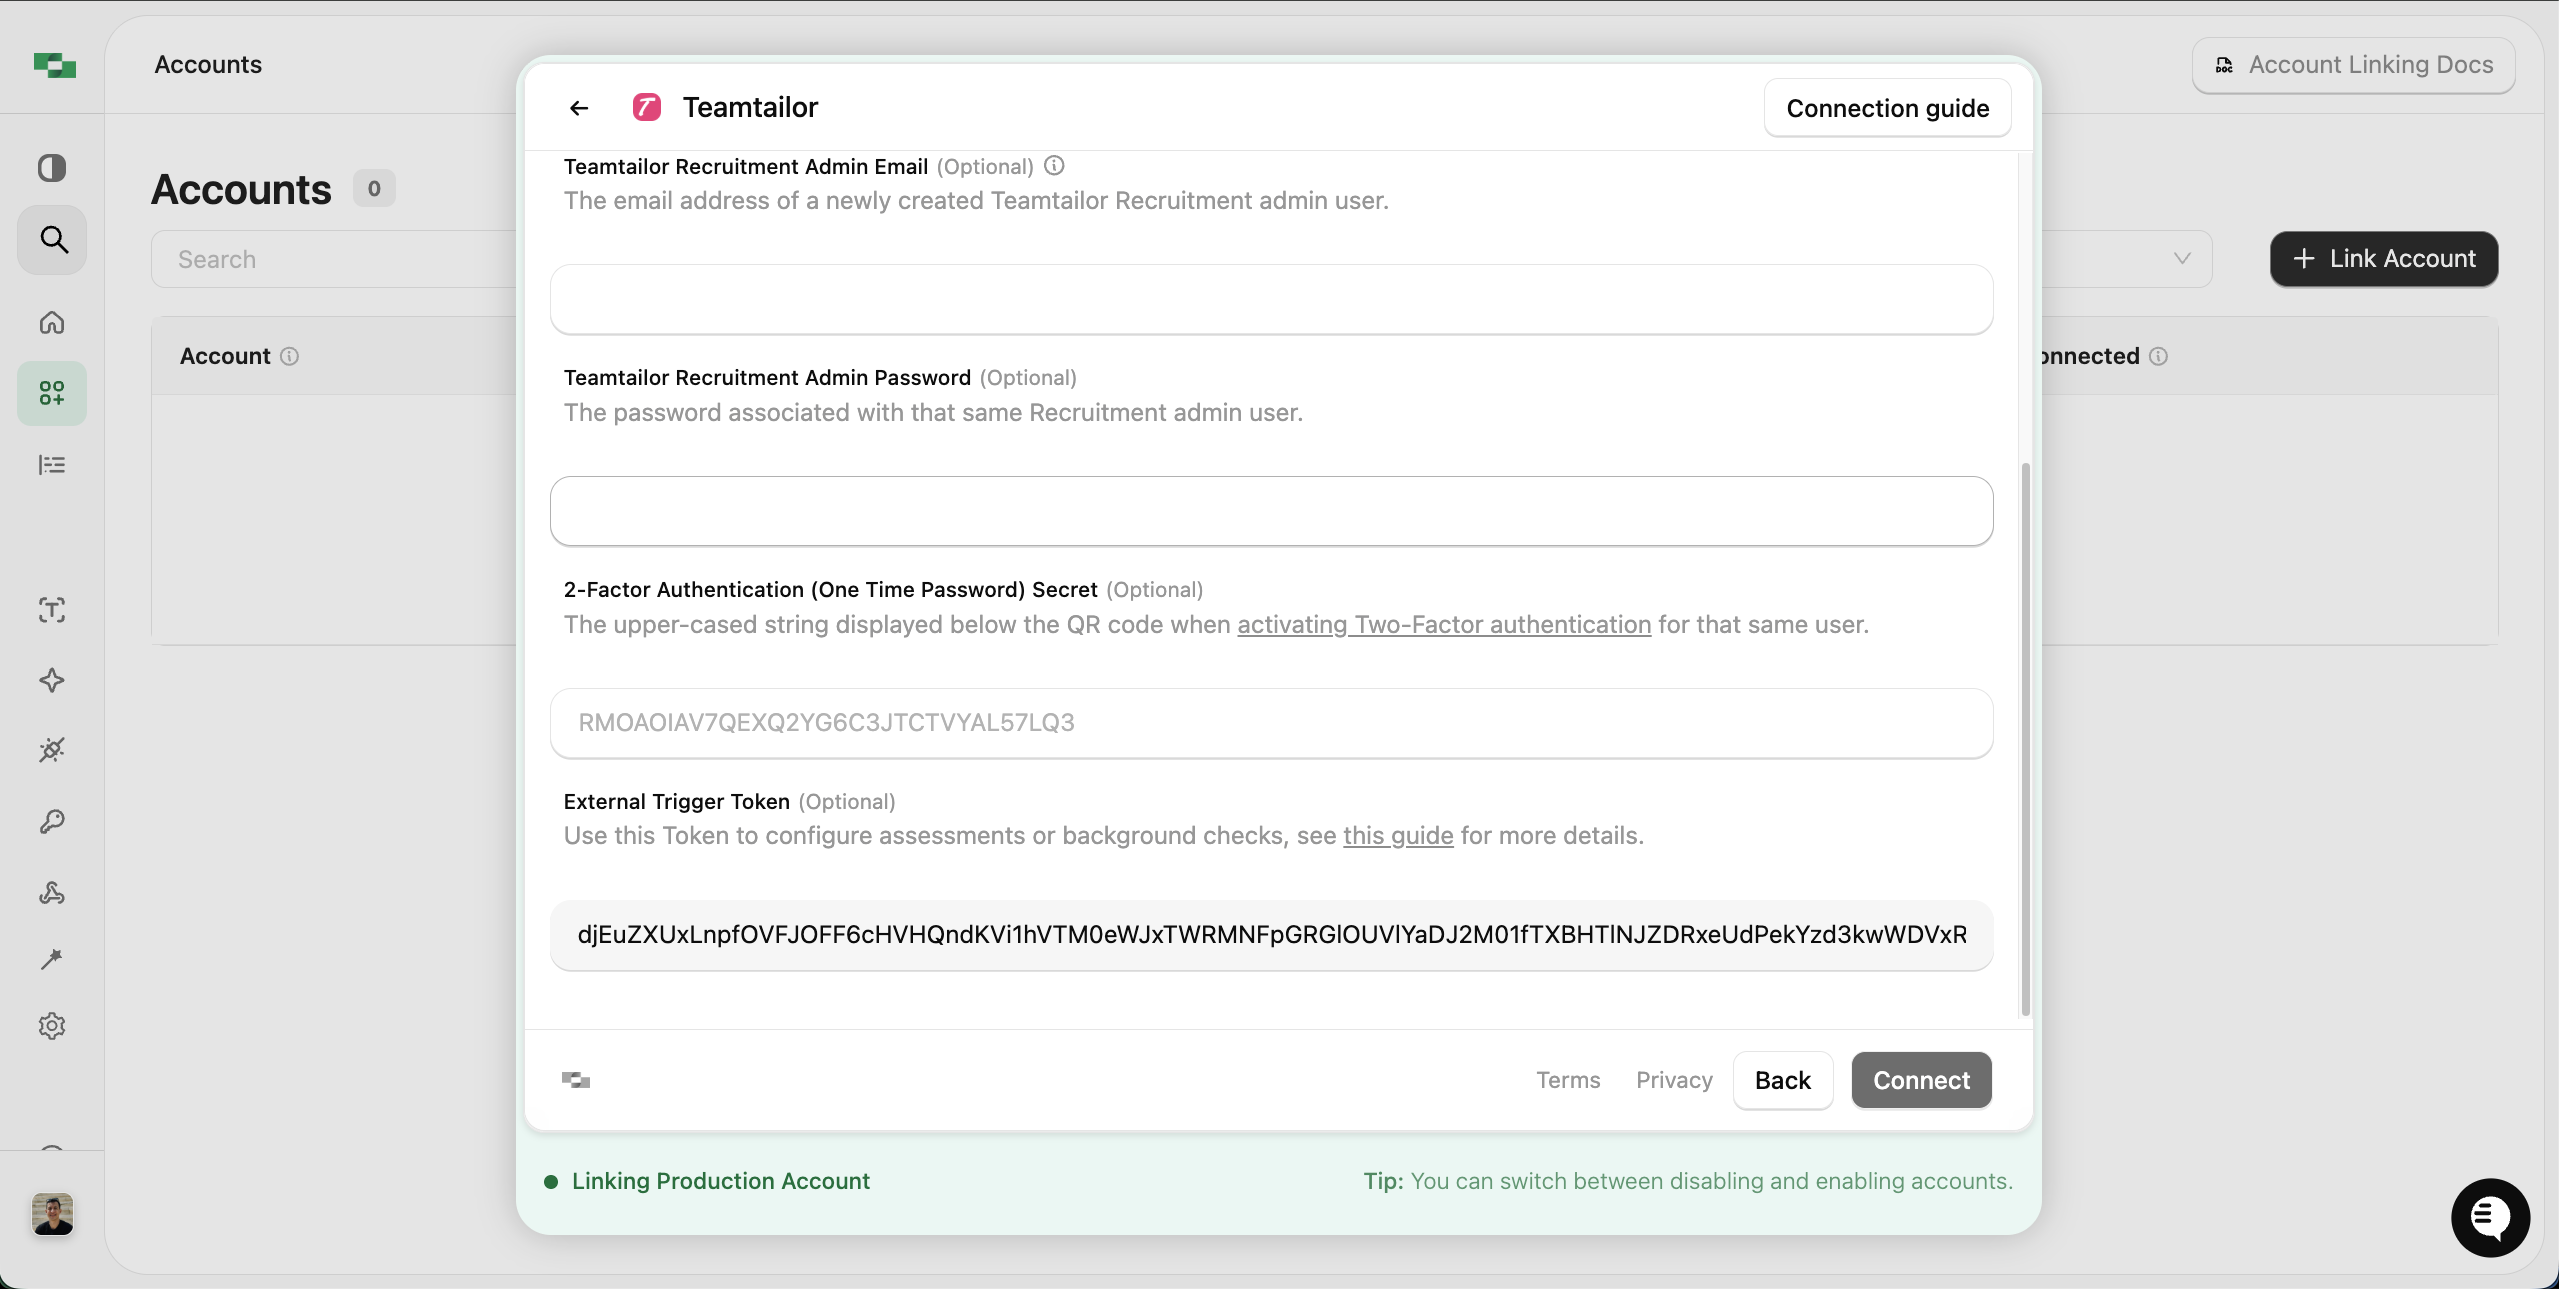
When setting up or updating a connector, you are configuring a specific authentication type. The authentication type determines the process for your end-user to link their account for that provider, specifically which details or credentials they will need to submit.API Key and Basic Token
In most instances, you will seeAPI Key or Basic Token, in which case the end-user will need to generate the required secret (e.g., Ashby or Hibob).
OAuth-based authentications
For other connectors, you may have a choice ofOAuth (and similar, e.g., OIDC), in which case your user may experience a simpler login-like flow (e.g., Lever or Hubspot).
Some connectors will prompt for OAuth-based fields such as Client ID and Client Secret.
You can use StackOne-provided credentials for testing, but for production you should register your own OAuth apps. Your own credentials give you:
- Your brand on OAuth consent screens (instead of “StackOne”)
- Dedicated rate limits (not shared with other StackOne users)
- Compliance with marketplace requirements if you plan to list your integration
OAuth Apps →
When and why to use your own OAuth credentials
When configuring an OAuth application with a provider, you may be asked for a Callback or Redirect URI. Make sure to use
https://api.stackone.com/connect/oauth2/{provider key}/callback (replace {provider key} with the actual key, for example: hubspot or bamboohr).Configuring multiple auth configs for the same connector
You can configure multiple auth configs for the same connector. This is useful if you want to use different configurations for the same connector for different groups of accounts in the same project, for example if some accounts need to be linked with an API key and others with an OAuth token. To configure multiple auth configs for the same connector, you can go to the Auth Configs page and click on the+ button. You will be presented with the same form as before, and you will be able to configure whether this auth config should be the default for the connector or not.
You can toggle the default auth config for the connector by clicking on the “Make default” option mentioned in the ellipsis menu options section above.
For example, with the Airtable connector we used in the previous example, we previously set up an API Key auth config. Now we want to set up an OAuth 2.0 auth config.
Troubleshooting
Connector or account not visible on the Connectors page
Connector or account not visible on the Connectors page
If you cannot see a specific connector or account on the Auth Configs page, the connector likely needs to be enabled for your account by StackOne.Contact your StackOne support manager or reach out to support@stackone.com to request access. Connector and category availability depends on your plan and contract.
Connector not visible in the StackOne Hub
Connector not visible in the StackOne Hub
If the connector is visible on the Connectors page but not in the Hub, it’s typically because the connector is disabled. Enable it from the Connectors page.
Wrong fields being shown in the StackOne Hub
Wrong fields being shown in the StackOne Hub
Verify that the correct auth config is set as the default for the connector. If you have multiple auth configs for the same connector, only the default one’s fields are shown in the Hub.
Connection issues behind a firewall
Connection issues behind a firewall
If your infrastructure is behind a firewall, allowlist these StackOne IP addresses:
API traffic routes through AWS Edge Locations, so you may also need to allow those. For webhooks, allow inbound traffic from the IPs above. All API requests use HTTPS with TLS 1.2+.
| IP Address | Location |
|---|---|
| 35.175.11.132 | US East |
| 54.221.239.152 | US East |
| 52.5.1.25 | US East |
| 34.249.109.57 | Ireland |
| 46.51.152.189 | Ireland |
| 52.51.165.231 | Ireland |
| 18.135.210.22 | UK |
| 18.169.58.64 | UK |
| 13.40.58.44 | UK |