Step-by-Step Guide to Generating an API Key
Access the API Key Management Section
Log in to StackOne and go to Project Settings > API Keys in the left navigation menu. This is where you can generate and manage your API keys.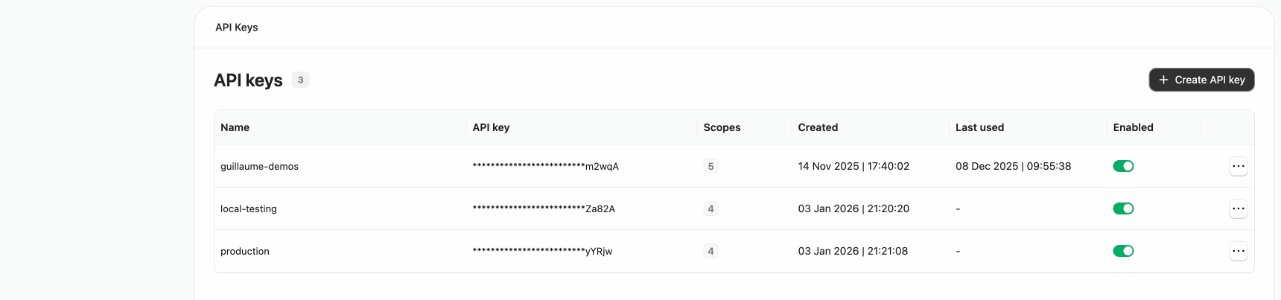
Generate a New API Key
Click the Create API key button. In the popup dialog, enter a name for your key (e.g., 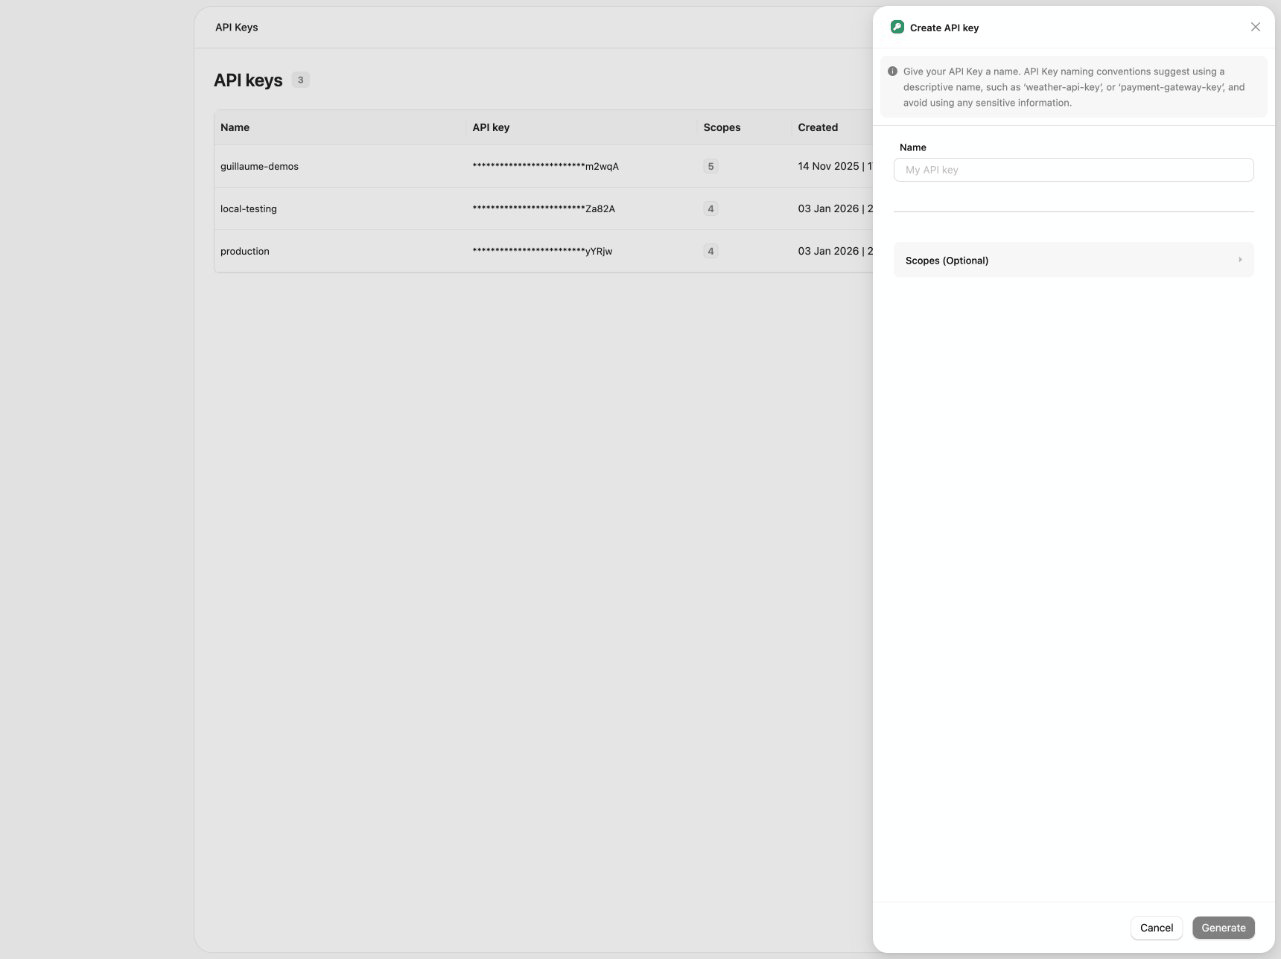
my-agent-key or production-hris-sync). This name is a label and cannot be changed later.Configure API Key Scopes (optional)
New keys come with a default set of scopes enabled (see the Default column below). Expand the Scopes section to enable or restrict access based on your application’s needs.
Available Scopes
| Scope | Default | Description |
|---|---|---|
| Platform API | Read + Write | Access to account management, session tokens, and connector profiles. Required for Platform API operations such as StackOne Connect and account management. |
| Actions | Execute | Allows you to interact with actions via RPC and MCP. |
| Connectors | Read | Access to custom connector management. Read (connectors:read) allows downloading connectors from the registry. Write (connectors:write) allows pushing and deleting connectors. Required for Connector Engine operations. |
| Credentials | Off | Retrieve stored credentials for direct provider access (read-only). Required for StackOne CLI and running actions outside the platform. |
| Unified API | Read + Write | Access to all legacy (unified) endpoints (HRIS, ATS, CRM, LMS, etc.) for reading and writing data across connected providers. |
Copy and Store the API Key
After clicking Generate, the API key is displayed on-screen. Copy it immediately and store it securely. This is the only time it will be shown. If you lose the key, you’ll need to generate a new one.