Before linking an account, you need to enable and configure a Connector Profile. This is used to set up authentication and the actions and/or events you are looking to use.
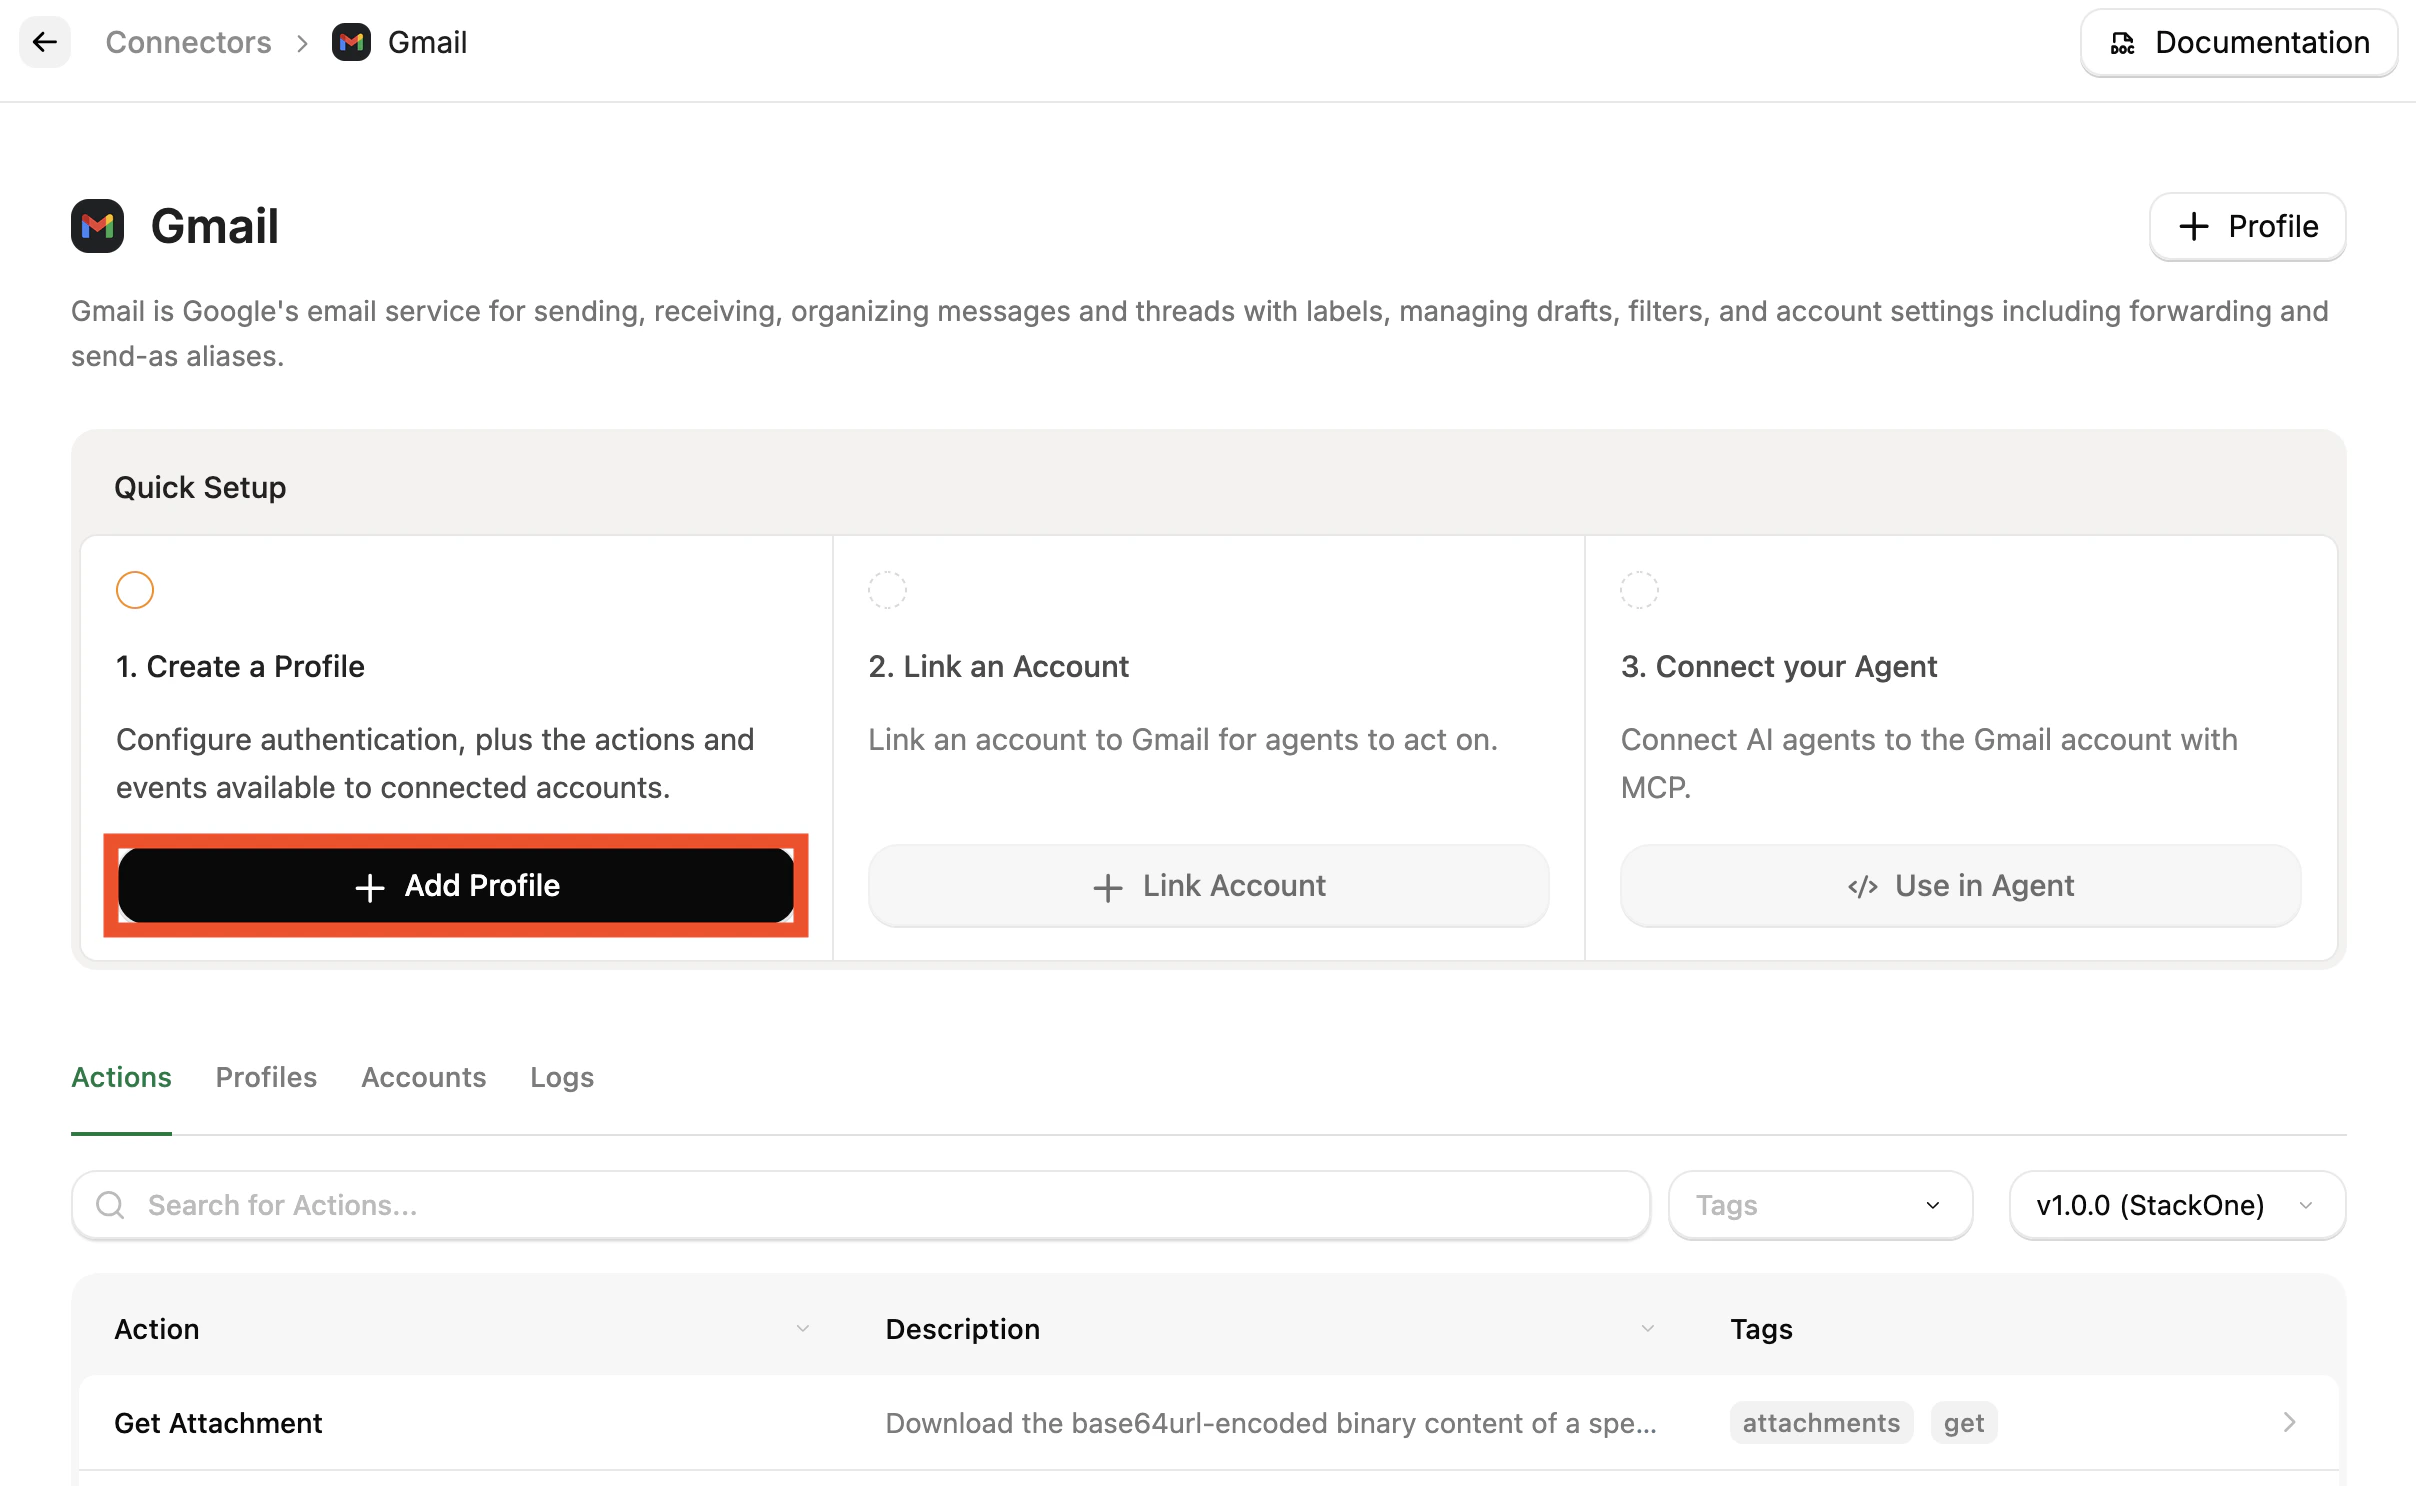
Search for a connector you are interested in using (e.g. Zendesk, Gmail, Salesforce) and select it. This will open the Connector page.
Following the Quick Setup, click Add Profile. This will open a side panel to configure the profile.
Connector page: Quick Setup with the Add Profile button
2
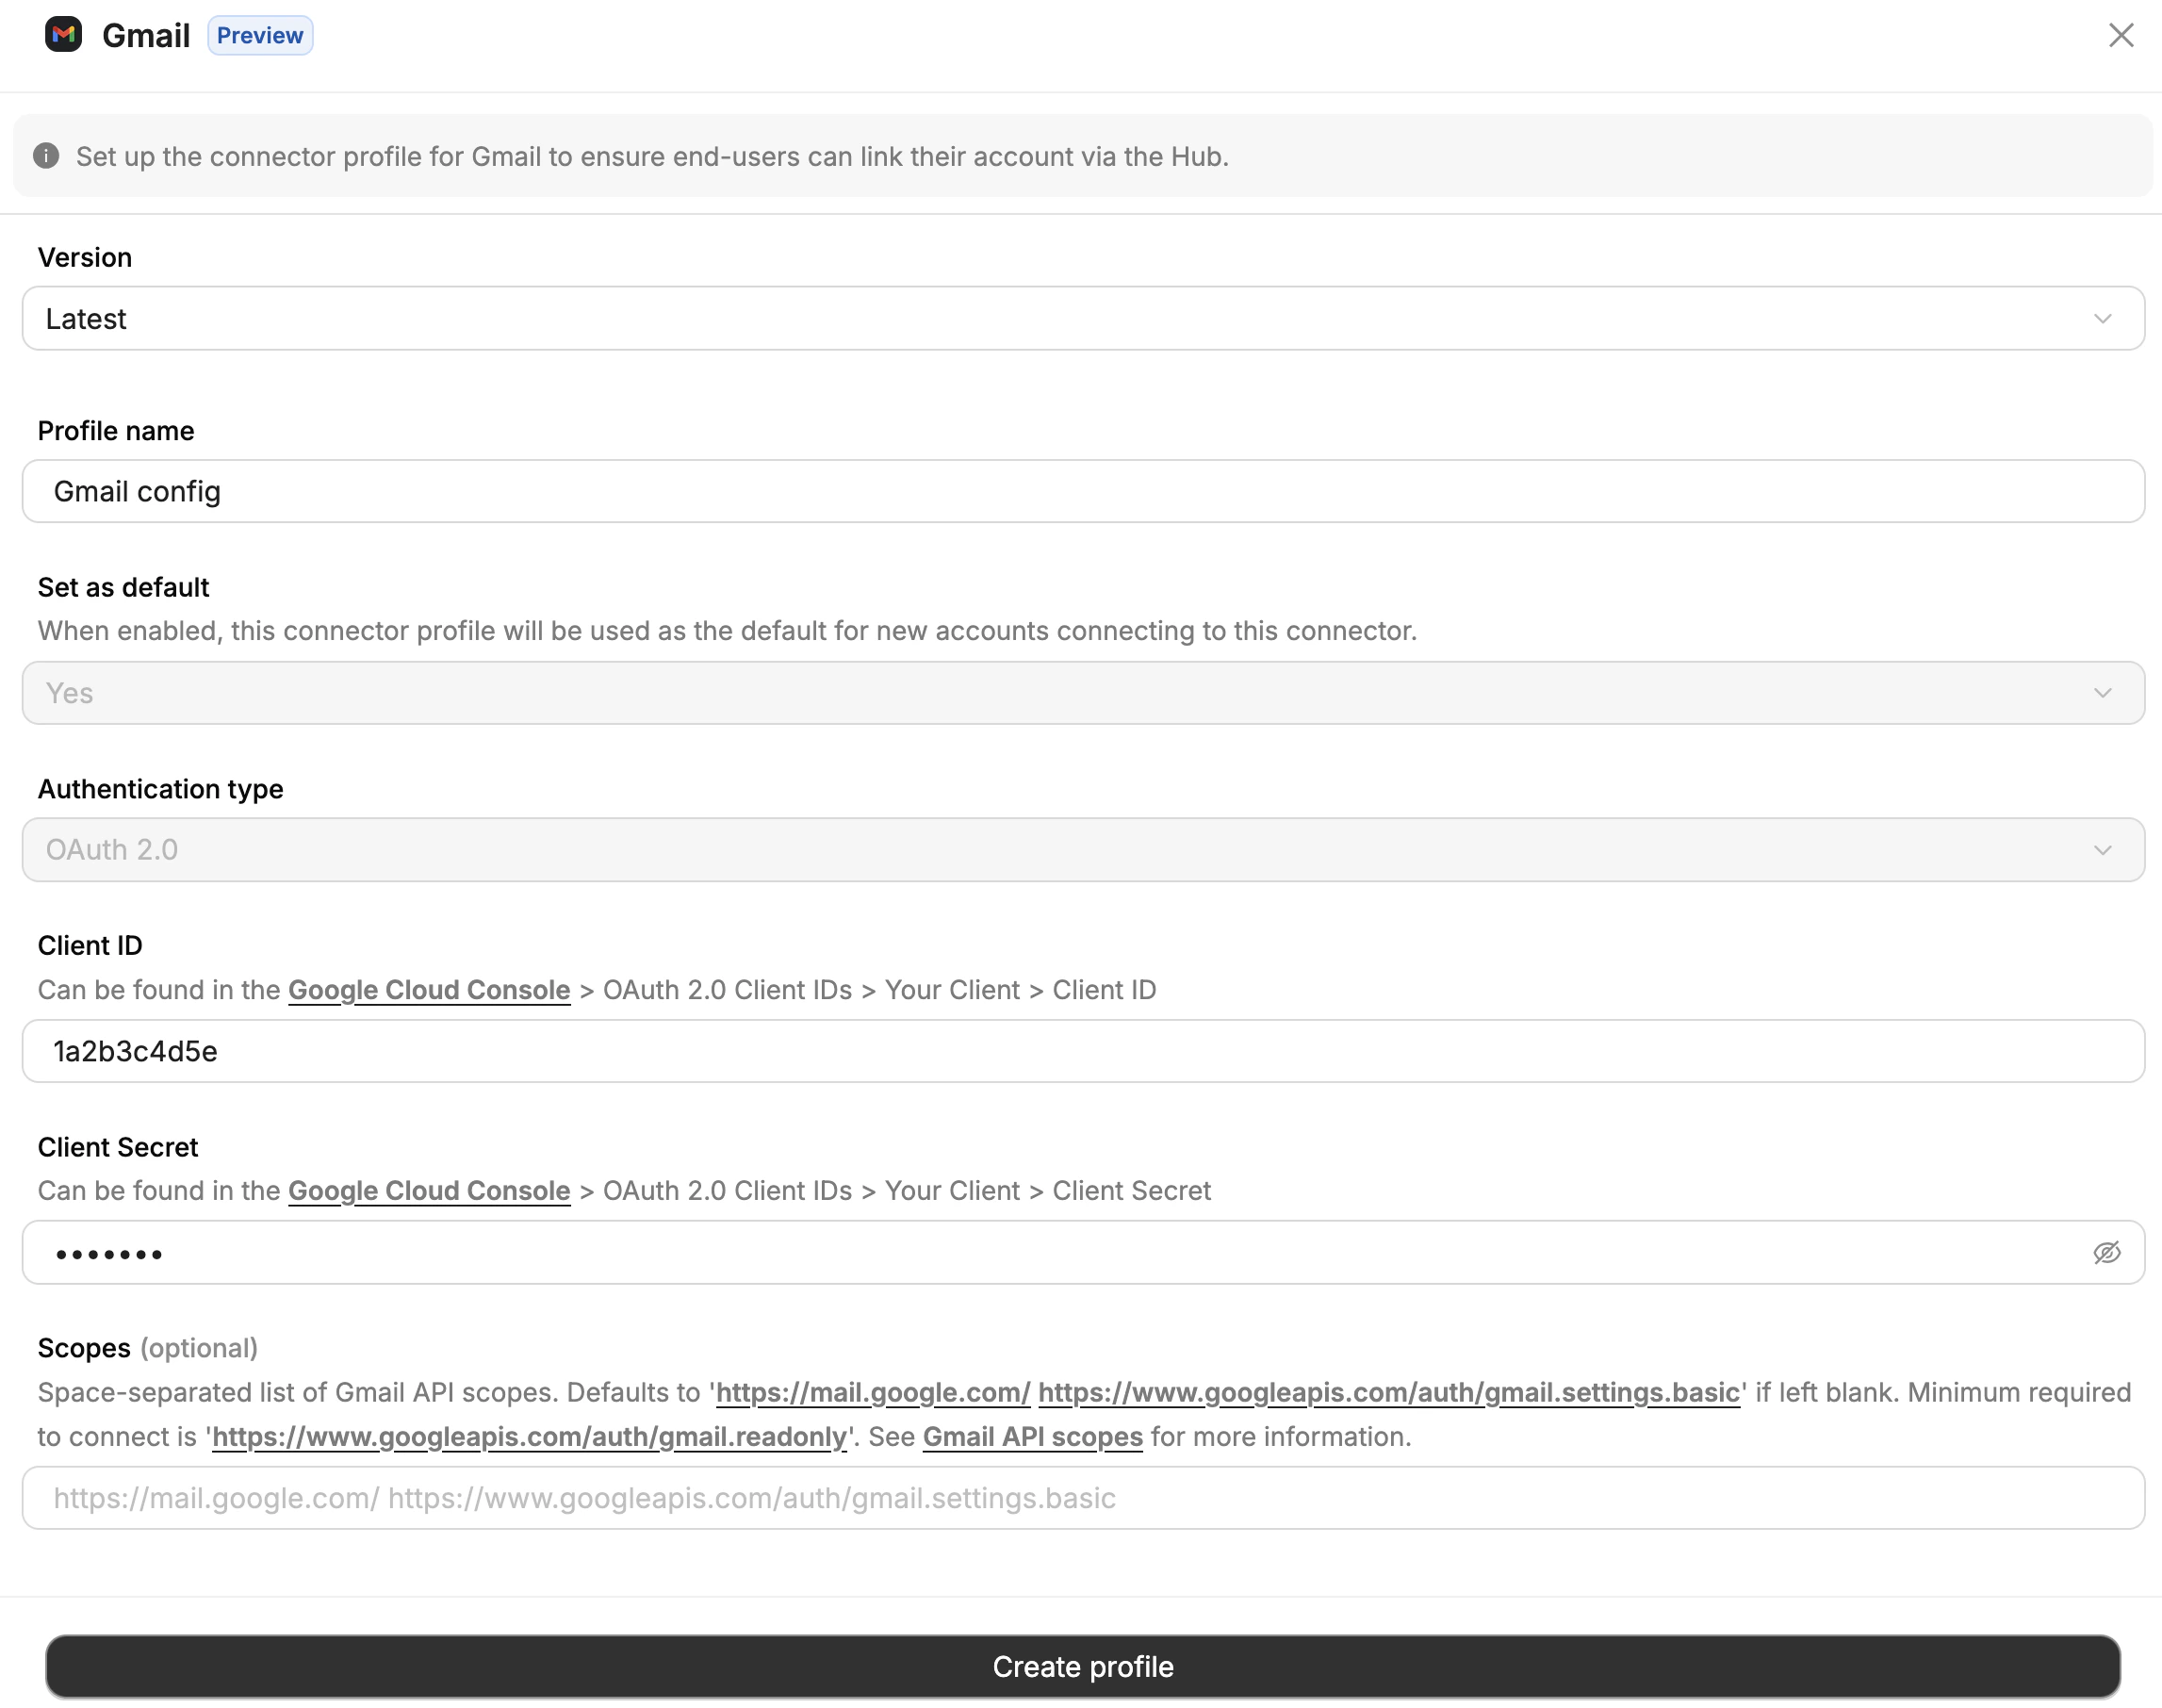
Configure the Connector Profile
Leave the Version at Latest.
Leave the Profile name as the default value.
If multiple options exist, choose the Authentication type you wish to use.
Depending on the Connector, there may be additional fields to complete (e.g. Client ID, Client Secret, API Key etc.) and/or additional configuration on the provider system. Check the Connector Guides and follow the relevant Connector Profile guide.
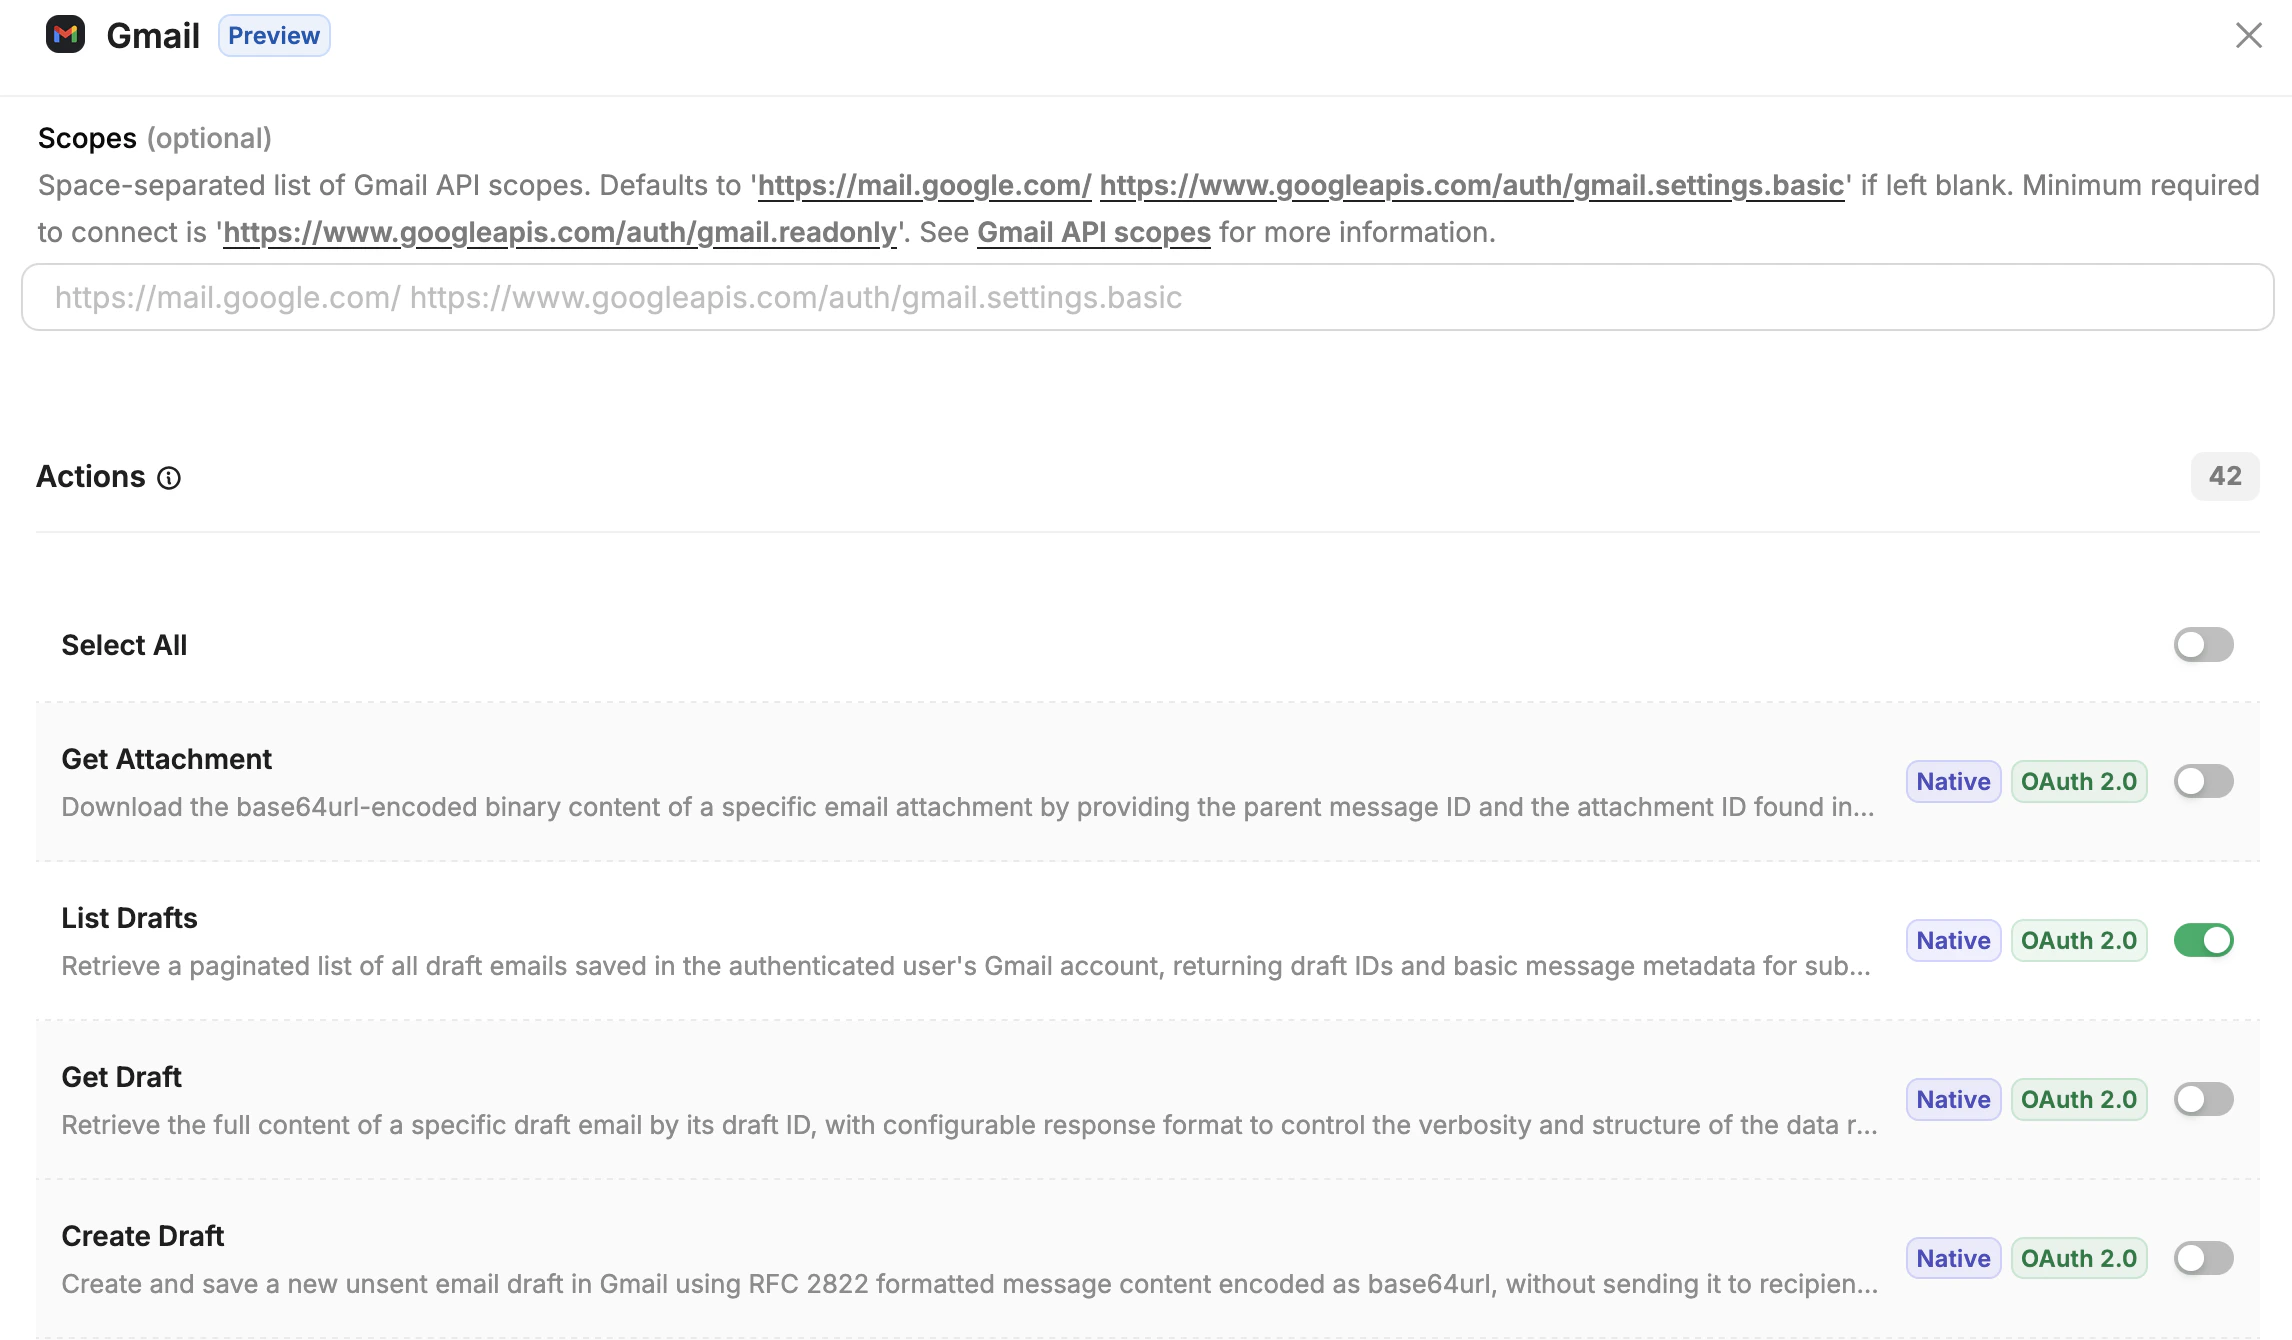
For getting started, we recommend deselecting all Actions and manually selecting a few read actions to test.
Click Create Profile. The Connector Profile is now ready to use.
Connector Profile side panel: Version, Profile name, and Authentication type
Actions selection: deselect all, then enable a few read actions to test
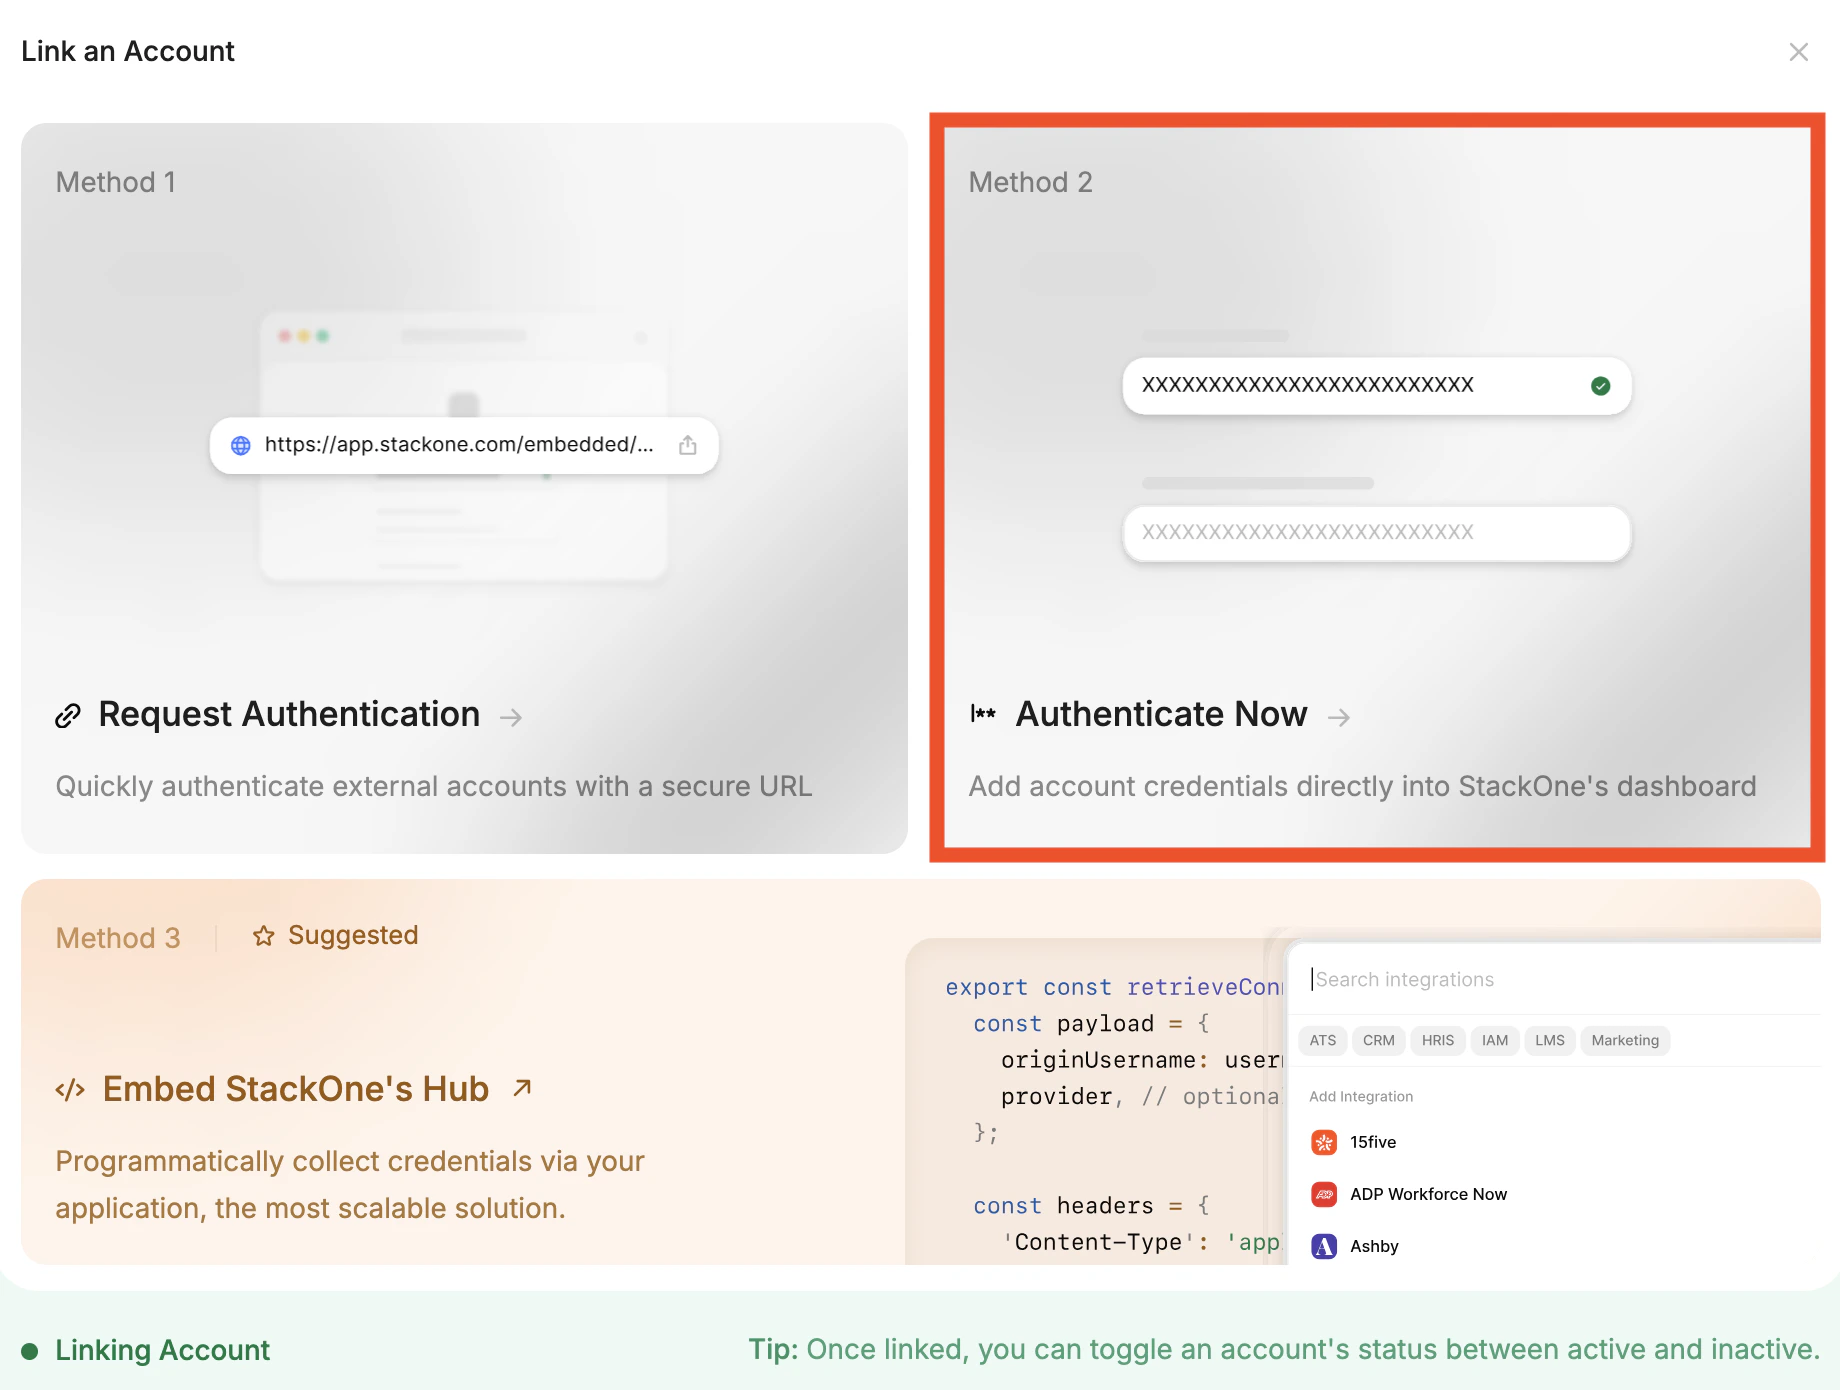
Following the Quick Setup, click the now enabled Link Account button. This will open the Link an Account popup.
Select Method 2 - Authenticate Now.
Link an Account popup: Method 2 - Authenticate Now
On Enter Origin Owner Details, leave all as default values and click Next.
On Integration Hub Preferences, confirm the Connector Profile you configured earlier is selected, then click Next.
Depending on the Connector there may be additional fields to complete and/or additional configuration on the provider system. Click Connection Guide in the top right for more details if needed.
Click Connect.
You may need to complete authentication with the provider (e.g. via OAuth). In this case a new window will pop up prompting you to sign in as needed.
Once authorization is complete, your Account will now be linked in StackOne.
With a linked account in place, you can now use this Connector in the Agent of your choice. We recommend connecting it to your preferred agent client via MCP. You can also call StackOne directly from a TypeScript or Python agent, or an A2A orchestrator. If you just want to sanity-check the connector first, the Playground lets you test it without wiring up an agent.
MCP
TypeScript SDK
Python SDK
A2A
Playground
The dashboard generates a ready-to-use MCP server for your linked account.
1
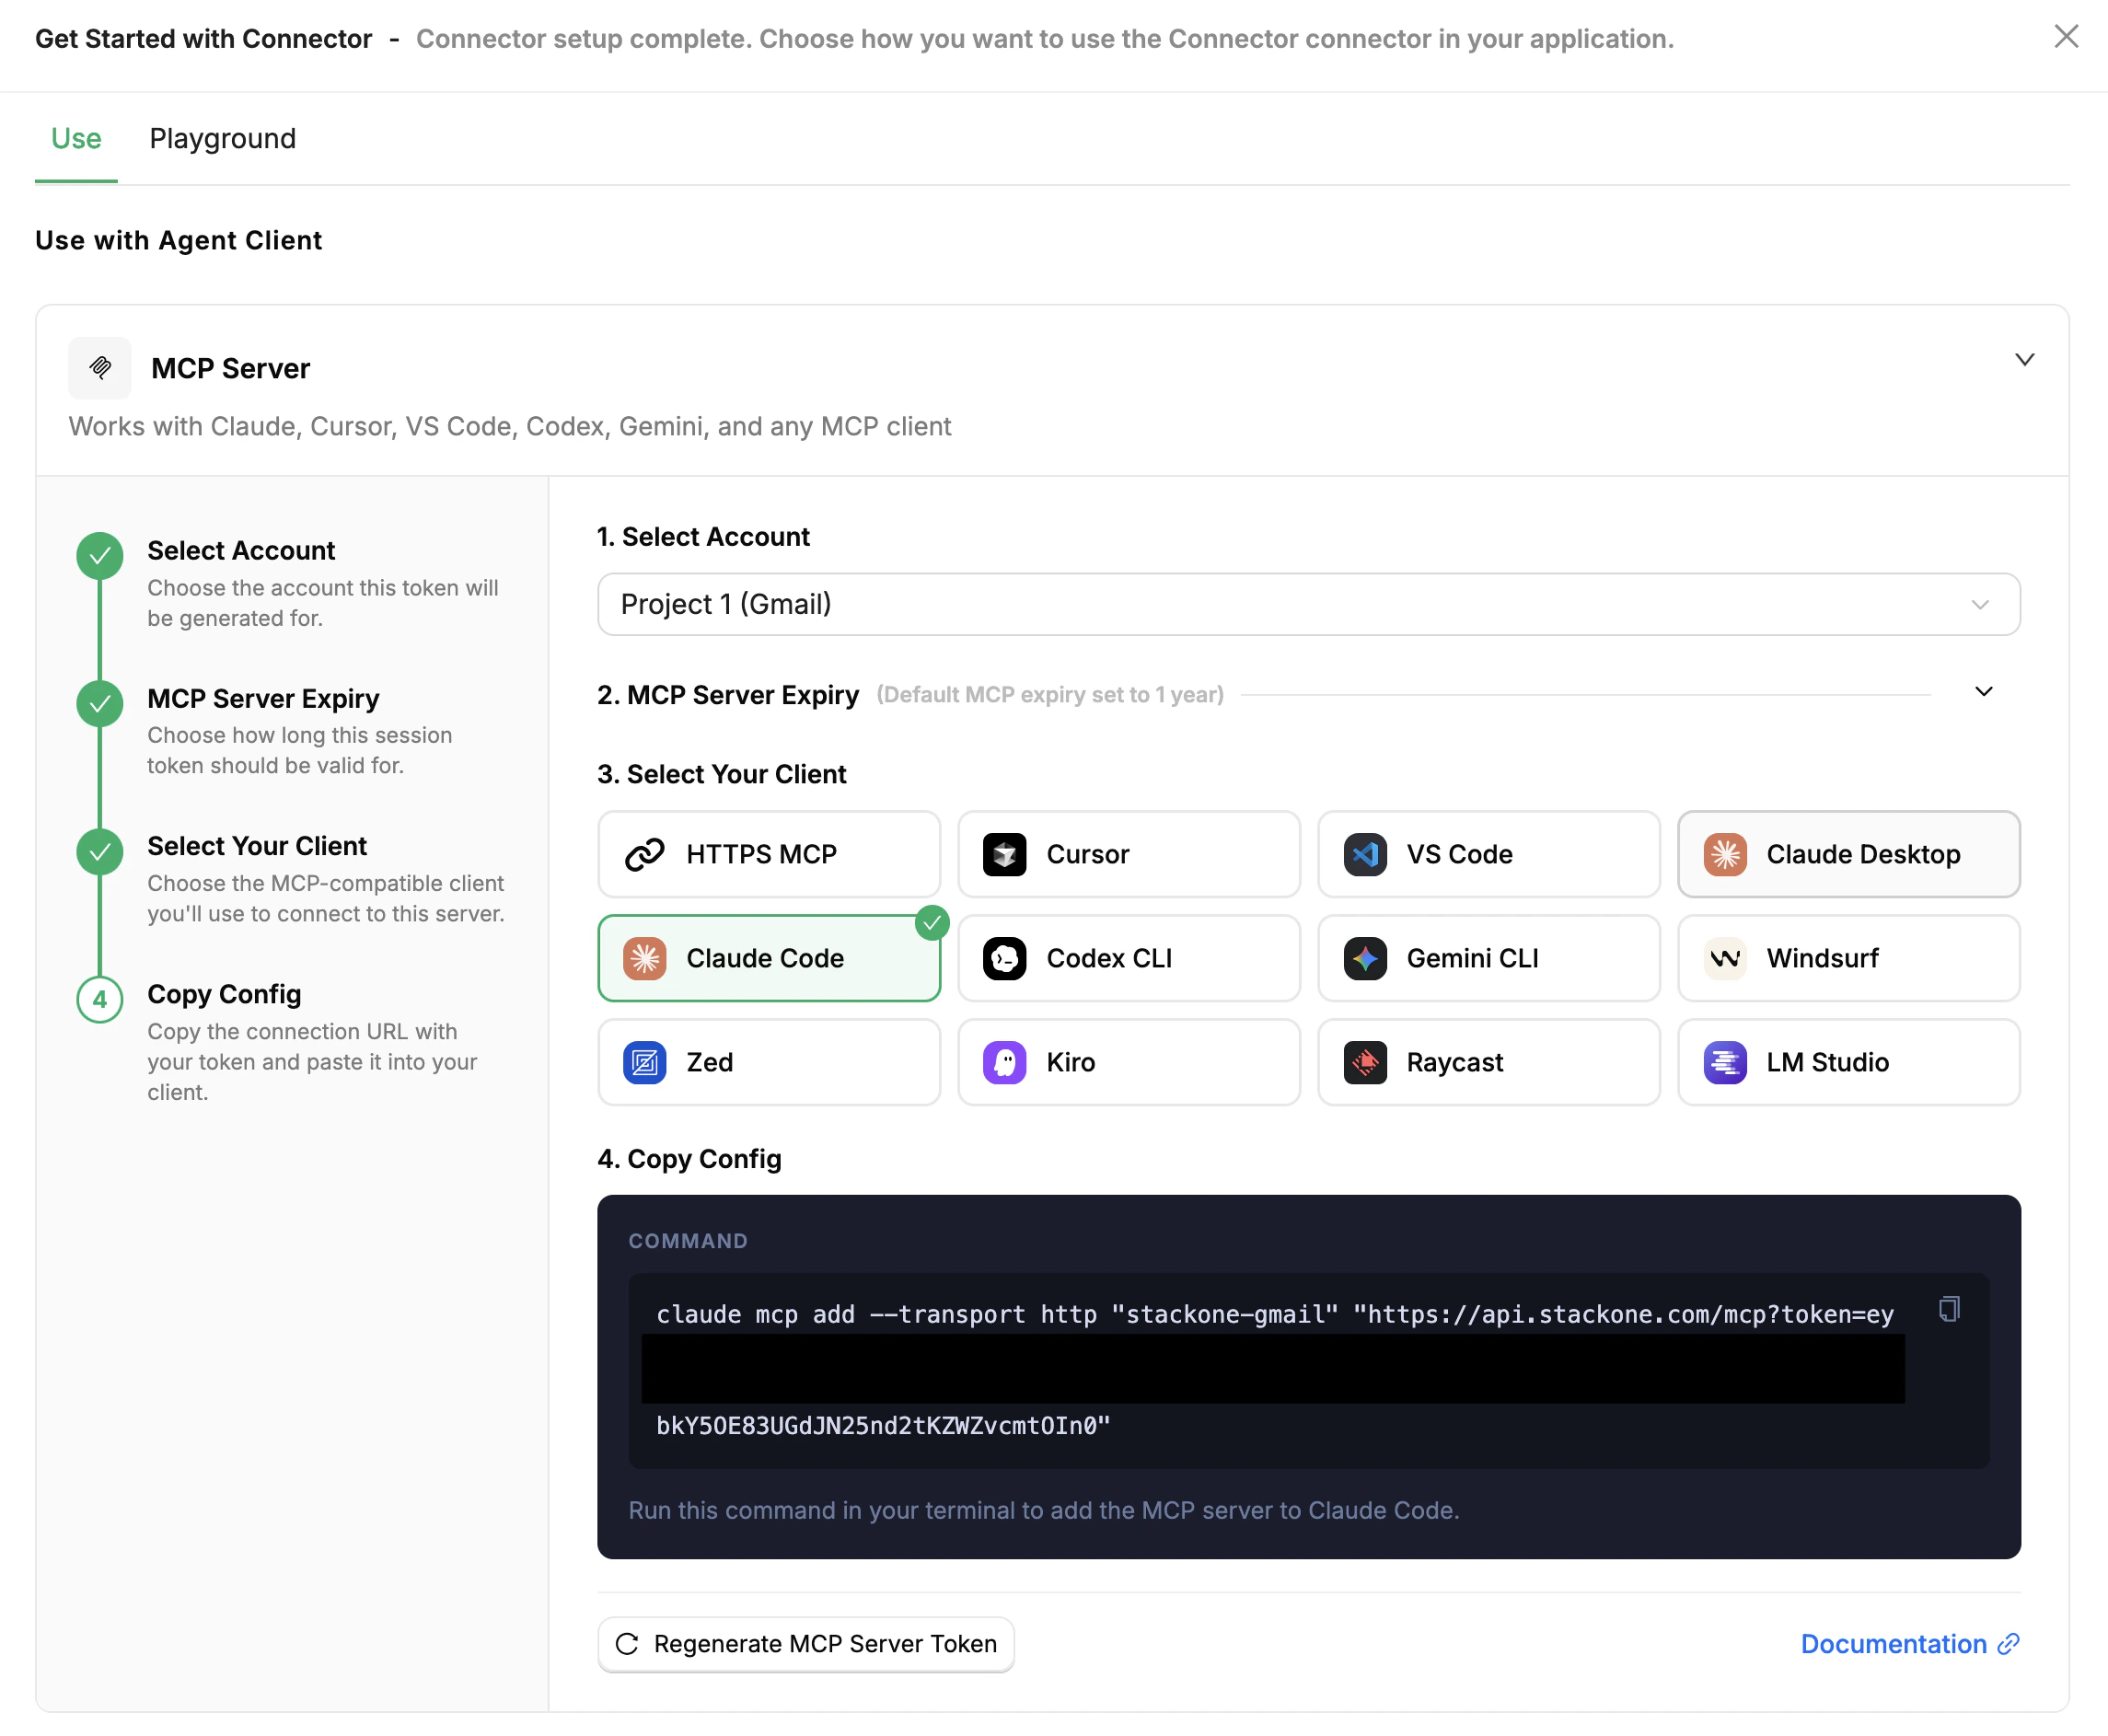
Following the Quick Setup, click the now enabled Use in Agent button. This will open the Use with Agent Client side panel.
2
Under MCP Server > Select Account, choose the account you configured above.
3
(Optional) Set the MCP Server Expiry. Default is 1 year.
4
Select the agent client you want to be able to use this Connector.
Further instructions are provided for most major platforms, otherwise the HTTPS MCP option reveals the URL that can be used in other MCP-compatible clients that support Streamable HTTP.
5
Once the agent client confirms the connection, try a prompt like "What tools can I use?" or "List the latest 5 records" to verify the Connector is working.
Use with Agent Client side panel: select account, set expiry, choose your client
MCP Quickstart →
Client-specific setup for Claude, Cursor, n8n, Vercel AI, and more
For OpenAI Agents SDK, Vercel AI SDK, or a custom TypeScript agent.
1
Create a StackOne API key
In the dashboard sidebar, open Project Settings → API Keys, click Create API Key, give it a name (e.g. local-dev), and copy the key — it’s only shown once.
The StackOne API key authenticates your application against StackOne and is separate from any provider credentials in the Connector Profile.
For LangChain, LangGraph, CrewAI, OpenAI Agents SDK, Pydantic AI, or a custom Python agent.
1
Create a StackOne API key
In the dashboard sidebar, open Project Settings → API Keys, click Create API Key, give it a name (e.g. local-dev), and copy the key — it’s only shown once.
The StackOne API key authenticates your application against StackOne and is separate from any provider credentials in the Connector Profile.
For Google ADK, AG2, BeeAI, or any other A2A-aware orchestrator over the Agent-to-Agent protocol.
1
Create a StackOne API key
In the dashboard sidebar, open Project Settings → API Keys, click Create API Key, give it a name (e.g. local-dev), and copy the key — it’s only shown once.
The StackOne API key authenticates your application against StackOne and is separate from any provider credentials in the Connector Profile.
2
Follow your framework's integration guide
Google ADK
AG2
BeeAI
A2A SDK
Or see the A2A Quickstart for the agent card URL, message format, and headers.
The AI Playground lets you test actions with natural language directly in the dashboard without having your own agent client.
1
In the dashboard sidebar, open Playground.
2
In the Configure panel, click Manage Action Sources.
Select the Account you previously linked.
Click Done.
3
Try a prompt like "What tools can I use?" or "List the latest 5 records".
You should be able to see the tool calls and responses from the agent, and provide follow-up prompts.
Full Playground Guide →
Available models, debugging tool calls, and Playground limits
Compare Agent Protocols →
Side-by-side comparison of MCP, SDKs, and A2A with worked examples.