Overview
This document provides a comprehensive, step-by-step guide for integrating SAP SuccessFactors with StackOne for background checks. It covers enabling theBackground Check Vendor option, configuring integration templates in SAP SuccessFactors, mapping the required
fields, and setting up permissions and picklists. The guide also details how to activate the integration in StackOne, obtain the necessary
tokens, and ensure users can initiate and view background checks directly within the SAP SuccessFactors user interface.
Partner Requirements
There is no formal or explicit partnership requirement with SAP SuccessFactors for this integration. However, you must have administrative privileges with the necessary permissions to access various features in SAP SuccessFactors. You will need the following mandatory permissions to access and utilise the Integration Center for modelling and executing the integration:- Admin access to MDF OData API
- Access to Integration Center
- Access to non-Secured Objects
Provider Side Setup
Enable the Other Background Check Vendor option
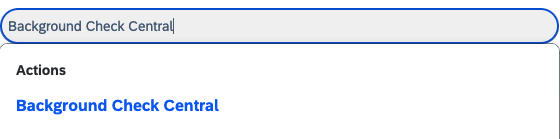
Background Check Central Configuration
Other Background Check Vendor.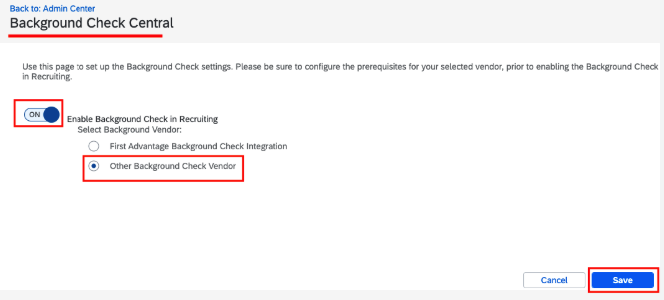
Select the type of integration template for the external background check
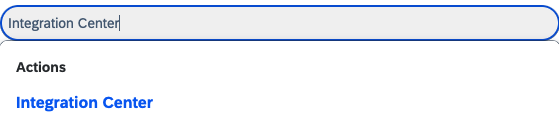
Go to Integration Center
My Integrations.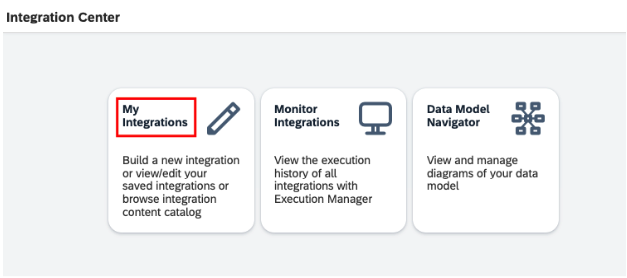
Select the Type of Integration Center Template
+ Create button and select More Integration Types to access the list of available integration types.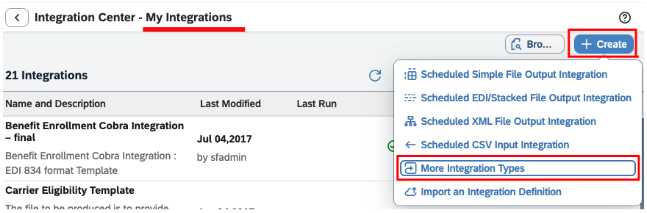
- Application/UI for Trigger Type
- SuccessFactors for Source Type
- REST for Destination Type
- JSON for Format
Create button.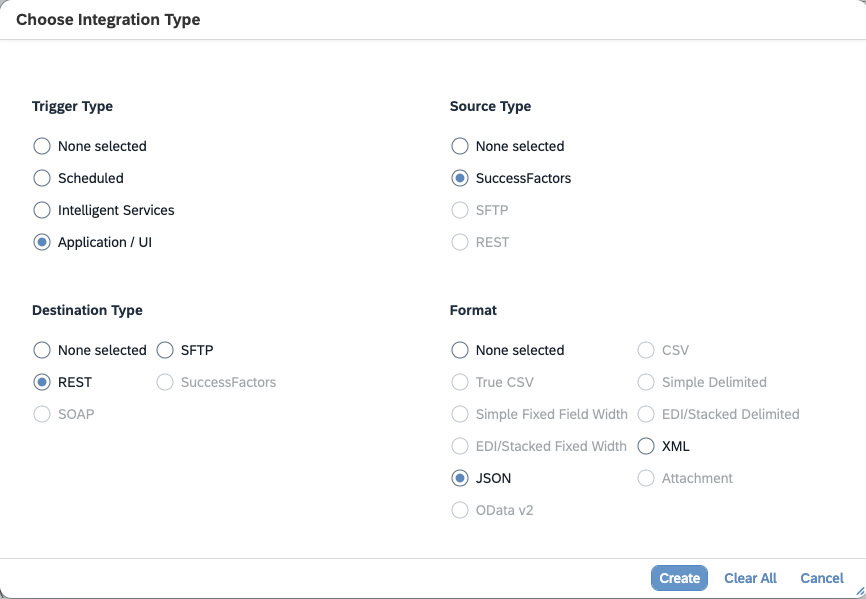
JobApplicationBackgroundCheckRequest, and then select it from the search results.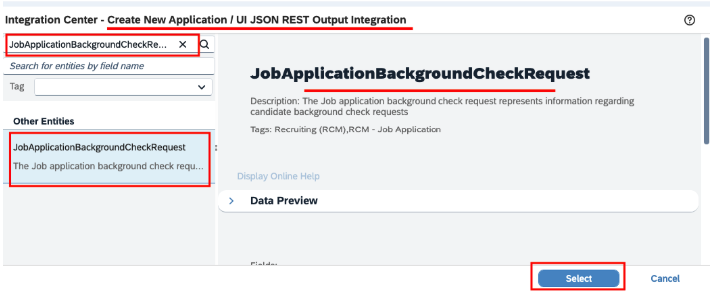
Create and configure an integration template for background checks
Options Step
Next button to proceed with further configuration steps. You may also click the Save button to save the current step’s configuration.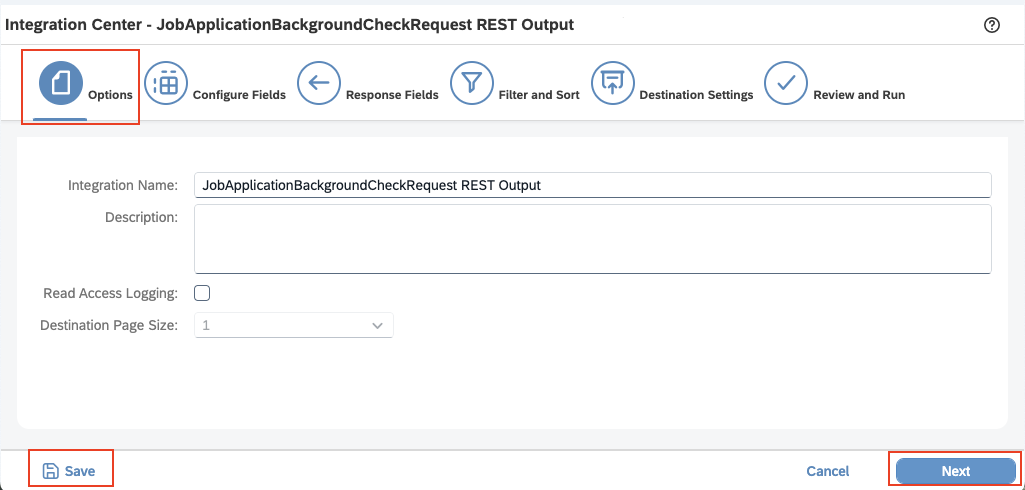
Configure Fields Step
+ button > Insert Sibling Element, then click on the inserted element to open a prompt where you can enter the name of the element.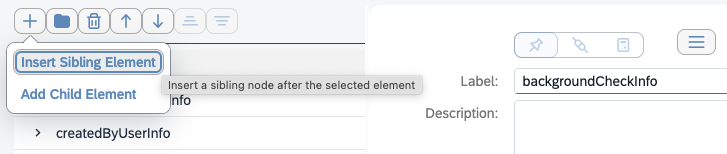
+ button > Add Child Element for the added element, then click on the inserted element to open a prompt where you can enter the name of the child element.
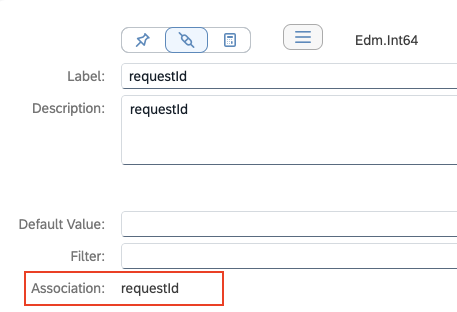
Set as Associated Field icon.
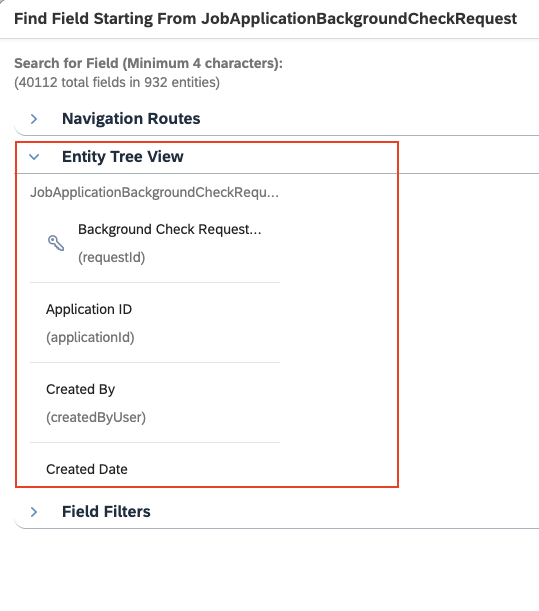
Change Association button.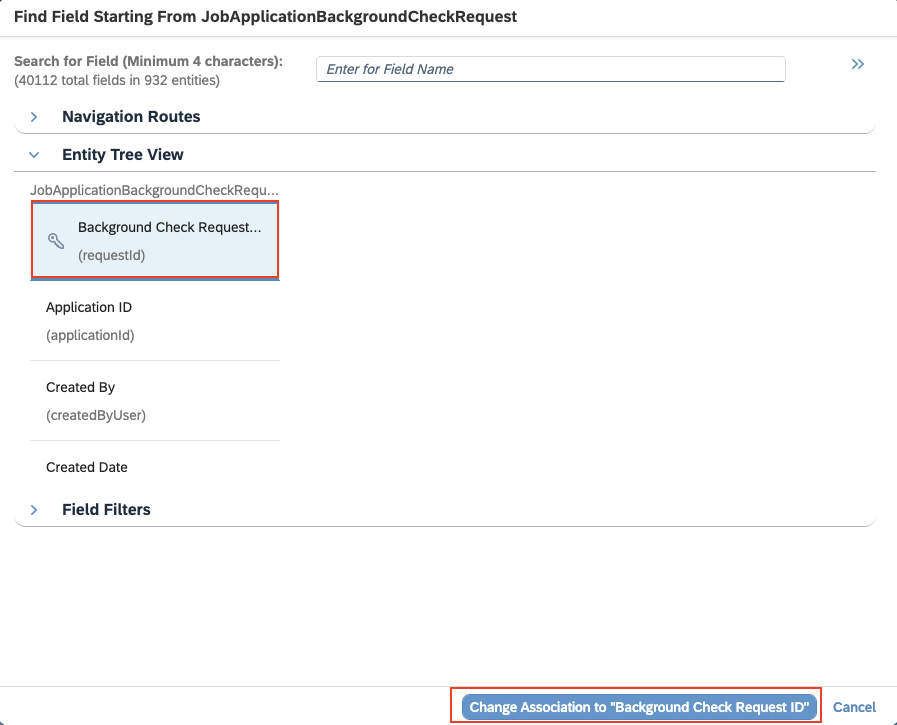
Please follow the mapping below to receive the correct order notification
Please follow the mapping below to receive the correct order notification

Response Fields Step
Switch to Field Mapping View option,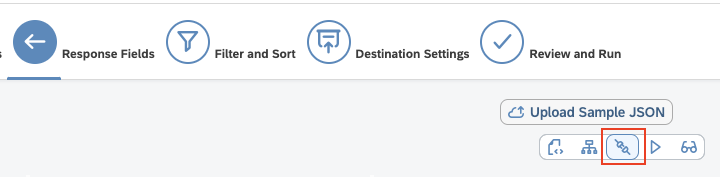
+ button and select the JobApplicationBackgroundCheckRequest entity. Then click Add and proceed by clicking the Next button.
Filter and Sort Step
Next button.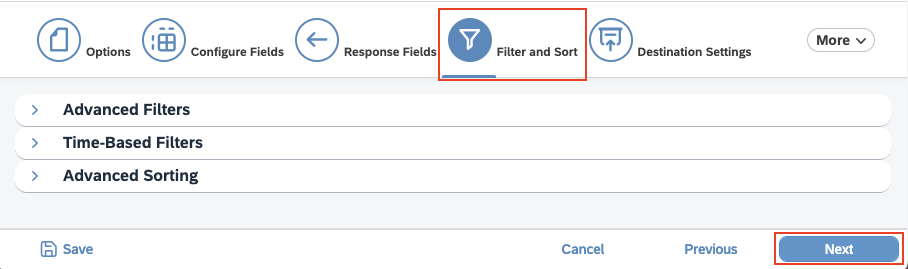
Destination Settings Step
REST Server Settings and enter the following details:-
Connection Name: You may choose any name you prefer.
- REST API URL: This is the endpoint URL provided by StackOne, which will be used to receive background check order requests.
- Authentication Type: Select
Basic Authenticationfrom the dropdown menu. - Username: Enter the
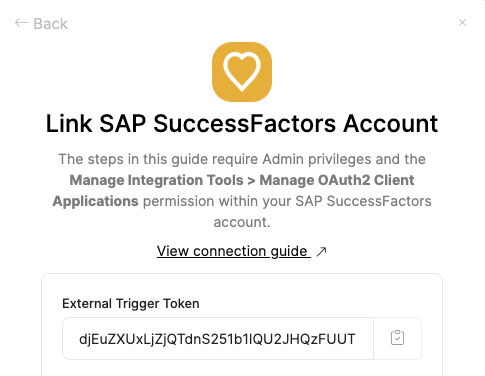
External Trigger Tokenthat you will receive from theStackOne Connector Hubduring the connection.
To obtain the External Trigger Token, follow these steps: - Password: This field can be left empty.
-
HTTP Method: Choose the
POSTmethod under REST Operation Settings.
Next button to proceed.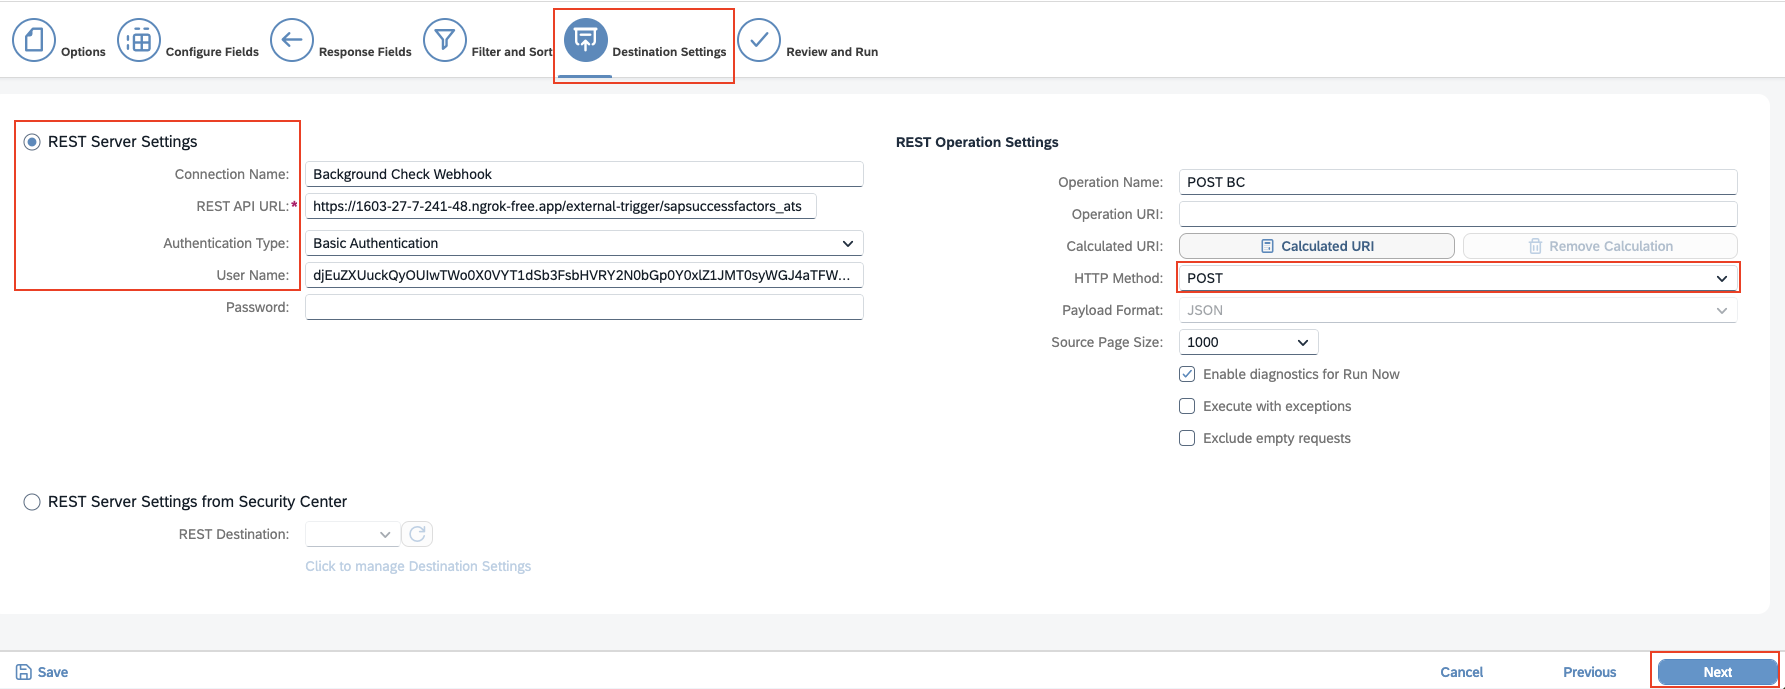
Review and Run Step
Save option. After creation, the template will run in the background, so there is no need to click Run Now.
Last Run Time link.Create Vendor from Recruiting External Vendor
Go to Manage Data
Recruiting External Vendor from the Create New dropdown.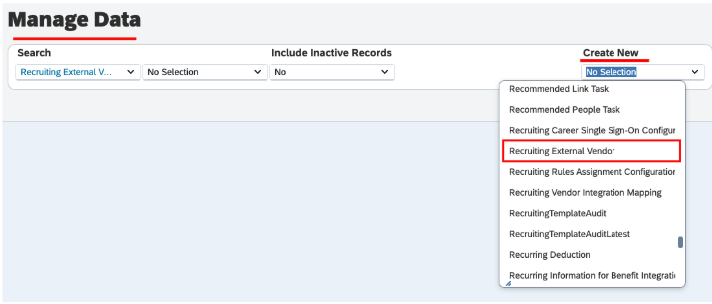
Background Check as the Integration Type from the dropdown menu. Click Save to create the vendor.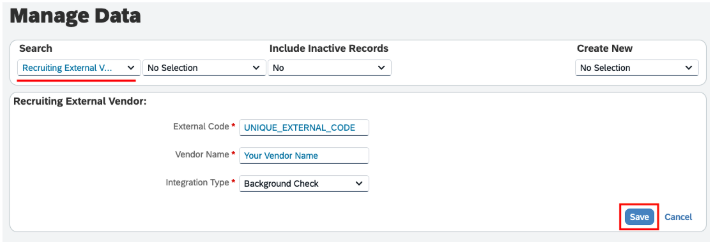
Create Recruiting Vendor Integration Mapping
Go to the Manage Data
Recruiting Vendor Integration Mapping from Create New dropdown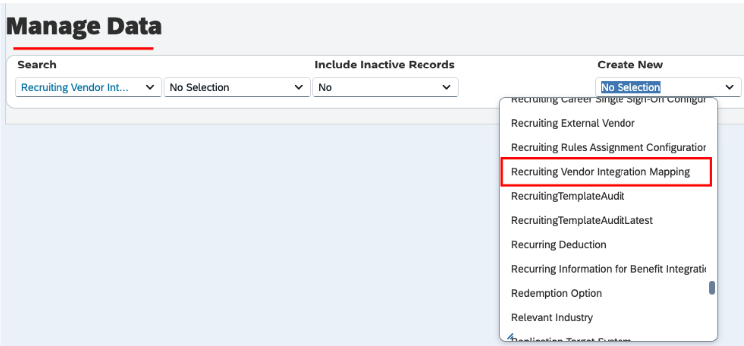
- External Code: Enter a unique identifier code.
- Vendor Name: Select your vendor name from the dropdown menu created in the previous step.
- Integration Name: Choose your integration name from the dropdown menu.
-
Default Integration: Select
Yes. -
Hours Before User Can Reinitiate: This field currently has no functionality in SAP SuccessFactors. You may enter
0.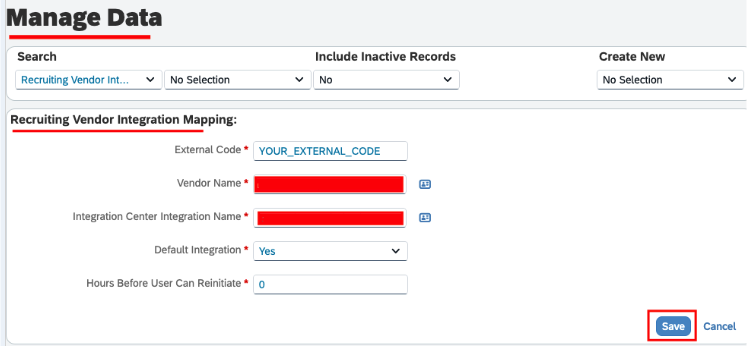
Save to save the mapping between the vendor and the integration.Recruiting Vendor Integration Mapping can be active at a time. To activate the selected vendor integration for the instance, choose Yes in the Default Integration field. Additionally, ensure that No is selected for all other Recruiting Vendors you may have created.Manage fields for the Job Requisition template
Go to Manage Templates
Standard Job Requisition.How to Locate the Job Requisition Template Name
How to Locate the Job Requisition Template Name

i icon to view the Job Requisition Template.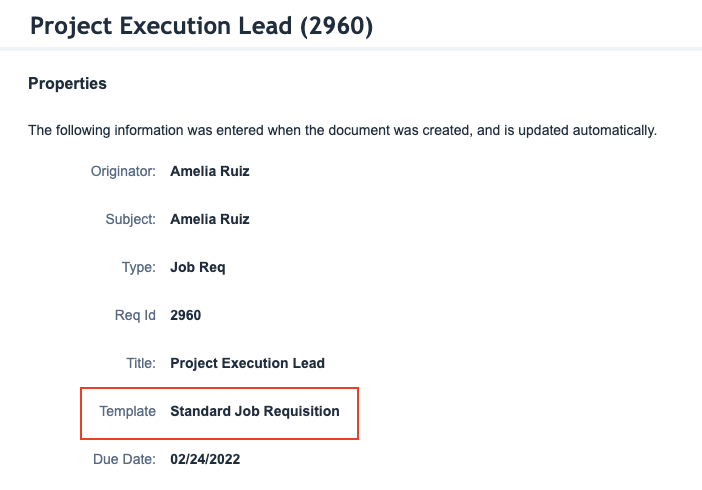

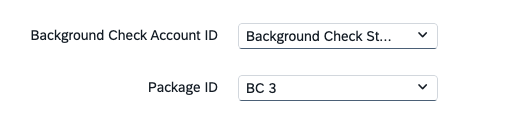
Add bgiAccountId & packageId fields in template
- bgiAccountId: This field allows you to create multiple accounts with a single third-party background check vendor. It enables users to select which account to use.
-
packageId: This field allows users to choose the package they wish to associate with a specific job requisition.
You can specify the standard fields `bgiAccountId` and `packageId` using the Job Requisition XML as well.
In the next step, update the permissions to ensure the fields are visible during Job Requisition creation or updates. The fields
bgiAccountIdandpackageIdwill only be accessible for Job Requisitions that utilise a specific Job Requisition template where these fields are configured.
Manage the permissions for the fields added to the Job Requisition template
Go to Manage Templates
Field Permissions Defined, and then click Add Field Permission in the modal.- Field Permission Description: Enter any description.
- Field Permission Type: Select
Write Permission. - Field Permission Role Name: Select
Recruiter. - Field Reference ID: Select the
bgiAccountIdandpackageIdfields. - Field Permission Status: Select
Allorpre-approvedfrom the dropdown menu.
- Field Permission Type: Select
Publish to save your changes.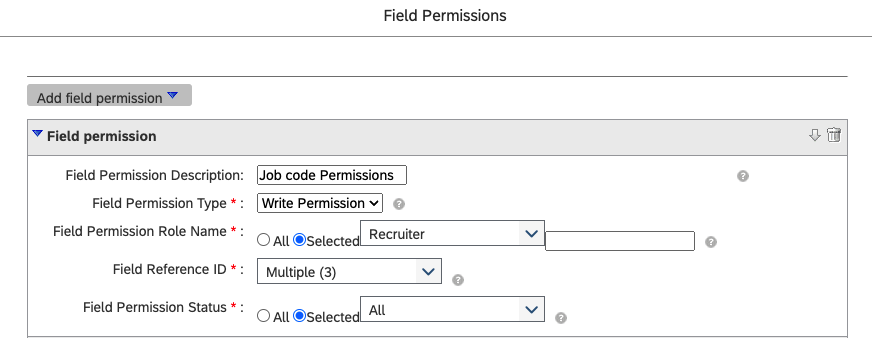
Grant Background Check Initiate Permission
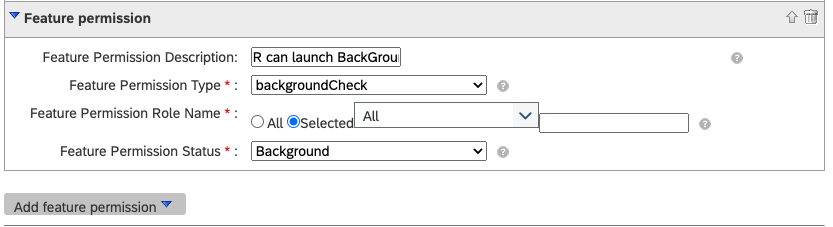
Background Check Initiate permission is assigned, the user will be able to execute “Application/UI” or “Event-based” integrations.
Add background check accounts from the PickList Center
Go to background check accounts
PickList Center.
bgiAccountId.
Add New Accounts
bgiAccountId. This will take you to the Picklist Values page, where you can add different Background Check Accounts.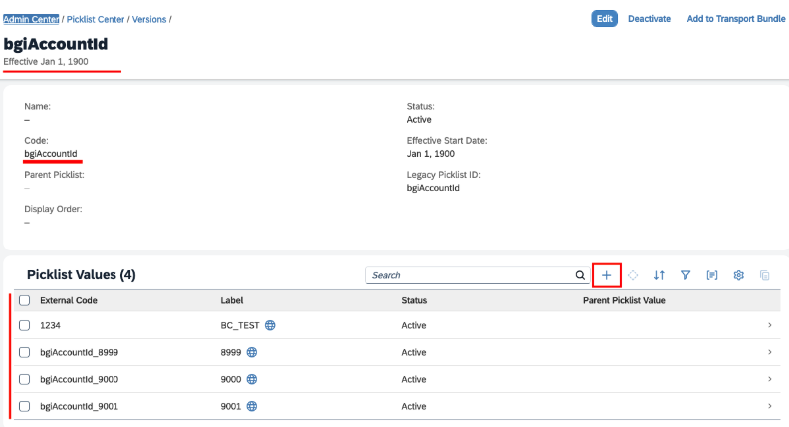
Add background check packages from the PickList Center
Go to the packages
PickList Center.packageId.
Add New Packages
packageId to go to the Picklist Values page, where you can add different Background Check Packages.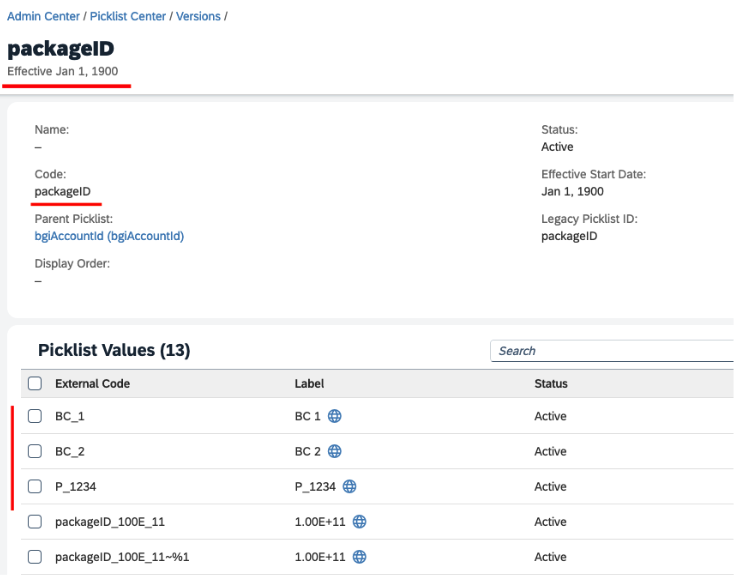
Include a Background Check stage in the Talent Pipeline
Go to Applicant Status Configuration
Edit Applicant Status Configuration. Select the specific Applicant Status Set currently in use for the job requisition, such as the Standard Status Set.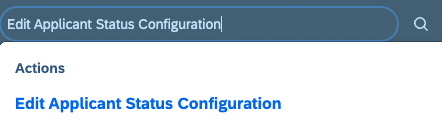
Standard Status Set.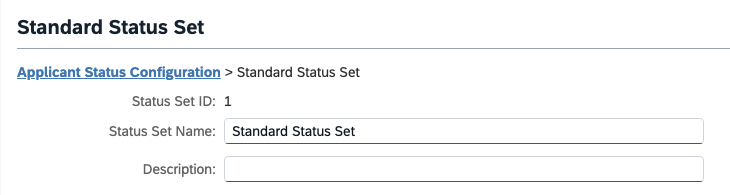
Edit Applicant Status Set configurations
Background Check stage, edit it, and select none from the Status Group dropdown. This will make the Background Check visible as a separate stage in the Job Requisition’s Talent Pipeline.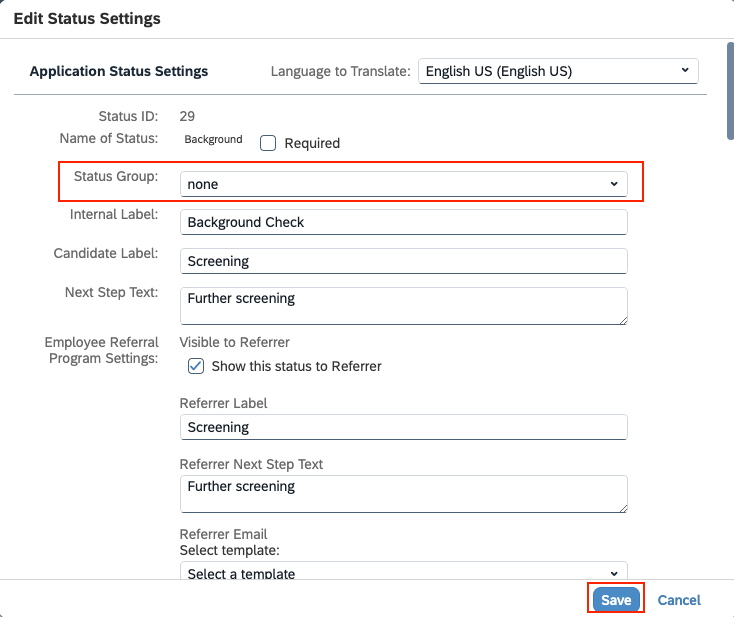
Save and Finish button to save your changes.
Where can you verify the added stage
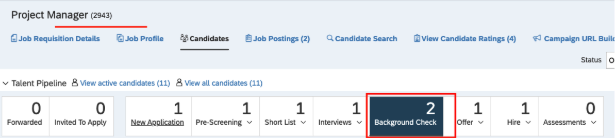
Background Check fields visibility under the Job Requisition
Go to Job Requisition
View or Edit Requisition.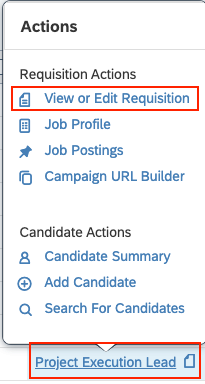
If fields are not visible after adding fields & permissions in the above steps
If fields are not visible after adding fields & permissions in the above steps
OData API Metadata Refresh and Export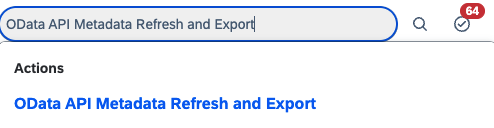
Refresh button next to Cache.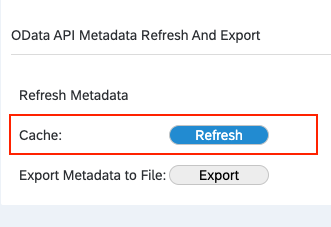
Visibility of Initiate Background Check option
Initiate Background Check option will be visible to users under the Take Actions menu within the candidate’s application.Initiate Background Check option is not visible, please ensure that the user has been granted the necessary permissions to initiate background checks as outlined in the previous step.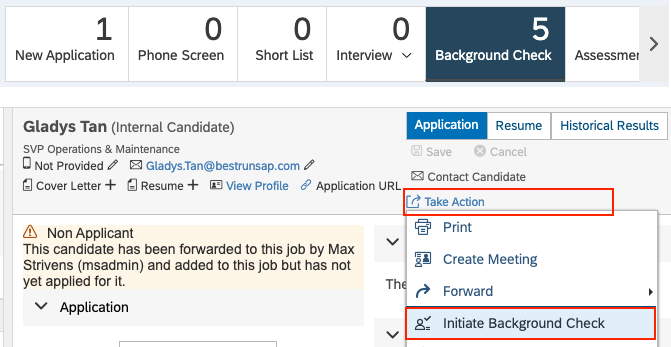
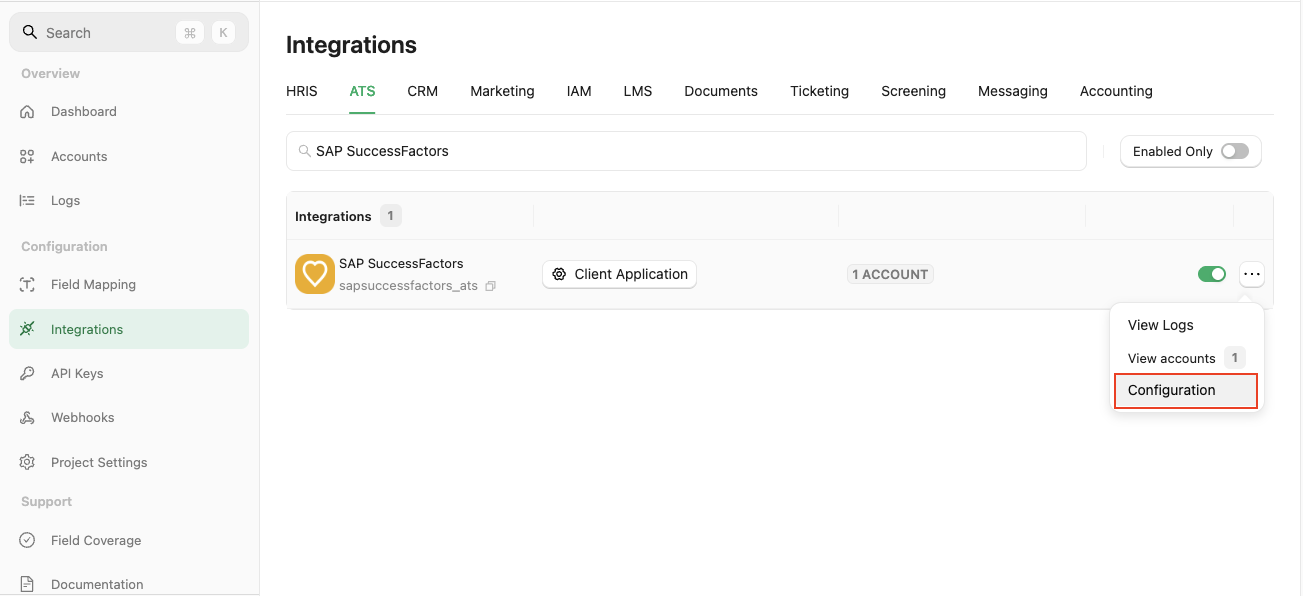
StackOne Configuration
Enable SAP SuccessFactors in StackOne
Complete the configuration form
- Authentication Type: Select
Client Application. - Integration Category: Select
Background Checks.
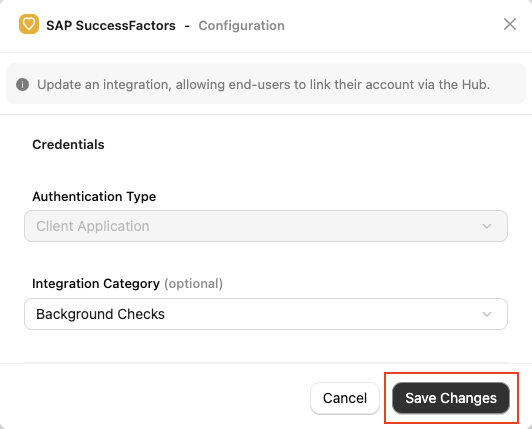
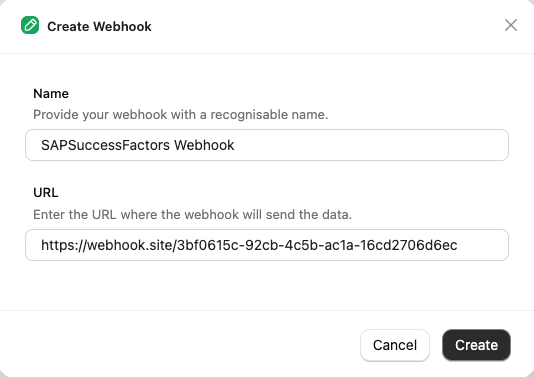
Confirm or Save Changes to enable the SAP SuccessFactors integration, allowing end users to link their accounts via the StackOne Connector Hub.Add a Webhook
Add webhook, and complete the form:- Name: Enter a recognisable name for your webhook.
-
URL: Enter the URL where the webhook will send notifications of enable events.
Enable webhook events from the
Eventstab for Background Check, such asBackground Check Order.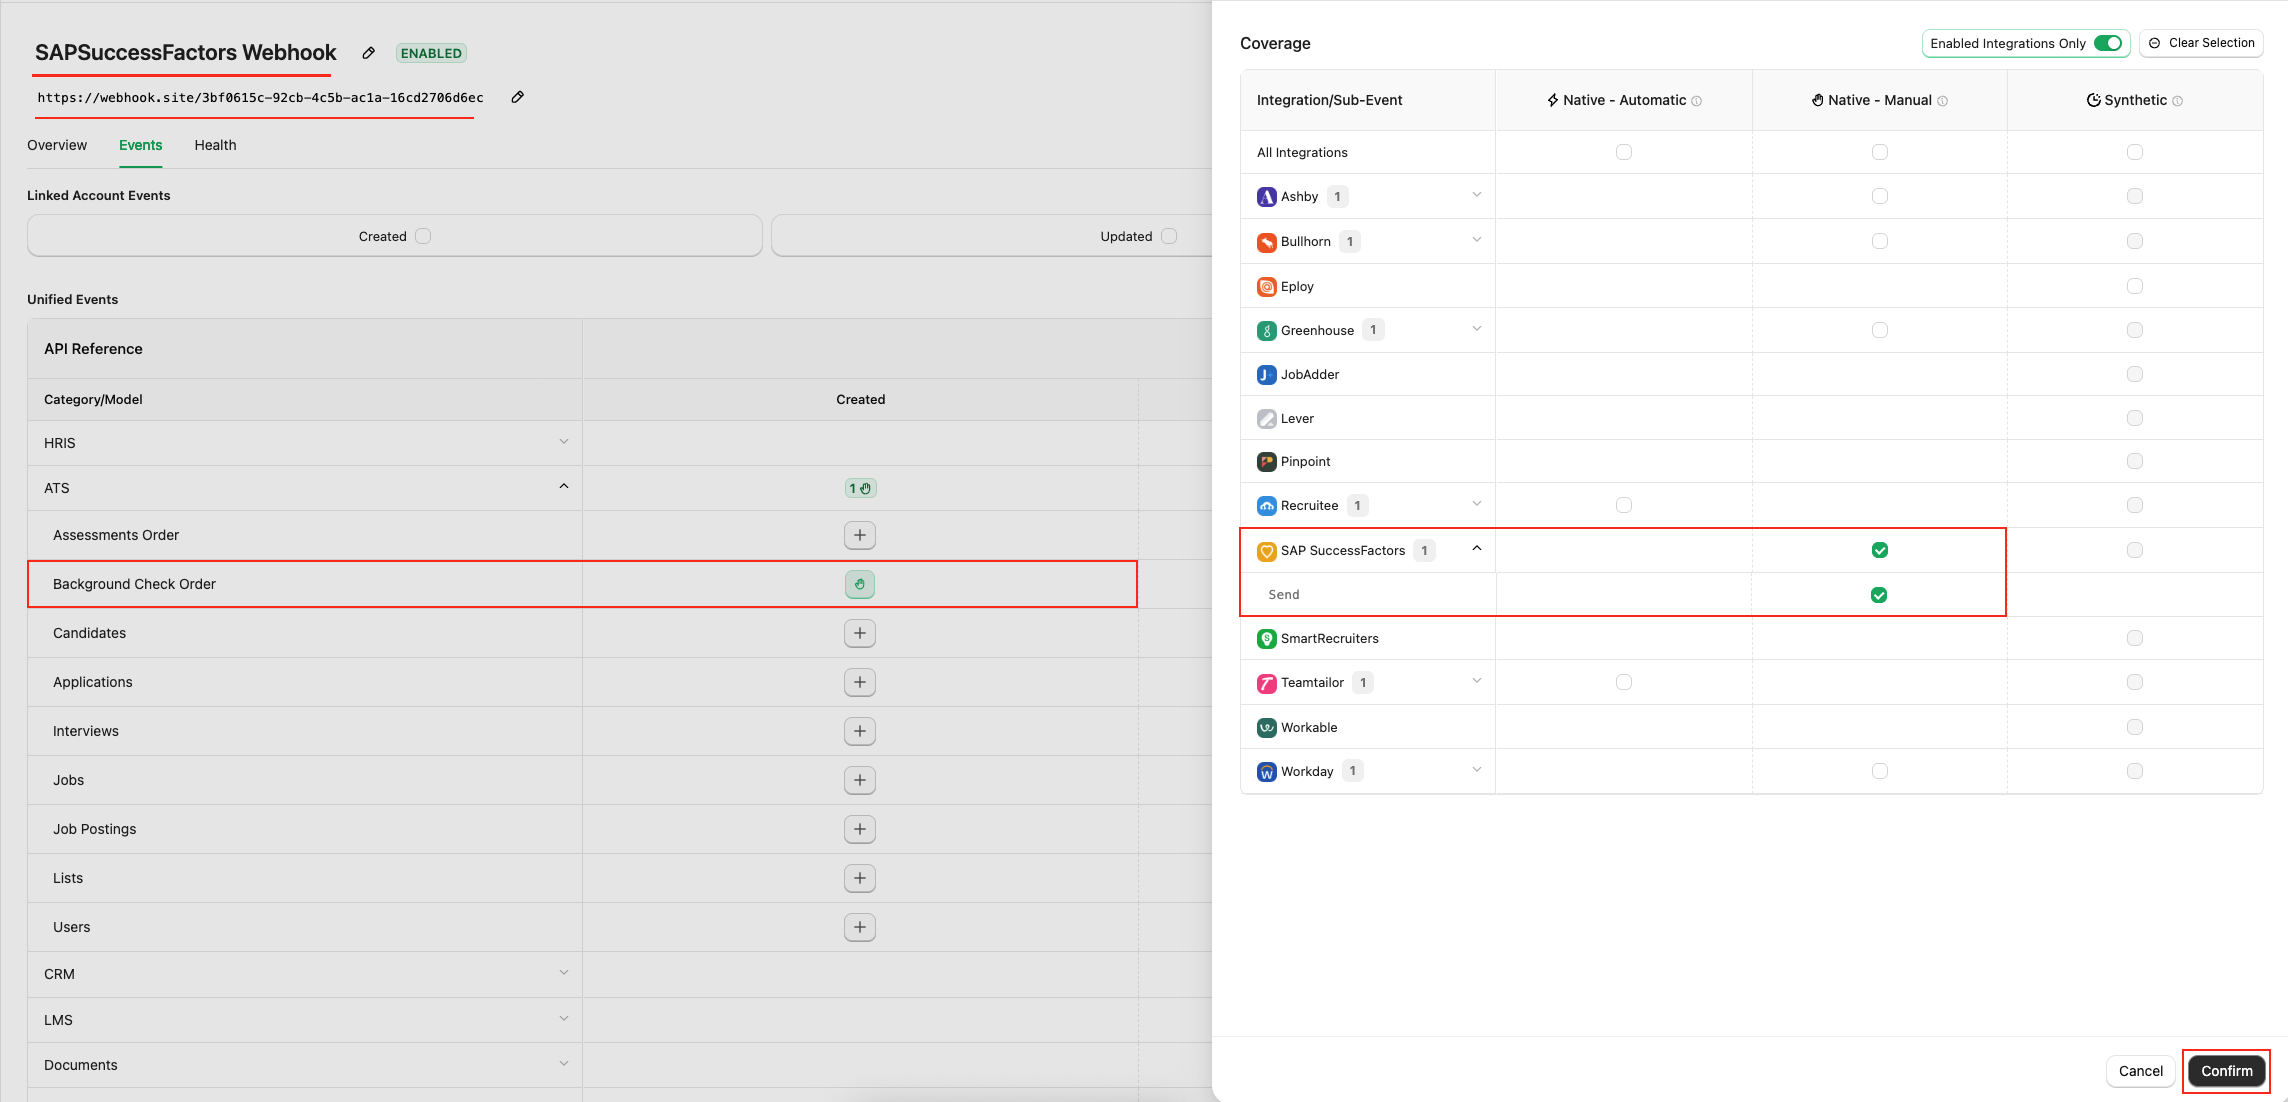
ATS User Enablement
Navigate to the Accounts page or the StackOne Connector Hub to link your SAP SuccessFactors account with StackOne.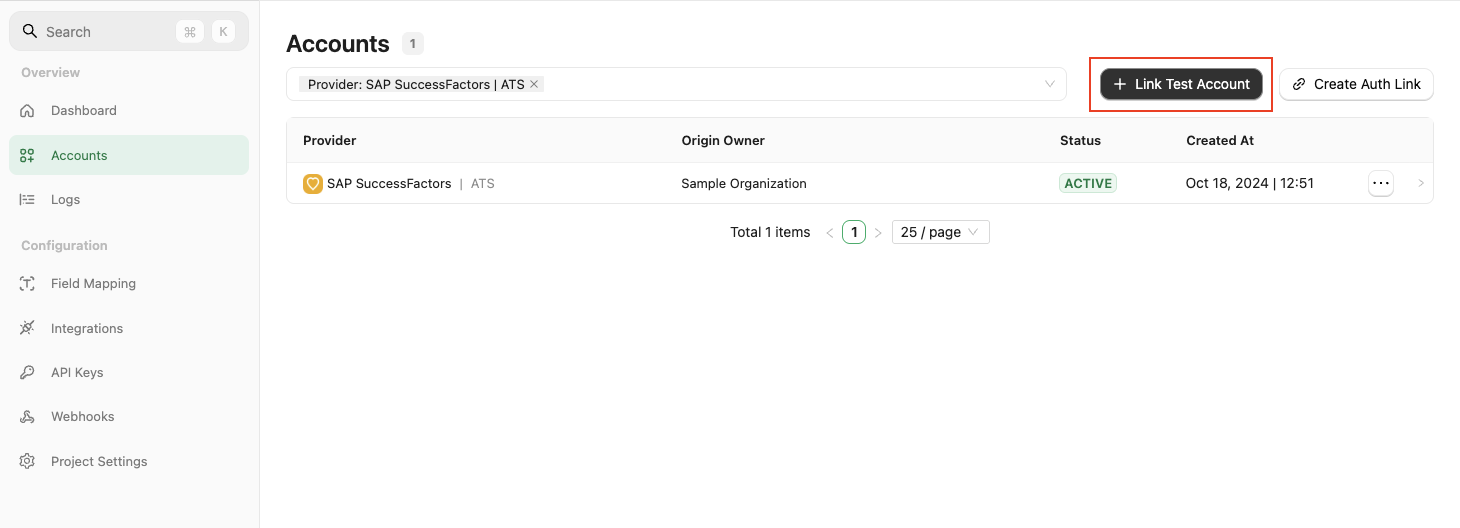
External Trigger Token, which must be entered as the username during the Destination Settings step under configure an integration template in SAP SuccessFactors.
ATS User Experience
Go to Job Requisition
View or Edit Requisition.Save Changes button.If fields are not visible after adding fields & permissions in the above steps
If fields are not visible after adding fields & permissions in the above steps
OData API Metadata Refresh and Export.Refresh button next to Cache.Move candidate within the Talent Pipeline
Move Candidate option from the Take Action menu.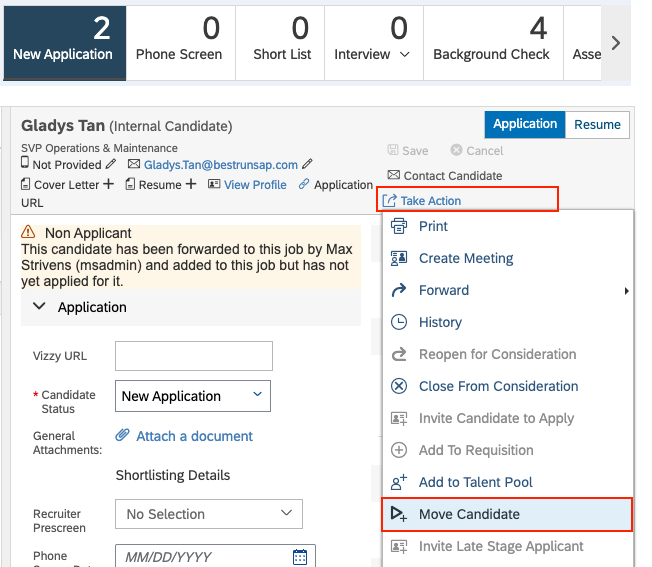
Background Check from the dropdown menu, then click Apply Updates to move the candidate forward.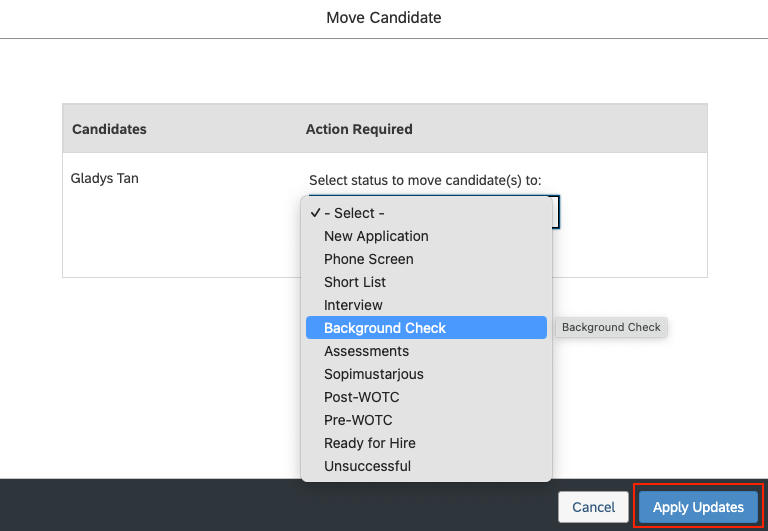
Visibility of Initiate Background Check option
Initiate Background Check option will be visible to users under the Take Actions menu within the candidate’s application.Send the test to the candidate from SAP SuccessFactors
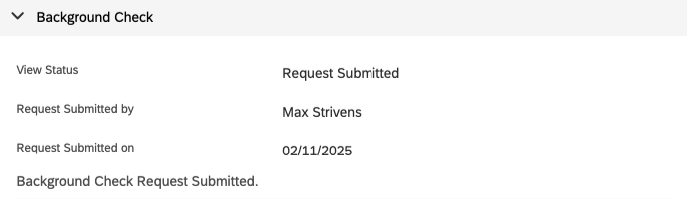
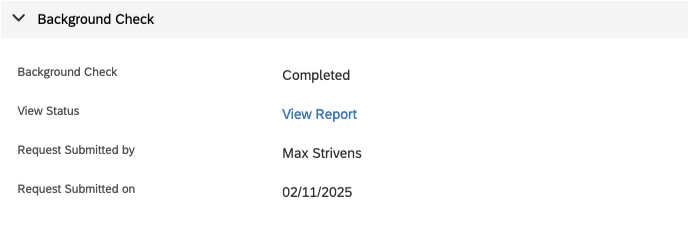
User experience after the background check has been sent
When a user sends a background check to a candidate, they will see theRequest Submitted status along with the background check portlet in the candidate’s application.
ATS User Experience Customisation
Update the result via Unified API
- Connector Meta Information with the provider key
sapsuccessfactors_atsfor modelbackground_checks/results.update
How are background check results displayed to the user in SAP SuccessFactors?
Testing Checklist
✅ Provider Setup:- You have all the necessary permissions mentioned in the Partner Requirements section.
- The
Other Background Check Vendoroption is enabled from Background Check Central as mentioned in Enable the Other Background Check Vendor option step. - A valid integration template is selected for the external background check.
- Valid configurations exist in the integration template for background checks, with a valid StackOne endpoint URL and valid External Trigger Token.
- A vendor has been created from Recruiting External Vendor with
Background Checkas the Integration Type. - A Recruiting Vendor Integration Mapping has been created with the vendor and integration from the previous steps.
- The
bgiAccountIdandpackageIdfields have been added to the Job Requisition template with the necessary permissions. - Accounts have been added in the
bgiAccountIdpicklist and packages in thepackageIdpicklist. - A
Background Checkstage has been added to the talent pipeline for the job requisition, if not already present. - The feature permission for
Background Check Initiate Permissionhas been granted to the job requisition template. - Account ID and Package ID fields are visible to users during creation/editing of the Job Requisition.
- The
Initiate Background Checkoption is visible to users under theTake Actionsmenu within the candidate’s application, as mentioned in this step.
- The integration category
Background Checksis selected.
- A valid
External Trigger Tokenis entered as the username during theDestination Settingsstep under configure an integration template. - A single
Recruiting Vendor Integration Mappingis activated to use the background check integration. Please refer this step.
- A webhook for SAP SuccessFactors has been added and enabled with the
Background Check Orderevent. - A valid webhook URL has been added to receive background check notifications.
- The
Background Checkstage is visible in the talent pipeline for the job requisition. - Account ID and Package ID fields are visible to users during creation/editing of the Job Requisitions.
- The
Initiate Background Checkoption is visible to users under theTake Actionsmenu within the candidate’s application, as mentioned in this step. - After sending the background check to a candidate, the user can see the
Request Submittedstatus along with the background check portlet in the candidate’s application.
- A success response is received from the update result endpoint.
- Updated result details are visible in SAP SuccessFactors’s UI.