ChatGPT connects to remote MCP servers as custom MCP servers, added from Plugins and saved as a plugin. It registers itself with StackOne and runs the OAuth flow, so the URL is the whole configuration.Add the server in a browser at chatgpt.com/plugins. What you create belongs to your ChatGPT account or workspace, and the desktop app picks it up from there once it exists.
Adding a custom MCP server no longer requires Developer mode. Account and workspace policies still apply, so in a Business, Enterprise, or Edu workspace an admin may need to allow custom MCP servers first. The menu labels change often, so see OpenAI’s Connect and test your plugin guide for the current flow.
Enter a name and description, for example StackOne.
Under Connection, enter the MCP server URL:
https://mcp.stackone.com/mcp
Set authentication to OAuth. ChatGPT discovers the endpoints and registers itself, so leave the client ID and secret empty. No mcp-remote wrapper needed.
Review the risk warning and select I understand and want to continue.
Select Create as a plugin.
If Add custom MCP server is missing from the menu, a policy on your account or workspace is blocking it. In a Business, Enterprise, or Edu workspace, ask a workspace admin or owner to allow custom MCP servers for your role. On a personal plan, check OpenAI’s Connect and test your plugin guide for current availability.
2
Approve the consent screen
ChatGPT opens StackOne in your browser.Sign in, pick the project and the linked accounts the connector should reach, then Authorize.
Walk through the consent screen
Sign in to StackOne. If you are already signed in to the dashboard you skip straight to the next step.
Check where the connection returns. The line under the client’s logo shows where it goes after you approve. If it names localhost or an app on this device, only continue if you started the connection from that client.
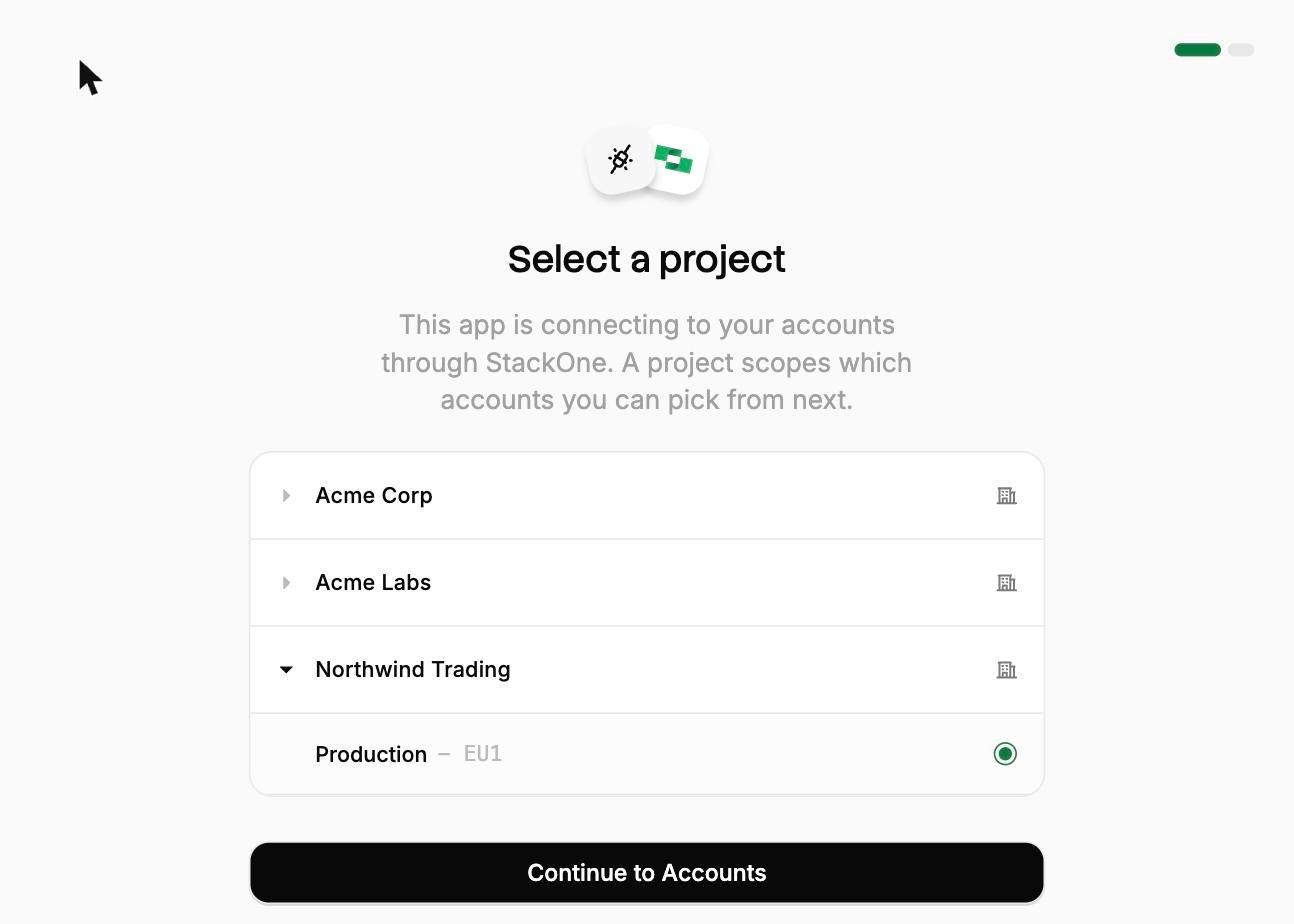
Select a project. Select the project you would like to associate the connection with.
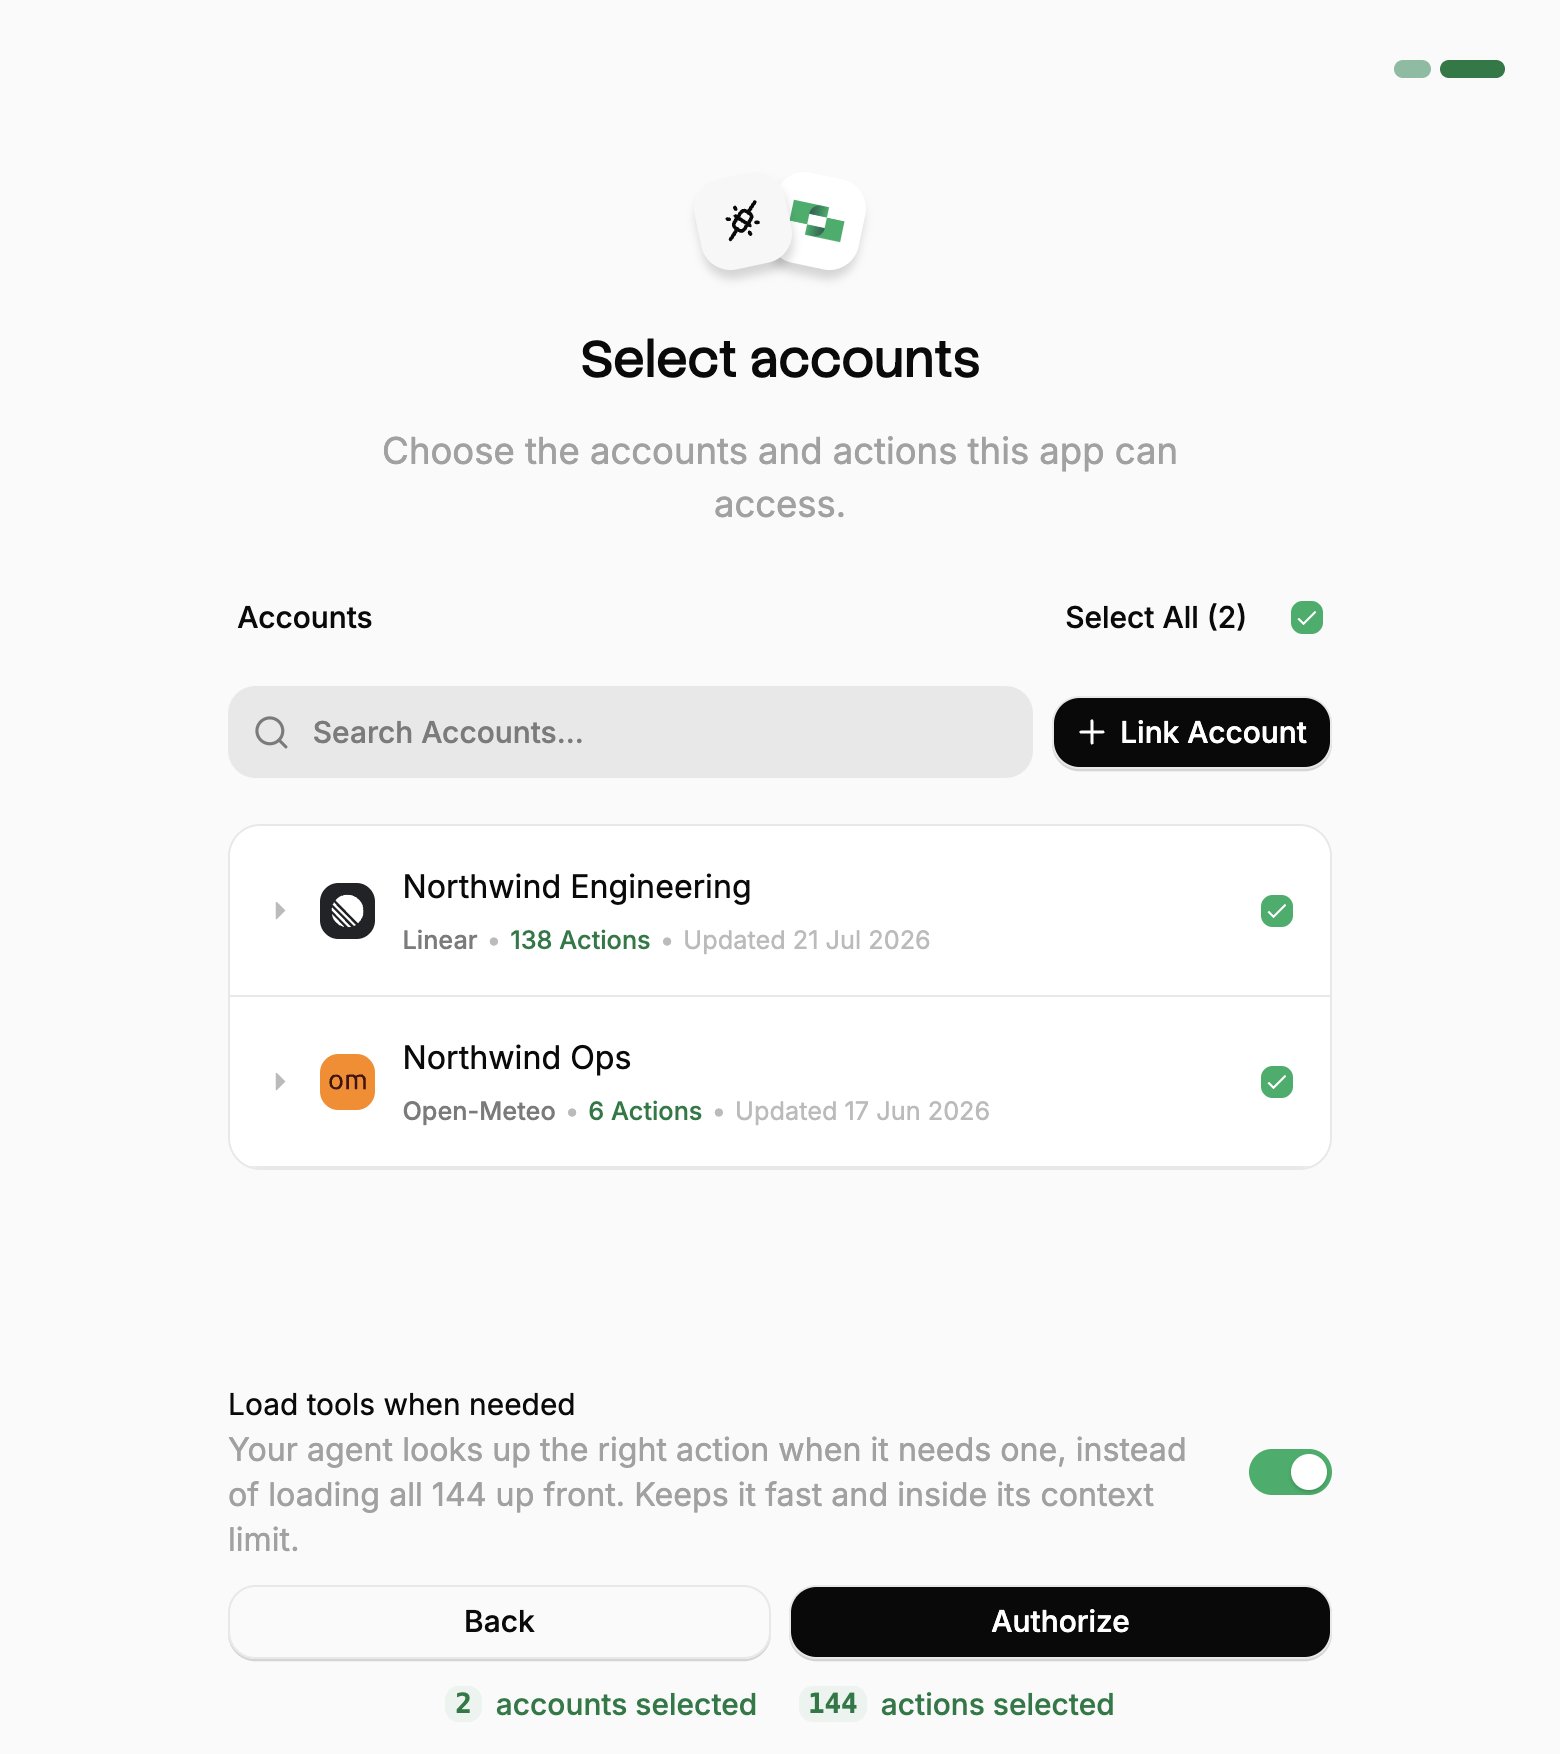
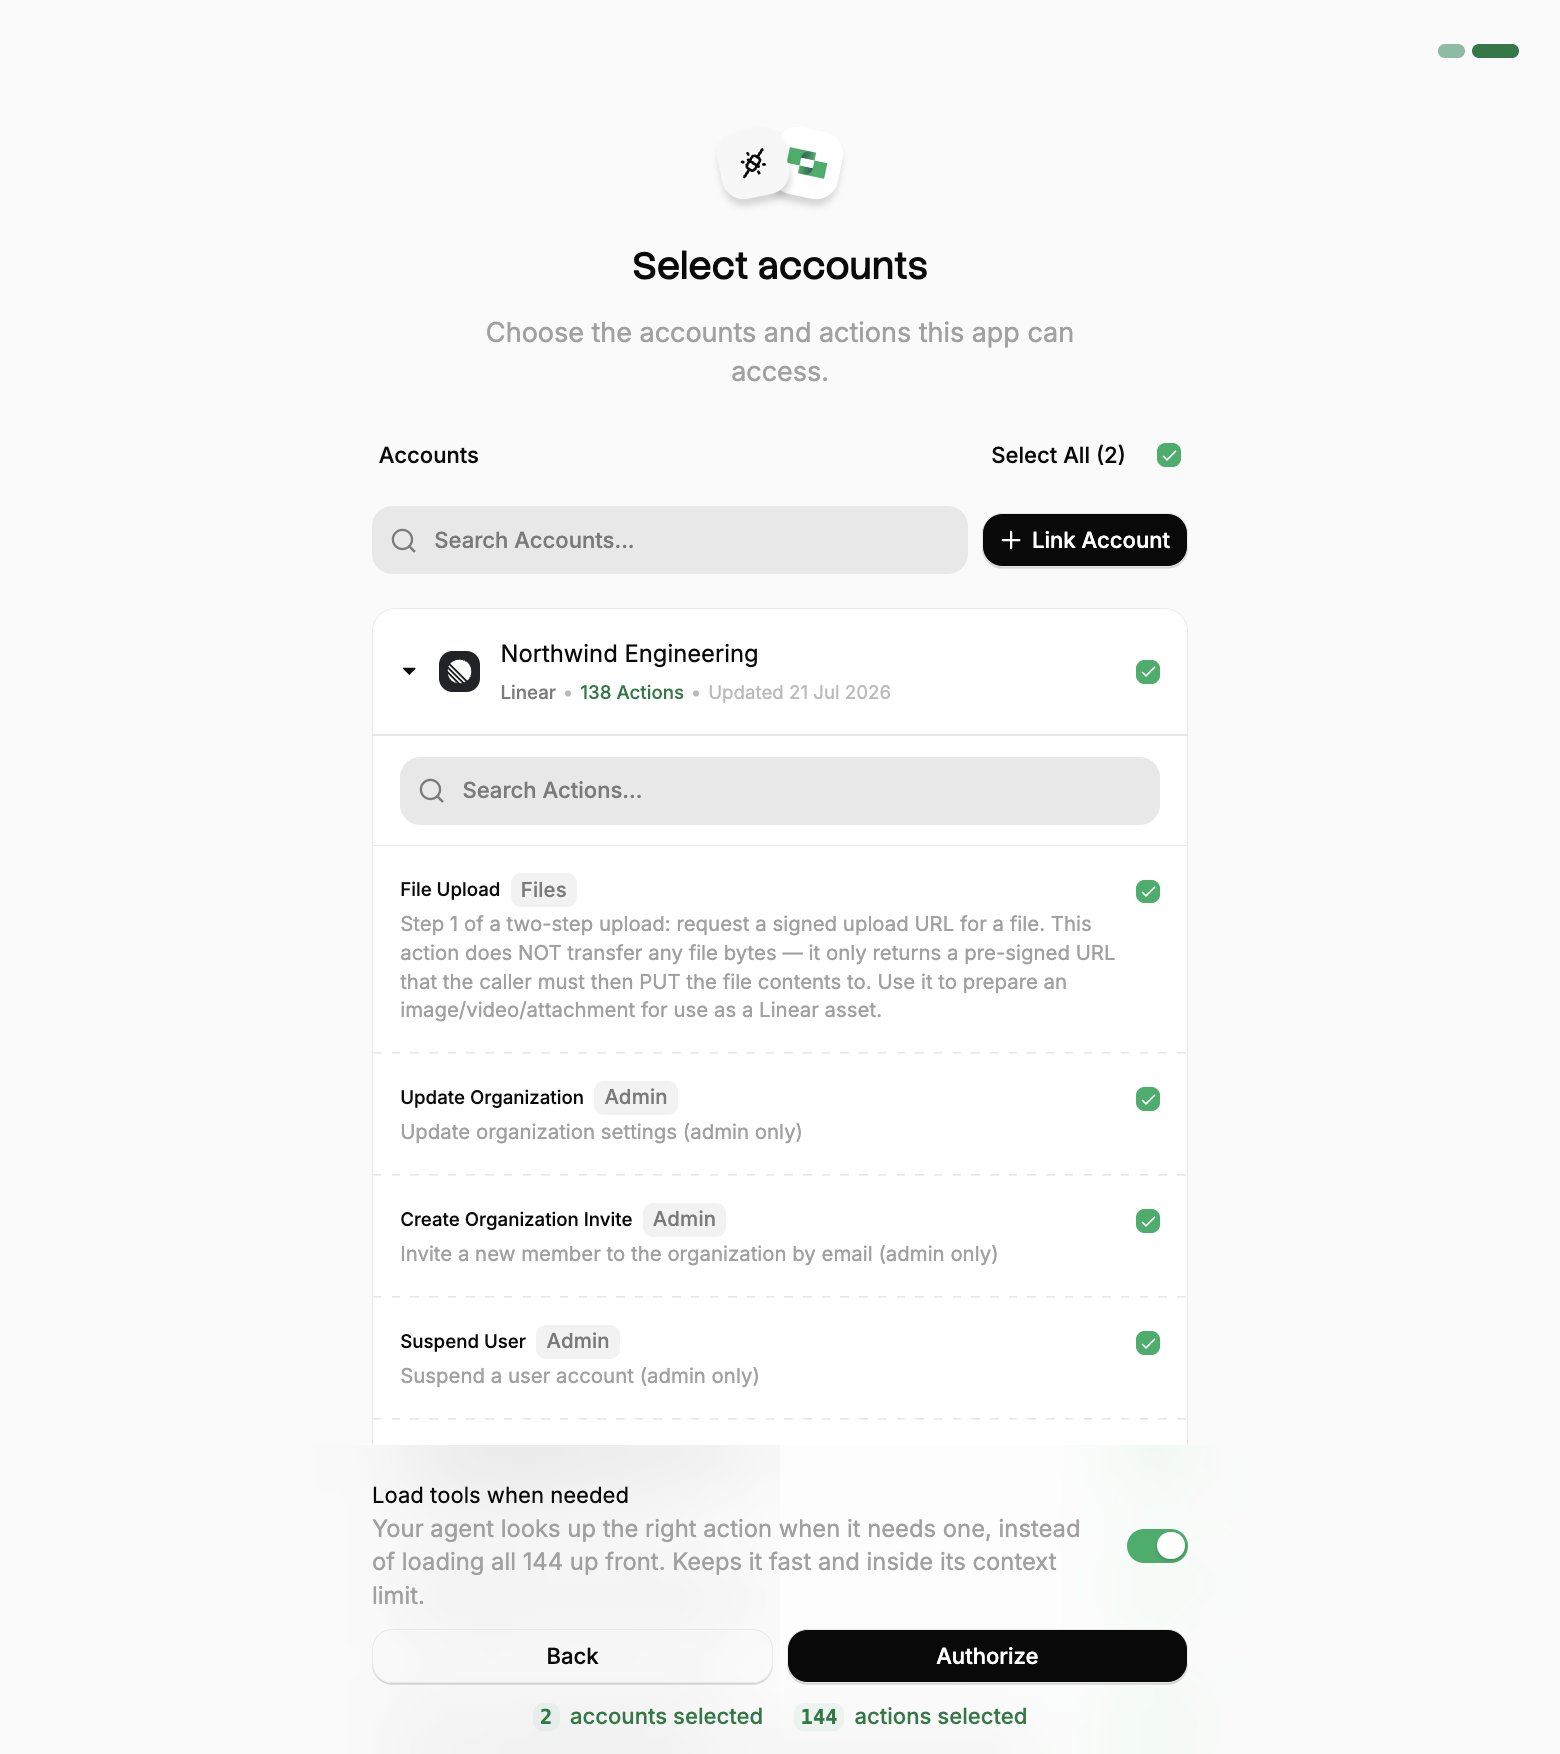
Select accounts and actions. Existing linked accounts are shown. New accounts can be linked by clicking + Link Account. You can either select the whole account (all actions will be granted) or refine by toggling individual actions.
(Optional) Load tools when needed. On by default, and the toggle that puts the connection into Advanced Tool Search. Leave it on for large action sets. Turn it off to hand the agent every selected action up front.
Authorize. Completes the connection; you can return to your client.
Select a project
Select accounts
Toggle actions
If you see a sentence where the Load tools when needed toggle should be, an admin has already settled it for the whole project. See project settings.
Back in ChatGPT, review the tools it discovered, then install the plugin.
3
Share it with your workspace
The plugin is yours as soon as it is installed. Sharing it with everyone else depends on your plan.
Plus and Pro
Business
Enterprise and Edu
Not applicable. A personal account has no workspace to publish to. Skip to the next step.
An admin or owner opens Workspace Settings → Apps → Drafts and clicks Publish, reviewing the safety warnings for any write actions.Published apps show in the workspace’s approved connectors list, labeled custom. They cannot be edited afterwards, so changing the tools or metadata means creating and publishing the app again.
An admin or owner opens Workspace Settings → Apps → Drafts and clicks Publish.In the dialog that follows, Configure Actions selects which actions the app may run, and Configure Access limits it to specific groups. Both stay editable after publishing, from the ellipsis menu next to the app under Workspace Settings → Apps.
4
Use it in a chat
Start a new chat, type @, select the StackOne plugin, and try:
What StackOne tools are available?
The plugin works in the ChatGPT desktop app as well as the browser. It is not available on mobile.
OpenAI asks you to confirm that an OAuth provider issues refresh tokens. StackOne advertises offline_access in its discovery metadata and issues them, so ChatGPT renews access on its own. Nothing to configure.
ChatGPT works from a snapshot of the tools StackOne exposed when the server was added. Changing what StackOne exposes, by authorizing another linked account or enabling more actions on a connector profile, does not reach ChatGPT until the snapshot is refreshed:
A server you added yourself. Open it at ChatGPT Plugins and select Refresh.
An app an admin published to a workspace. Enterprise and Edu admins refresh from the ellipsis menu next to the app under Workspace Settings → Apps. Business plans cannot refresh a published app, so it has to be created and published again.
Advanced Tool Search sidesteps most of this. It replaces the per-action tool list with two stable tools, Search and Execute, so the snapshot holds however the underlying grant changes.To change which accounts or actions ChatGPT can reach, re-run the OAuth flow. To revoke it, use Connected Apps in the StackOne dashboard.
Connecting with a session token instead
A session token URL carries its own credential, so it covers the cases OAuth can’t: a shared server, a scheduled job, or anywhere nobody is present to approve a consent screen. For a comparison of each connection method, see Choosing a connection method.From the StackOne dashboard, go to Connectors, open a connector, then click Use in Agent.
Pick a linked account.
Set the expiry (one year by default).
Select HTTPS MCP and copy the URL. It should be in the format of:
This URL covers one linked account, and anyone holding it has that access until it expires, so treat it like a password.To enable Advanced Tool Search, add the tool-mode query parameter to the URL: