

This assumes you already have a connector profile. To create one, follow the Quickstart or pick a connector in Connectors, then return here.
Enable or disable actions
Scope a profile to just the actions your app uses. This limits what every linked account on the profile can do and keeps the OAuth consent screen focused.1
Open the profile
In Connectors, open the connector and select the profile’s card.
2
Open the Actions tab
Each action has a switch showing whether it’s enabled for this profile. The switch in the table header turns every action on or off at once.
3
Turn actions on or off
Enable only the actions your app calls and disable the rest. We recommend starting with a few read actions, then enabling more as you need them.
4
Save
Click Save Profile in the bar at the bottom of the page. Changes apply to every linked account on the profile. Cancel discards them.
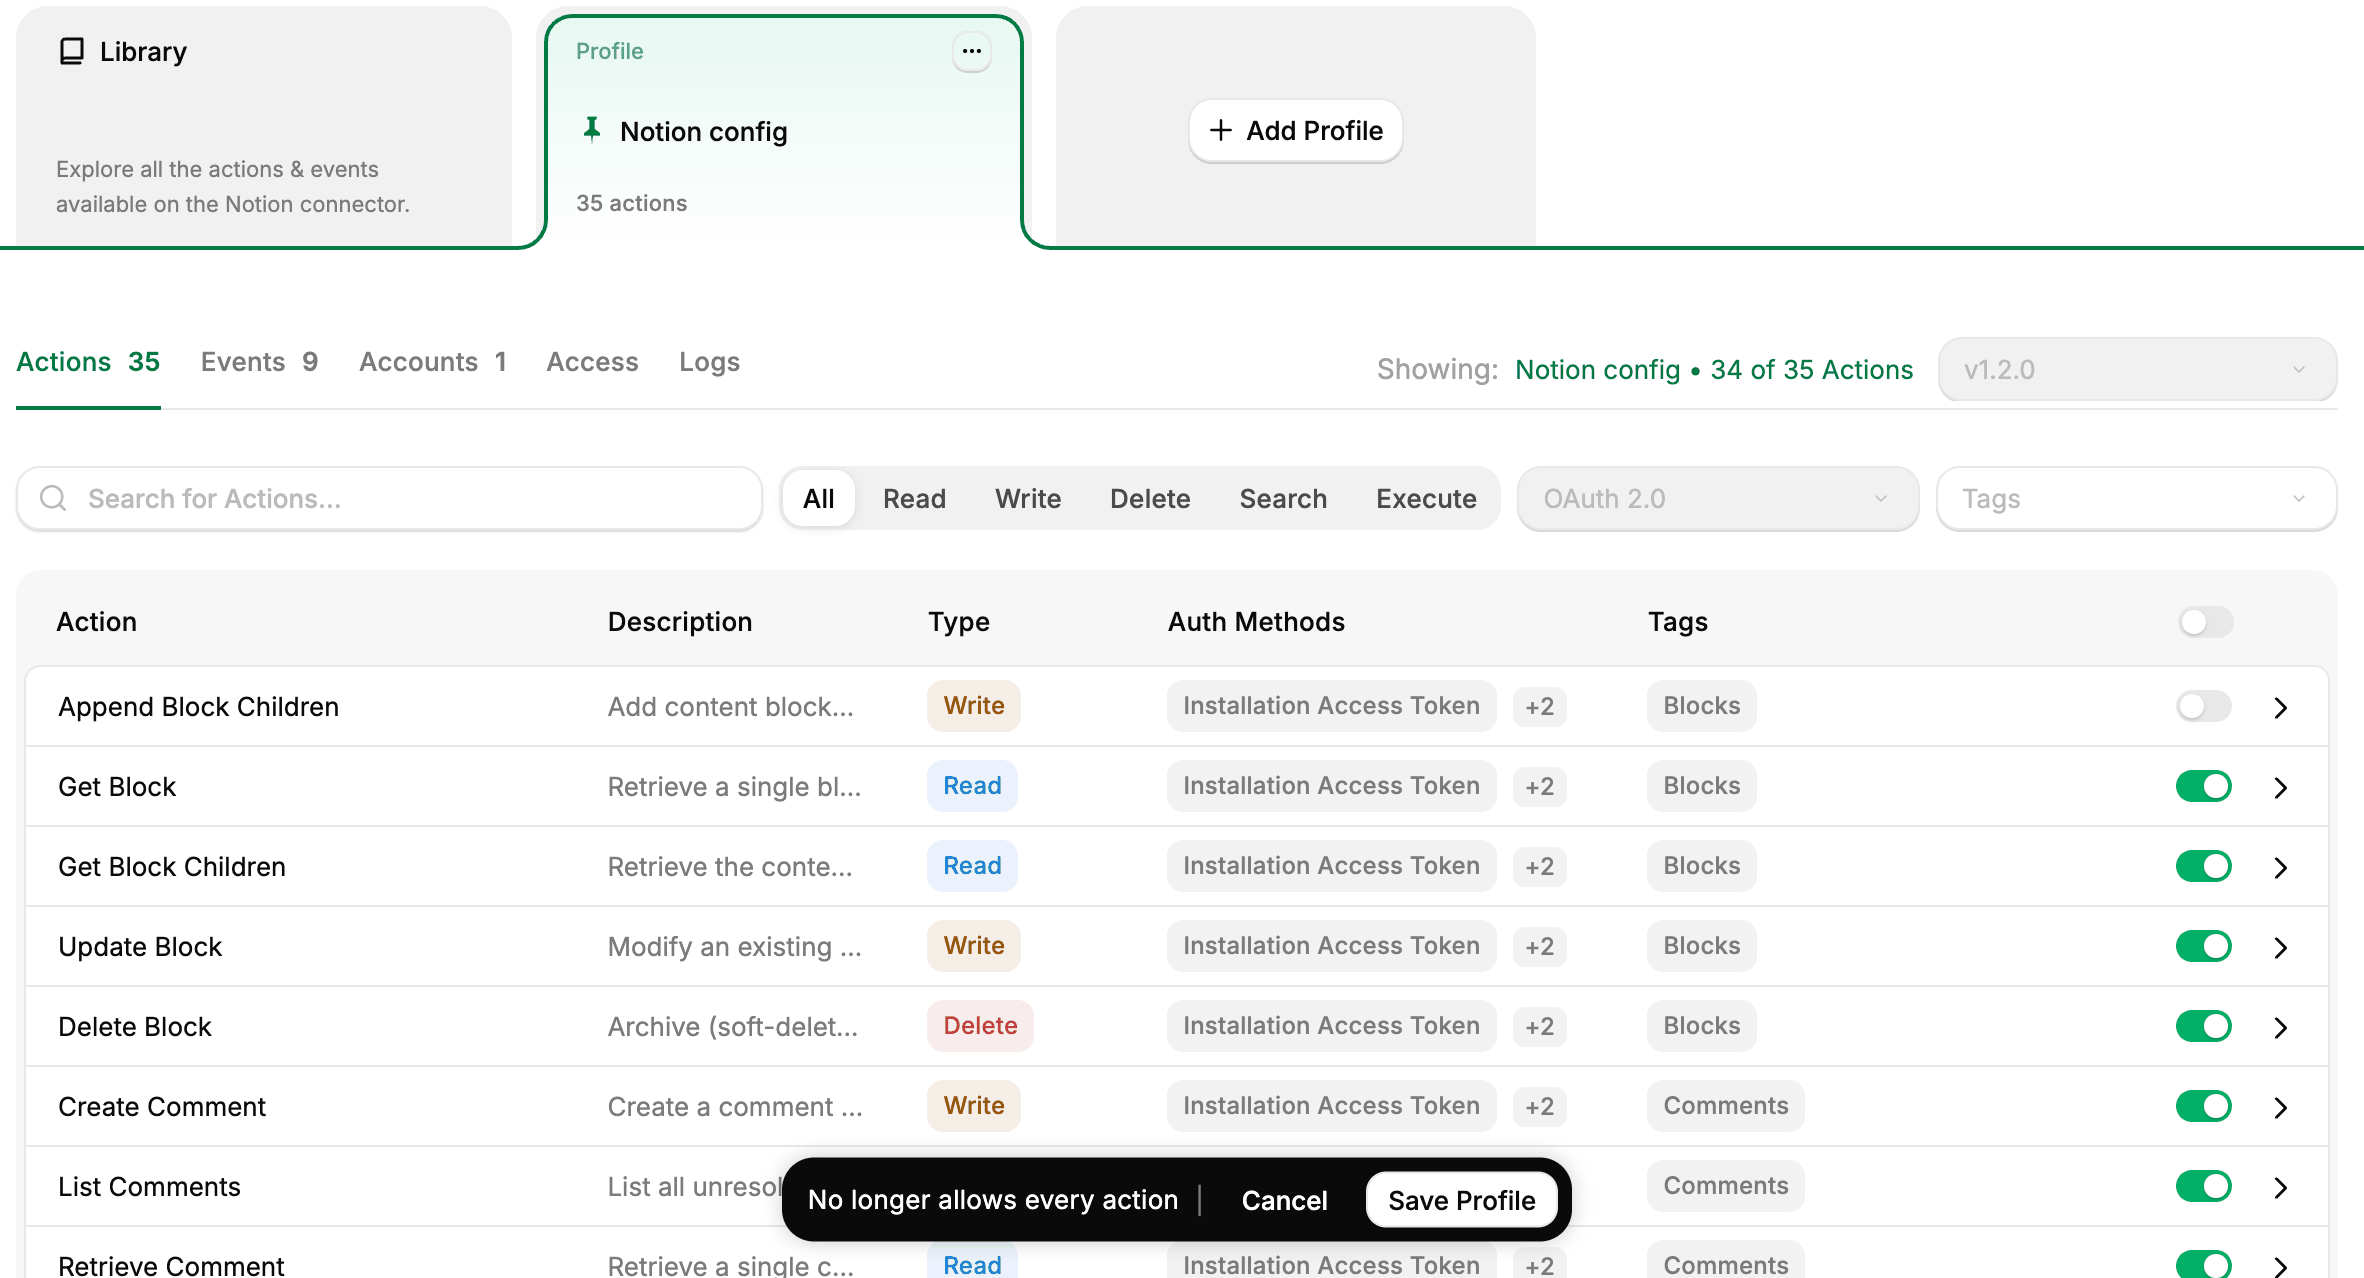
Editing a saved profile's actions
Enable or disable events
The Events tab lists every event this connector can emit. Turn on the events you want, and pick which webhook each one fires to from the dropdown alongside it, then click Save Profile. Choose + Add Webhook in the dropdown to create a new webhook without leaving the page. The webhook is created right away and belongs to the project, so it stays even if you cancel the profile edits. See Webhooks for the model and the difference between programmatic and manual events.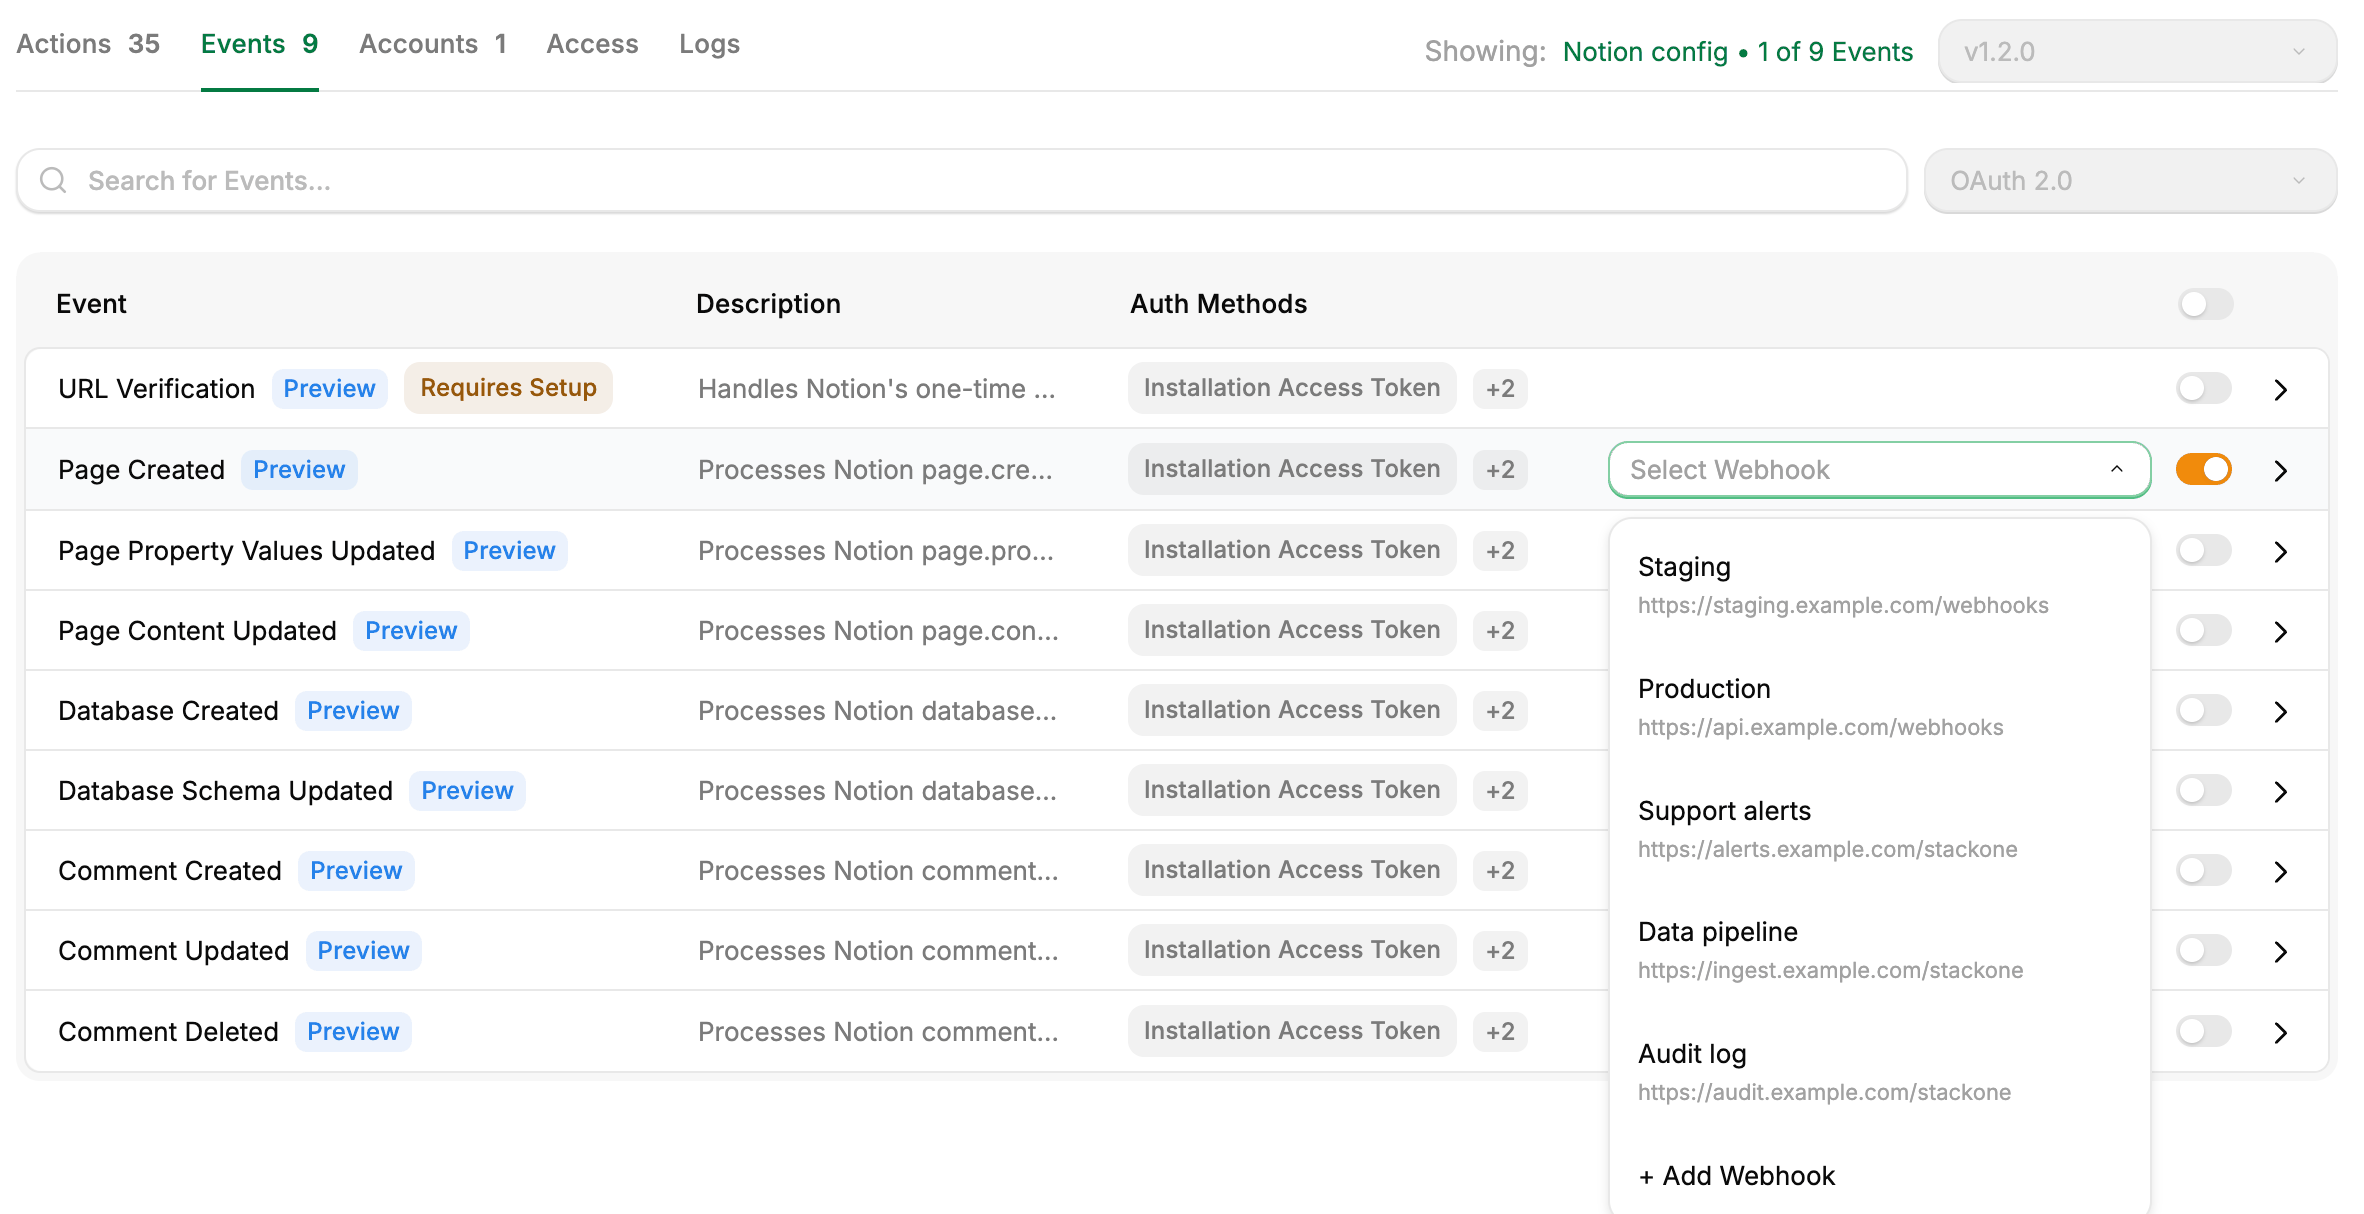
Routing an event to a webhook