When prompted, choose Add Extension from the menu.
2
Choose extension type
Select Remote Extension (Streamable HTTP).
3
Name your extension
Enter stackone (or any name you prefer).
4
Enter the server URL
Paste https://mcp.stackone.com/mcp.
5
Approve the browser prompt
Goose opens StackOne in your browser.Sign in, pick the project and the linked accounts the connector should reach, then Authorize.
Walk through the consent screen
Sign in to StackOne. If you are already signed in to the dashboard you skip straight to the next step.
Check where the connection returns. The line under the client’s logo shows where it goes after you approve. If it names localhost or an app on this device, only continue if you started the connection from that client.
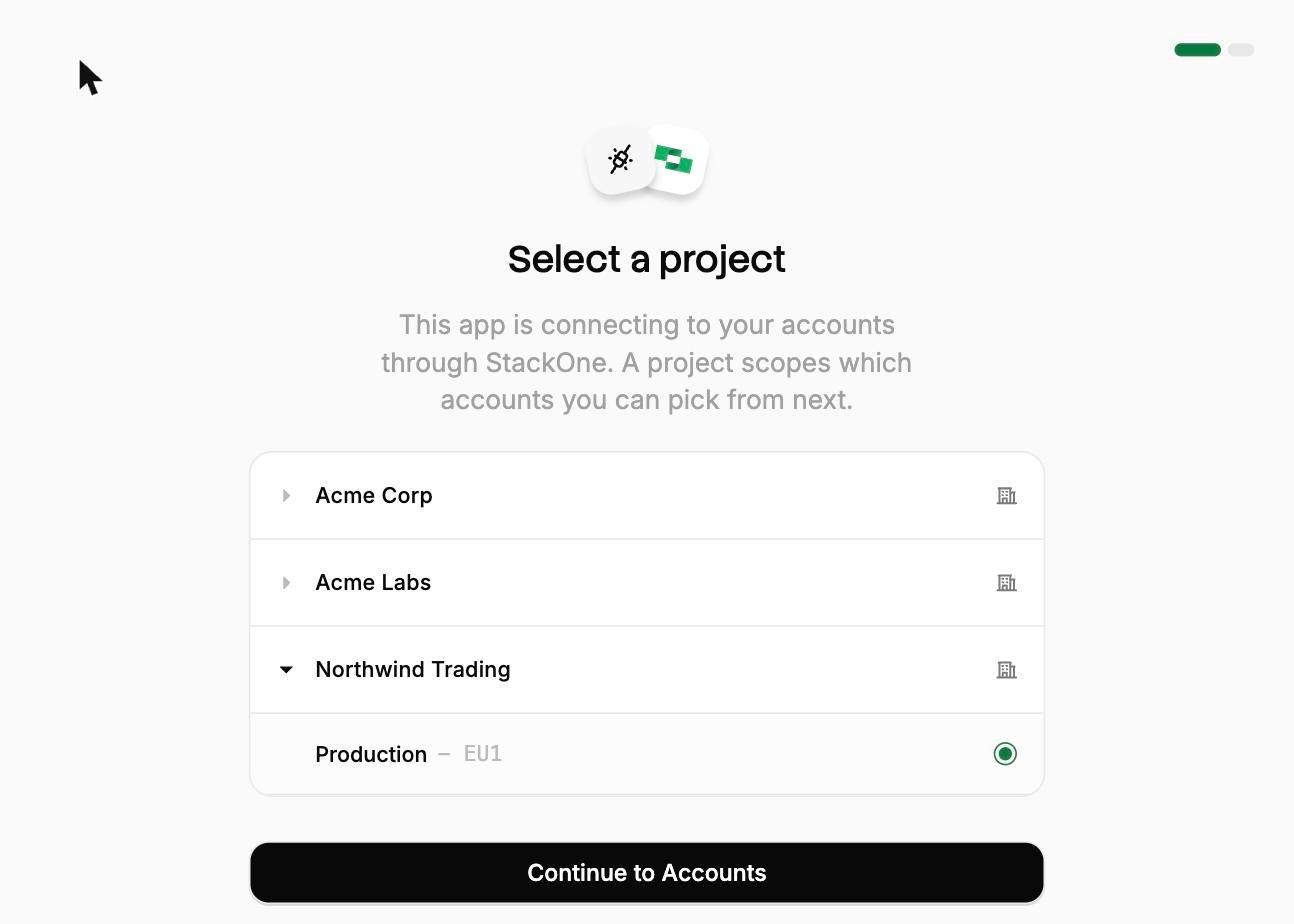
Select a project. Select the project you would like to associate the connection with.
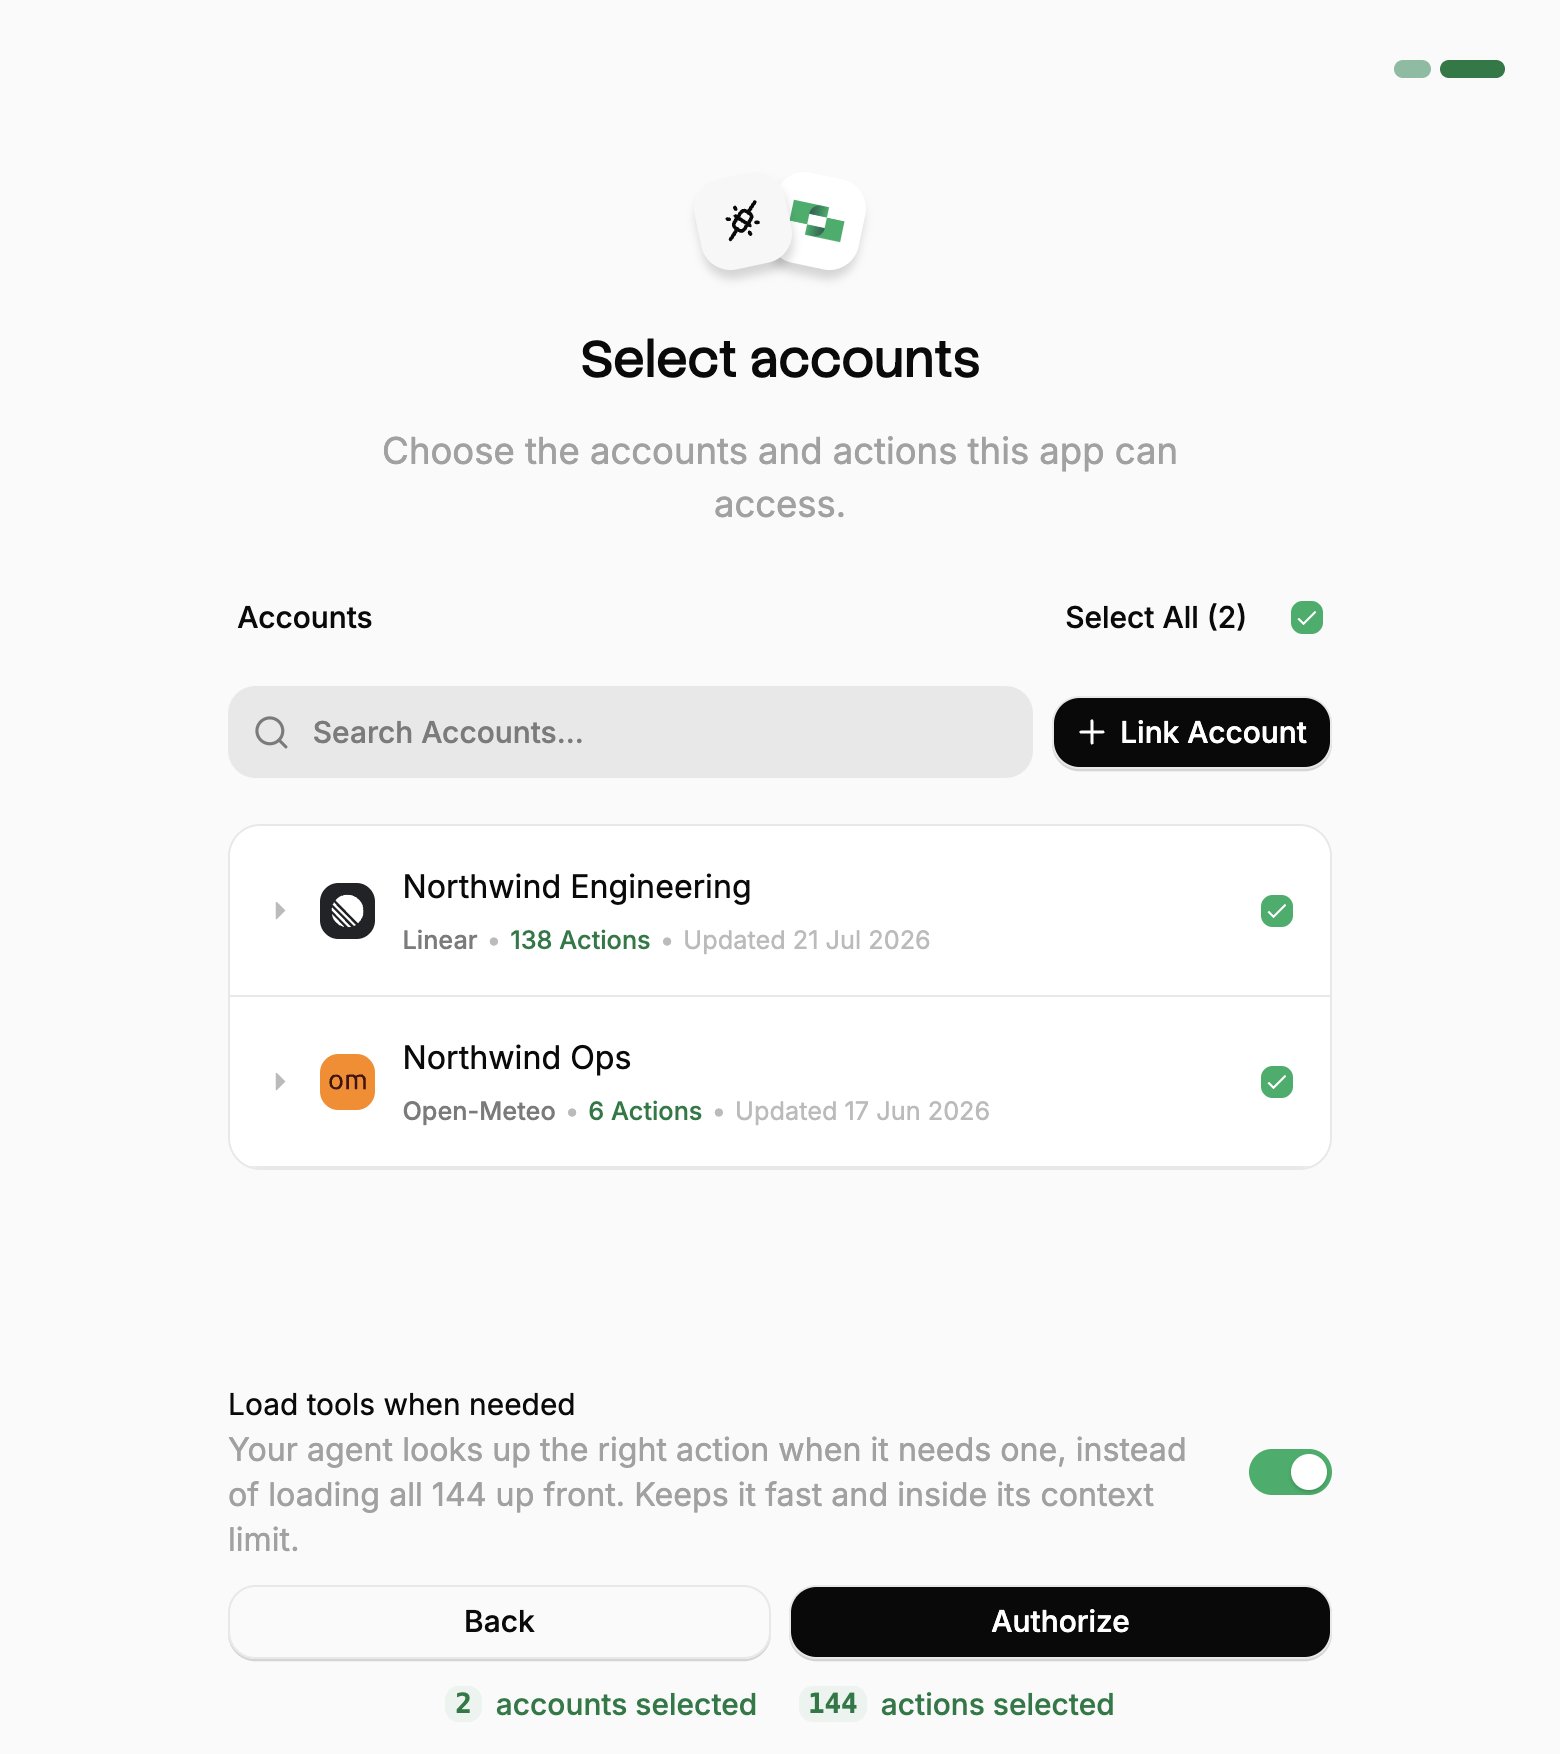
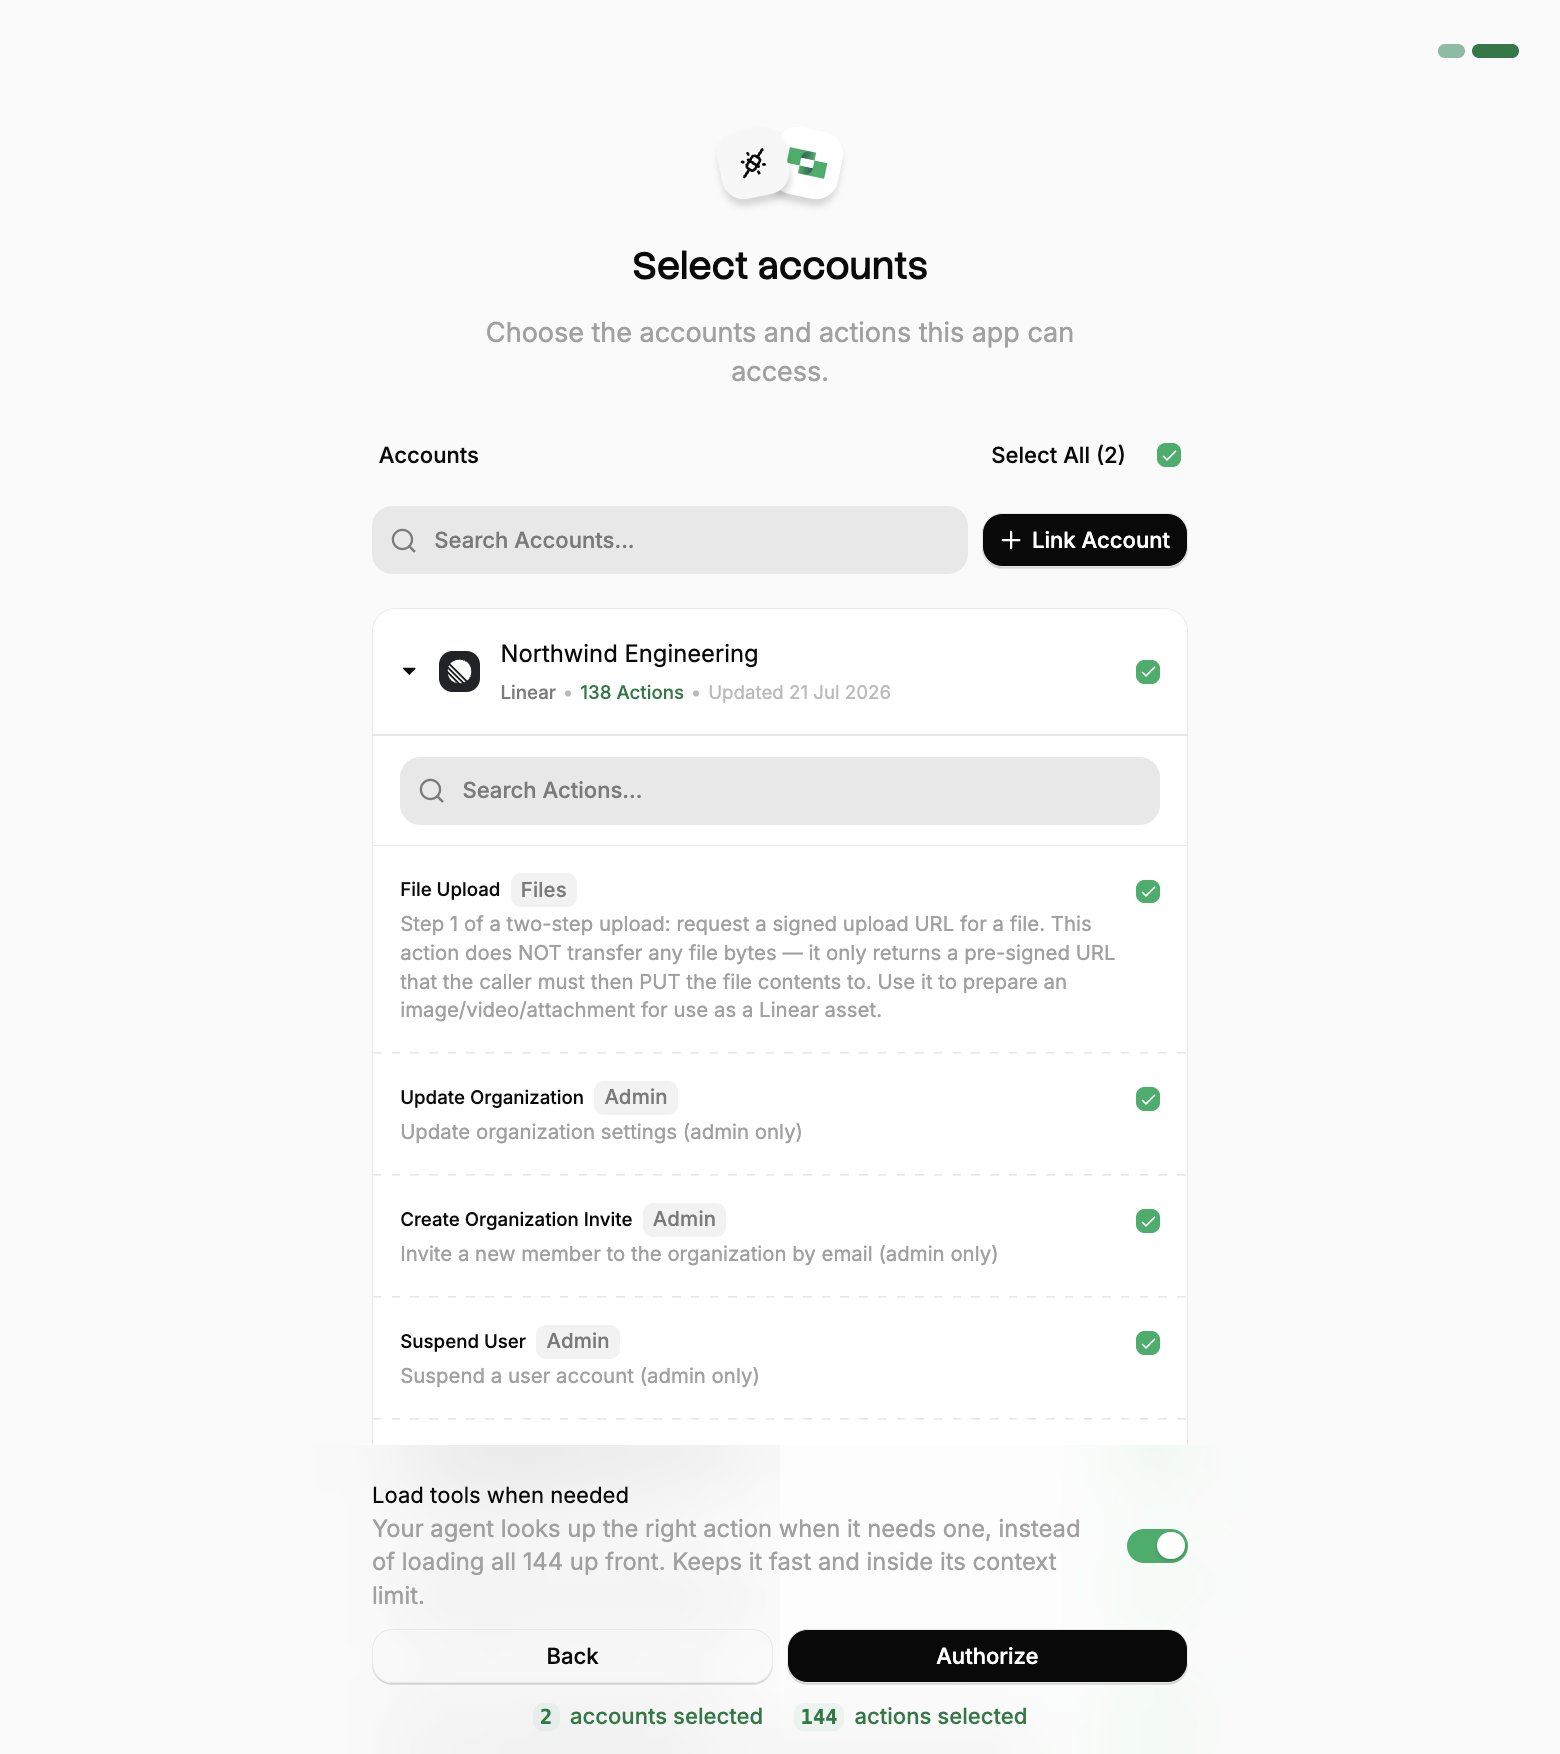
Select accounts and actions. Existing linked accounts are shown. New accounts can be linked by clicking + Link Account. You can either select the whole account (all actions will be granted) or refine by toggling individual actions.
(Optional) Load tools when needed. On by default, and the toggle that puts the connection into Advanced Tool Search. Leave it on for large action sets. Turn it off to hand the agent every selected action up front.
Authorize. Completes the connection; you can return to your client.
Select a project
Select accounts
Toggle actions
If you see a sentence where the Load tools when needed toggle should be, an admin has already settled it for the whole project. See project settings.
Goose prompts for authorization the first time the extension loads. If it does not, use a session token URL instead.One grant covers every account you approved, so a single stackone extension is usually all you need. To revoke it, use Connected Apps in the StackOne dashboard.
If using Goose Desktop, open Settings → Extensions. Your StackOne extension appears in the list, where you can toggle it on and off.
Connecting with a session token instead
A session token URL carries its own credential, so it covers the cases OAuth can’t: a shared server, a scheduled job, or anywhere nobody is present to approve a consent screen. For a comparison of each connection method, see Choosing a connection method.From the StackOne dashboard, go to Connectors, open a connector, then click Use in Agent.
Pick a linked account.
Set the expiry (one year by default).
Select HTTPS MCP and copy the URL. It should be in the format of:
This URL covers one linked account, and anyone holding it has that access until it expires, so treat it like a password.To enable Advanced Tool Search, add the tool-mode query parameter to the URL:
Symptoms: StackOne tools don’t appear when asked “what tools do you have?”
Verify config file location: goose info -v
Check YAML syntax (indentation matters)
Ensure the extension is marked enabled: true
Restart Goose after config changes
Check logs: goose logs
Authentication errors
Symptoms: “401 Unauthorized” or “403 Forbidden”If you connected with OAuth, re-run goose configure to authorize again, and check the grant still exists under Connected Apps in the StackOne dashboard.If using a dashboard token, regenerate it with Use in Agent on the connector in the dashboard.If using manual API key auth:
Verify base64 encoding includes the trailing colon: echo -n "your_api_key:" | base64
Confirm the account ID matches your linked account