

SCIM Provisioning is only available on certain plans. See plans and pricing.

Enable SCIM Provisioning
To set up SCIM Provisioning with Okta or Microsoft Entra, follow the Okta or Microsoft Entra guide instead. Google Workspace doesn’t support SCIM Provisioning. Before setting up SCIM Provisioning, you need:- A verified SSO connection between the organization and your IdP. See Single Sign-On.
- The Organization Admin role in StackOne.
- Admin access to the StackOne application in your IdP.
- (Optional) your IdP set up to send
adminin the SCIMrolesfield for anyone who should join as an Organization Admin. Everyone else joins as an Organization Member. See Organization Roles.
The
roles value only counts when a user first joins. After that, their role can only be changed in StackOne.1
Open the SSO connection
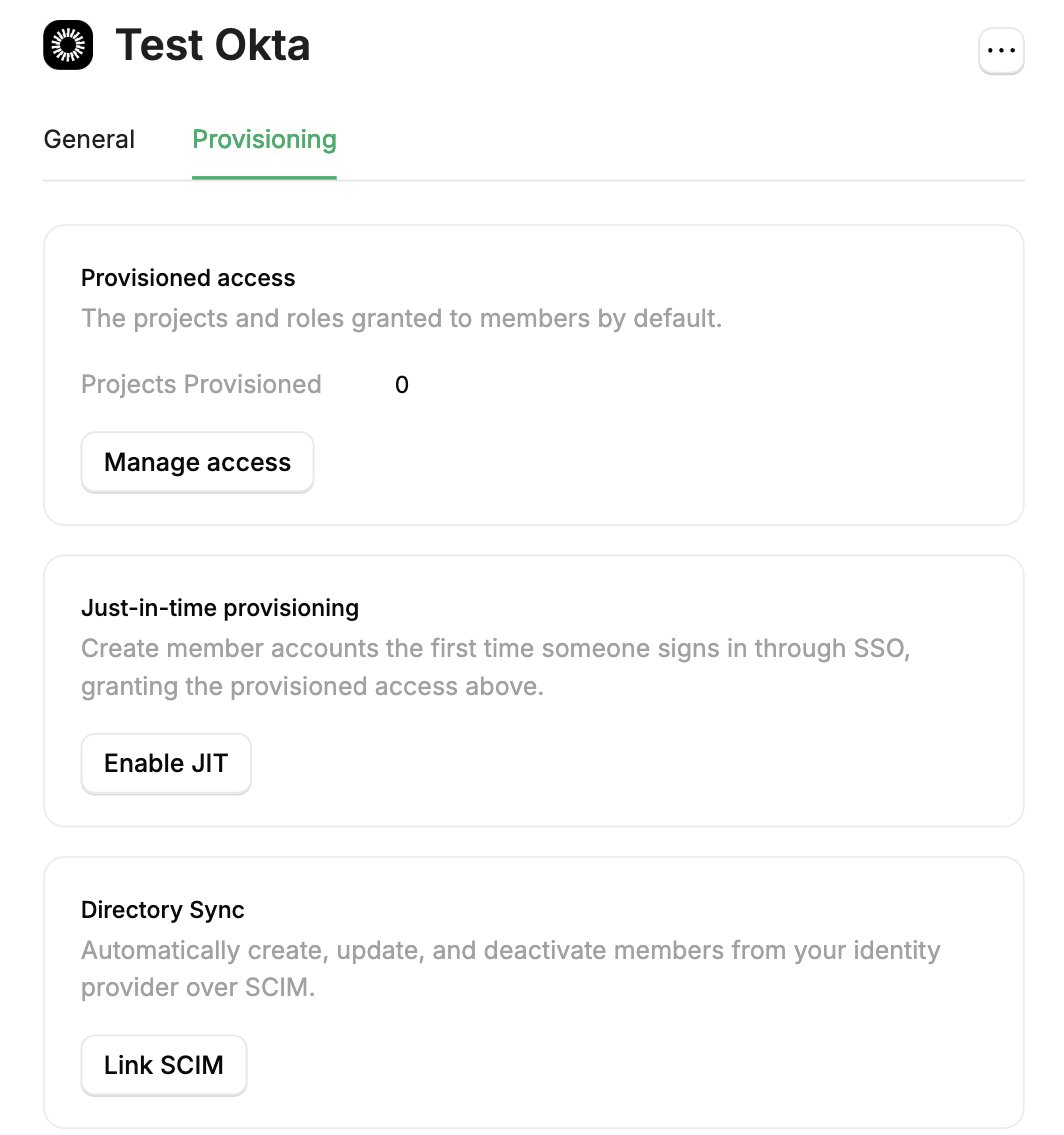
- In the StackOne dashboard, go to Organization > Security > SSO.
- Open the verified SSO connection.
- Select the Provisioning tab.
2
Choose projects and roles
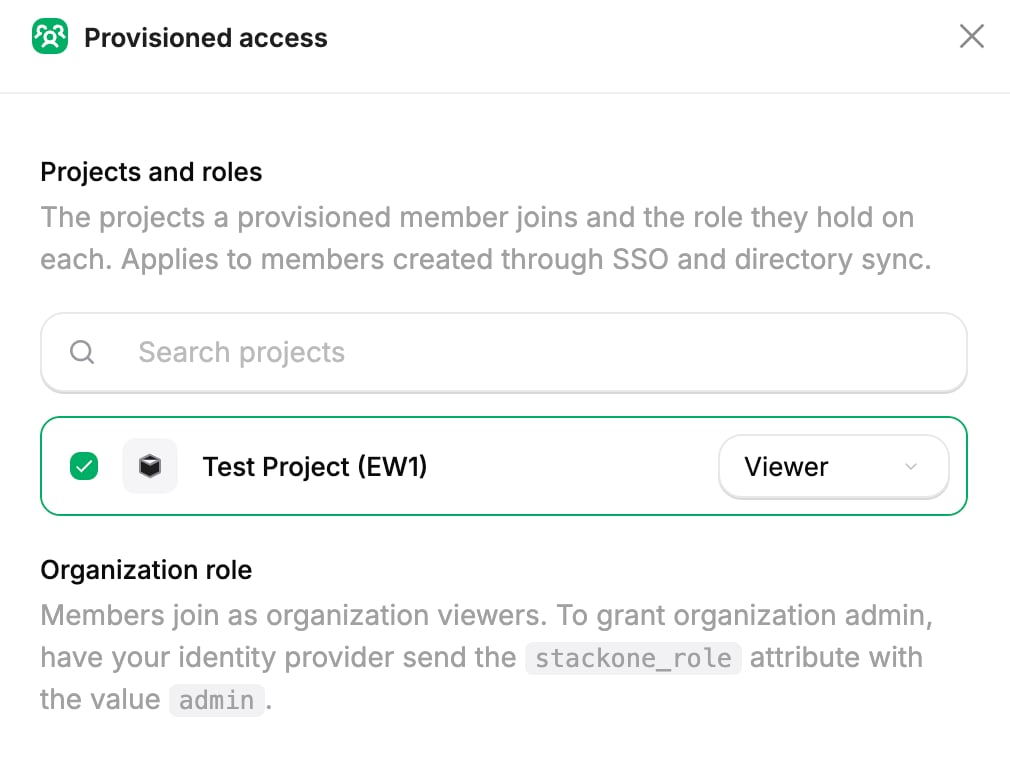
- On the Provisioned access card, select Manage access.
- Pick the projects new users should join.
- Choose a role for each one. See Project Roles.
- Select Save changes.
3
Link SCIM and copy the credentials
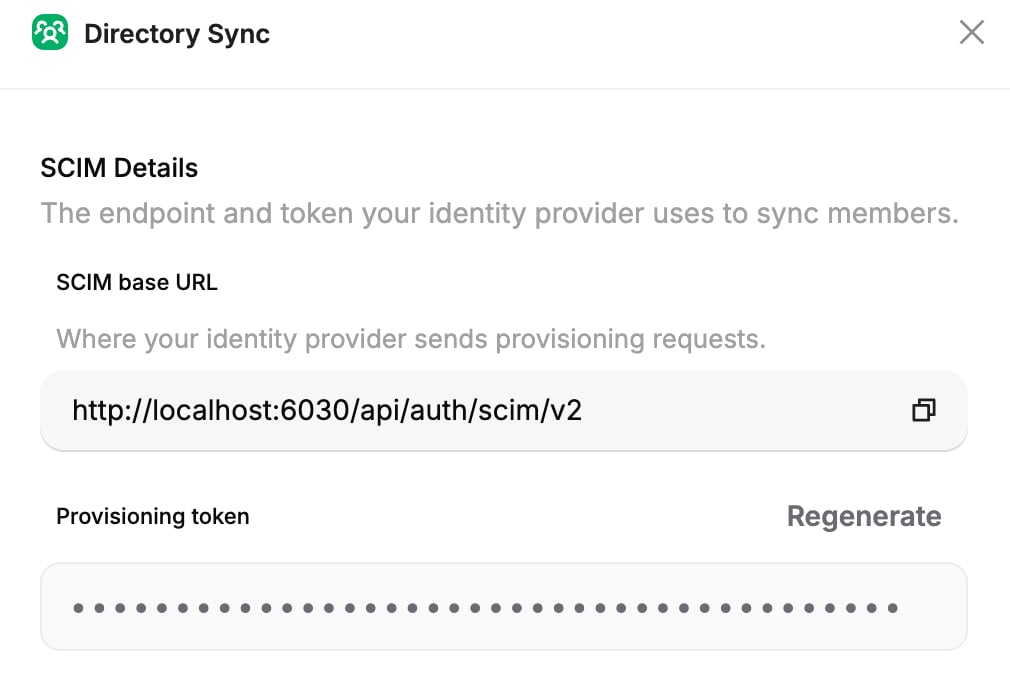
- On the Directory Sync card, select Link SCIM.
- In the SCIM Details section, copy the SCIM base URL and the Provisioning token. You paste both into the IdP.
4
Configure the IdP
In the IdP, enable provisioning for the StackOne application, paste in the SCIM base URL and token, and assign the users who should sync.
When a user is assigned
When you assign a user to the StackOne application in the IdP:- The user is added to the organization.
- The user gets the connection’s provisioned access. It’s applied again on every update from the IdP, so a project you remove from the user in StackOne comes back.
- The user joins any synced groups the IdP pushes them into, and gets the access those groups grant.
Deprovisioning
Deprovisioning affects every user the IdP manages through SCIM Provisioning, including people who first joined by invitation or Just-in-Time Provisioning. Users the IdP has never assigned are left untouched.
- The user’s access to the organization is suspended.
- The user is removed from their synced groups.
- The user is signed out on any device where they’re currently working in the organization.
Manage or remove SCIM Provisioning
Manage SCIM Provisioning from the Directory Sync card on the SSO connection’s Provisioning tab.Rotate the token
- Select Edit SCIM.
- Select Regenerate, then Confirm rotate.
- Paste the new token into the IdP.
Change provisioned access
Select Manage access on the Provisioned access card. New users get the updated access. Users SCIM Provisioning already manages get any added projects on their next update from the IdP, but keep projects you removed and their role on projects they already had. Synced groups grant access separately. When a user has a project through both, the strongest role applies. See Which role applies.Unlink SCIM Provisioning
Select Unlink. This stops all future provisioning and revokes the token. Users synced so far keep their access, and synced groups become normal groups that keep their members and assignments. If you link again later, the SCIM base URL stays the same, so you only paste the new token into the IdP.Next steps
Okta SCIM Provisioning
Enable SCIM provisioning on an Okta SSO connection.
Microsoft Entra SCIM Provisioning
Enable SCIM provisioning on a Microsoft Entra SSO connection.
Single Sign-On
Set up the SSO connection that SCIM Provisioning builds on.
SCIM Groups
Push the IdP’s groups into StackOne and grant access through them.