

Prerequisites
- The Org Admin role in your StackOne organization, since only Org Admins manage SSO.
- Admin access to your identity provider, to create and configure a SAML application.
- Access to your domain’s DNS records, to add the verification record.
Start the setup wizard
The SSO tab and this setup wizard are enabled per organization. If you don’t see SSO under Organization > Security, even as an Org Admin, contact StackOne support to turn it on.
1
Open the SSO settings
In the StackOne dashboard, go to Organization > Security > SSO, then click Get started to open the Set up SSO wizard.
2
Select your identity provider
On the first step, select Other SAML 2.0 provider, then click Continue. The wizard also lists Okta and Microsoft Entra ID if one of those matches your IdP.
3
Enter the connection details
On the Connection details step, set:
- Connection name, a label for this connection. StackOne generates the connection’s unique provider ID from it automatically.
- Domain, the email domain your members sign in with, for example
acme.com. Members with an address on this domain are sent to your IdP.
Configure your identity provider
StackOne is the service provider (SP) in this exchange. The wizard’s Configure your identity provider step shows StackOne’s SP endpoints. Create a SAML 2.0 application in your IdP and register these values in it.1
Copy the service provider endpoints
Copy these generated values from the Configure your identity provider step: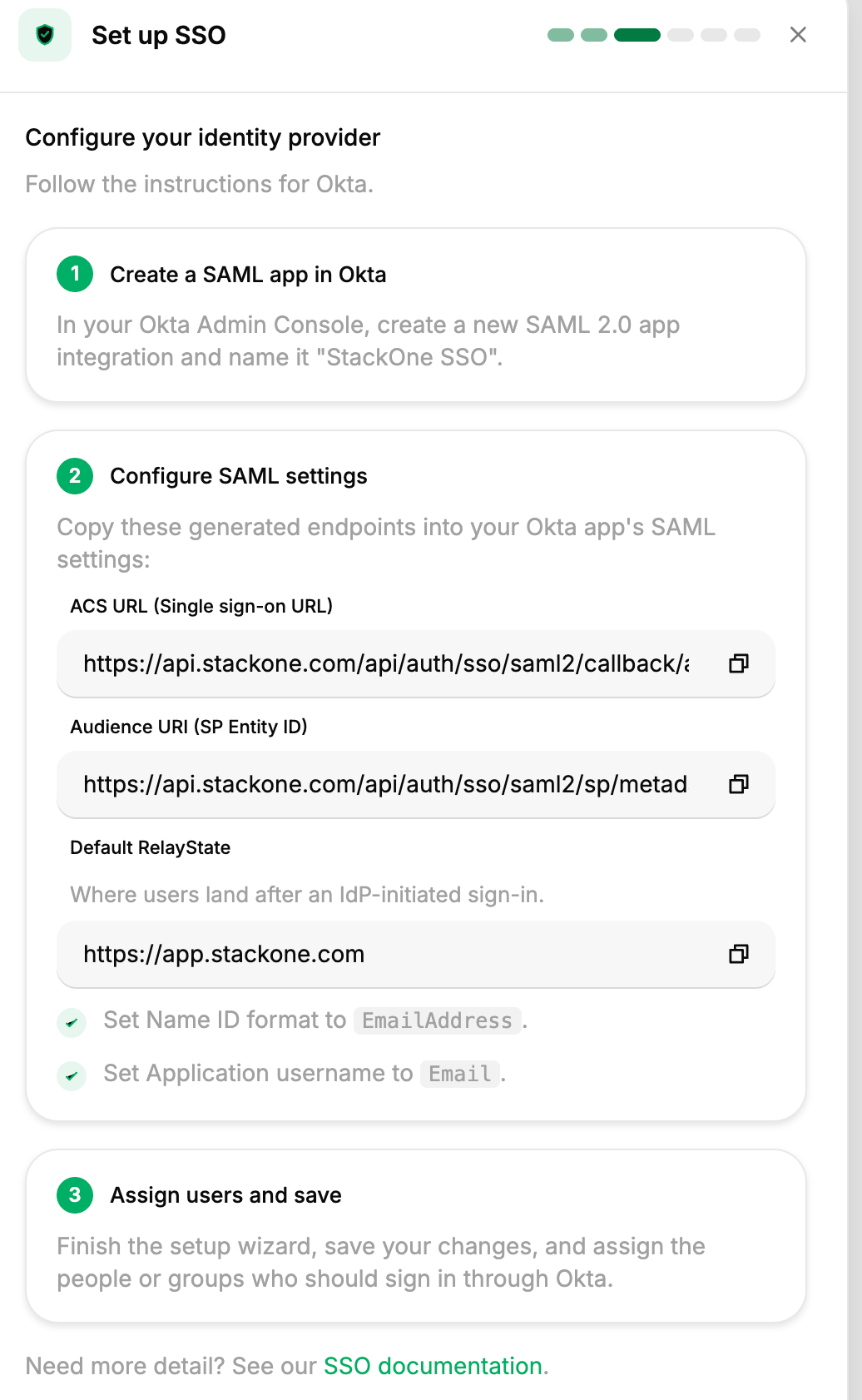
- ACS URL (Single sign-on URL) is the endpoint where your IdP posts the SAML assertion after a user signs in.
- SP Entity ID (Audience) is the identifier your IdP uses to address StackOne as the audience of the assertion.
- Default RelayState is where users land after an IdP-initiated sign-in. Set it only if your IdP supports IdP-initiated SSO.
2
Create the SAML application
In your IdP’s admin console, create a new SAML 2.0 application for StackOne, then paste the ACS URL and SP Entity ID into the matching fields.
3
Set the Name ID to the user's email
StackOne uses the Name ID as both the account identifier and the email address, so its value must be the user’s work email, not a username, UPN, or object ID.
- Set the Name ID value to the user’s work email, in the format
urn:oasis:names:tc:SAML:1.1:nameid-format:emailAddress. - Optionally, also send the email as an attribute named exactly
email. When present, StackOne uses it; otherwise it falls back to the Name ID.
4
Send the user's name
StackOne sets a member’s display name from the assertion when it creates their account on first sign-in. Without name attributes, new members show their email address as their name.
- Send the first and last name as attributes named exactly
givenNameandsurname. - Alternatively, send a full display name as an attribute named exactly
displayName, which StackOne uses whengivenName/surnameare absent.
5
Sign the assertion
StackOne requires a signed assertion and validates the signature against the certificate you register in StackOne, so enable assertion signing and note the active X.509 signing certificate.
6
Assign users and save
Assign the users or groups who should sign in to StackOne through this application, then save.
7
Collect the IdP values
From your IdP’s SAML metadata or setup summary, note these three values for the next step:
- Issuer (Entity ID), the IdP’s unique identifier.
- Single Sign-On URL, the IdP’s login endpoint.
- X.509 signing certificate, in PEM format.
Register your SSO provider
On the Register your SSO provider step, provide the values from your IdP’s SAML settings. Either import them from your IdP’s metadata file, or enter them manually.1
Import or enter the IdP values
Click Upload SAML metadata file to import the values from your IdP’s metadata XML, or enter them manually into these fields: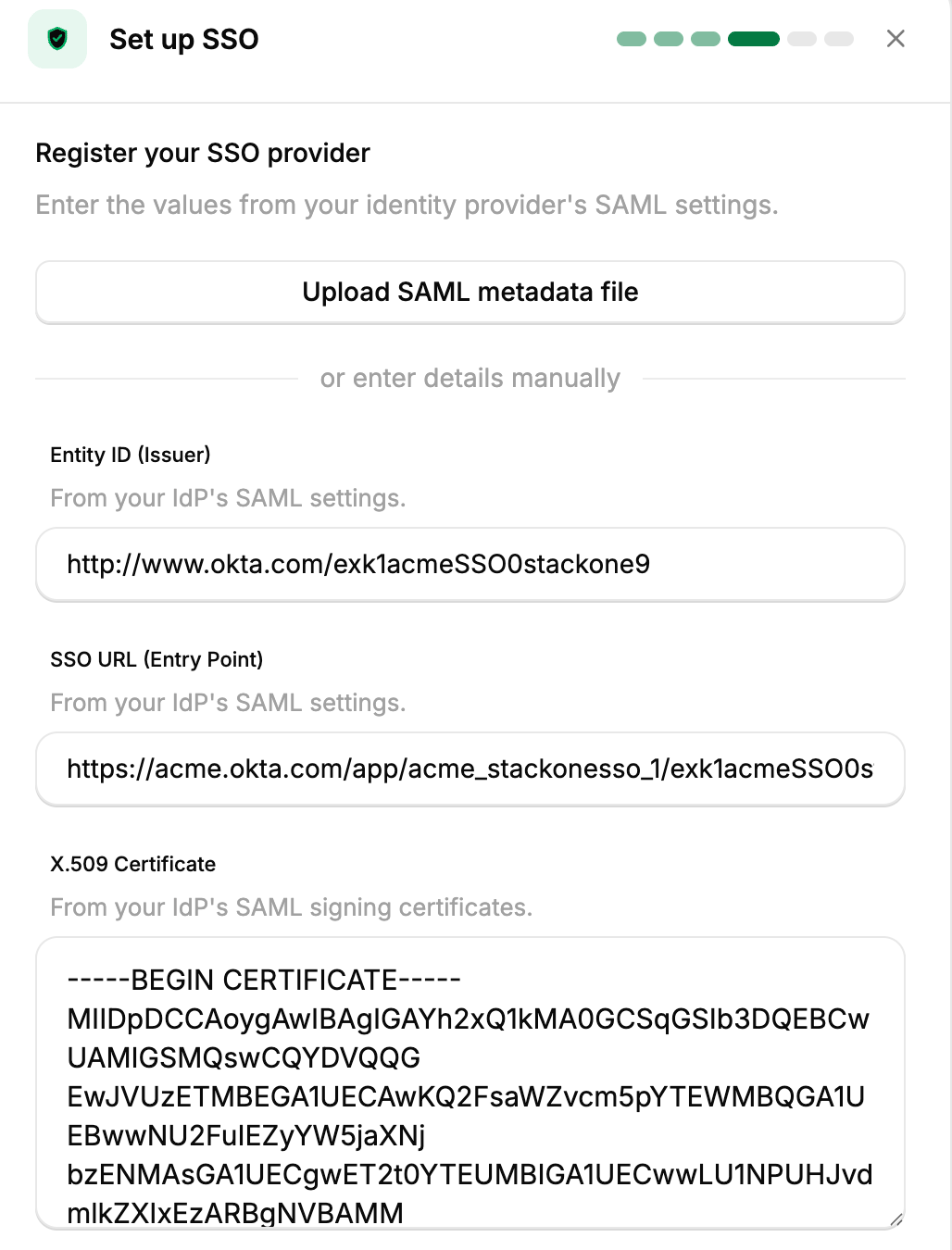
2
Register the connection
Click Continue. StackOne registers the connection and advances to the Verify your domain step.
Verify your domain
Verifying the domain proves your organization owns the email domain and activates SSO. It is also what lets a SAML sign-in link to an existing StackOne user with the same email.1
Copy the DNS TXT record
The Verify your domain step shows a TXT record to add to your DNS: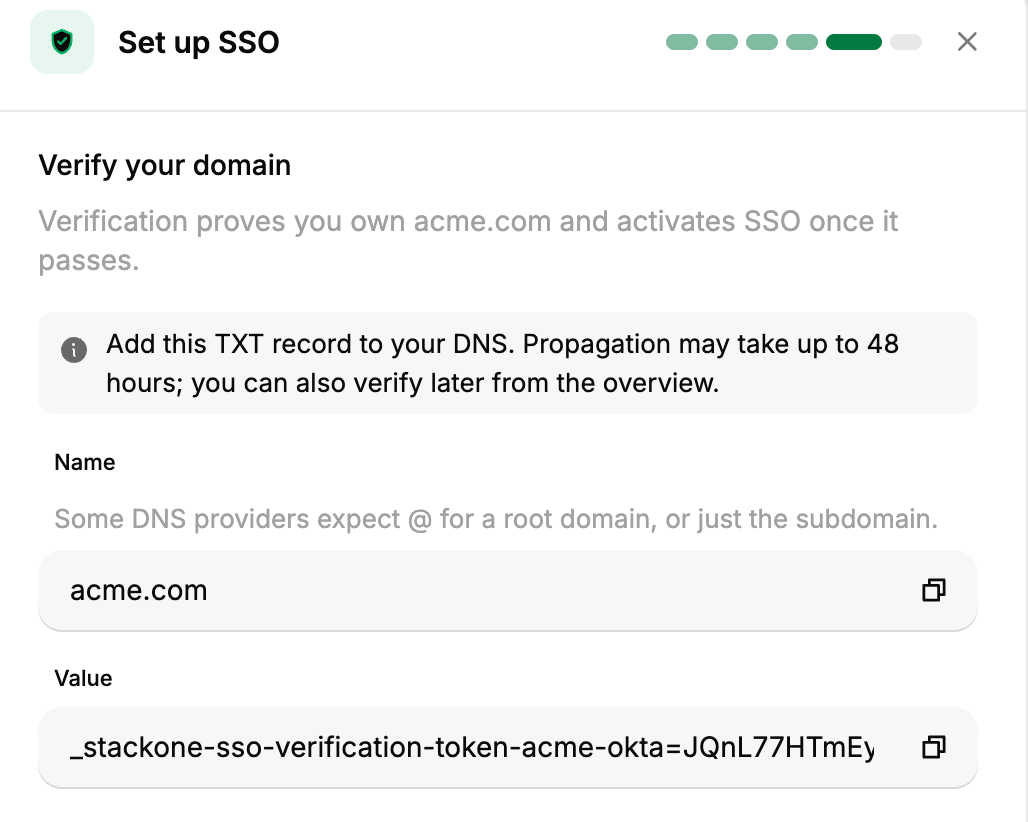
- Name is your domain. Some DNS providers expect
@for a root domain, or just the subdomain label. - Value is the verification record, in this format:
2
Add the record to your DNS
In your domain’s DNS panel, add a TXT record with the Name and Value shown.How you add the value depends on your DNS provider. Cloudflare lets you add a separate TXT record at the same name. AWS Route 53 and Google Cloud DNS keep one TXT record set per name, so add the token as a new value on its own line rather than appending it to an existing string such as your SPF record.
DNS changes can take up to 48 hours to propagate, though they often complete within minutes. Check what’s publicly visible with Google Admin Toolbox Dig.
3
Verify
Click Verify. Once the record is visible, StackOne marks the domain verified and SSO becomes active. If the check fails, wait for propagation and try again.To finish setup before the record propagates, click Verify Later. You can verify afterward from the connection’s General tab, under the Trusted Domain card, by clicking Verify.
4
Finish
On the final step, click Finish to close the wizard.
After SSO is active, require members to sign in through it by adding the SAML method to the Enforcement Policy on the Authentication tab.
Troubleshooting
Next steps
SSO overview
How SSO, directory sync, and domain verification fit together.
Okta SSO
The same setup with Okta’s field names and screenshots.
Microsoft Entra SSO
The same setup with Microsoft Entra ID.