

Prerequisites
Directory Sync attaches to an existing SSO connection, so set up SSO first.- An active SSO connection for your organization, with its domain verified. Directory Sync keys on this connection and can’t be enabled without it. See SSO setup.
- The Org Admin role in StackOne, which is required to manage provisioning.
- Admin access to your Okta org to configure the app.
Provisioned members and their Okta SSO logins converge on one StackOne account by email, which is why the SSO connection’s domain must be verified. Keep provisioning and SSO on the same verified domain.
The Provisioning tab is turned on per organization. If you don’t see it on your SSO connection, even as an Org Admin, contact StackOne support to enable it.
Link SCIM in StackOne
1
Open Directory Sync
Go to Organization > Security > SSO, open your connection, and select the Provisioning tab. On the Directory Sync card, click Link SCIM to open the Directory Sync panel.
2
Copy the SCIM base URL and token
In the SCIM Details section, copy the SCIM base URL and the Provisioning token. The token is shown once. Copy it now, because StackOne stores only a hash of it and can’t display it again.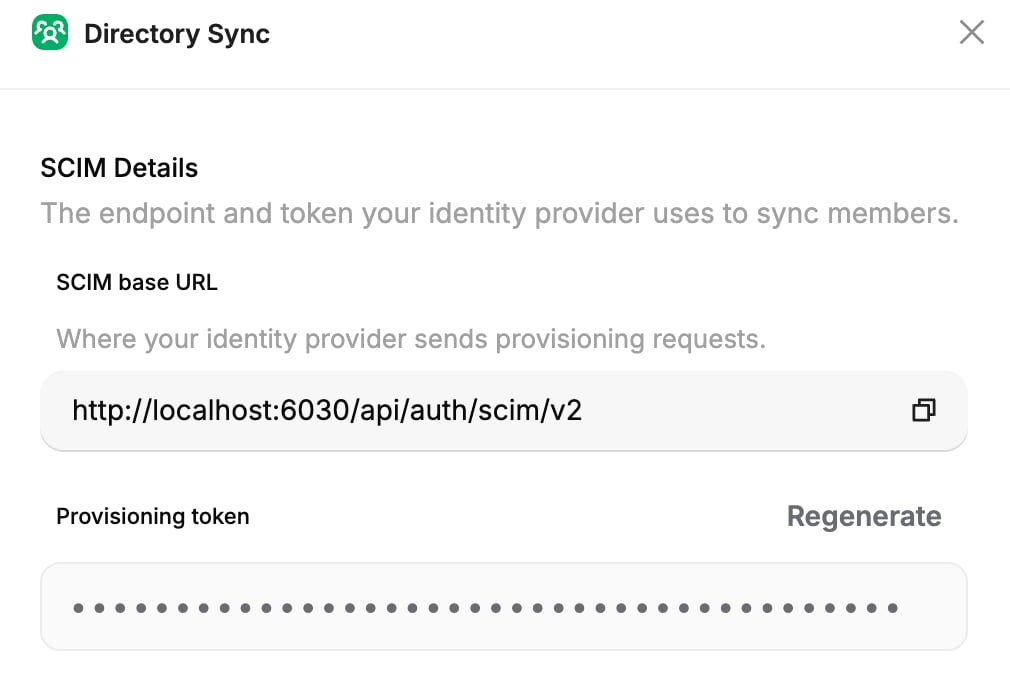
The SCIM base URL ends in
/api/auth/scim/v2. Copy it from the panel rather than typing it. If the token is ever lost or leaked, reopen the panel with Edit SCIM on the Directory Sync card, then click Regenerate next to the Provisioning token and confirm with Confirm rotate. Rotating the token swaps the secret only and leaves your provisioned access unchanged, so update Okta with the new token afterward.3
Set the provisioned access
On the Provisioned access card, select Manage access. Choose the projects synced members join and a role for each one (Viewer, Member, or Admin), then click Save changes. This access is shared with JIT provisioning, and every provisioned user still joins your organization at the Viewer role.
Configure provisioning in Okta
1
Enable the API integration
In your Okta admin console, open the StackOne app you use for SSO and go to the Provisioning tab. Click Configure API Integration and select Enable API integration.
2
Add the SCIM endpoint and token
Paste the SCIM base URL from StackOne into SCIM connector base URL. Set the authentication mode to HTTP Header and paste the Provisioning token as the bearer token. Click Test Connector Configuration to confirm Okta can reach StackOne, then click Save.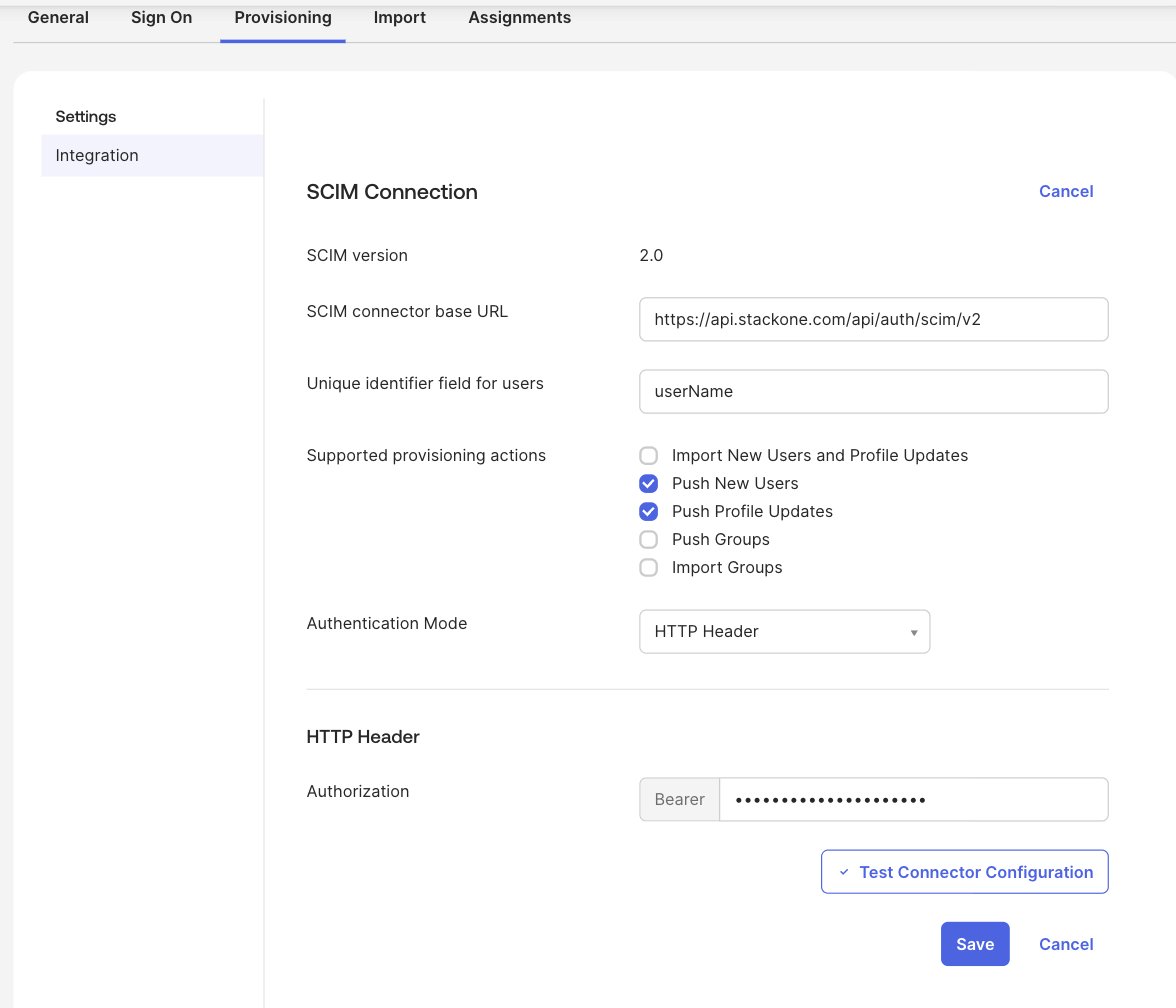
3
Turn on the provisioning actions
Under Provisioning > To App, click Edit and enable Create Users, Update User Attributes, and Deactivate Users. These let Okta create members in StackOne, keep their profiles in sync, and remove access when you unassign or deactivate them.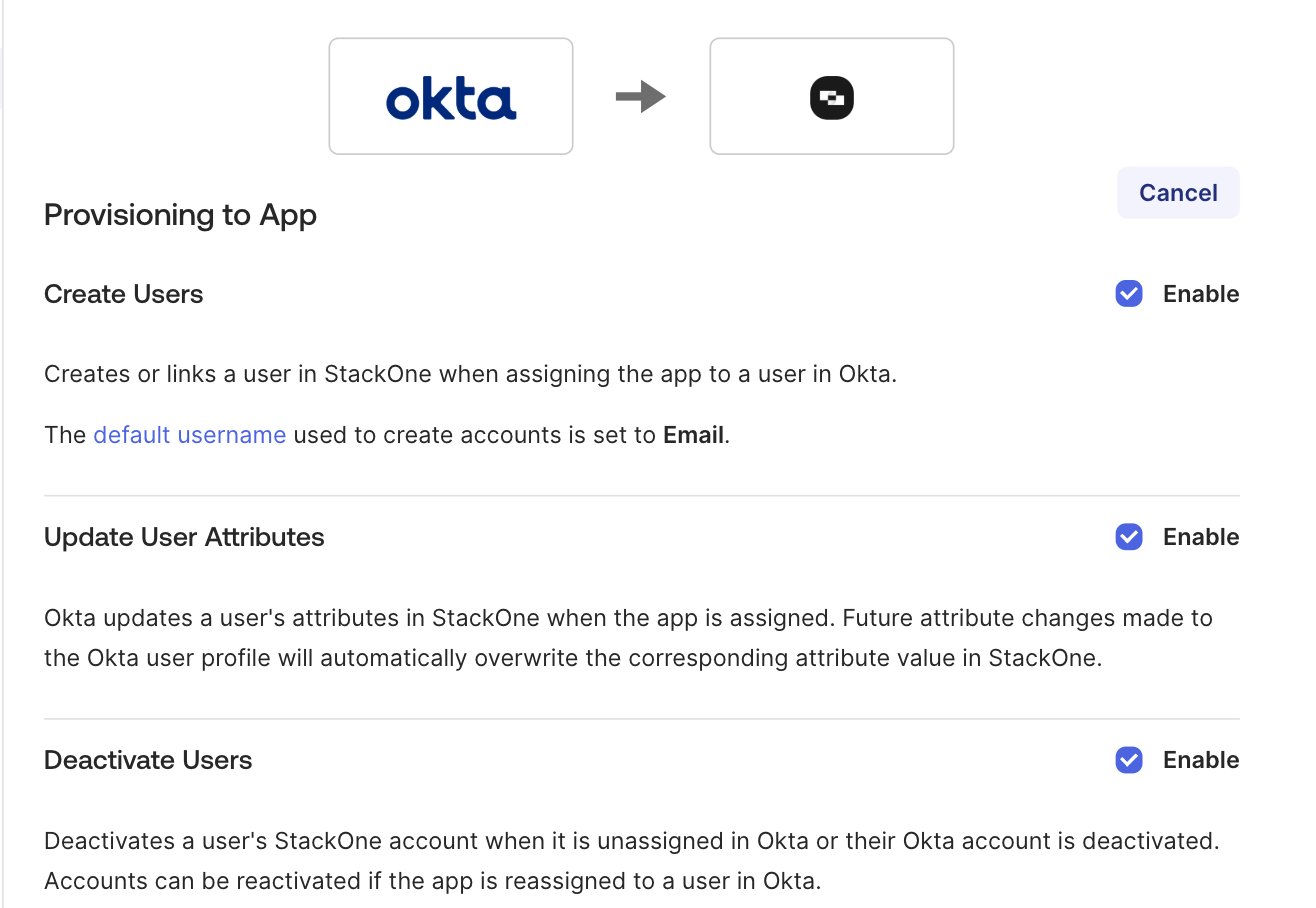
Assign members in Okta
1
Assign people to the app
Open the Assignments tab of the StackOne app and assign the people you want in StackOne. You can assign individuals or Okta groups; in both cases Okta provisions each assigned person into your organization with the default role and projects you set.
Directory Sync provisions users only. Assigning an Okta group provisions its members as individual users; the group itself and its membership don’t sync into StackOne. Group sync isn’t available yet.
2
Confirm the sync
Return to the Directory Sync card in StackOne. The Synced members and Last synced values update as Okta pushes users, and new members appear in the projects you selected.
Next steps
Directory Sync overview
How SCIM provisioning works across identity providers.
Microsoft Entra Directory Sync
Provision members from Microsoft Entra ID instead.