

What to hand out
The same URL for everyone in your organization:What the user sees
Authorization happens in the StackOne dashboard, against the user’s own login. A user only ever sees the organizations, projects, and linked accounts they already have access to. Sign in, pick a project, select the linked accounts the client should reach, then Authorize. The granted accounts and actions become the client’s tool list. Selecting an account grants every action enabled on its connector profile. Expanding an account narrows the grant to individual actions. The same screen carries the Load tools when needed toggle, which puts the connection into Advanced Tool Search. It is on by default.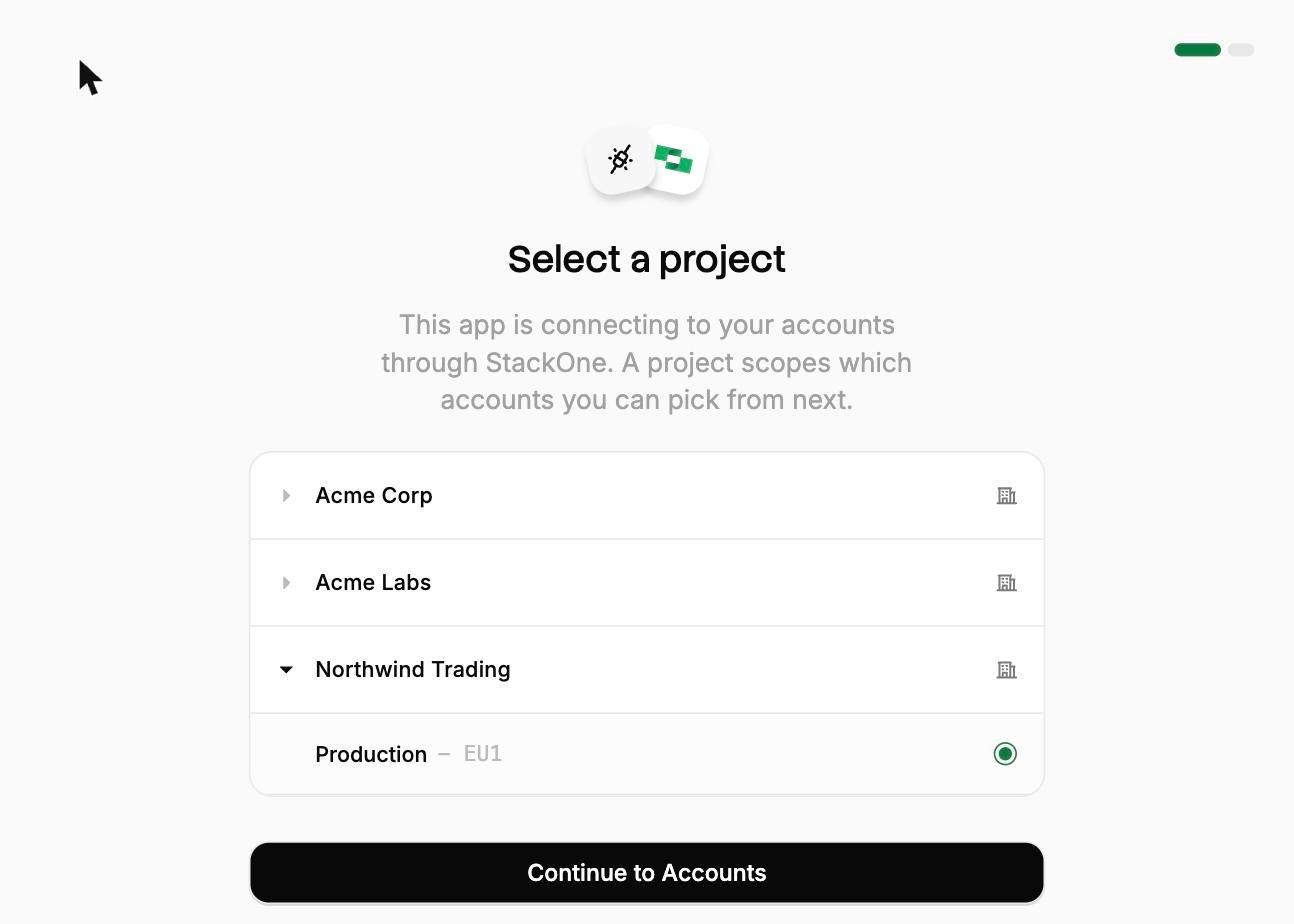
Pick a project
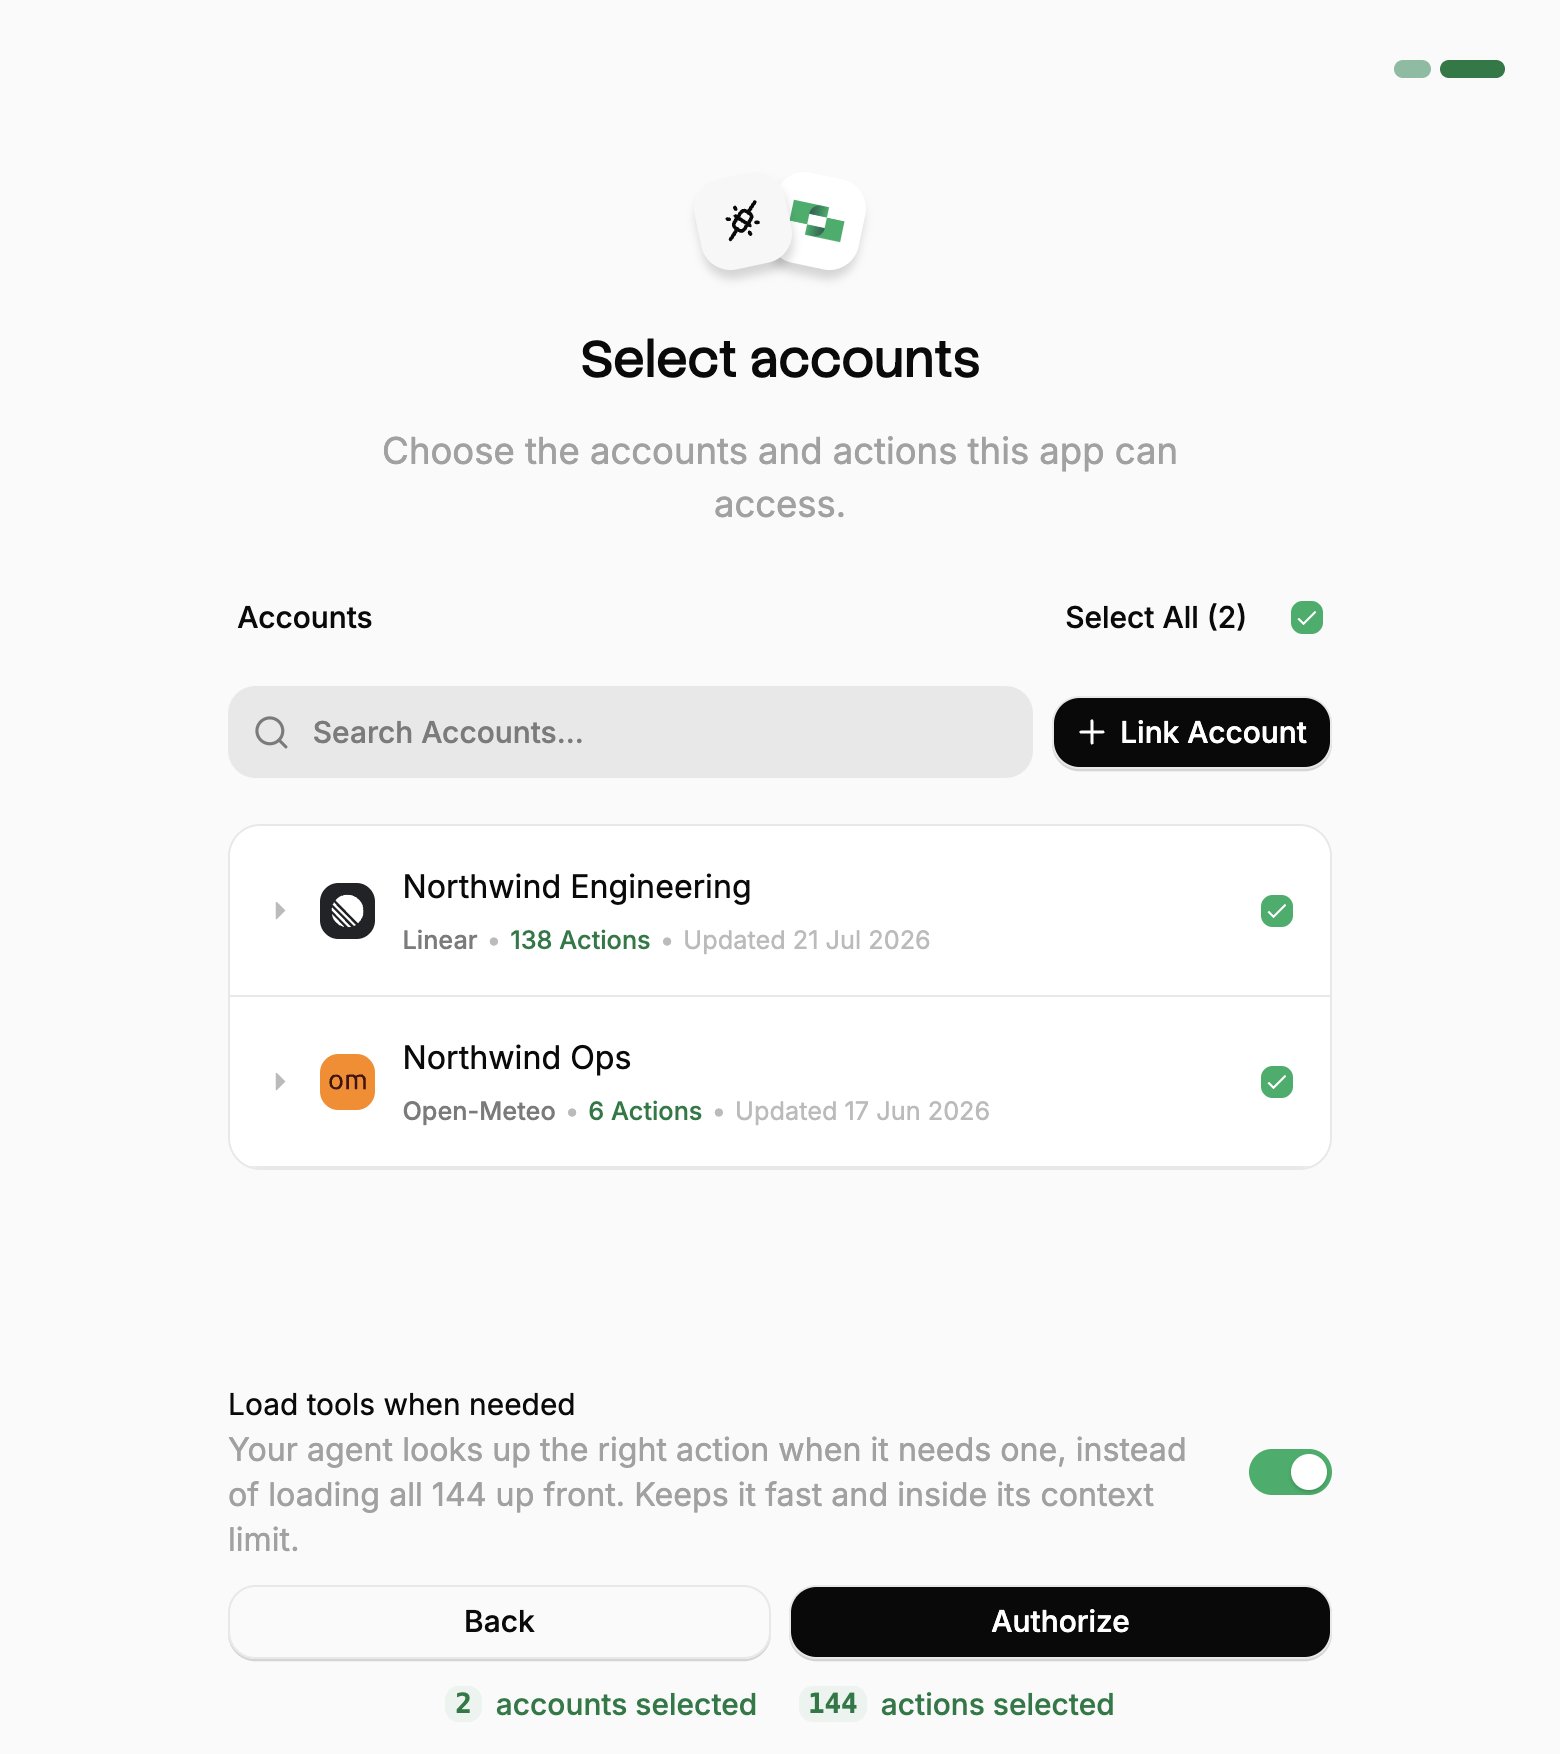
Select accounts
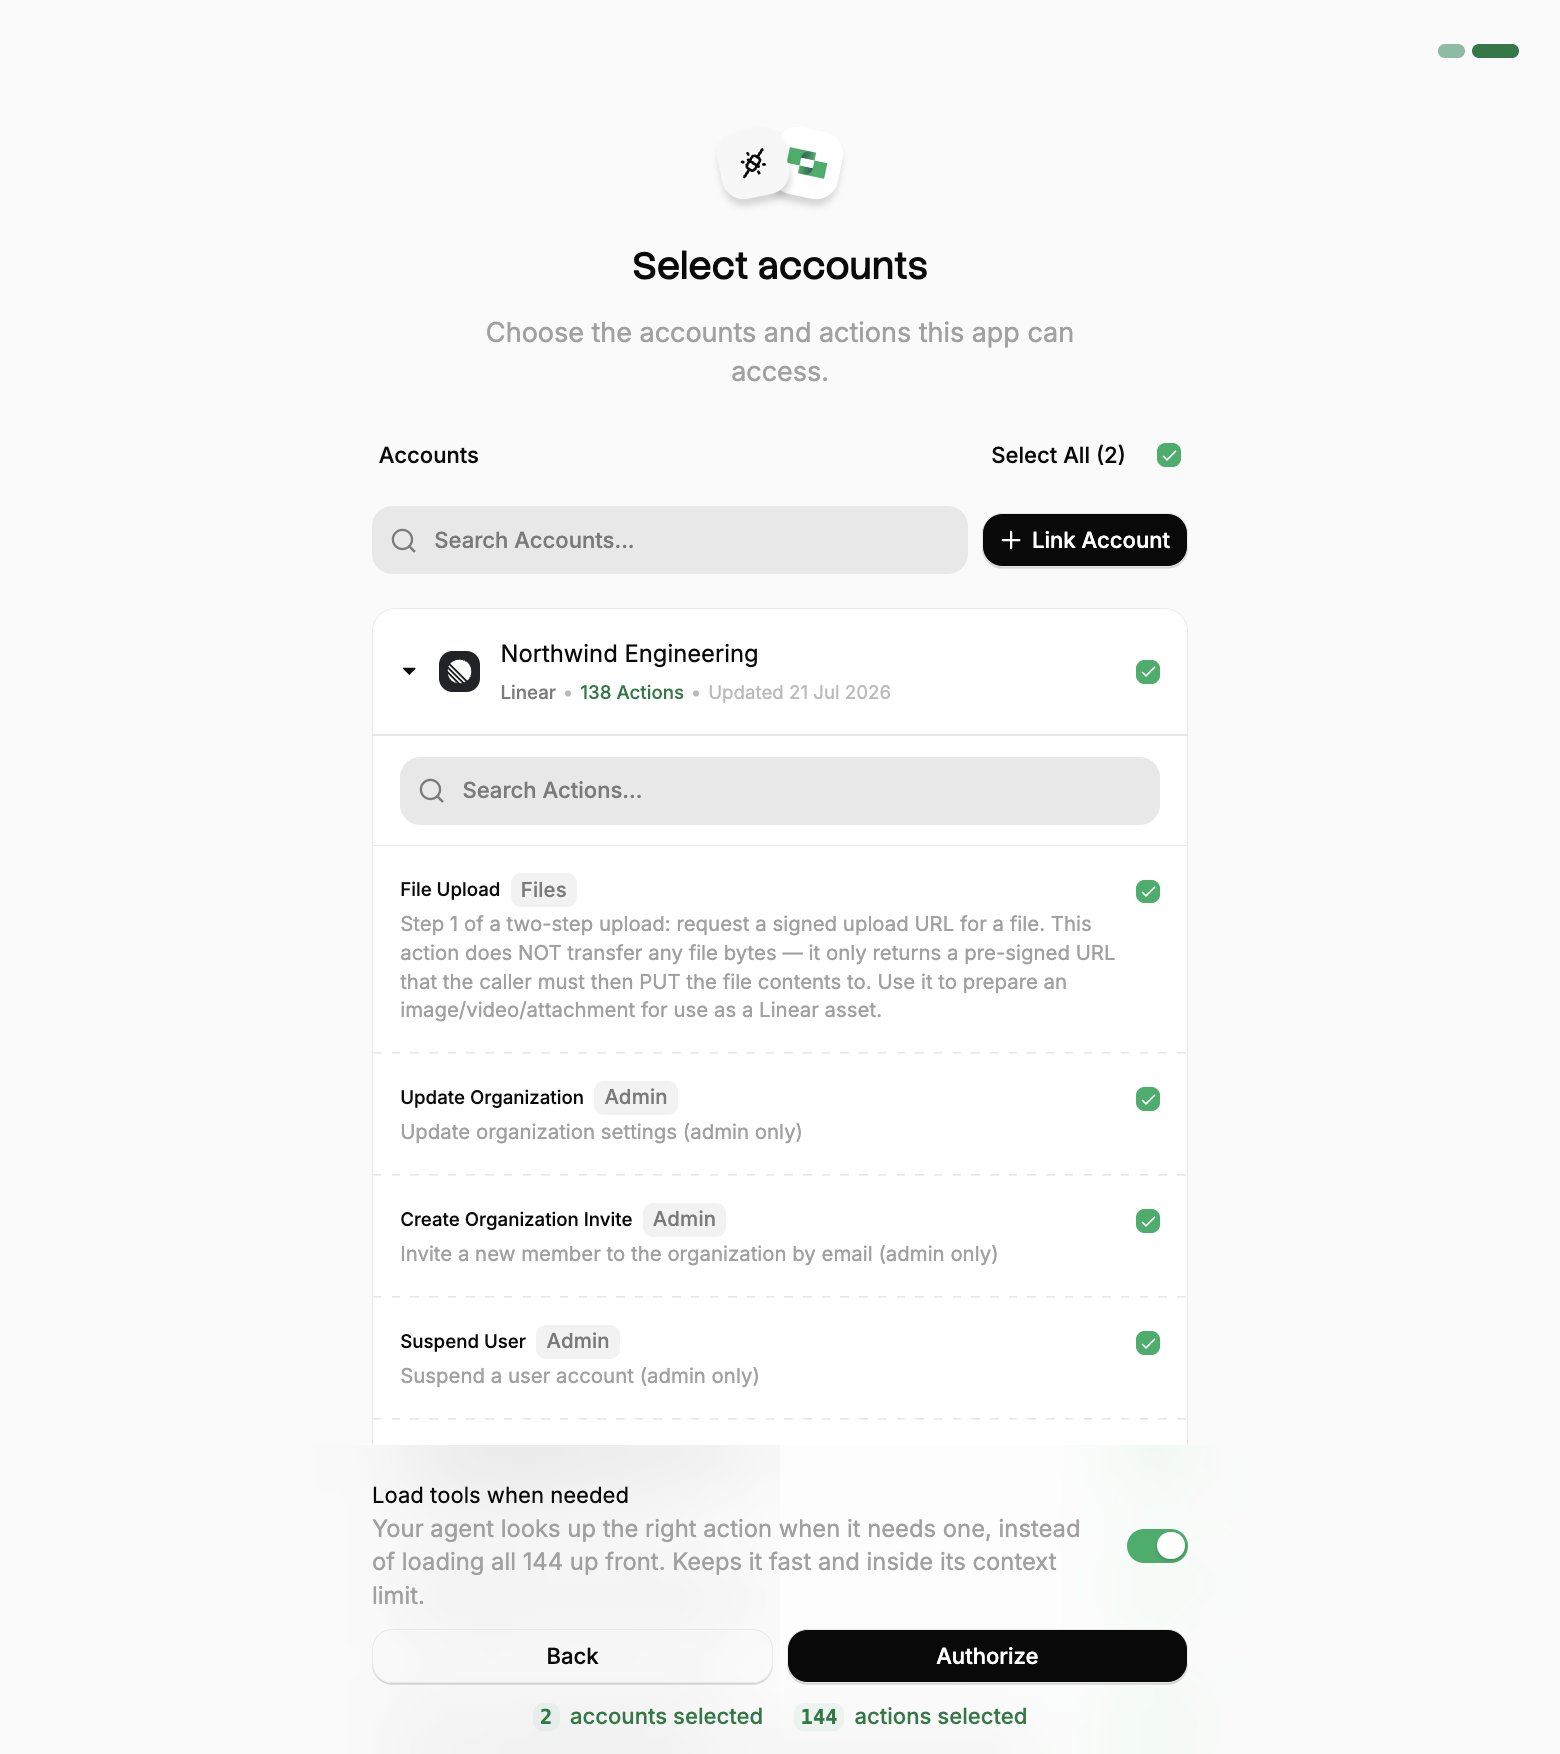
Narrow the actions
Who can grant access
Users typically hold the project-level Member role, which is what the flow is built around. A project Member sees the accounts they linked themselves, plus any they have been added to. That is what makes one URL safe to publish across an organization. Access can also be granted on a single linked account, which is how a shared account (a service mailbox, a company CRM login) reaches someone who is otherwise only a Member. Each person added to an account gets one of two levels:Choosing a connection method
There are two ways to connect a client:Client setup (OAuth)
OAuth is the recommended way to connect. Each person authorizes with their own StackOne login, and their grant can be revoked at any time.Popular clients
Here are step-by-step guides for some of the most popular clients:
ChatGPT

Claude Code
Claude Desktop & Web
Codex (OpenAI)
Cursor
Gemini CLI

Glean

Goose
n8n
VS Code (Copilot)
Clients requiring Client ID and Secret
Most clients register themselves with StackOne automatically, which is why the URL is usually the whole configuration. A few sign in from a fixed, hosted callback address instead and cannot self-register. Those need a client created in the dashboard first, and you paste its credentials into the client.1
Create the client
Go to Project Settings → MCP OAuth Clients → Create. Give it a descriptive name and one redirect URI per line. This is the callback address the client returns to after sign-in, which the client’s own documentation states.The Common integrations picker fills the redirect URI in for the clients we have confirmed:
Redirect URIs must be
https or a loopback address.2
Copy the credentials
Generate returns the client ID and secret. The secret is shown only once, so store it before you close the panel. If it is lost, create a new client rather than trying to recover it.
3
Configure the client
Paste the credentials into the client along with the endpoints shown beside them:
Then run the flow. The consent screen is the same one every other client shows, and Who can grant access applies unchanged.
Access tokens last one hour and are renewed automatically using the
offline_access refresh token. The grant itself lasts 90 days, after which the user runs the flow again. Revoking under Connected Apps ends it immediately.Client not listed?
Any MCP client that speaks the Streamable HTTP transport and supports OAuth can connect. Point it athttps://mcp.stackone.com/mcp and let it run the flow. If a client cannot open a browser for someone to approve the prompt, use a session token instead.
Reviewing and revoking access
Every authorization is a grant against the user who approved it, not against a project API key. Users manage their own grants under Connected Apps in the dashboard, where revoking one immediately stops that client’s tool calls. Revoking access does not unlink the account or change the connector profile. The account keeps working for every other client.Client setup (session token)
Session token URLs cover the cases OAuth cannot: a shared server, a scheduled job, or anywhere nobody is present to approve a prompt. The trade-off is that the access is built into the URL itself, so one leaked link exposes the account it was minted for.Optimize and secure
With your agent connected, use StackOne’s platform features to optimize performance and secure every call.Advanced Tool Search
Reduce context and save tokens.
Deep Query
Search synced records for a fraction of the tokens.
Defender
Block prompt injections before they reach your agent.