

- Manual groups (see below).
- Synced from the identity provider, through SCIM Groups.
Manual groups
These are the groups created in StackOne. Groups from the identity provider are managed there instead.Create a group
Only Organization Admins can create groups, manage their members, and delete them.1
Open the Groups tab
Go to Organization > Manage Team and select the Groups tab.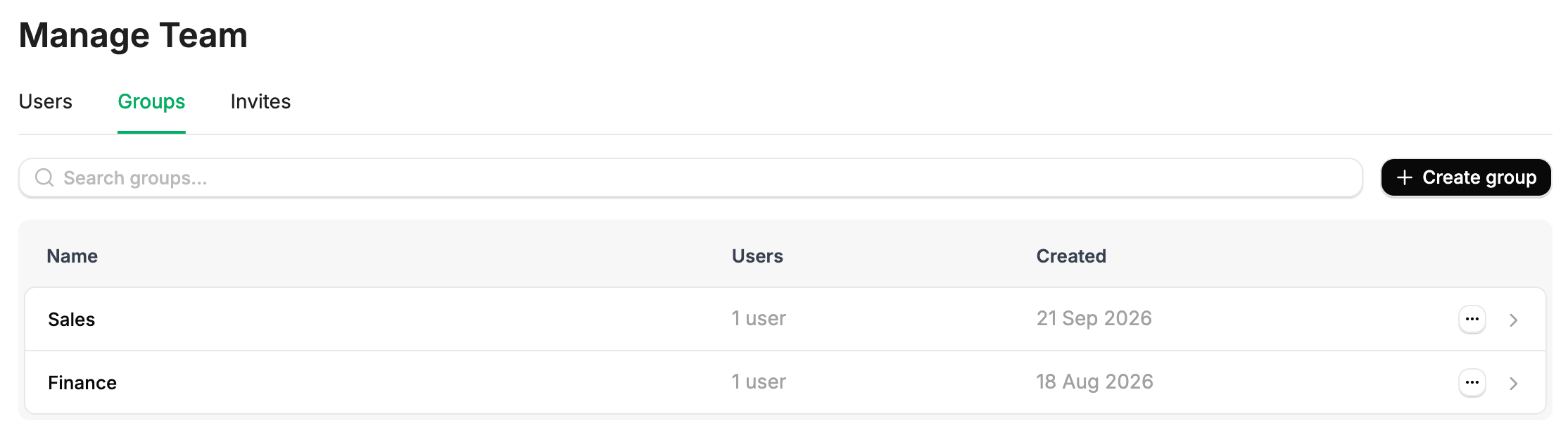
2
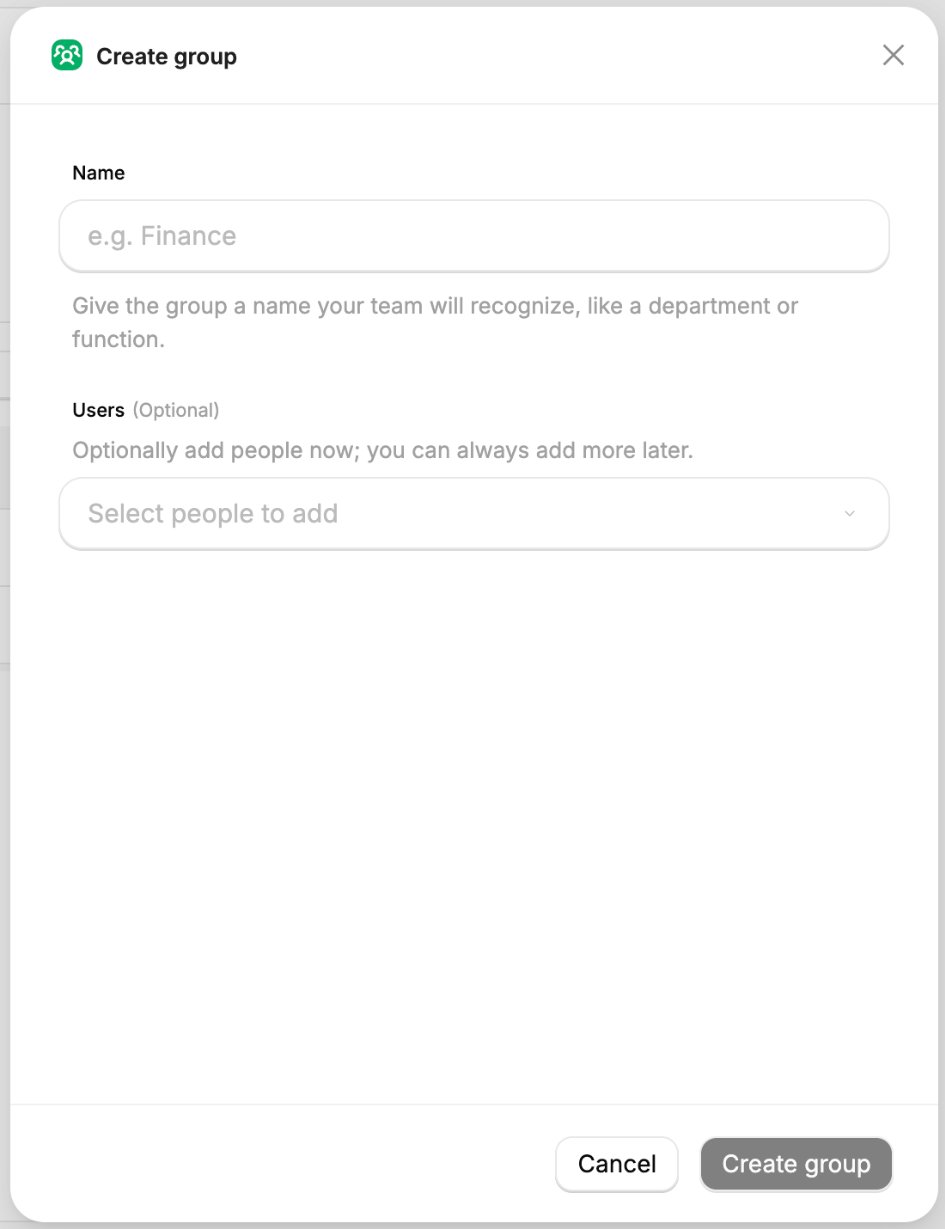
Name the group and add users
- Click Create group to open the panel.
- Enter a Name, for example a department, team or function. You can rename the group later with Edit Details.
- Optionally, add Users from the organization. You can add more later.
- Click Create group to finish.
Manage group membership
Open the group from the Groups tab.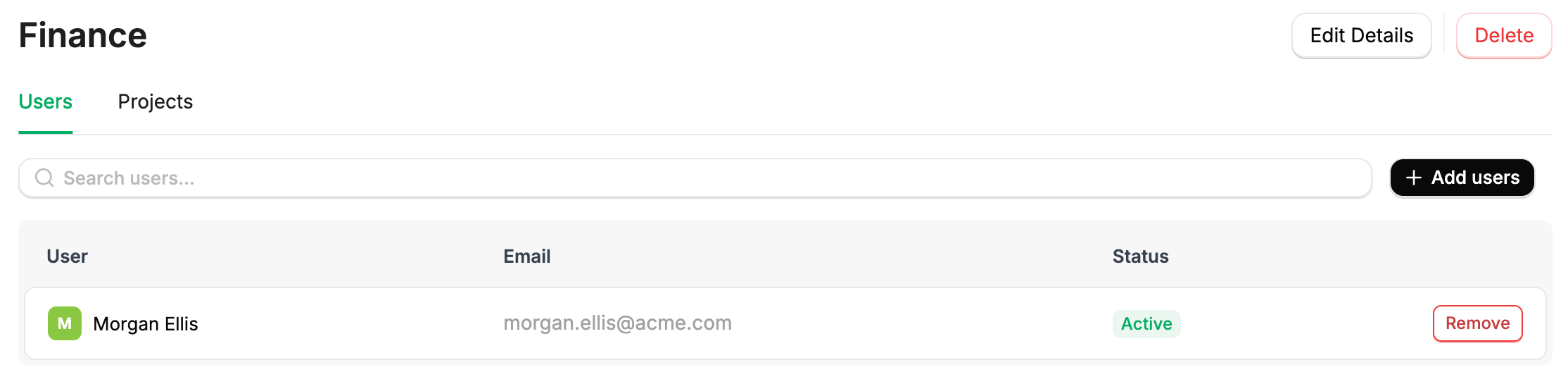
- To add people, click Add users, select them, and confirm.
- To remove someone, click Remove on their row and confirm. They lose any access the group gave them.
Delete a group
- Open the group from the Groups tab and click Delete.
- Type the group’s name, then click Delete to confirm.
Assign a group to a project
Assigning a group to a project needs Organization Admin or Project Admin. Start from the project to add several groups to it at once, or from the group to add it to several projects:- From the project
- From the group
1
Open the project's group access
- Go to Project Settings > Access.
- Switch the view from Users to Groups.

2
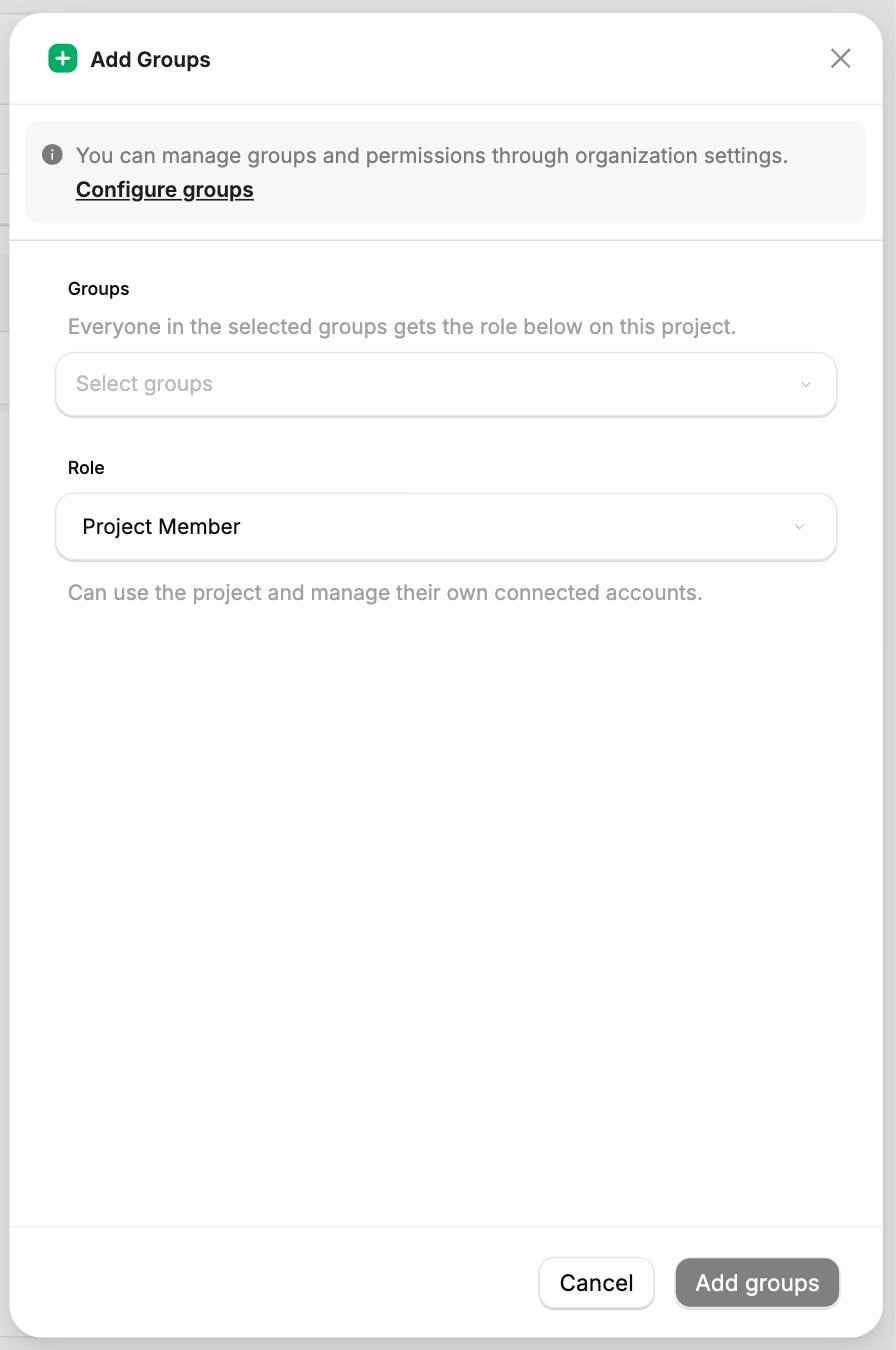
Select groups and a role
- Click Add Groups.
- Select one or more groups.
- Choose a Role. It defaults to Project Member. See Project Roles for what each role allows.
3
Add the groups
Confirm the selection to add the groups. Every member of each selected group gains the chosen role on the project.
Assign a group to an account
Before assigning a group to an account:- You need Account Admin on that account.
- The group must already be assigned to the account’s project. See Assign a group to a project.
Organization Admins and Project Admins are Account Admin on every account by default, unless explicit account access is enabled.
1
Open the account's group access
- Go to Accounts and open the account.
- Select its Access tab.
- Switch the view to Groups.
2
Select groups and a role
- Click Add Groups.
- Select one or more groups.
- Choose Account Admin or Account Member. It defaults to Account Member. See Shared Accounts for what each role allows.
3
Add the groups
Confirm the selection to add the groups. Every member of each selected group gains the chosen role on the account.
Change or remove a group’s access
Open the Groups view on the project or account, then:- To change the group’s role, pick a new role on its row.
- To remove the group’s access, click Revoke on its row and confirm.
To stop you locking yourself out, you can’t revoke a group that is your only access to a project. Organization Admins can, because they always have access to every project.