

 MCP
MCP A2A
A2AGather your Timesheet Portal API credentials
You need three values: your Account Name (login subdomain) and the Email and
Password of an API-authorised System Administrator user. StackOne uses these to obtain a
session API token automatically.
Find your account name
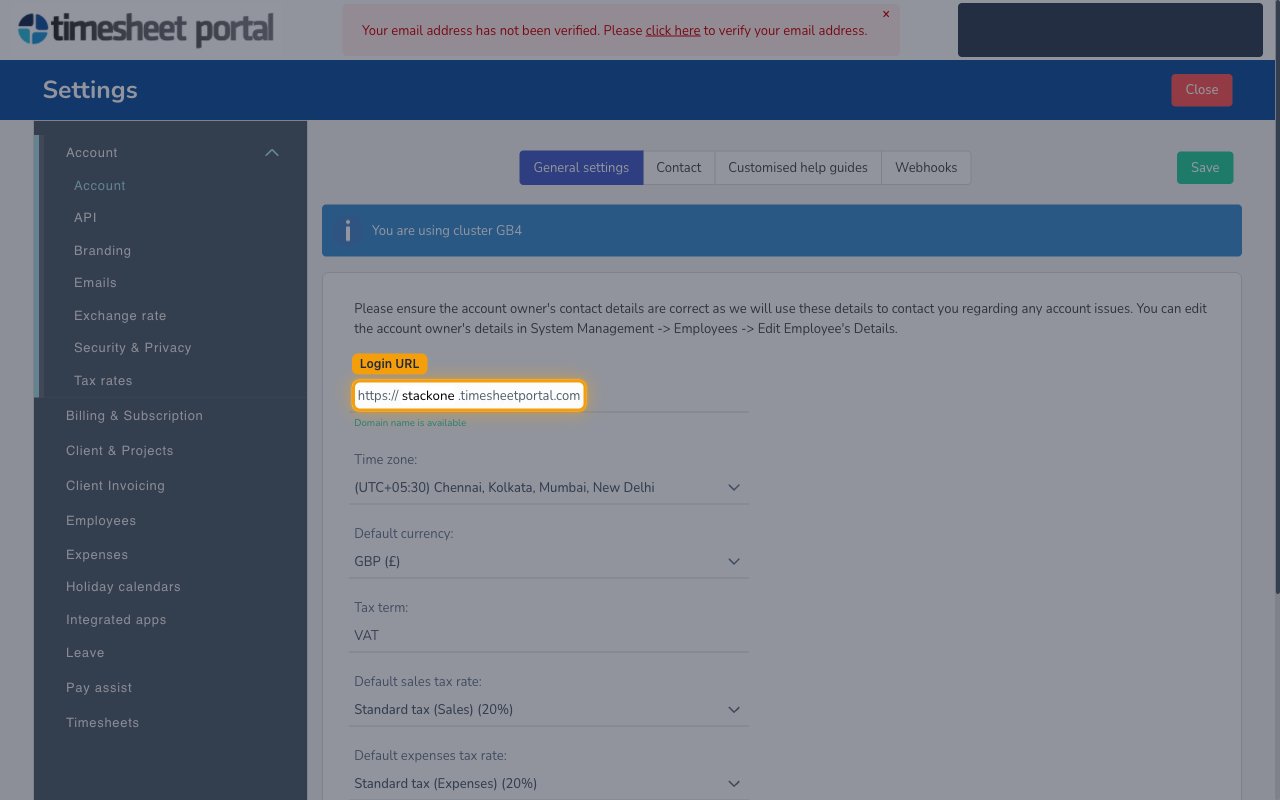
Click the Settings menu, then under the Account section open Account. On the
General settings tab, read the Login URL field. Your Account Name is the
subdomain shown before .timesheetportal.com.
- Format:
https://{account-name}.timesheetportal.com - Example: for
https://acme.timesheetportal.comthe Account Name isacme. - Enter the subdomain only (e.g.
acme) into the Account Name field in StackOne Hub — not the full URL.
Enter an API-authorised user's email and password
The Email and Password must belong to a Timesheet Portal user with the
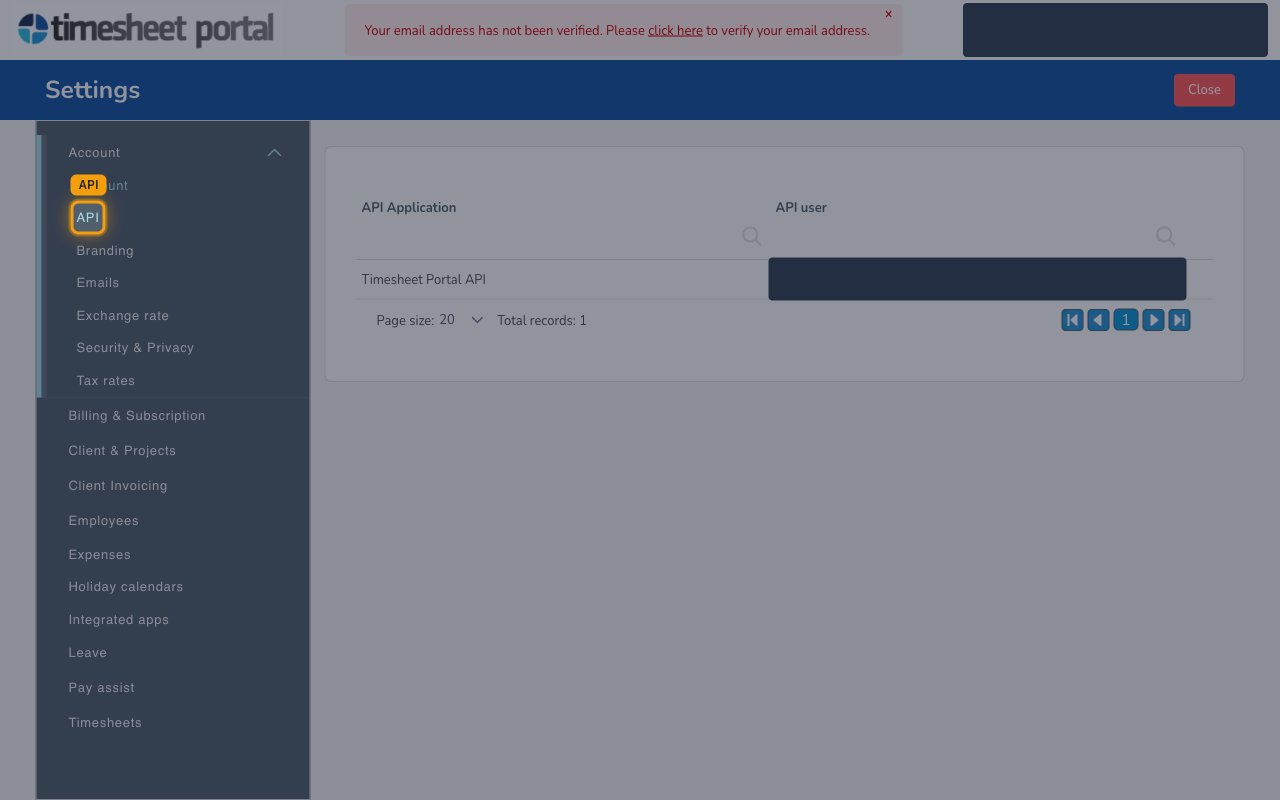
System Administrator role that is authorised for API access. Under Settings →
Account → API, the Timesheet Portal API application lists its assigned
API user — that is the user whose credentials to enter.
- Enter that user’s login email into the Email field in StackOne Hub.
- Enter that user’s password into the Password field in StackOne Hub. It is used only to obtain a session API token.
Linking the Account from the Hub
Navigate to the Hub
Fill out the fields
- Account Name
- Password
Connect
- Click Connect
- If applicable, the provider will redirect you to a sign-in or authorization page. Complete the provider’s authorization flow.
- Once authorization is successful, you will see a confirmation popup
If the account linking is successful, you will see the newly linked account in your Accounts page.