

Generate an API key
1
Open the API Keys section
Log in to the StackOne dashboard and go to Project Settings → API Keys in the left navigation.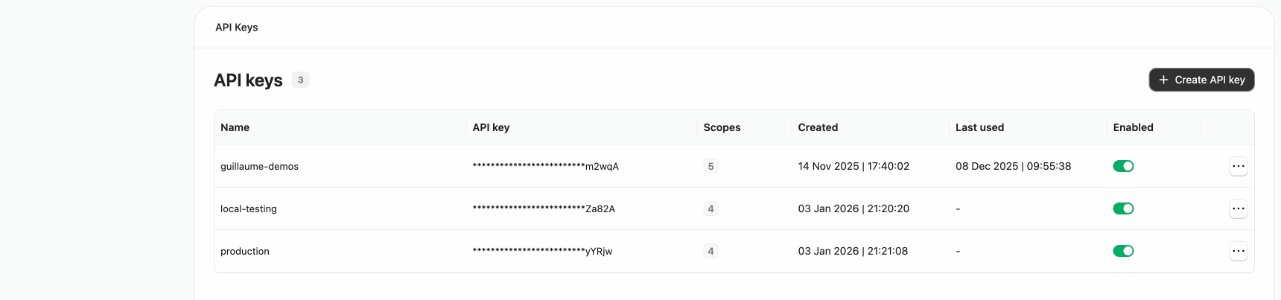
2
Create a key
Click Create API key and enter a name (e.g. 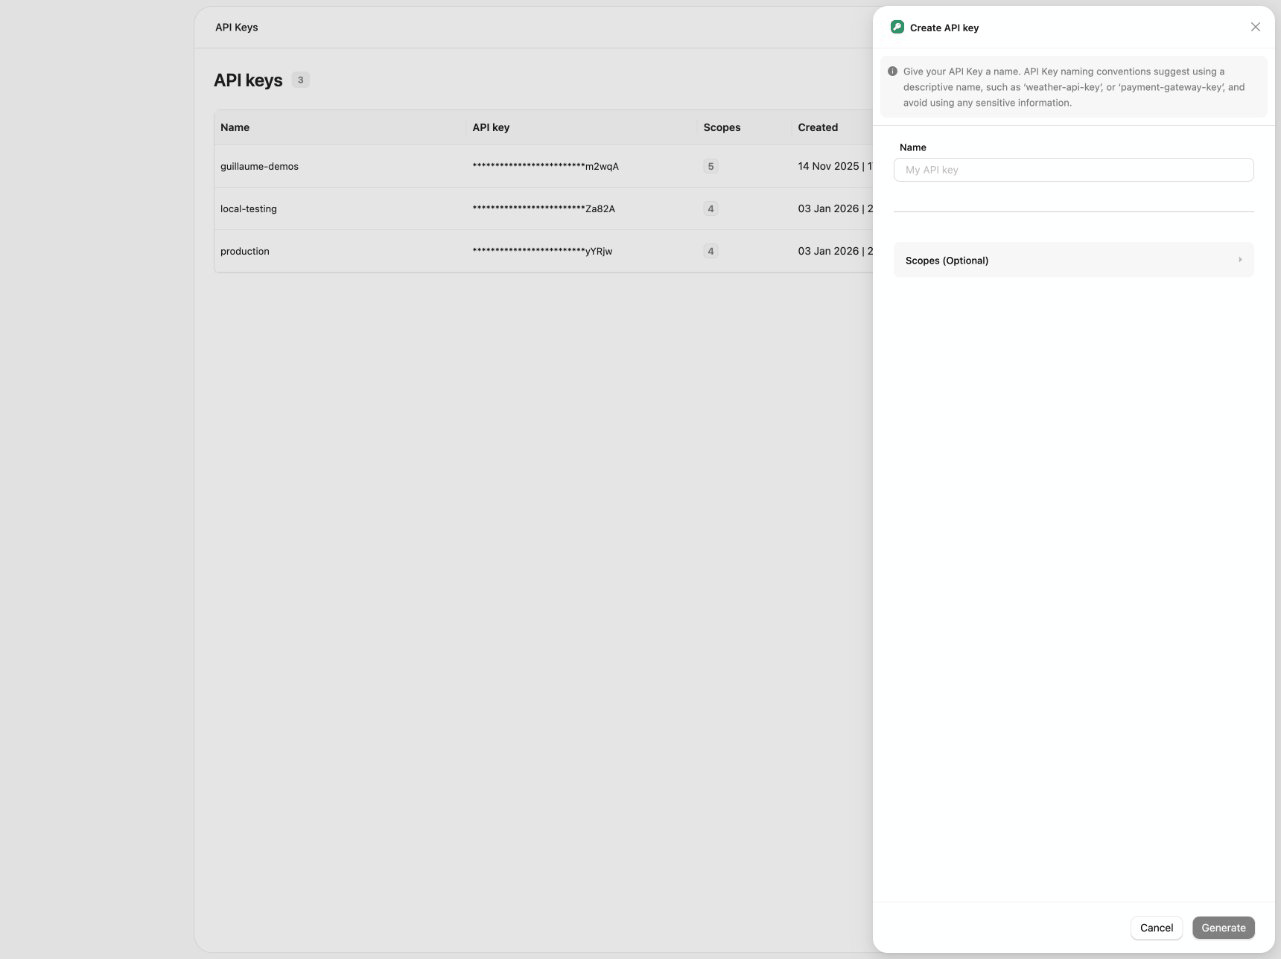
my-agent-key or production-hris-sync). This label can’t be changed later.3
Configure scopes
New keys come with a default set of scopes. Expand the Scopes section to enable or restrict access for your use case. The scopes reference below lists what each scope allows.
4
Copy and store the key
After clicking Generate, the key is shown once. Copy it immediately and store it securely.
Scopes
An API key’s scopes control what it can access. Set them when creating the key; new keys start with the defaults below.Key management
Your key appears in the API Keys table, where you can enable, disable, view scopes for, and delete keys at any time. Usage is tracked. The Last used column helps you spot stale keys to revoke. Review the list regularly.Next steps
Connect Session
Use your key to create a session token and open the account-linking flow for a user.
Getting Started
Return to the end-to-end embedding journey.