> ## Documentation Index
> Fetch the complete documentation index at: https://docs.stackone.com/llms.txt
> Use this file to discover all available pages before exploring further.
# Okta SCIM Provisioning
> Connect Okta to StackOne with SCIM, assign users, and push Okta groups.
export const idp_0 = "Okta"
Sync users from Okta, your identity provider (IdP), into StackOne with SCIM. Once linked, assigning a person to the StackOne app in Okta adds them to the organization, and unassigning or deactivating them removes their access.
For what happens to users once SCIM Provisioning is running, see the [SCIM Provisioning overview](/secure/identity-and-access/manage-team/scim/overview).
Before setting up SCIM Provisioning, you need:
* A verified SSO connection between the organization and {idp_0}. See [Single Sign-On](/secure/identity-and-access/authentication/sso/overview).
* The **Organization Admin** role in StackOne.
* Admin access to the StackOne application in {idp_0}.
* (Optional) {idp_0} set up to send `admin` in the SCIM `roles` field for anyone who should join as an **Organization Admin**. Everyone else joins as an **Organization Member**. See [Organization Roles](/secure/identity-and-access/roles-and-groups/organization-roles).
The `roles` value only counts when a user first joins. After that, their role can only be changed in StackOne.
SCIM Provisioning only adds users whose email is on the organization's verified domain. Anyone else, including everyone assigned before the domain is verified, shows as an error in {idp_0}'s provisioning log.
## Link SCIM in StackOne
1. In the StackOne dashboard, go to [**Organization > Security > SSO**](https://app.stackone.com/organization/security/sso).
2. Open the verified SSO connection.
3. Select the **Provisioning** tab.
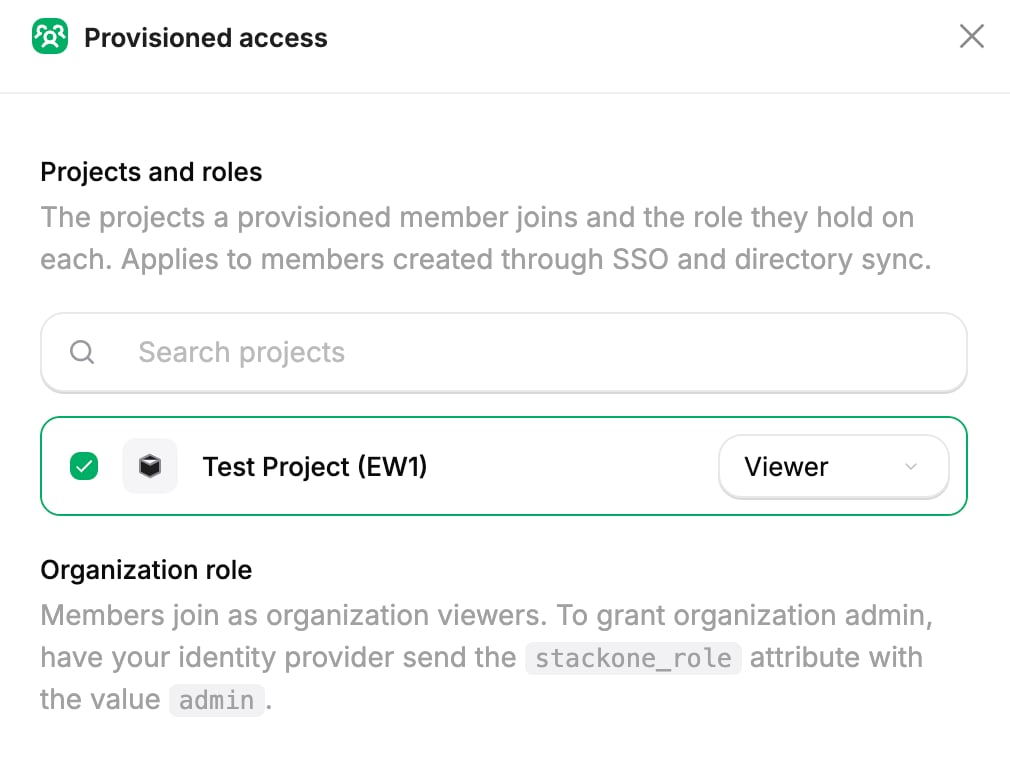
1. On the **Provisioned access** card, select **Manage access**.
2. Pick the projects new users should join.
3. Choose a role for each one. See [Project Roles](/secure/identity-and-access/roles-and-groups/project-roles).
4. Select **Save changes**.
Provisioned access applies to users added by both Just-in-Time Provisioning and SCIM Provisioning.
 1. On the **Directory Sync** card, select **Link SCIM**.
2. In the **SCIM Details** section, copy the **SCIM base URL** and the **Provisioning token**. You paste both into the IdP.
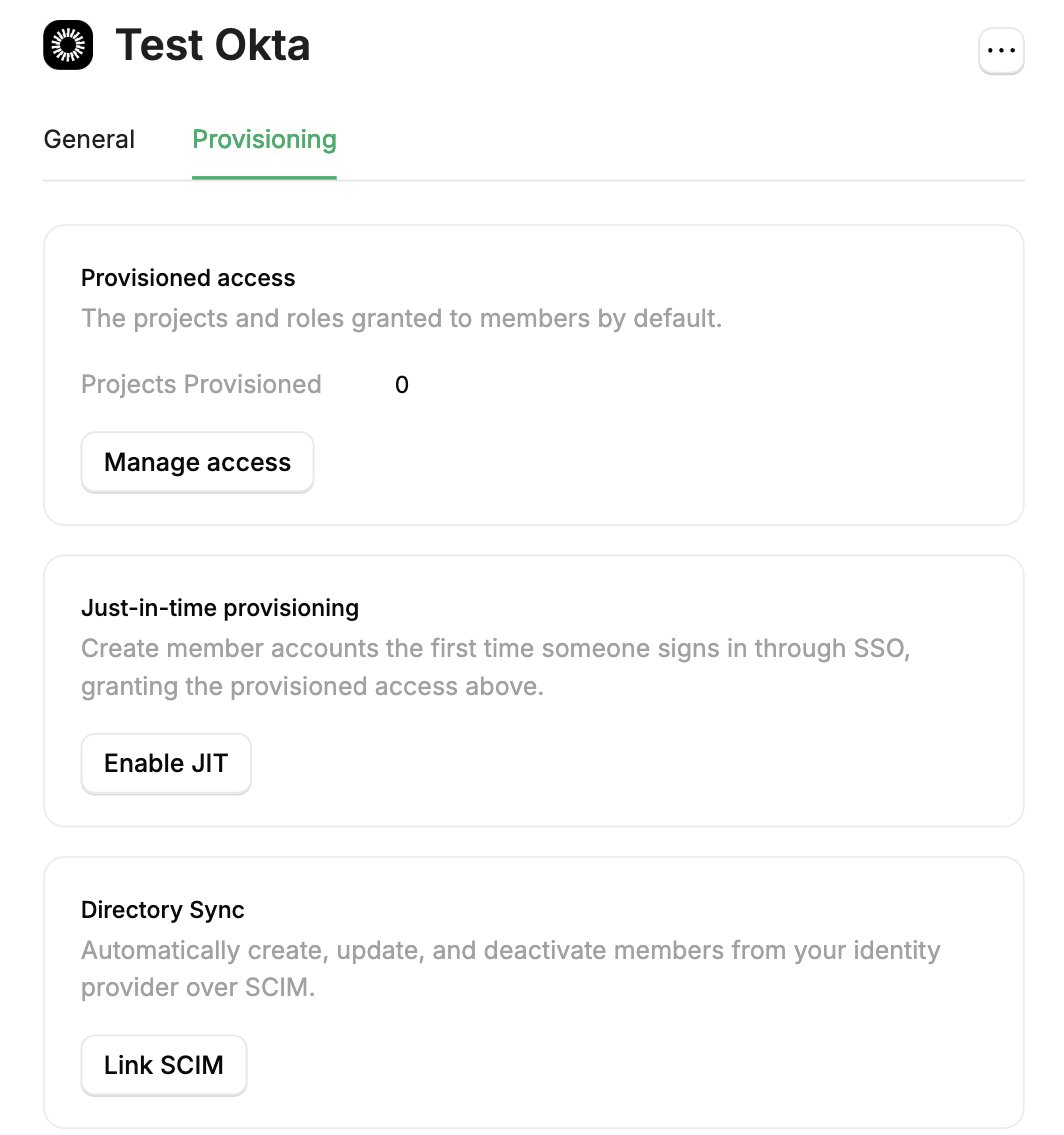
1. On the **Directory Sync** card, select **Link SCIM**.
2. In the **SCIM Details** section, copy the **SCIM base URL** and the **Provisioning token**. You paste both into the IdP.
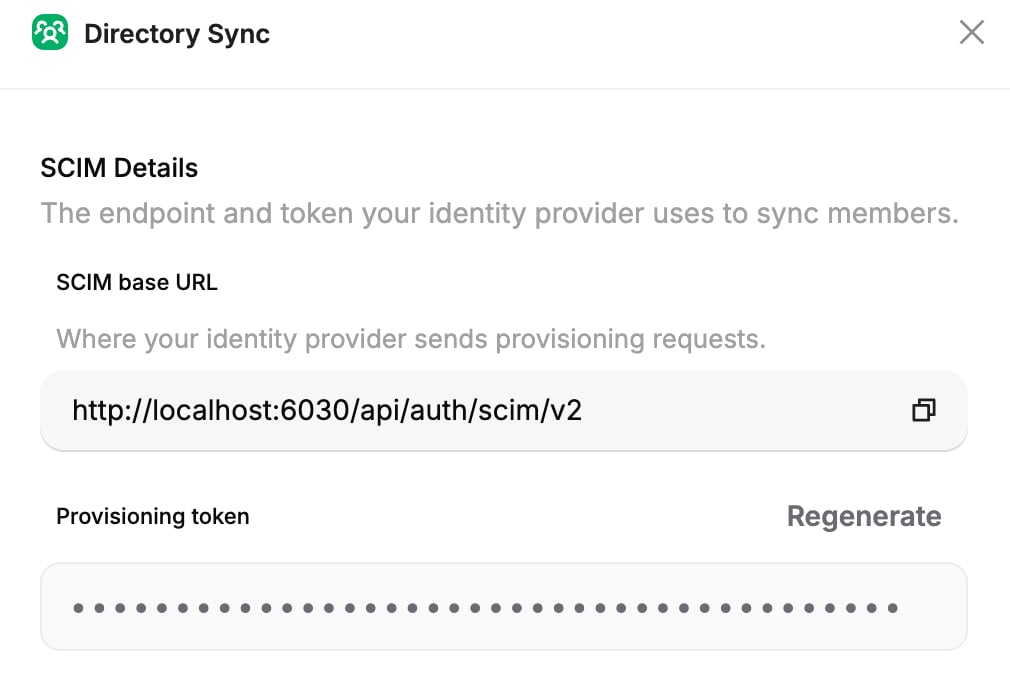 The token is only shown once. Store it somewhere safe before you close the panel. To replace a lost or leaked token, see [Rotate the token](/secure/identity-and-access/manage-team/scim/overview#rotate-the-token).
## Configure provisioning in Okta
1. In the Okta admin console, go to **Applications > Applications** and open the app you created for StackOne SSO.
2. Go to the **Provisioning** tab.
3. Click **Configure API Integration**.
4. Select **Enable API integration**.
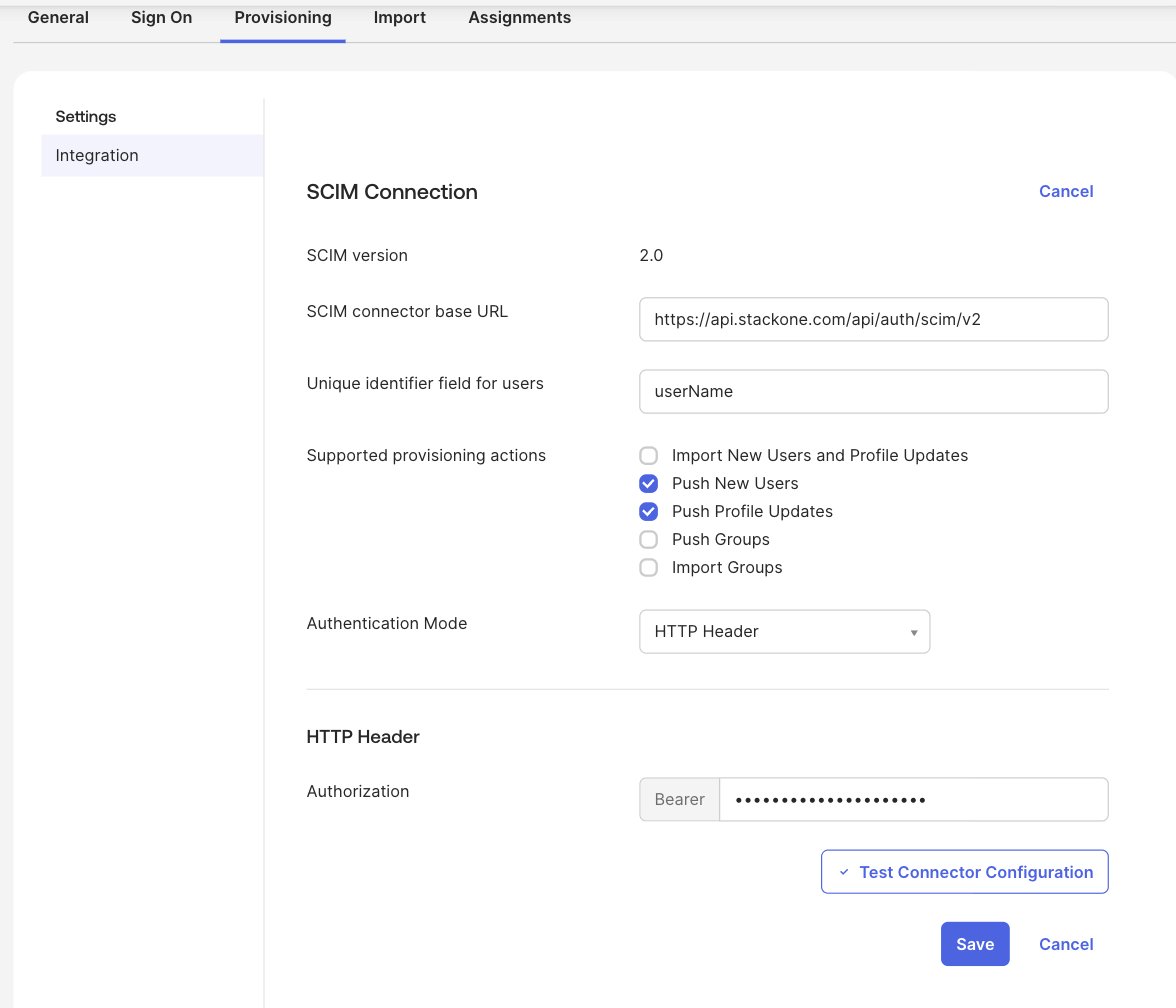
1. Set the following:
* **SCIM connector base URL**: the **SCIM base URL** from StackOne.
* **Unique identifier field for users**: `userName`.
* **Supported provisioning actions**: `Push New Users` and `Push Profile Updates`.
* **Authentication Mode**: `HTTP Header`.
* **Authorization**: the **Provisioning token** from StackOne.
2. Click **Test Connector Configuration** to confirm Okta can reach StackOne.
3. Click **Save**.
The token is only shown once. Store it somewhere safe before you close the panel. To replace a lost or leaked token, see [Rotate the token](/secure/identity-and-access/manage-team/scim/overview#rotate-the-token).
## Configure provisioning in Okta
1. In the Okta admin console, go to **Applications > Applications** and open the app you created for StackOne SSO.
2. Go to the **Provisioning** tab.
3. Click **Configure API Integration**.
4. Select **Enable API integration**.
1. Set the following:
* **SCIM connector base URL**: the **SCIM base URL** from StackOne.
* **Unique identifier field for users**: `userName`.
* **Supported provisioning actions**: `Push New Users` and `Push Profile Updates`.
* **Authentication Mode**: `HTTP Header`.
* **Authorization**: the **Provisioning token** from StackOne.
2. Click **Test Connector Configuration** to confirm Okta can reach StackOne.
3. Click **Save**.
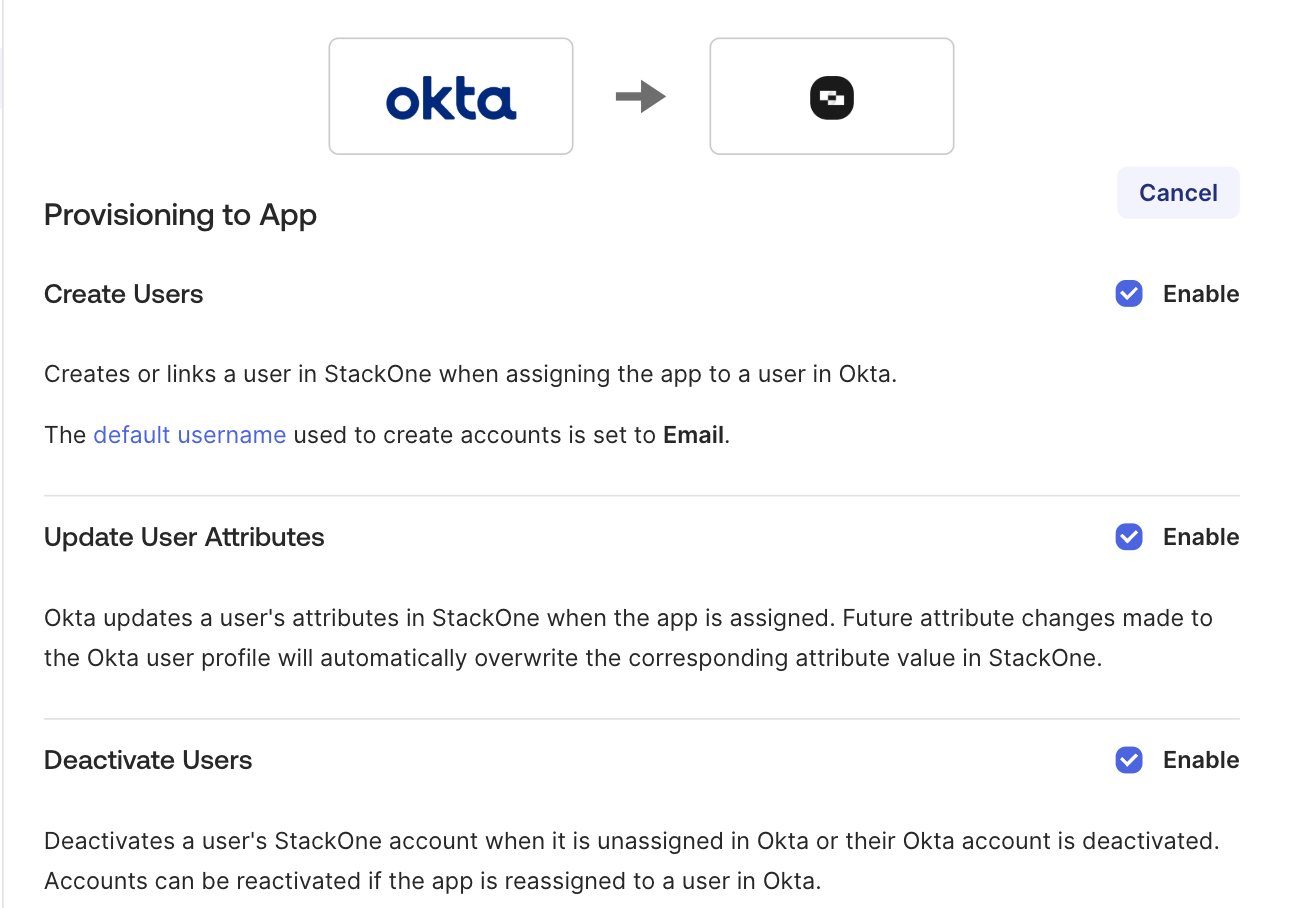
 1. Under **Provisioning > To App**, click **Edit**.
2. Enable **Create Users**, **Update User Attributes**, and **Deactivate Users**.
3. Click **Save**.
These let Okta create members in StackOne, keep their profiles in sync, and remove access when you unassign or deactivate them.
1. Under **Provisioning > To App**, click **Edit**.
2. Enable **Create Users**, **Update User Attributes**, and **Deactivate Users**.
3. Click **Save**.
These let Okta create members in StackOne, keep their profiles in sync, and remove access when you unassign or deactivate them.
 ## Assign members in Okta
1. Open the **Assignments** tab of the StackOne app.
2. Assign the people you want in StackOne.
You can assign individuals or Okta groups. Either way, Okta adds each assigned person to the organization, with their organization role and provisioned access.
Assigning an Okta group provisions its members as individual users. To bring the group itself into StackOne, with its membership kept in step, push it as well. See [Push groups](#push-groups).
Return to the **Directory Sync** card in StackOne. The **Synced members** and **Last synced** values update as Okta pushes users, and new members appear in the projects you selected.
## Push groups
Okta's **Group Push** creates the group in StackOne as a synced group and keeps its members in step. Only members who are assigned to the StackOne app, and so already provisioned, are pushed.
If StackOne already has a group with the same name, an empty one becomes the synced group and keeps its access.
If the group has members, it's left untouched, and StackOne creates a second, synced group with the same name instead. To set up a group's access before anyone is pushed into it, see [Prepare the access before you push](/secure/identity-and-access/manage-team/scim/groups#prepare-the-access-before-you-push).
1. On the app's **Provisioning** tab, under **Integration**, click **Edit**.
2. Make sure **Push Groups** is enabled alongside **Push New Users** and **Push Profile Updates**.
3. Click **Save**.
1. Open the app's **Push Groups** tab.
2. Click **Push Groups**, and choose **Find groups by name**. To push several groups that share a naming pattern, choose **Find groups by rule** instead.
3. Select the Okta group, and leave **Push group memberships immediately** on.
4. Click **Save**.
Okta creates the group in StackOne.
1. Go to [**Organization > Manage Team**](https://app.stackone.com/organization/manage_team) and open the **Groups** tab. The group is listed with a **Synced** tag and its pushed members.
2. Assign it to projects from its **Projects** tab.
Use different Okta groups for assigning the app and for Group Push. For example, assign the app to ***StackOne Users*** and push ***Finance***. Okta doesn't support using one group for both, and the group's members in StackOne can end up different from Okta's. See Okta's [App assignments and Group Push](https://help.okta.com/en-us/content/topics/users-groups-profiles/app-assignments-group-push.htm).
After a group is pushed:
* **To rename it**, rename it in Okta.
* **To stop pushing it**:
1. On the **Push Groups** tab, choose **Unlink pushed group** on the group's row.
2. Choose whether to also delete the group in StackOne.
A group you keep stays a synced group in StackOne until you unlink SCIM Provisioning.
## Next steps
How SCIM provisioning works across identity providers.
Provision members from Microsoft Entra ID instead.
Push the identity provider's groups into StackOne and grant access through them.
This documentation is built and hosted on [Mintlify](https://mintlify.com), a developer documentation platform.
## Assign members in Okta
1. Open the **Assignments** tab of the StackOne app.
2. Assign the people you want in StackOne.
You can assign individuals or Okta groups. Either way, Okta adds each assigned person to the organization, with their organization role and provisioned access.
Assigning an Okta group provisions its members as individual users. To bring the group itself into StackOne, with its membership kept in step, push it as well. See [Push groups](#push-groups).
Return to the **Directory Sync** card in StackOne. The **Synced members** and **Last synced** values update as Okta pushes users, and new members appear in the projects you selected.
## Push groups
Okta's **Group Push** creates the group in StackOne as a synced group and keeps its members in step. Only members who are assigned to the StackOne app, and so already provisioned, are pushed.
If StackOne already has a group with the same name, an empty one becomes the synced group and keeps its access.
If the group has members, it's left untouched, and StackOne creates a second, synced group with the same name instead. To set up a group's access before anyone is pushed into it, see [Prepare the access before you push](/secure/identity-and-access/manage-team/scim/groups#prepare-the-access-before-you-push).
1. On the app's **Provisioning** tab, under **Integration**, click **Edit**.
2. Make sure **Push Groups** is enabled alongside **Push New Users** and **Push Profile Updates**.
3. Click **Save**.
1. Open the app's **Push Groups** tab.
2. Click **Push Groups**, and choose **Find groups by name**. To push several groups that share a naming pattern, choose **Find groups by rule** instead.
3. Select the Okta group, and leave **Push group memberships immediately** on.
4. Click **Save**.
Okta creates the group in StackOne.
1. Go to [**Organization > Manage Team**](https://app.stackone.com/organization/manage_team) and open the **Groups** tab. The group is listed with a **Synced** tag and its pushed members.
2. Assign it to projects from its **Projects** tab.
Use different Okta groups for assigning the app and for Group Push. For example, assign the app to ***StackOne Users*** and push ***Finance***. Okta doesn't support using one group for both, and the group's members in StackOne can end up different from Okta's. See Okta's [App assignments and Group Push](https://help.okta.com/en-us/content/topics/users-groups-profiles/app-assignments-group-push.htm).
After a group is pushed:
* **To rename it**, rename it in Okta.
* **To stop pushing it**:
1. On the **Push Groups** tab, choose **Unlink pushed group** on the group's row.
2. Choose whether to also delete the group in StackOne.
A group you keep stays a synced group in StackOne until you unlink SCIM Provisioning.
## Next steps
How SCIM provisioning works across identity providers.
Provision members from Microsoft Entra ID instead.
Push the identity provider's groups into StackOne and grant access through them.
This documentation is built and hosted on [Mintlify](https://mintlify.com), a developer documentation platform.