> ## Documentation Index
> Fetch the complete documentation index at: https://docs.stackone.com/llms.txt
> Use this file to discover all available pages before exploring further.
# Claude Code
> Connect StackOne MCP to Claude Code using built-in MCP commands.
## Overview
[Claude Code](https://code.claude.com/) is Anthropic's CLI for developers. It provides built-in commands for managing MCP servers.
For complete Claude Code MCP documentation, see the [official MCP guide](https://code.claude.com/docs/en/mcp).
## Setup
The fastest way to get your configuration is directly from the StackOne dashboard — it generates a ready-to-paste `claude mcp add` command. See [Connect from Dashboard](/mcp/connect-from-dashboard).
1. Go to **Connectors** in the left nav and open the connector you want to use
2. Click **Use Connector** in the top right
3. On the **Use** tab, click **MCP Server** under "Use with Agent Client"
4. Select a linked account from the dropdown
5. Choose **Claude Code** as the client
6. Copy the generated command
The command uses a single token URL — no API key encoding required.
The token expires after one year. Regenerate it at any time using the refresh button in the MCP tile.
Run the command from the dashboard in your terminal. It looks like this:
```bash theme={null}
claude mcp add \
--transport http \
gsheets \
"https://api.stackone.com/mcp?token={session_token}"
```
Use short names for easier CLI usage: `gsheets`, `slack`, `hubspot-sales`. You can prefix with `stackone-` or `s1-` if you have other MCP servers, but it's not required.
If you prefer to use your API key and account ID directly, set your encoded API key as an environment variable first:
```bash theme={null}
export STACKONE_AUTH_TOKEN=$(echo -n "{stackone_api_key}:" | base64)
```
```powershell theme={null}
$env:STACKONE_AUTH_TOKEN = [Convert]::ToBase64String([System.Text.Encoding]::UTF8.GetBytes("{stackone_api_key}:"))
```
Then add the server:
```bash theme={null}
claude mcp add \
--transport http \
--header "Authorization: Basic $STACKONE_AUTH_TOKEN" \
gsheets \
"https://api.stackone.com/mcp?x-account-id={account_id}"
```
Check the server status:
```bash theme={null}
claude mcp list
```
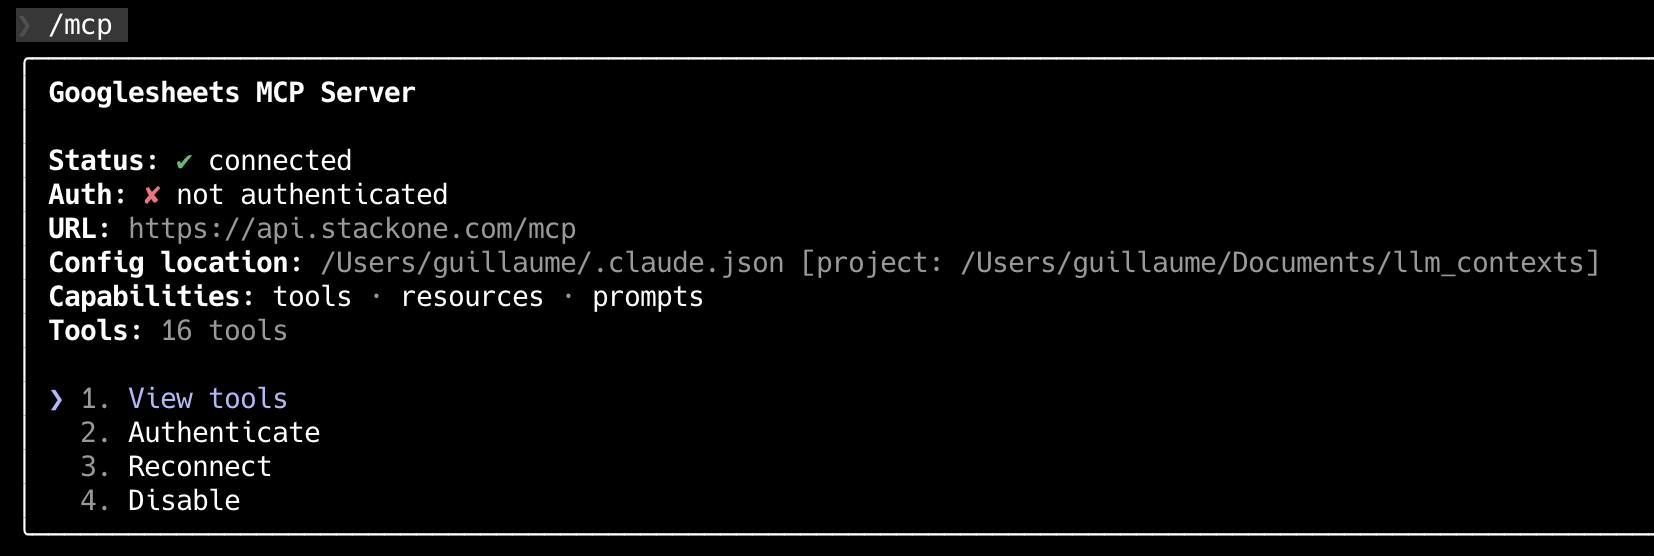
 Within a Claude Code session, use the `/mcp` command to view server details and available tools:
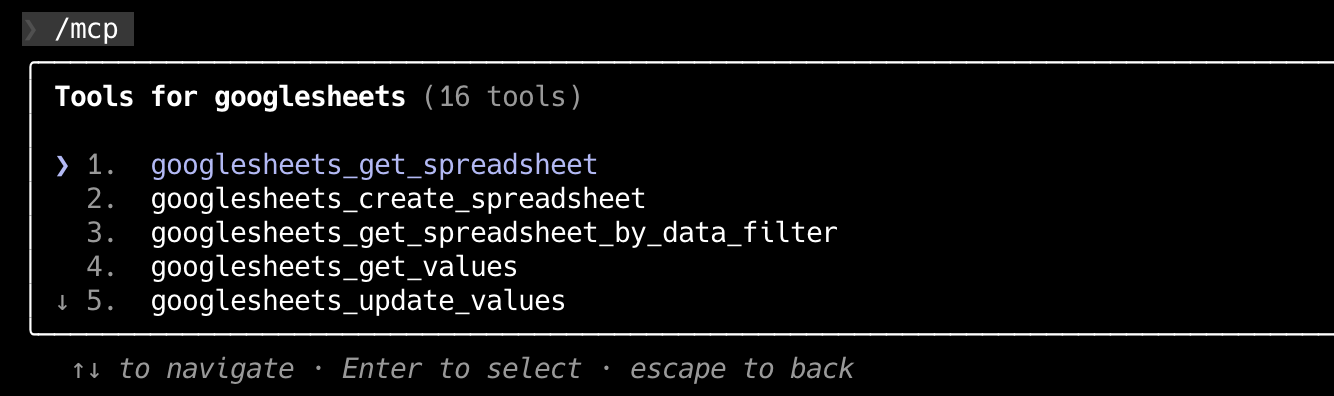
 Select "View tools" to browse available operations:
 ## Adding Multiple Accounts
Get a separate token for each account from the dashboard, then add them as distinct servers:
```bash theme={null}
# Google Sheets account
claude mcp add \
--transport http \
gsheets \
"https://api.stackone.com/mcp?token={google_sheets_session_token}"
# Slack account
claude mcp add \
--transport http \
slack \
"https://api.stackone.com/mcp?token={slack_session_token}"
```
## Scope Options
Control where the configuration is stored:
| Scope | Flag | Storage Location | Use Case |
| ------- | ----------------- | ----------------------------------- | --------------------------------------- |
| Local | (default) | `.claude.json` in current directory | Project-specific |
| Project | `--scope project` | `.mcp.json` at project root | Team collaboration (version controlled) |
| User | `--scope user` | `~/.claude.json` | Personal tools across all projects |
**Example with user scope** (available across all projects):
```bash theme={null}
claude mcp add \
--transport http \
--scope user \
gsheets \
"https://api.stackone.com/mcp?token={session_token}"
```
## Management Commands
```bash theme={null}
claude mcp list # View all configured servers
claude mcp get gsheets # Show details for specific server
claude mcp remove gsheets # Remove a server
```
## Programmatic Integration
For programmatic integration with Anthropic's Claude API, see the [Anthropic SDK Framework Guide](/mcp/framework-guides/anthropic-sdk).
## Next Steps
Set up MCP in the Claude Desktop app
Configure authentication and security
## Adding Multiple Accounts
Get a separate token for each account from the dashboard, then add them as distinct servers:
```bash theme={null}
# Google Sheets account
claude mcp add \
--transport http \
gsheets \
"https://api.stackone.com/mcp?token={google_sheets_session_token}"
# Slack account
claude mcp add \
--transport http \
slack \
"https://api.stackone.com/mcp?token={slack_session_token}"
```
## Scope Options
Control where the configuration is stored:
| Scope | Flag | Storage Location | Use Case |
| ------- | ----------------- | ----------------------------------- | --------------------------------------- |
| Local | (default) | `.claude.json` in current directory | Project-specific |
| Project | `--scope project` | `.mcp.json` at project root | Team collaboration (version controlled) |
| User | `--scope user` | `~/.claude.json` | Personal tools across all projects |
**Example with user scope** (available across all projects):
```bash theme={null}
claude mcp add \
--transport http \
--scope user \
gsheets \
"https://api.stackone.com/mcp?token={session_token}"
```
## Management Commands
```bash theme={null}
claude mcp list # View all configured servers
claude mcp get gsheets # Show details for specific server
claude mcp remove gsheets # Remove a server
```
## Programmatic Integration
For programmatic integration with Anthropic's Claude API, see the [Anthropic SDK Framework Guide](/mcp/framework-guides/anthropic-sdk).
## Next Steps
Set up MCP in the Claude Desktop app
Configure authentication and security