> ## Documentation Index
> Fetch the complete documentation index at: https://docs.stackone.com/llms.txt
> Use this file to discover all available pages before exploring further.
# SharePoint Partner OAuth
> Follow these steps to connect SharePoint via the StackOne Hub successfully.
Ensure that your Microsoft account has the [**Global Administrator**](https://learn.microsoft.com/en-us/microsoft-365/admin/add-users/about-admin-roles?view=o365-worldwide#permissions-based-on-admin-role-and-group-type-in-m365-admin-page) and [**SharePoint Administrator**](https://learn.microsoft.com/en-us/sharepoint/sharepoint-admin-role) roles assigned.
You can view and manage user role assignments in your [Microsoft Admin center](https://admin.microsoft.com/Adminportal/Home#/users).
For users outside of your organization to connect with your Microsoft application, a Microsoft Partner Center account is required. [Read more](https://learn.microsoft.com/en-gb/entra/identity-platform/publisher-verification-overview)
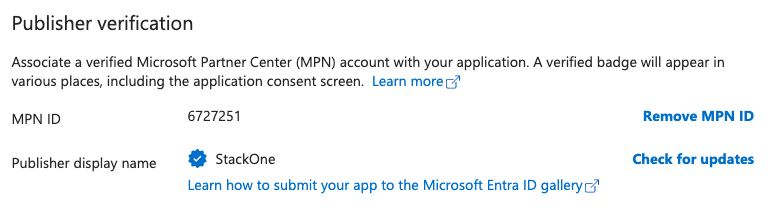
Your Microsoft application must have your **MPN ID** assigned under *Branding & Properties* > *Publisher Verification:*
 If you've been directed to StackOne to integrate with SharePoint, the following steps will help you understand the process and any necessary actions to configure a successful integration.
## Create and configure a new application
Log in to your [Microsoft Azure](https://portal.azure.com/) portal.
If you've been directed to StackOne to integrate with SharePoint, the following steps will help you understand the process and any necessary actions to configure a successful integration.
## Create and configure a new application
Log in to your [Microsoft Azure](https://portal.azure.com/) portal.
 Go to your [Microsoft Entra admin center](https://entra.microsoft.com/).
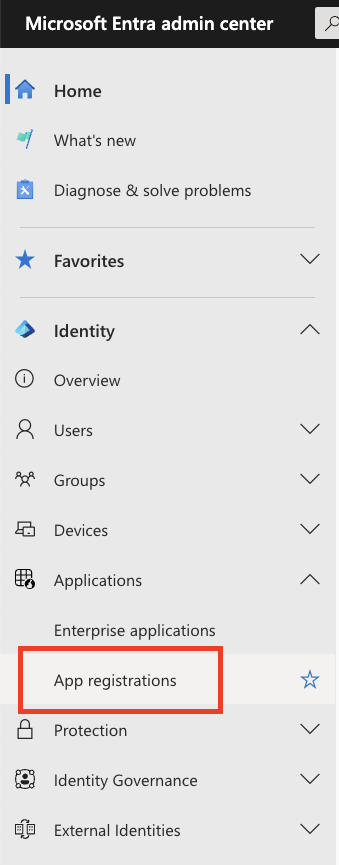
In the left navigation bar, click **Applications** > **App registrations**.
Go to your [Microsoft Entra admin center](https://entra.microsoft.com/).
In the left navigation bar, click **Applications** > **App registrations**.
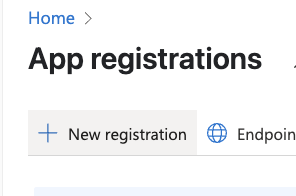
 Under **App registrations**, click the **+ New registration** button.
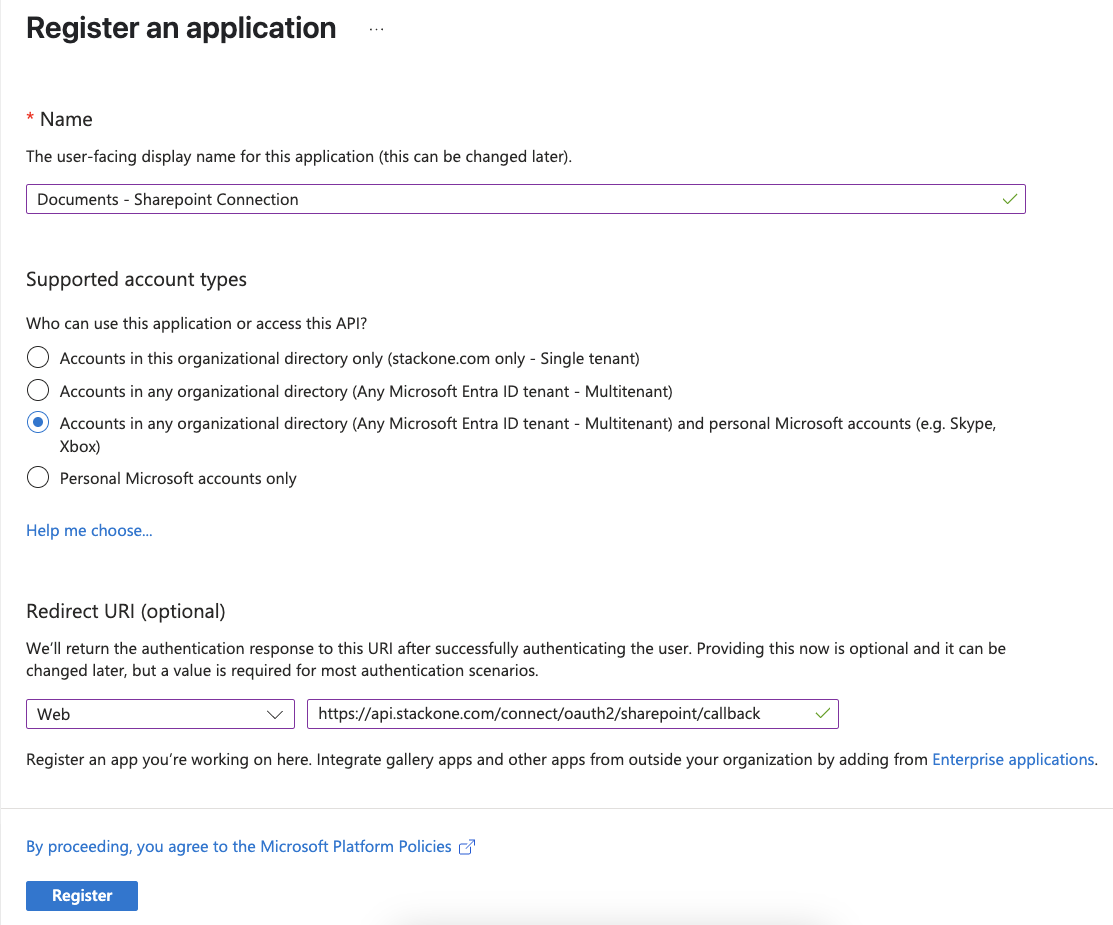
 Under ***Register an application***, input the following details:
* Name
* Supported account types
* Select **Accounts in any organizational directory (Any Microsoft Entra ID tenant - Multitenant) and personal Microsoft accounts**
* Redirect URI
* Select **Web**
* Enter the URI: `https://api.stackone.com/connect/oauth2/sharepoint/callback`
Once complete, click **Register** to create the new application.
Under ***Register an application***, input the following details:
* Name
* Supported account types
* Select **Accounts in any organizational directory (Any Microsoft Entra ID tenant - Multitenant) and personal Microsoft accounts**
* Redirect URI
* Select **Web**
* Enter the URI: `https://api.stackone.com/connect/oauth2/sharepoint/callback`
Once complete, click **Register** to create the new application.
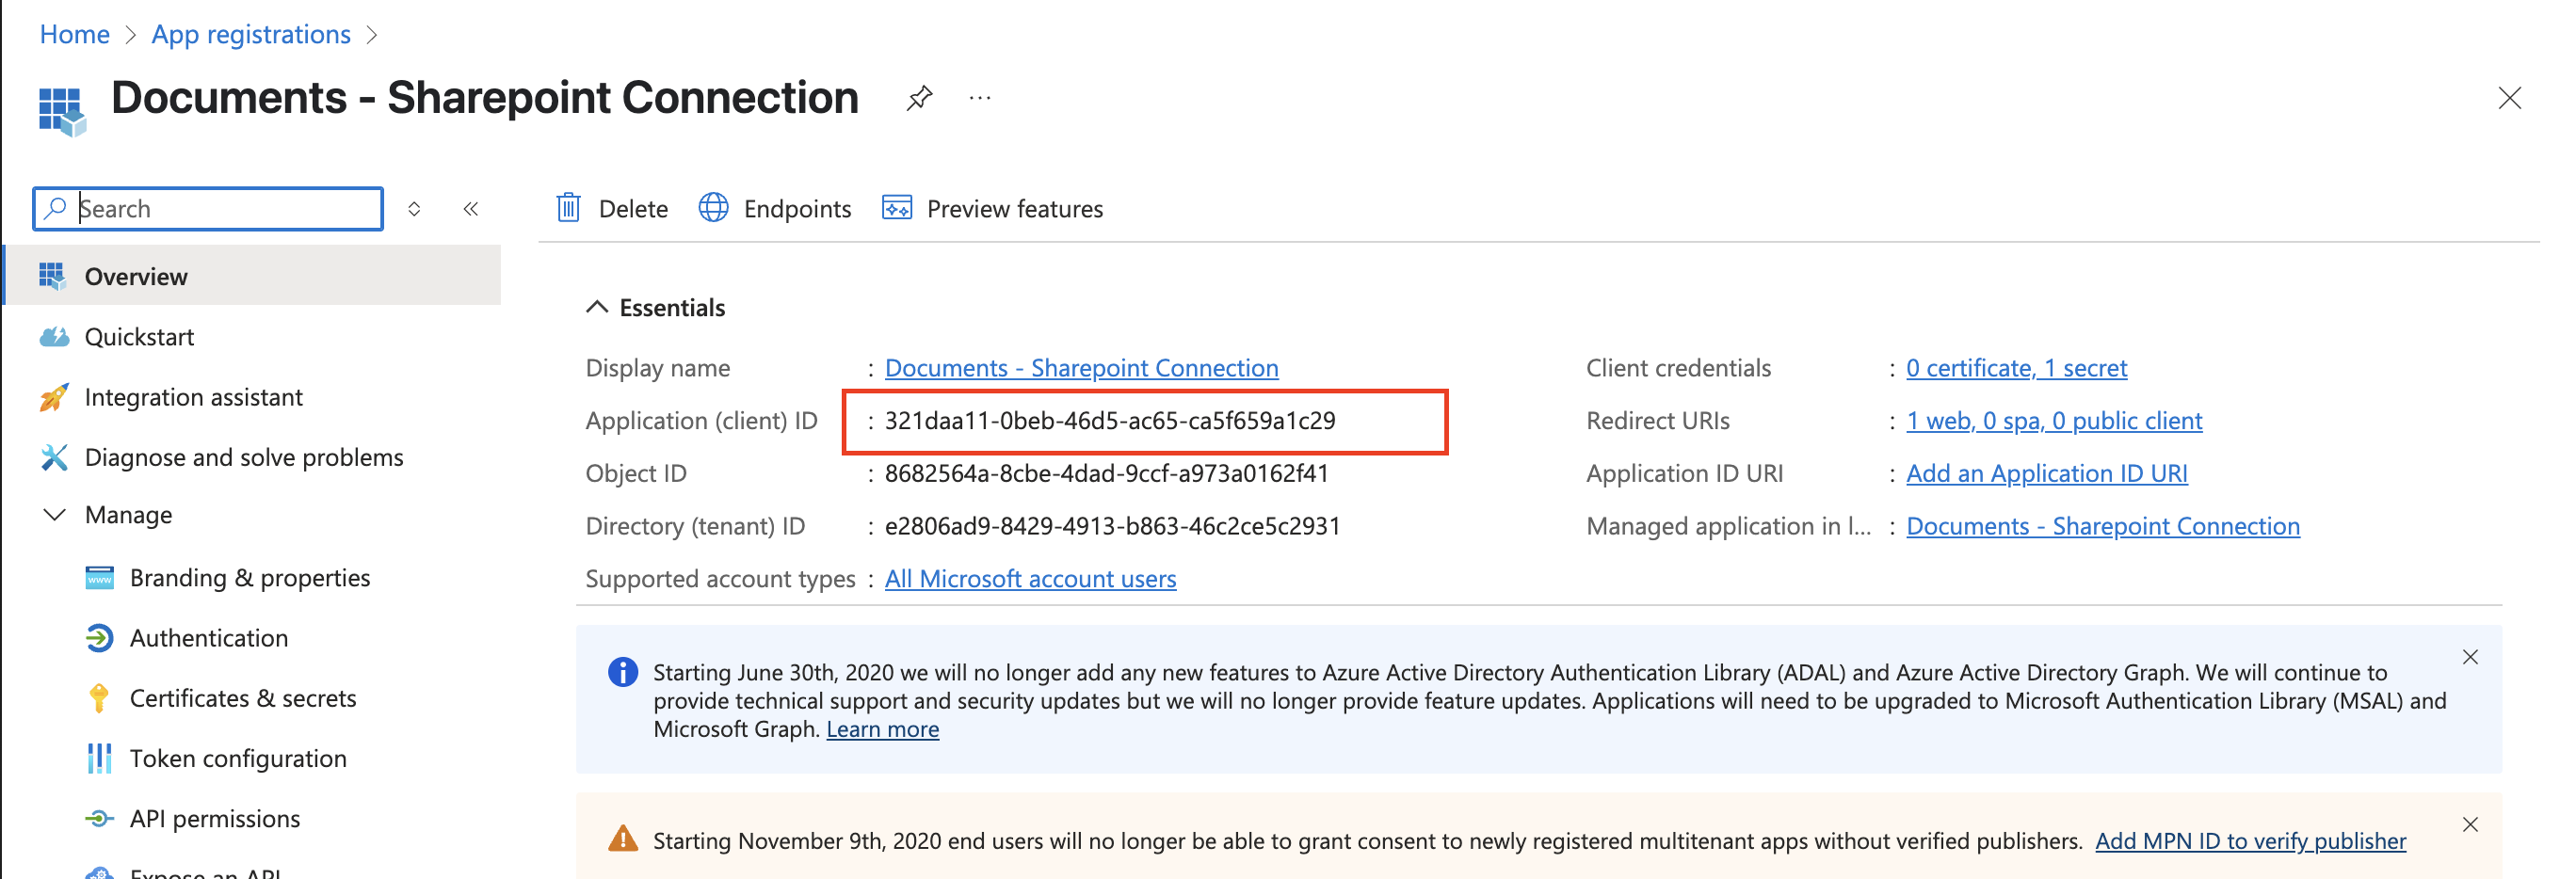
 After registration, you'll be taken to the application overview page.
**Copy** the following values and store them safely to be used in a later step:
* Application (client) ID
* Directory (tenant) ID
After registration, you'll be taken to the application overview page.
**Copy** the following values and store them safely to be used in a later step:
* Application (client) ID
* Directory (tenant) ID
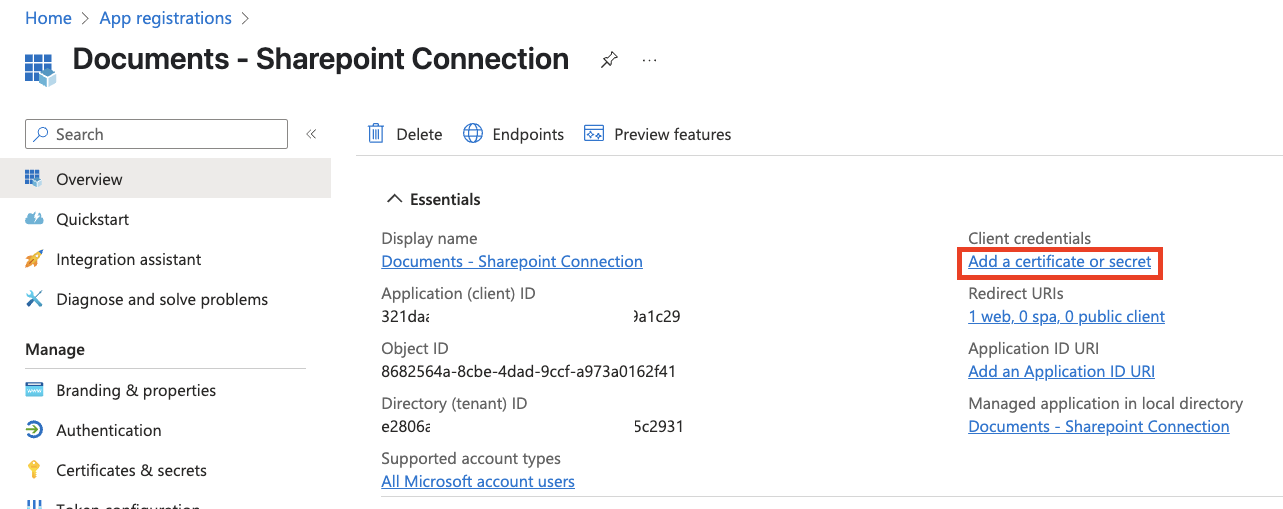
 Under *Client credentials* on the right, click **Add a certificate or secret**.
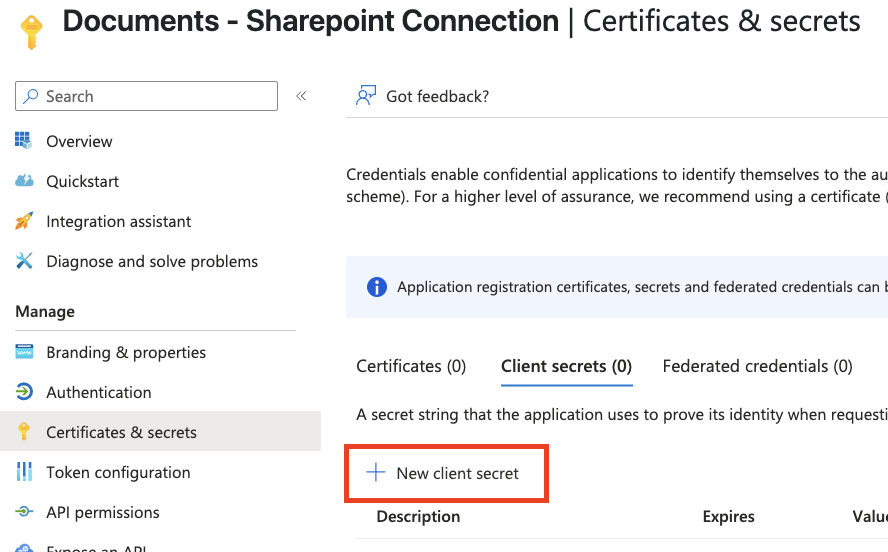
 Under *Client secrets*, click the **+ New client secret** button.
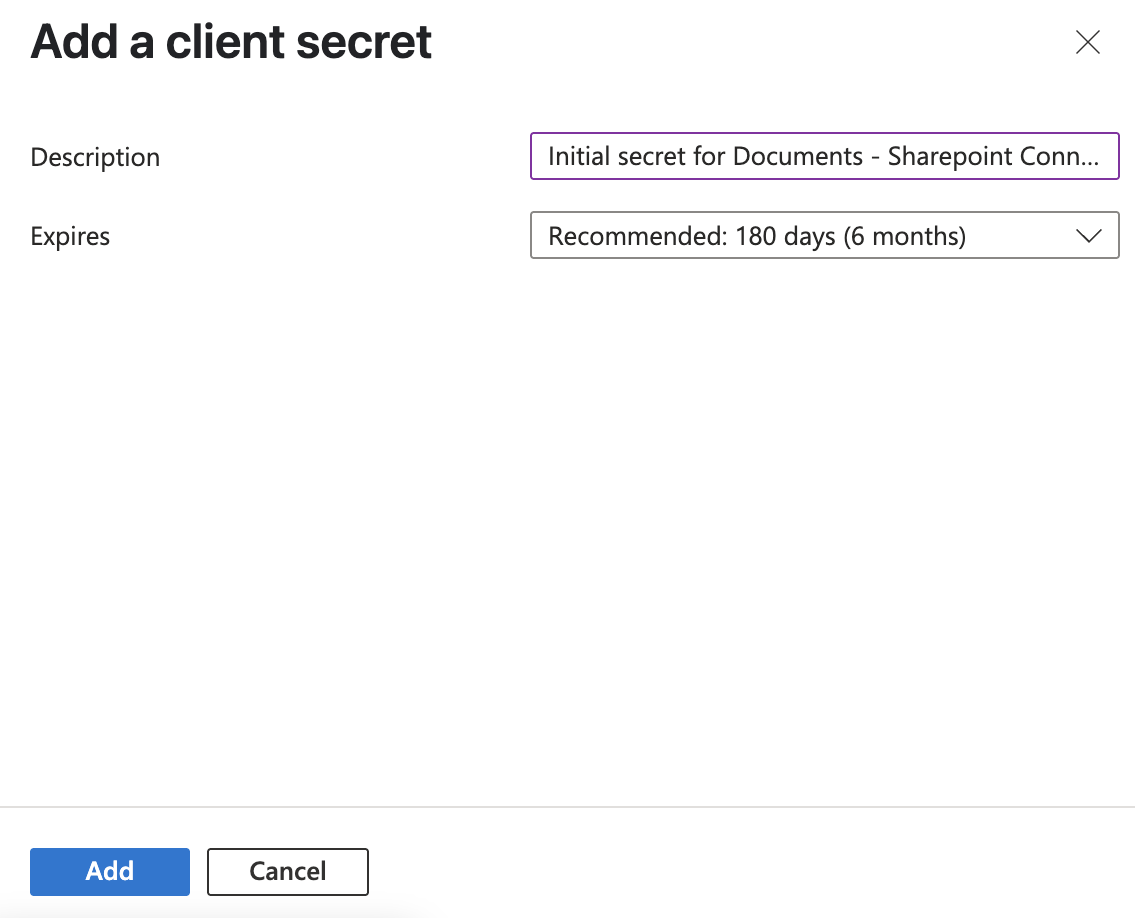
 Under *Add a client secret*, enter a description and select your desired expiration date for this secret.
Please keep in mind that a new secret will need to be generated when this one expires.
Click **Add** to proceed.
Under *Add a client secret*, enter a description and select your desired expiration date for this secret.
Please keep in mind that a new secret will need to be generated when this one expires.
Click **Add** to proceed.
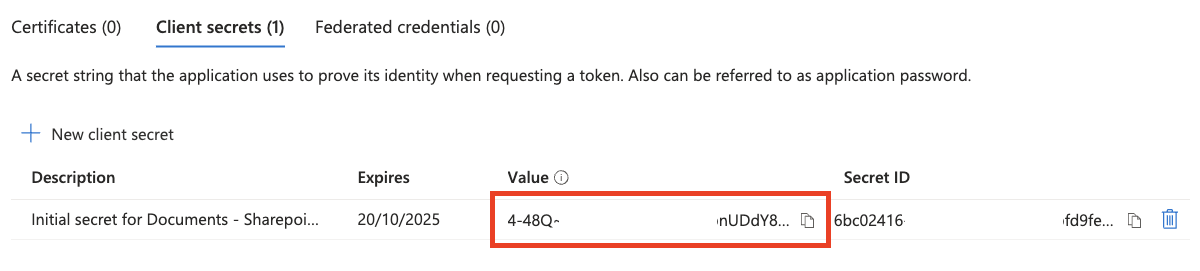
 The new client secret will be displayed. **Copy** the **Value** and store it safely to be used in a later step.
Make sure to copy this value now. It will not be displayed again.
The new client secret will be displayed. **Copy** the **Value** and store it safely to be used in a later step.
Make sure to copy this value now. It will not be displayed again.
 Click **API permissions** near the left navigation.
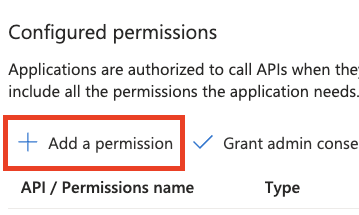
 Under *Configured permissions*, click **Add a permission**.
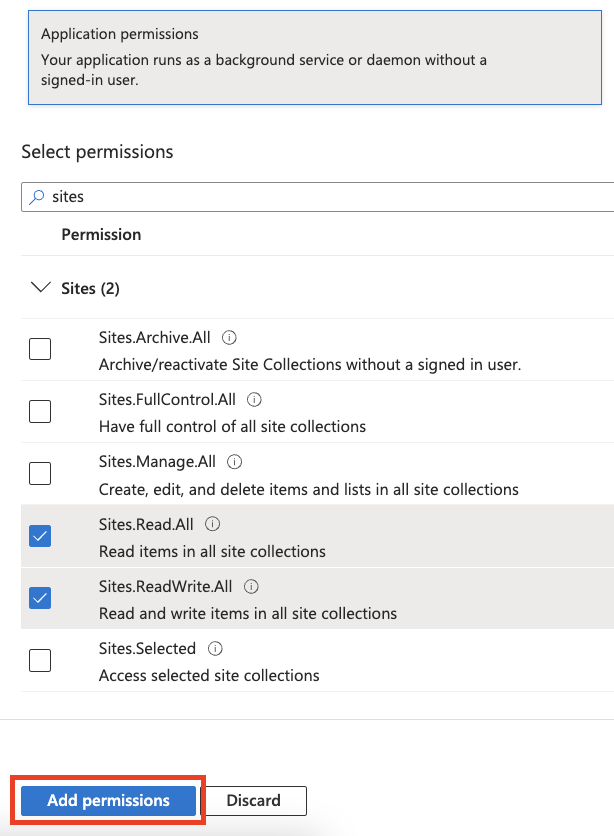
 Under *Request API permissions*, click **Microsoft Graph**.
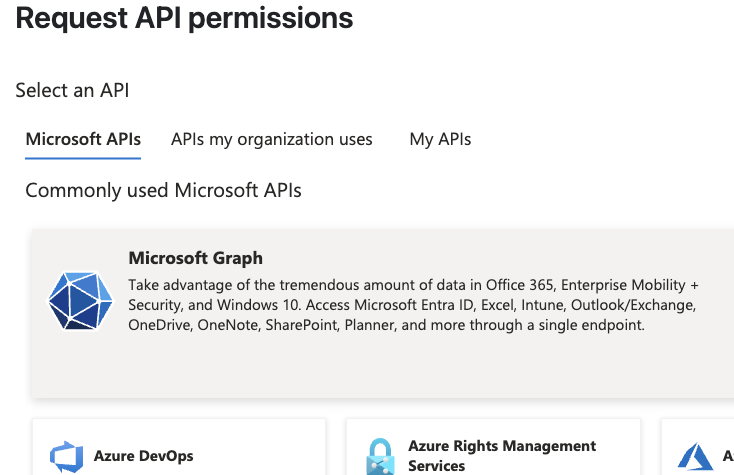 The application requires the following permissions.
**Delegated Permissions**
* **Files.Read** - Read user files
* **Files.Read.All** - Read all files that user can access
* **Files.ReadWrite** - Read and upload user files
* **offline\_access** - Maintain access to data you have given it access to
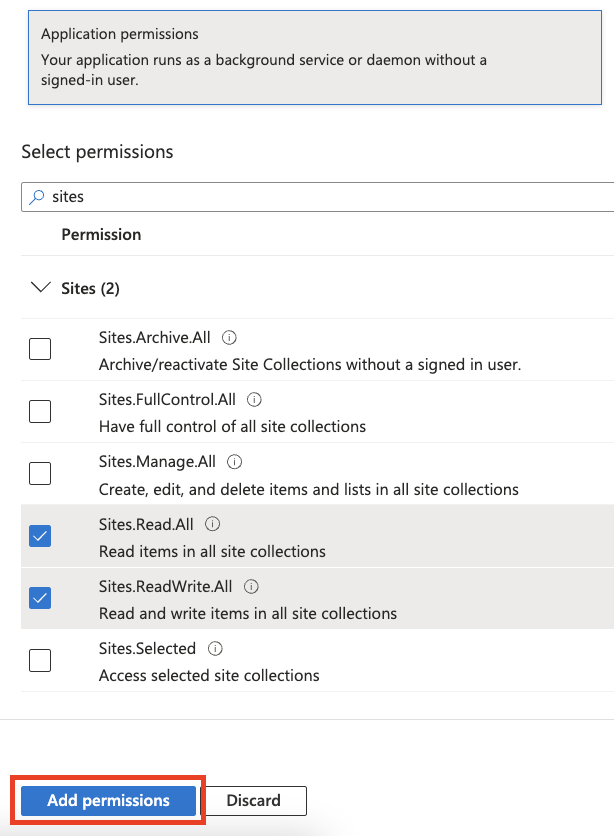
* **Sites.Read.All** - Read items in all site collections
* **Sites.ReadWrite.All** - Edit or delete items in all site collections
* **User.Read** - Sign in and read user profile
* **User.ReadBasic.All** - Read all users' basic profiles
After selecting all of the listed permissions above, click **Add permissions**.
The application requires the following permissions.
**Delegated Permissions**
* **Files.Read** - Read user files
* **Files.Read.All** - Read all files that user can access
* **Files.ReadWrite** - Read and upload user files
* **offline\_access** - Maintain access to data you have given it access to
* **Sites.Read.All** - Read items in all site collections
* **Sites.ReadWrite.All** - Edit or delete items in all site collections
* **User.Read** - Sign in and read user profile
* **User.ReadBasic.All** - Read all users' basic profiles
After selecting all of the listed permissions above, click **Add permissions**.
 All of the added permissions will be listed under *Configured permissions*. Please ensure that all of the permissions above are listed.
Click **Grant admin consent** to approve all of the listed permissions.
Click **Yes** to confirm admin approval.
All of the added permissions will be listed under *Configured permissions*. Please ensure that all of the permissions above are listed.
Click **Grant admin consent** to approve all of the listed permissions.
Click **Yes** to confirm admin approval.
 To support the File Picker, an additional Redirect URI is required for the Single-Page Application platform configuration.
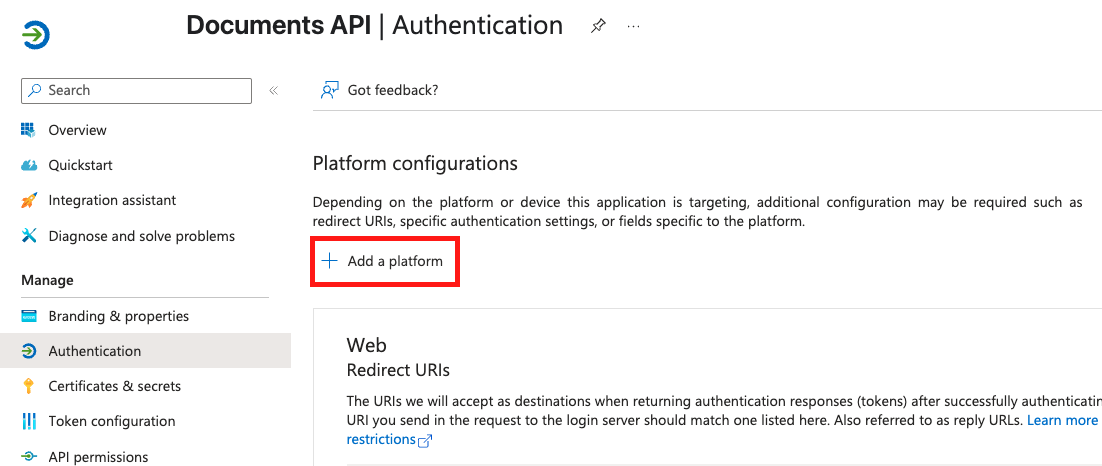
Navigate to **Authentication** under *Manage*, and click **Add a platform**.
To support the File Picker, an additional Redirect URI is required for the Single-Page Application platform configuration.
Navigate to **Authentication** under *Manage*, and click **Add a platform**.
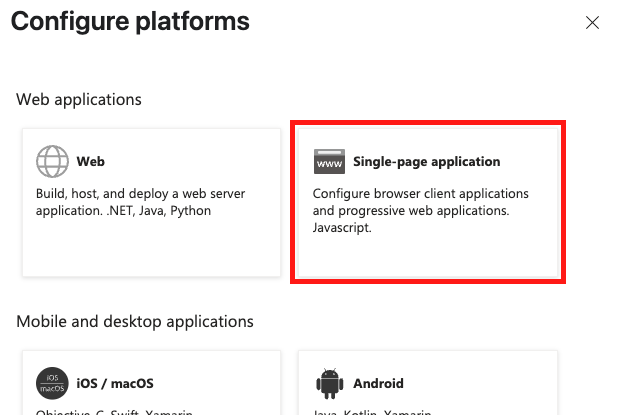
 Under *Configure Platforms* on the right, click **Single-page application**.
 Enter the following **Redirect URI**:\
`https://app.stackone.com`
Enter the following **Redirect URI**:\
`https://app.stackone.com`
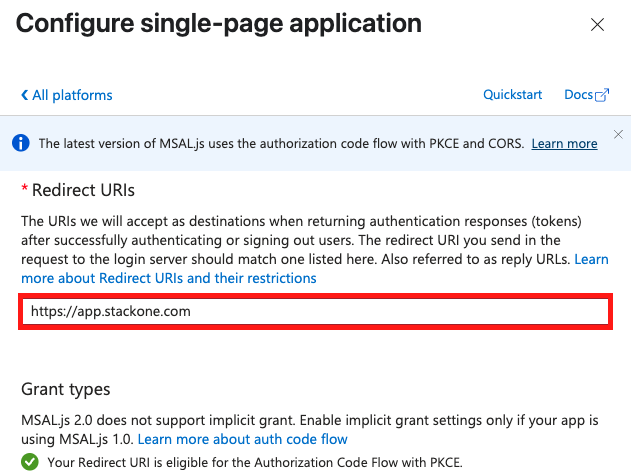 Press **Configure** to continue, then **Save** in the *Authorization* screen you are returned to.
## Get your SharePoint base URL
Your SharePoint base URL follows this format:
```
https://{your-domain}.sharepoint.com
```
You can find this URL by:
1. Opening your Microsoft SharePoint site
2. Copying the base URL from your browser's address bar
## Available data
This integration has the following [Documents resources](/documents/introduction) available from the provider:
* Drives
* Files
* Folders
Press **Configure** to continue, then **Save** in the *Authorization* screen you are returned to.
## Get your SharePoint base URL
Your SharePoint base URL follows this format:
```
https://{your-domain}.sharepoint.com
```
You can find this URL by:
1. Opening your Microsoft SharePoint site
2. Copying the base URL from your browser's address bar
## Available data
This integration has the following [Documents resources](/documents/introduction) available from the provider:
* Drives
* Files
* Folders