> ## Documentation Index
> Fetch the complete documentation index at: https://docs.stackone.com/llms.txt
> Use this file to discover all available pages before exploring further.
# OneDrive Partner OAuth
> Follow these steps to connect OneDrive via the StackOne Hub successfully.
Ensure that your Microsoft account has the [**Global Administrator**](https://learn.microsoft.com/en-us/microsoft-365/admin/add-users/about-admin-roles?view=o365-worldwide#permissions-based-on-admin-role-and-group-type-in-m365-admin-page) and [**OneDrive Administrator**](https://learn.microsoft.com/en-us/sharepoint/sharepoint-admin-role) roles assigned.
You can view and manage user role assignments in your [Microsoft Admin center](https://admin.microsoft.com/Adminportal/Home#/users).
For users outside of your organization to connect with your Microsoft application, a Microsoft Partner Center account is required. [Read more](https://learn.microsoft.com/en-gb/entra/identity-platform/publisher-verification-overview)
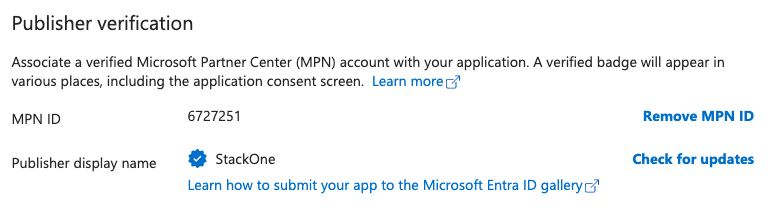
Your Microsoft application must have your **MPN ID** assigned under *Branding & Properties* > *Publisher Verification:*
 If you've been directed to StackOne to integrate with OneDrive, the following steps will help you understand the process and any necessary actions to configure a successful integration.
## Create and Configure a New Application
Log in to your [Microsoft Azure](https://portal.azure.com/) portal.
If you've been directed to StackOne to integrate with OneDrive, the following steps will help you understand the process and any necessary actions to configure a successful integration.
## Create and Configure a New Application
Log in to your [Microsoft Azure](https://portal.azure.com/) portal.
 Go to your [Microsoft Entra admin center](https://entra.microsoft.com/).
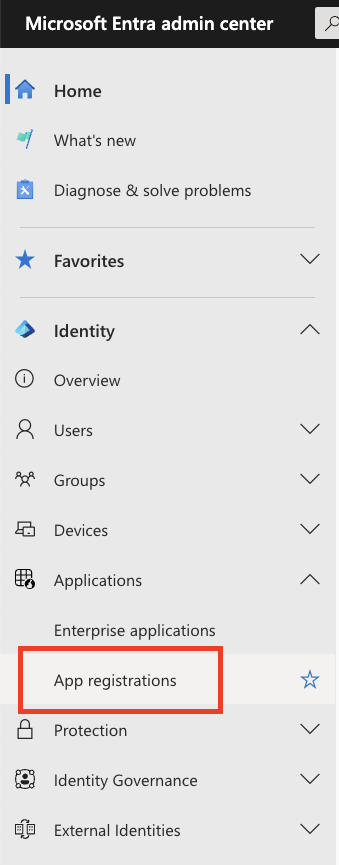
In the left navigation bar, click "Applications" > "App registrations".
Go to your [Microsoft Entra admin center](https://entra.microsoft.com/).
In the left navigation bar, click "Applications" > "App registrations".
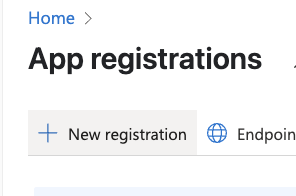
 Under ***App Registrations***, click the "+ New registration" button.
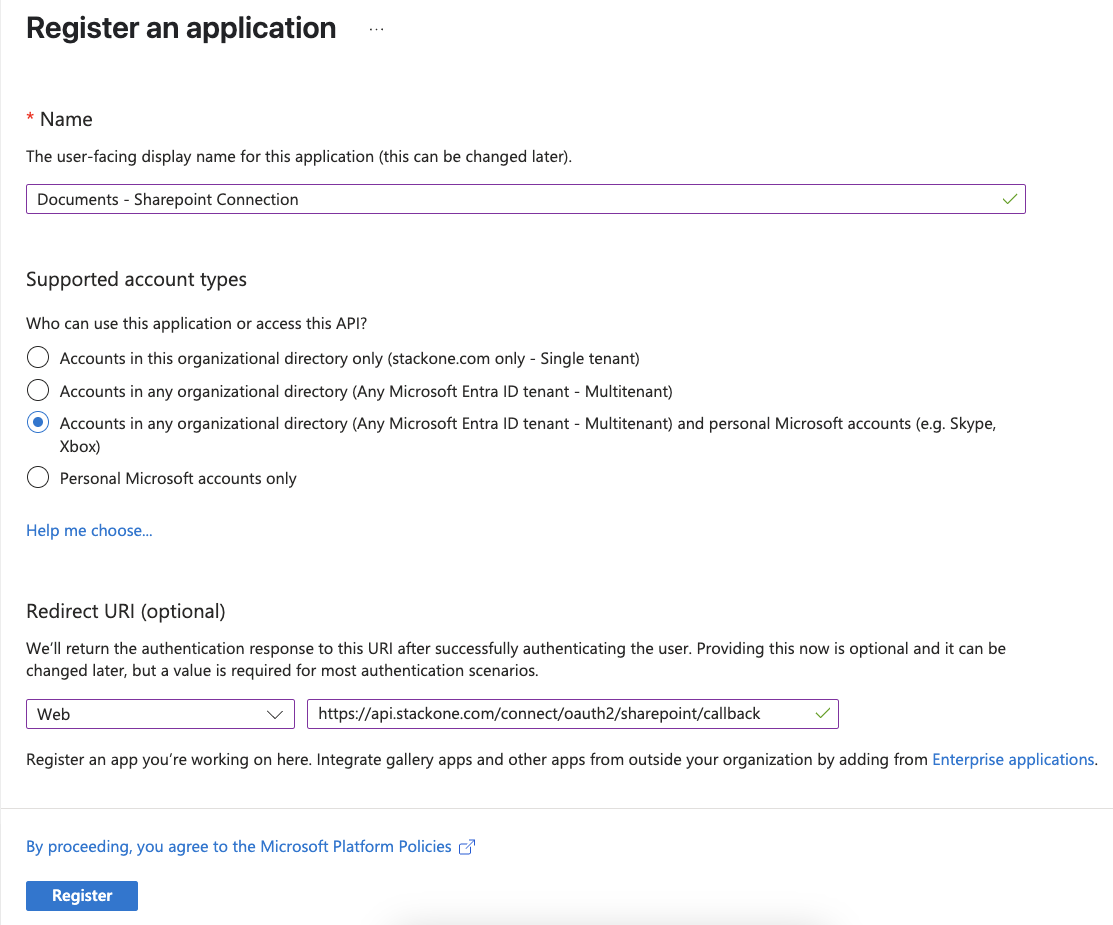
 Under ***Register an application***, input the following details:
* Name
* Supported account types
* Select "*Accounts in any organizational directory (Any Microsoft Entra ID tenant - Multitenant) and personal Microsoft accounts*"
* Redirect URI
* Select "*Web*"
* Enter the URI: `https://api.stackone.com/connect/oauth2/onedrive/callback`
Once complete, click "Register" to create the new application.
Under ***Register an application***, input the following details:
* Name
* Supported account types
* Select "*Accounts in any organizational directory (Any Microsoft Entra ID tenant - Multitenant) and personal Microsoft accounts*"
* Redirect URI
* Select "*Web*"
* Enter the URI: `https://api.stackone.com/connect/oauth2/onedrive/callback`
Once complete, click "Register" to create the new application.
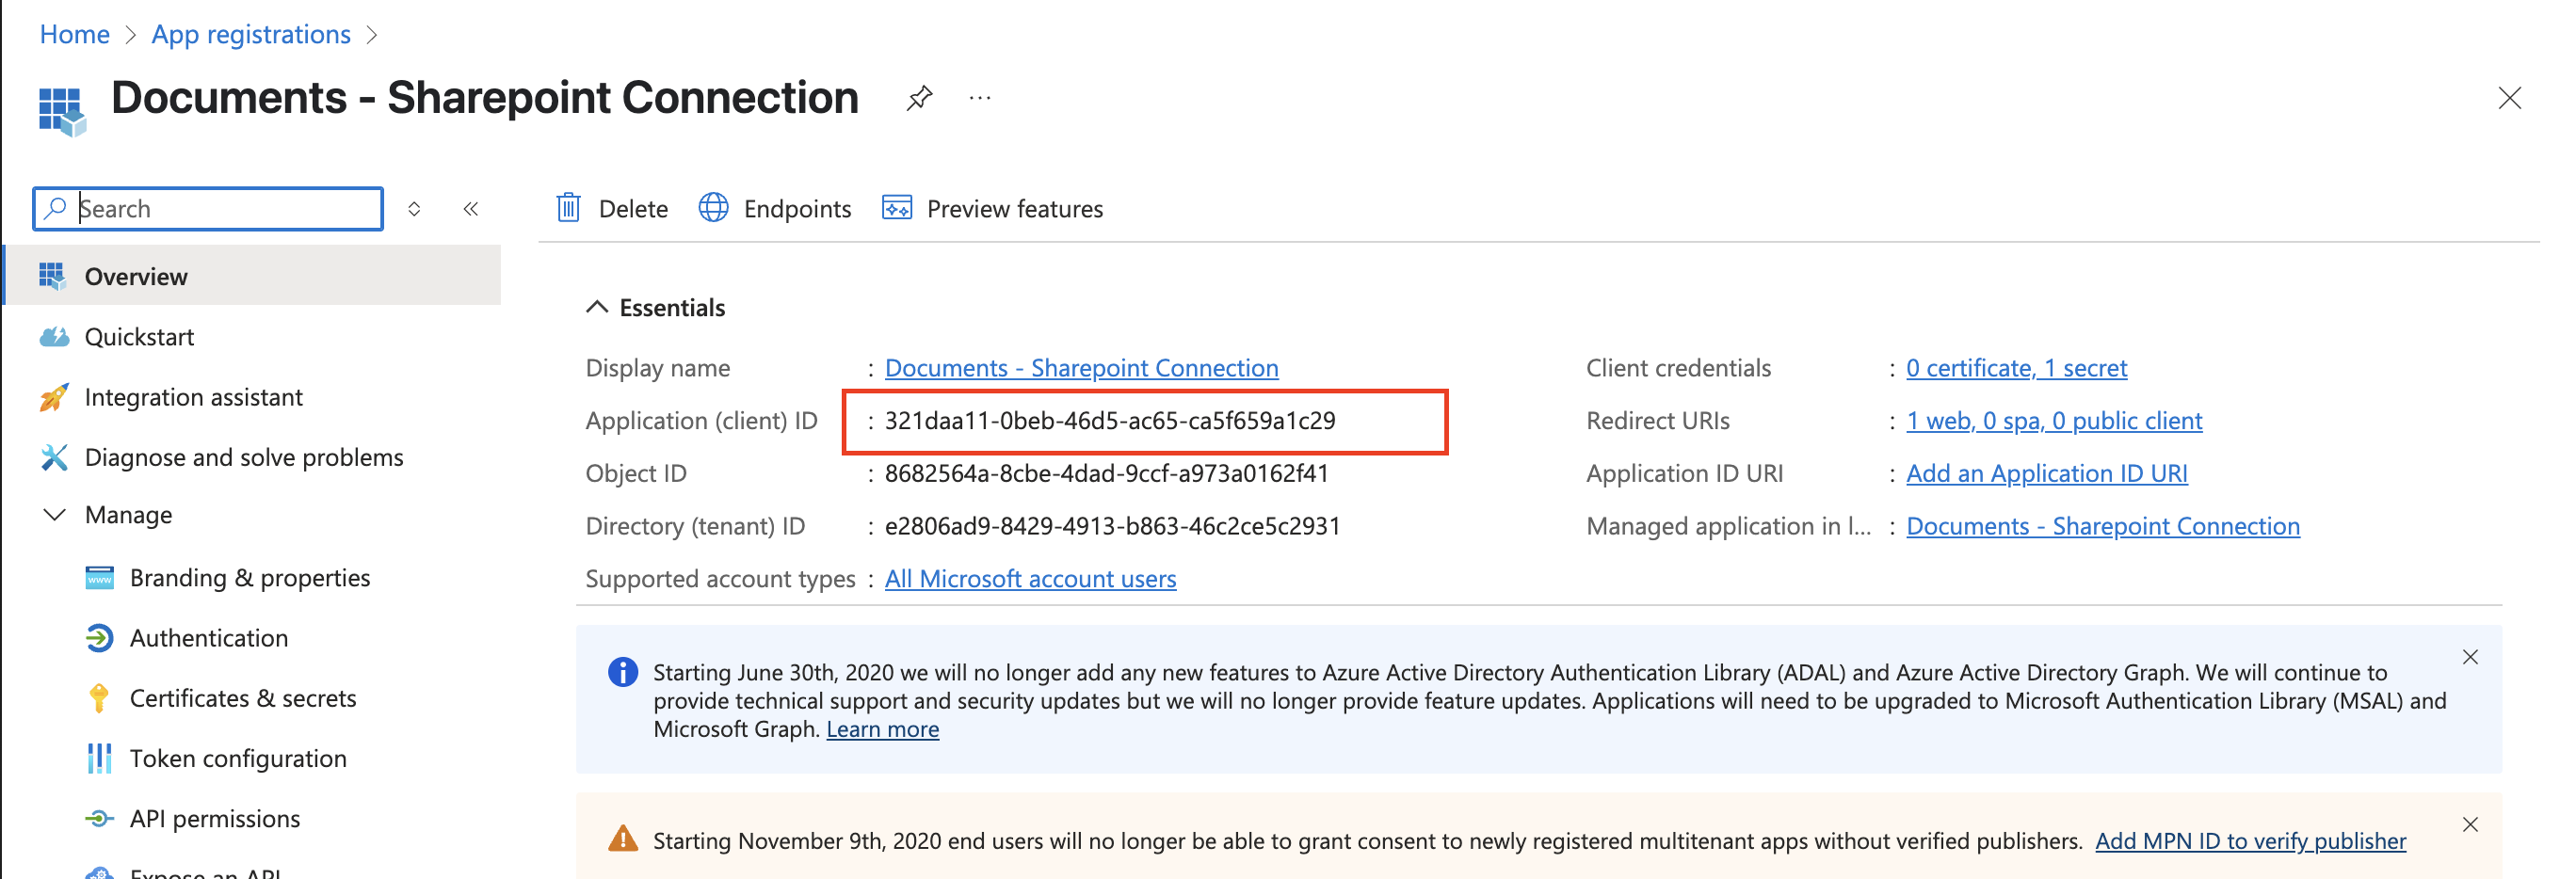
 After registration, you'll be taken to the application overview page.
**Copy** the following values and store them safely to be used in a later step:
* Application (client) ID
* Directory (tenant) ID
After registration, you'll be taken to the application overview page.
**Copy** the following values and store them safely to be used in a later step:
* Application (client) ID
* Directory (tenant) ID
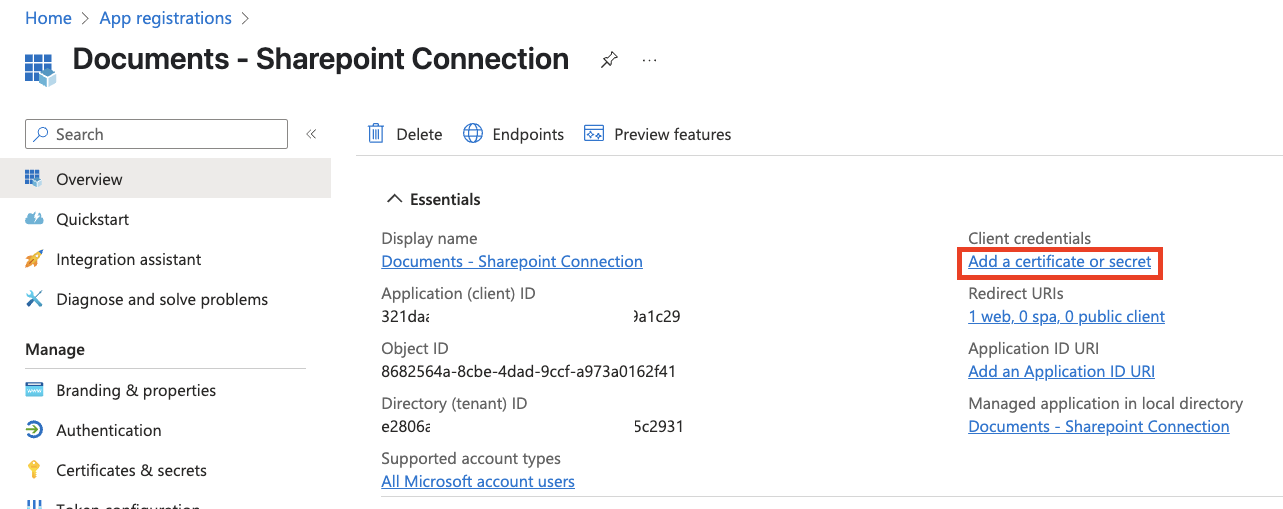
 Under *Client credentials* on the right, click "Add a certificate or secret".
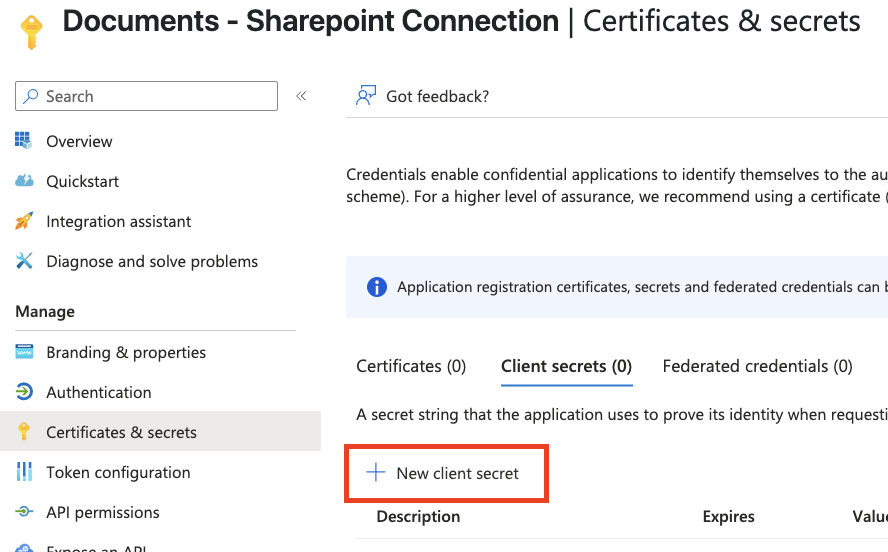
 Under *Client secrets*, click the "+ New client secret" button.
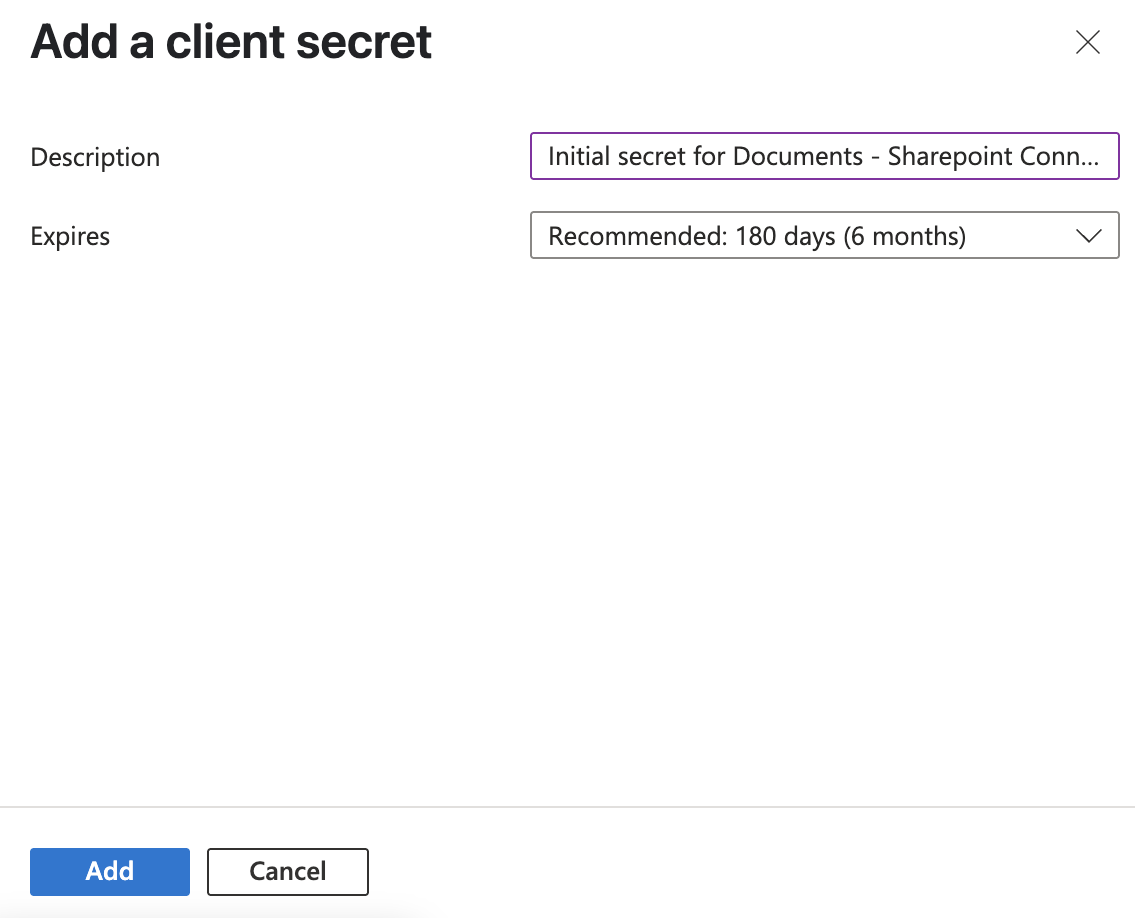
 Under *Add a client secret*, enter a description and select your desired expiration date for this secret.
Please keep in mind that a new secret will need to be generated when this one expires.
Click the "Add" button to proceed.
Under *Add a client secret*, enter a description and select your desired expiration date for this secret.
Please keep in mind that a new secret will need to be generated when this one expires.
Click the "Add" button to proceed.
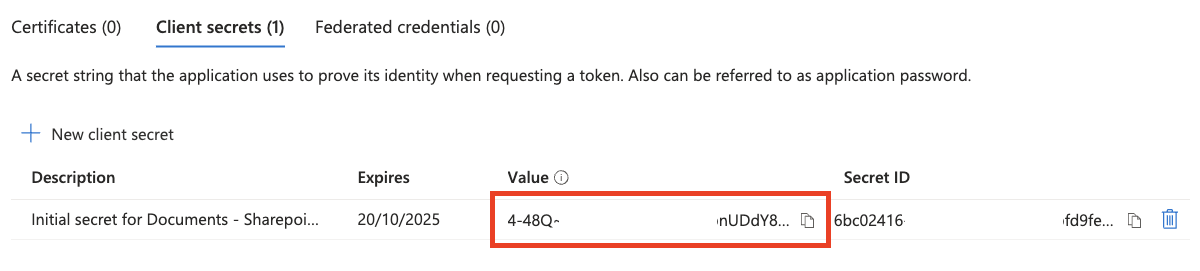
 The new client secret will be displayed. **Copy** the **Value** and store it safely to be used in a later step.
Make sure to copy this value now. It will not be displayed again.
The new client secret will be displayed. **Copy** the **Value** and store it safely to be used in a later step.
Make sure to copy this value now. It will not be displayed again.
 Click "API permissions" near the left navigation.
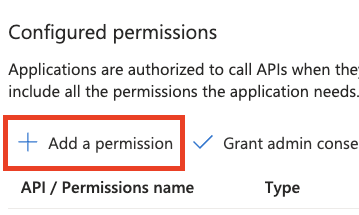
 Under *Configured permissions*, click the "Add a permission" button.
 Under *Request API permissions*, click "Microsoft Graph".
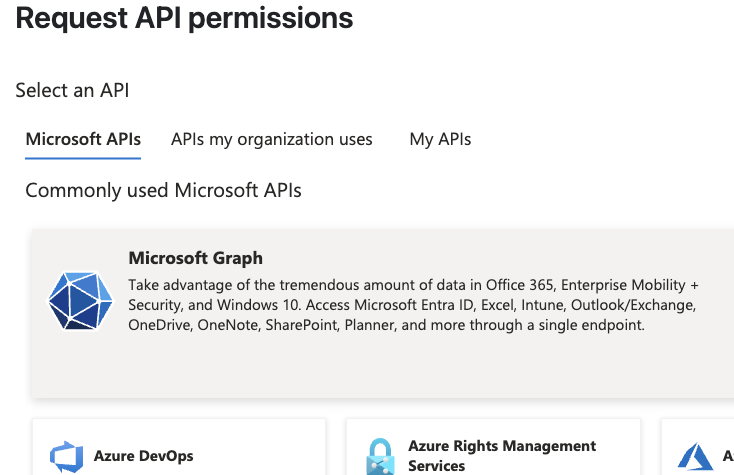 The application requires the following permissions.
**Delegated Permissions**
* **Files.Read** - Read user files
* **Files.Read.All** - Read all files that user can access
* **Files.ReadWrite** - Read and upload user files
* **offline\_access** - Maintain access to data you have given it access to
* **Sites.Read.All** - Read items in all site collections
* **Sites.ReadWrite.All** - Edit or delete items in all site collections
* **User.Read** - Sign in and read user profile
* **User.ReadBasic.All** - Read all users' basic profiles
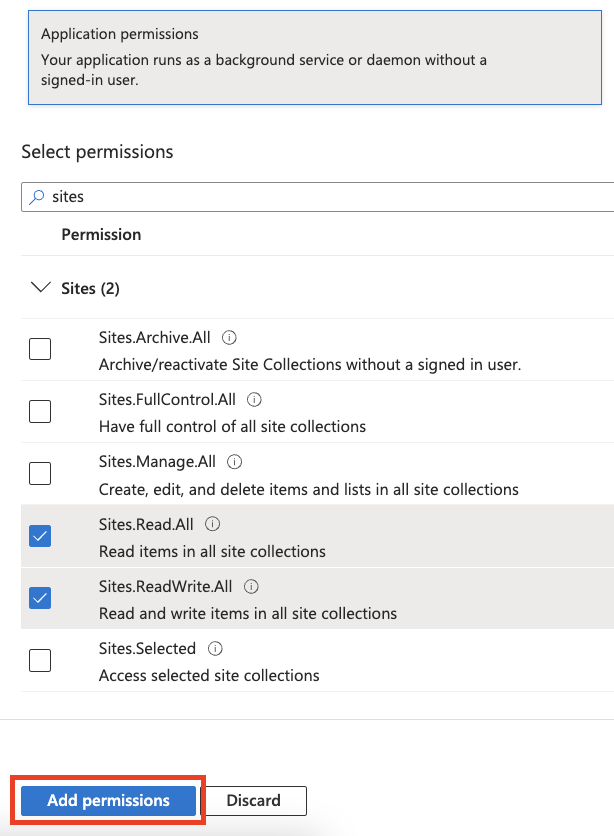
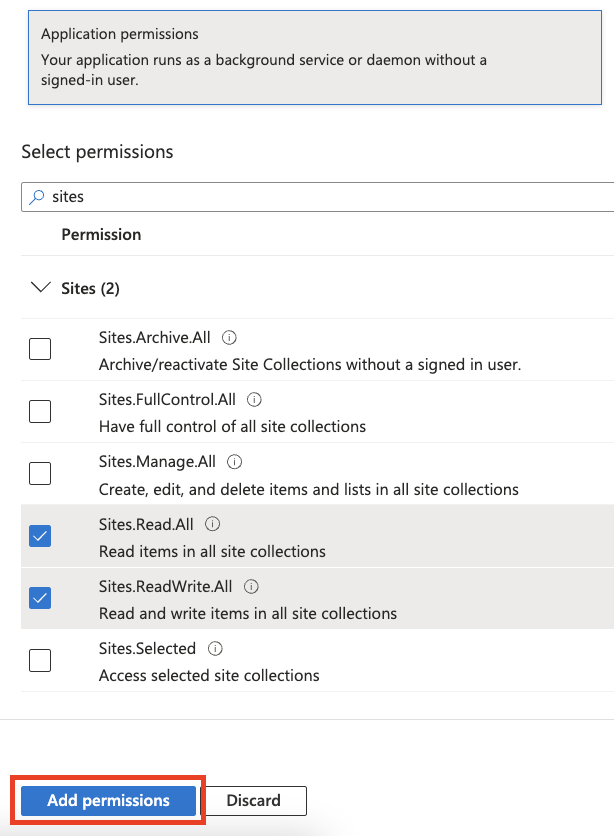
After selecting all of the listed permissions above, click the "Add permissions" button.
The application requires the following permissions.
**Delegated Permissions**
* **Files.Read** - Read user files
* **Files.Read.All** - Read all files that user can access
* **Files.ReadWrite** - Read and upload user files
* **offline\_access** - Maintain access to data you have given it access to
* **Sites.Read.All** - Read items in all site collections
* **Sites.ReadWrite.All** - Edit or delete items in all site collections
* **User.Read** - Sign in and read user profile
* **User.ReadBasic.All** - Read all users' basic profiles
After selecting all of the listed permissions above, click the "Add permissions" button.
 All of the added permissions will be listed under *Configured permissions*. Please ensure that all of the permissions above are listed.
Click the "Grant admin consent" button to approve all of the listed permissions.
Click the "Yes" button to confirm Admin approval.
All of the added permissions will be listed under *Configured permissions*. Please ensure that all of the permissions above are listed.
Click the "Grant admin consent" button to approve all of the listed permissions.
Click the "Yes" button to confirm Admin approval.
 To support the File Picker, an additional Redirect URI is required for the Single-Page Application platform configuration.
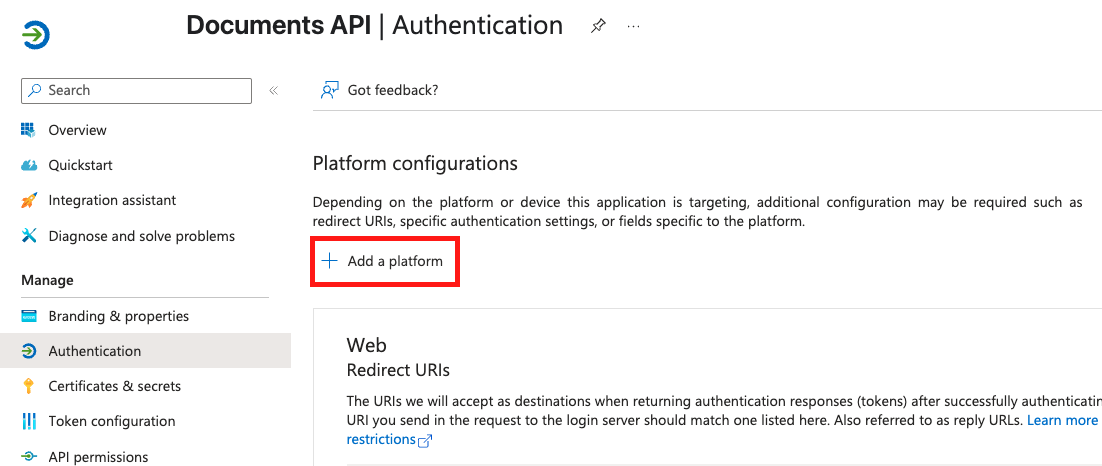
Navigate to **Authentication** under *Manage*, and click the "Add a platform" button.
To support the File Picker, an additional Redirect URI is required for the Single-Page Application platform configuration.
Navigate to **Authentication** under *Manage*, and click the "Add a platform" button.
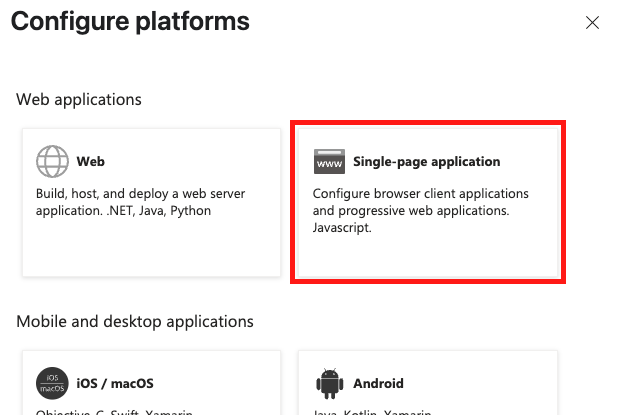
 Under *Configure Platforms* on the right, click **Single-page application**.
 Enter the following **Redirect URI**:\
`https://app.stackone.com`
Enter the following **Redirect URI**:\
`https://app.stackone.com`
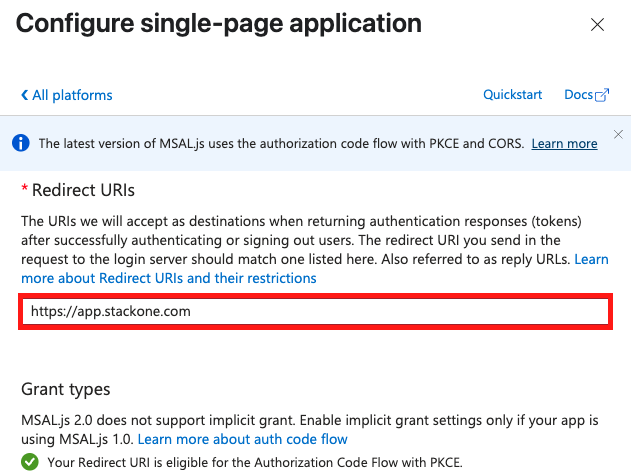 Press the "**Configure**" button to continue, then the "**Save**" button in the *Authorization* screen you are returned to.
## Get your OneDrive base URL
Your OneDrive base URL follows this format:
```
https://{your-domain}.sharepoint.com
```
You can find this URL by:
1. Opening your Microsoft OneDrive site
2. Copying the base URL from your browser's address bar
## Available data
This integration has the following [Documents resources](/documents/introduction) available from the provider:
* Drives
* Files
* Folders
Press the "**Configure**" button to continue, then the "**Save**" button in the *Authorization* screen you are returned to.
## Get your OneDrive base URL
Your OneDrive base URL follows this format:
```
https://{your-domain}.sharepoint.com
```
You can find this URL by:
1. Opening your Microsoft OneDrive site
2. Copying the base URL from your browser's address bar
## Available data
This integration has the following [Documents resources](/documents/introduction) available from the provider:
* Drives
* Files
* Folders