> ## Documentation Index
> Fetch the complete documentation index at: https://docs.stackone.com/llms.txt
> Use this file to discover all available pages before exploring further.
# Connect Zoho Show with API Key – StackOne Hub
> Link a Zoho Show account in the StackOne Hub using API Key. End-user guide to authorize the integration and start using Zoho Show actions.
Zoho Show's API is delivered through Zoho Office Integrator, a separate product from the Zoho Show app. Office Integrator is a metered product — a free plan (Free Partner) is available with no credit card required, and higher API-call volumes require a paid plan.
Copy your Office Integrator API key
The API key authenticates every Show API request and identifies your integrated application. Sign in to Office Integrator and copy the key from your dashboard.
Sign in to the Zoho Office Integrator dashboard. If you do not have an account yet, sign up first — no credit card is required to start on the free plan. New accounts are taken to a one-time registration form (next step); existing accounts land straight on the dashboard, so you can skip to copying the key.
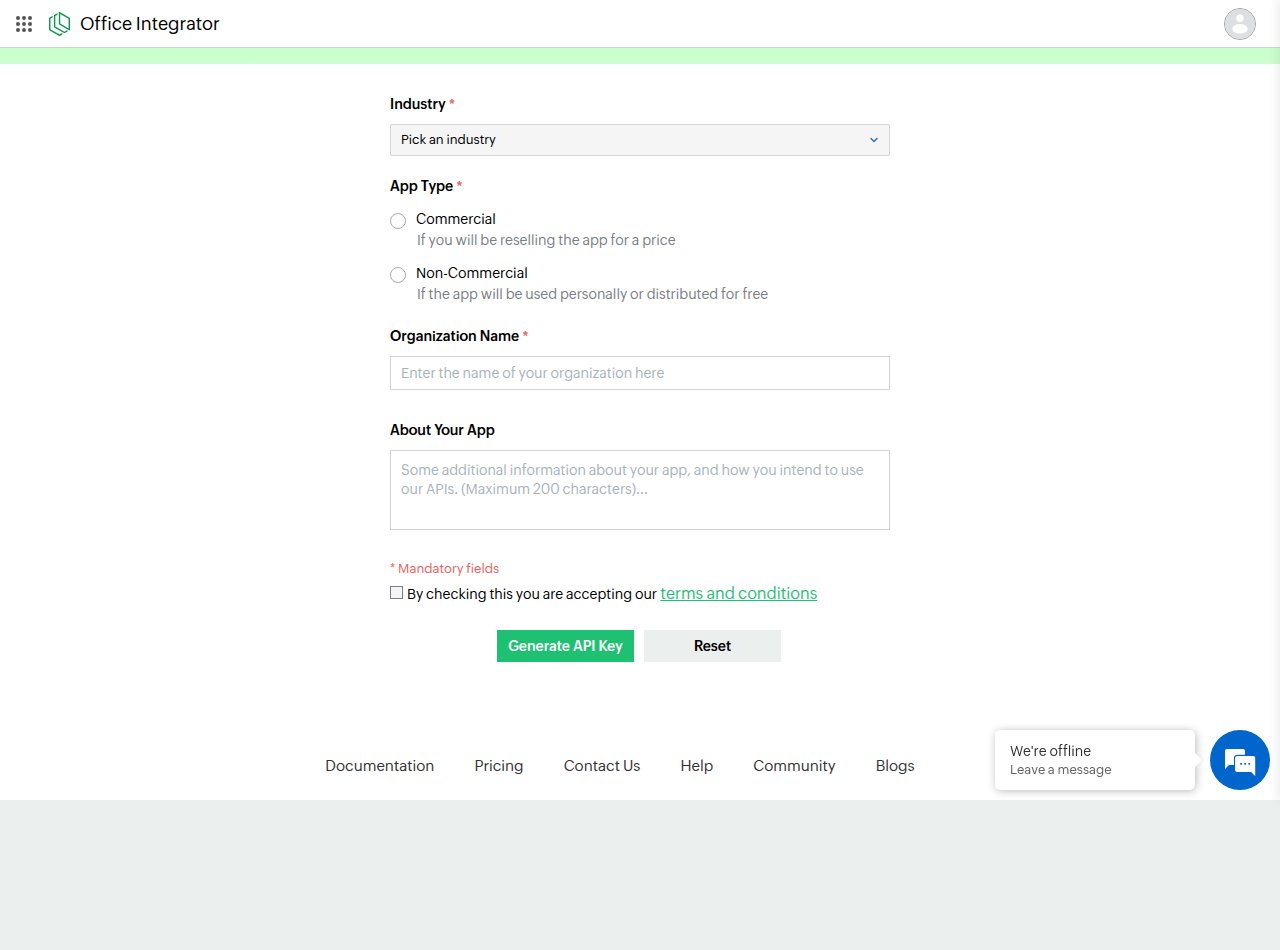
The first time you sign up, Office Integrator shows a registration form before generating your key. Fill it in and submit — existing accounts never see this and can skip this step.
- Industry — select your industry from the Pick an industry dropdown.
- App Type — choose Commercial ("If you will be reselling the app for a price") or Non-Commercial ("If the app will be used personally or distributed for free").
- Organization Name — enter the name of your organization.
- About Your App — optionally describe how you intend to use the APIs (maximum 200 characters).
- Industry, App Type and Organization Name are mandatory (marked with a red asterisk under Mandatory fields).
- Tick By checking this you are accepting our terms and conditions, then click Generate API Key.
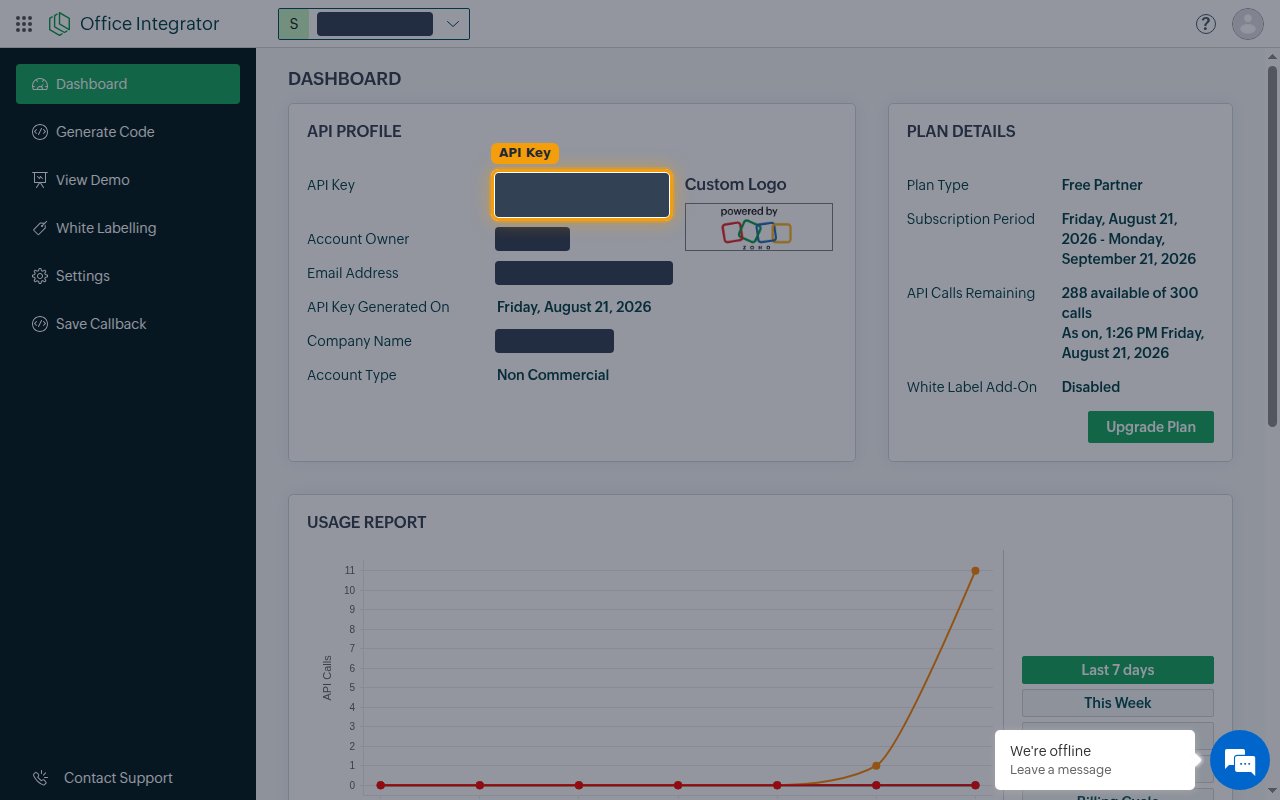
On the DASHBOARD, your key is shown under API PROFILE next to API Key. Click the key value to copy it.
- The key stays visible on the dashboard, so you can copy it again later — it is not shown only once.
- The same API PROFILE panel shows your Account Type and, under PLAN DETAILS, your Plan Type (for example Free Partner) and API Calls Remaining.
- Paste the copied key into the API Key field in StackOne Hub.
Find your data center
Your data center is the Zoho region where your account is registered — it is fixed when the account is created and cannot be changed here. You are not choosing a new region; you are identifying the one your account already belongs to.
The domain you sign in to Zoho with tells you your region — its country suffix is the same as your API domain's suffix. So look at the address bar while signed in to Office Integrator and read the suffix.
- A plain `.com` sign-in domain → United States (`api.office-integrator.com`).
- A `.eu` sign-in domain → Europe (`api.office-integrator.eu`).
- A `.in` sign-in domain → India (`api.office-integrator.in`); likewise `.com.au`, `.jp`, `.ca`, `.sa`, `.com.cn`.
- To confirm the exact value, open Generate Code in the left navigation: the --url line of the CODE FOR OPEN FILE sample shows an `api.office-integrator.*` domain in the same format you will select.
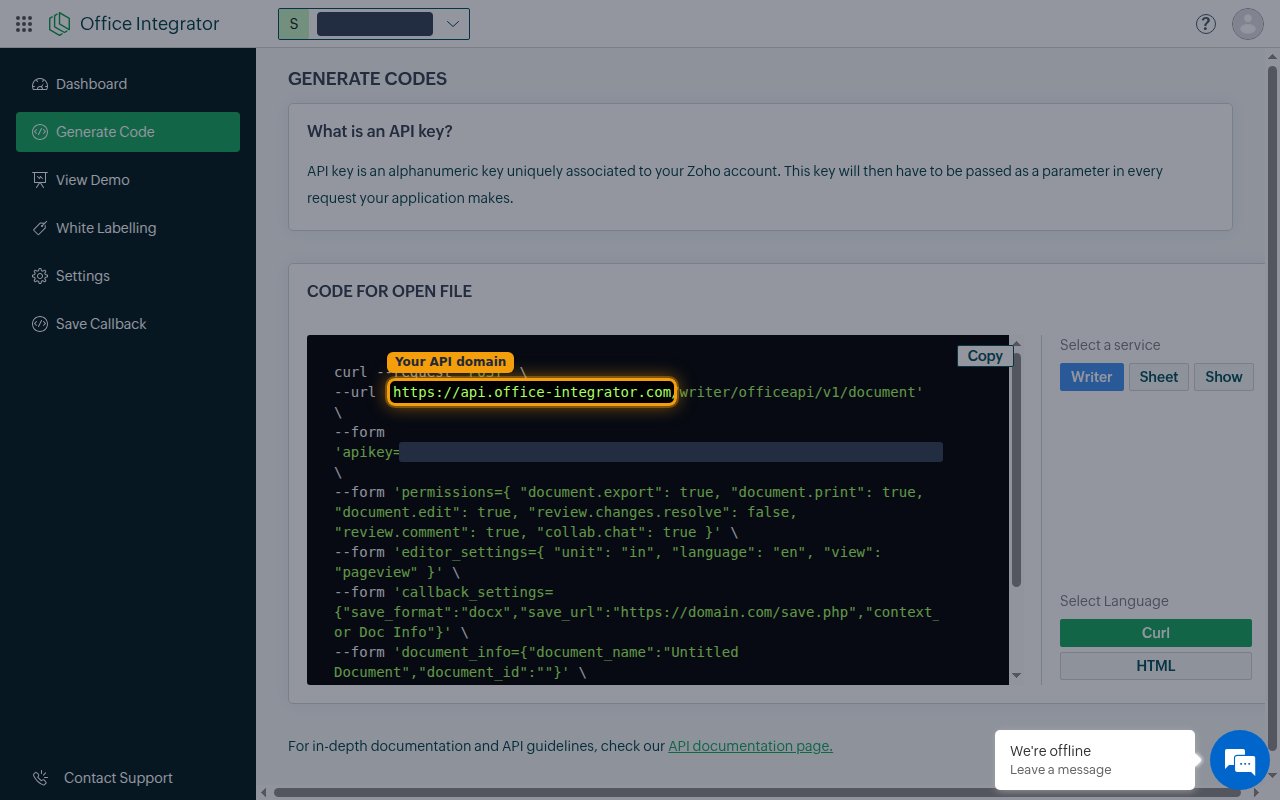
Set the Data Center field in StackOne Hub to the region whose API domain matches the suffix you identified:
- United States: `api.office-integrator.com`
- Europe: `api.office-integrator.eu`
- India: `api.office-integrator.in`
- Australia: `api.office-integrator.com.au`
- Japan: `api.office-integrator.jp`
- Canada: `api.office-integrator.ca`
- Saudi Arabia: `api.office-integrator.sa`
- China: `api.office-integrator.com.cn`
- Most accounts use the United States data center.
Linking the Account from the Hub
Use one of the three Linking Account Methods to access the Hub.
Fill out the following fields using details from your provider:
- Click Connect
- If applicable, the provider will redirect you to a sign-in or authorization page. Complete the provider's authorization flow.
- Once authorization is successful, you will see a confirmation popup
If the account linking is successful, you will see the newly linked account in your Accounts page.