> ## Documentation Index
> Fetch the complete documentation index at: https://docs.stackone.com/llms.txt
> Use this file to discover all available pages before exploring further.

# Connect Wikipedia with OAuth 2.0 Client Credentials – StackOne Hub

> Link a Wikipedia account in the StackOne Hub using OAuth 2.0 Client Credentials. End-user guide to authorize the integration and start using Wikipedia actions.

<section data-guide-section data-guide-scopes="">
  <h2>Register an owner-only OAuth 2.0 client on Meta-Wiki</h2>

  <p>Client credentials access uses an owner-only OAuth 2.0 client, which is automatically approved and usable immediately by your own account.</p>

  <Steps>
    <Step title="Sign in to Meta-Wiki">
      <div data-guide-step data-guide-scopes="" data-guide-display-scopes-list="">
        <p>Sign in to your <a href="https://meta.wikimedia.org" target="_blank" rel="noopener noreferrer">Meta-Wiki account</a> with your Wikimedia credentials, then open the <a href="https://meta.wikimedia.org/wiki/Special:OAuthConsumerRegistration/propose/oauth2" target="_blank" rel="noopener noreferrer">OAuth 2.0 client registration form</a>.</p>
      </div>
    </Step>

    <Step title="Enter the application details">
      <div data-guide-step data-guide-scopes="" data-guide-display-scopes-list="">
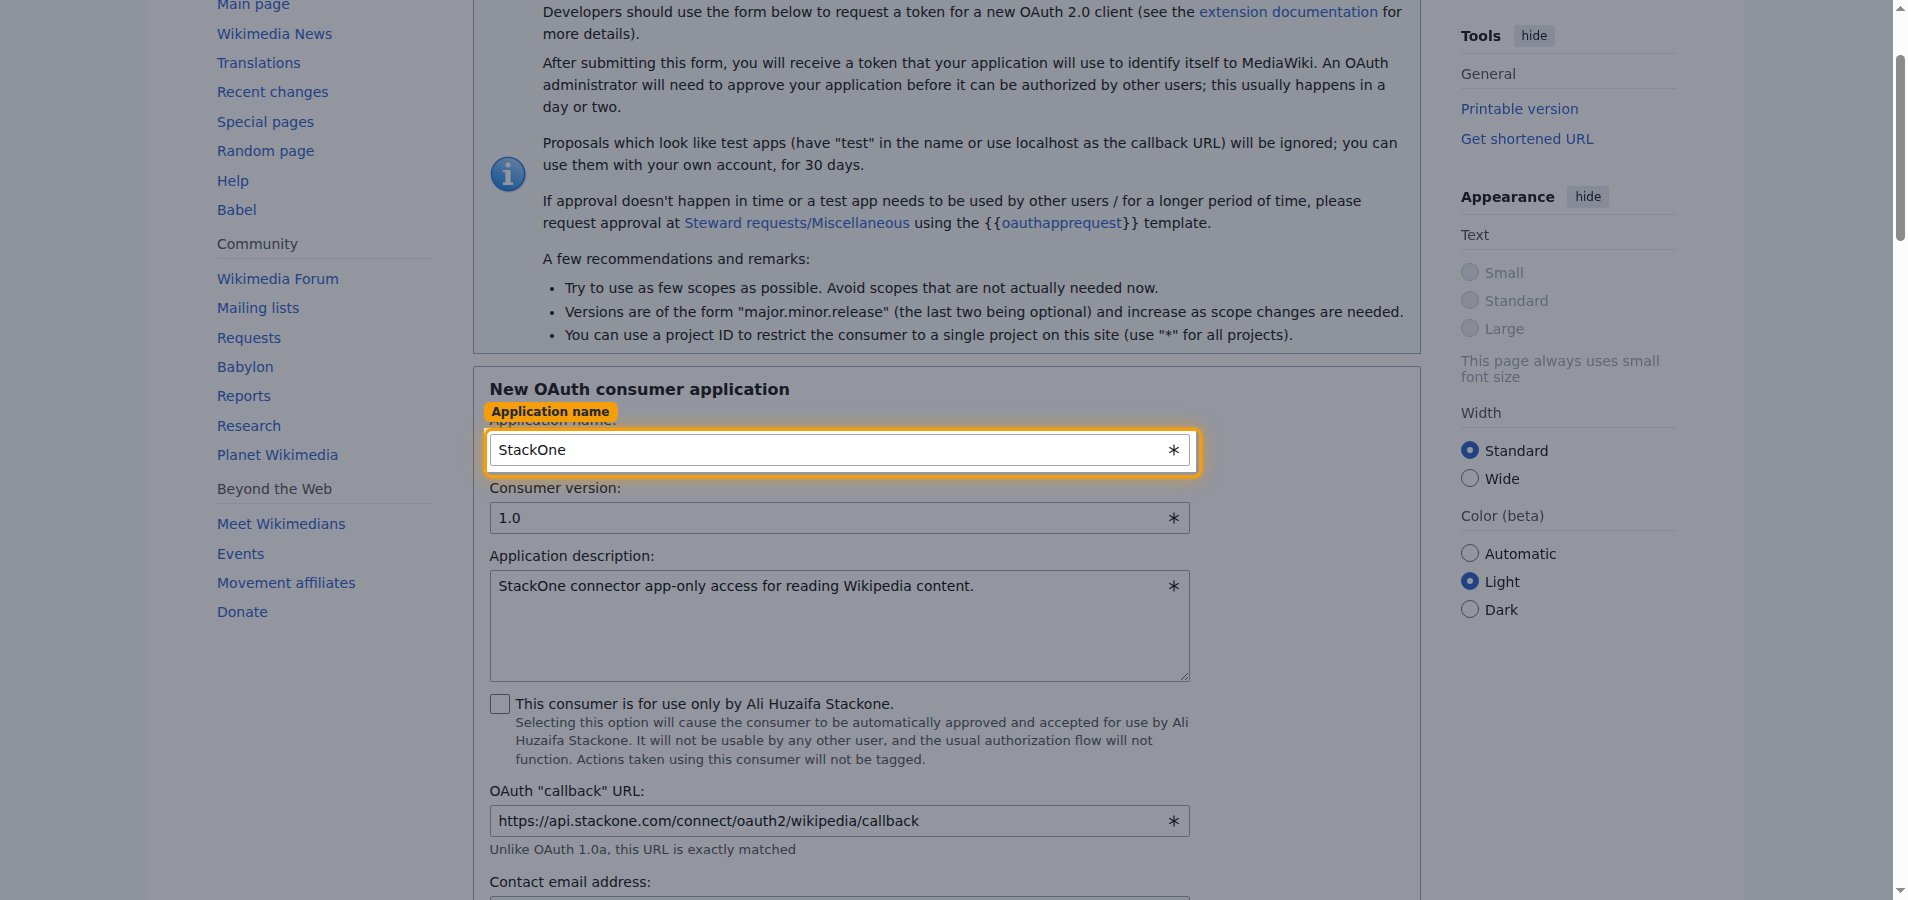
        <p>In the <strong>New OAuth consumer application</strong> form, describe your client.</p>

        <ul>
          <li><strong>Application name:</strong> enter a descriptive name — e.g., `StackOne`.</li>
          <li><strong>Consumer version:</strong> leave as `1.0`.</li>
          <li><strong>Application description:</strong> briefly describe how the client is used.</li>
        </ul>

        <img src="https://mintcdn.com/stackone-60/P1EEsB4-Ut35fmCr/connectors/wikipedia/images/client_credentials-config-application-details.png?fit=max&auto=format&n=P1EEsB4-Ut35fmCr&q=85&s=b7868731b9fcbcda9cd7584f284da8ed" alt="OAuth consumer registration form with the Application name field highlighted" width="1908" height="900" data-path="connectors/wikipedia/images/client_credentials-config-application-details.png" />
      </div>
    </Step>

    <Step title="Enable owner-only access">
      <div data-guide-step data-guide-scopes="" data-guide-display-scopes-list="">
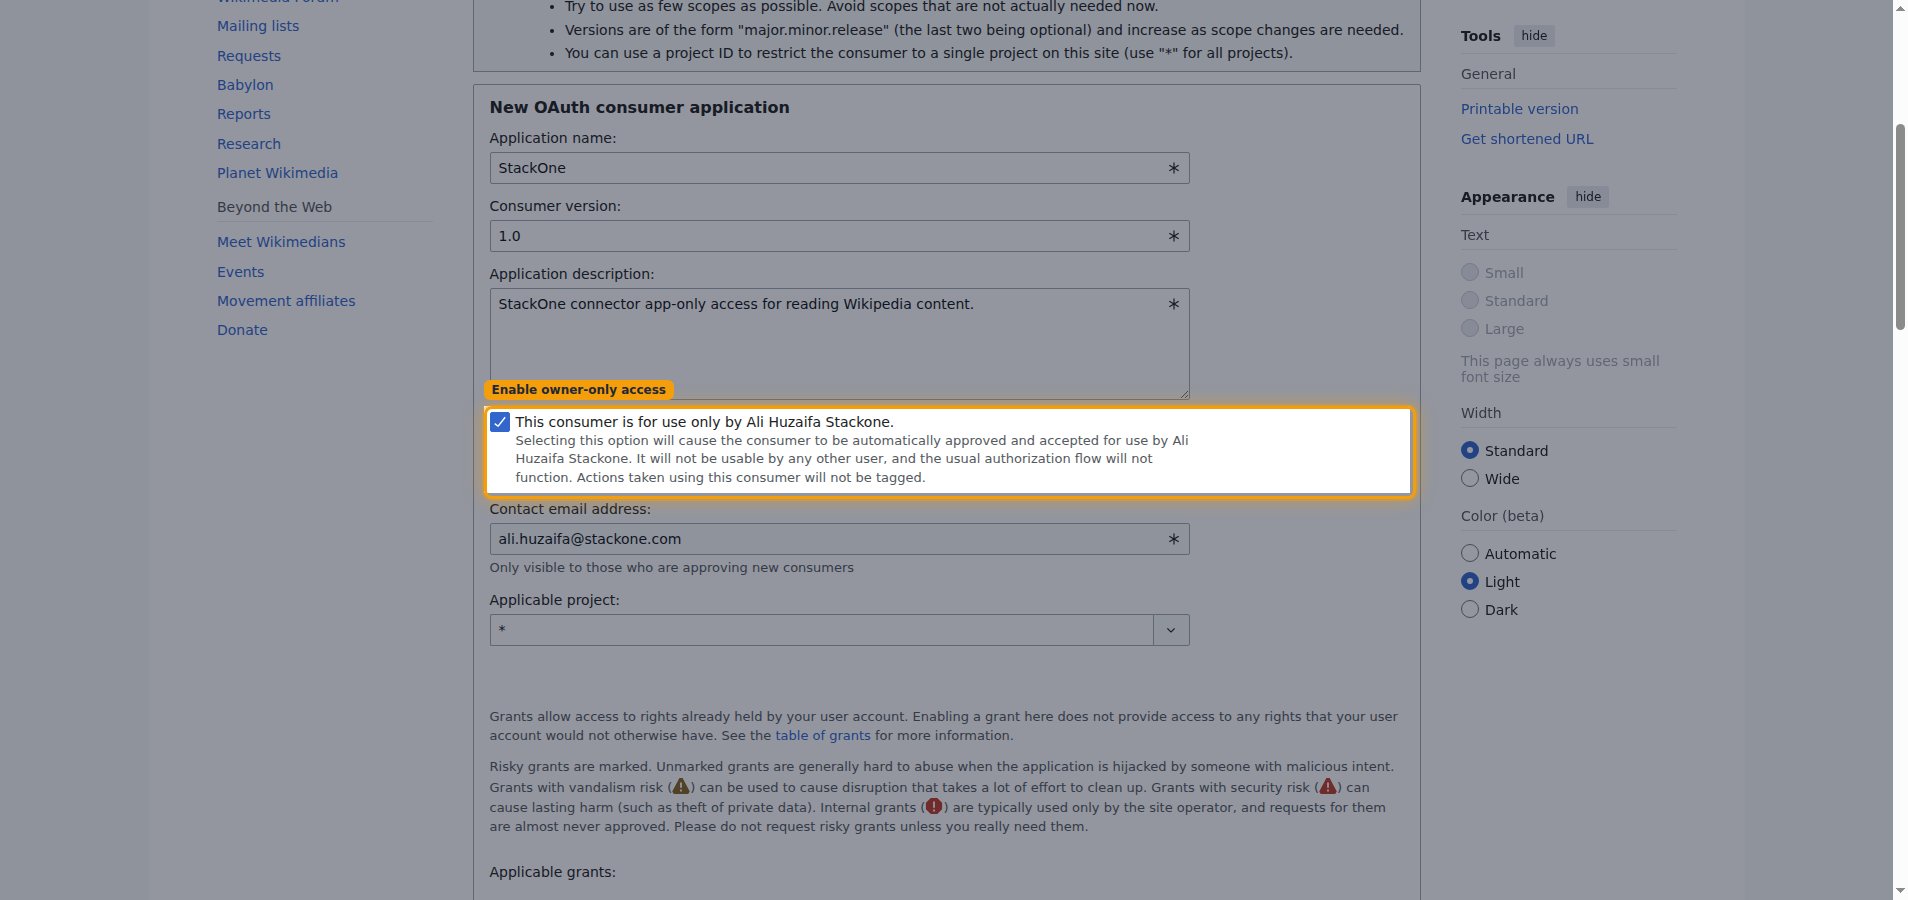
        <p>Check <strong>This consumer is for use only by \[your username].</strong> Selecting this option causes the client to be automatically approved and accepted for use by your account, so no administrator review is needed. (Once owner-only is enabled, the OAuth2 grant-types section is disabled — you do not select a grant type here; the client credentials grant is used automatically.)</p>

        <img src="https://mintcdn.com/stackone-60/P1EEsB4-Ut35fmCr/connectors/wikipedia/images/client_credentials-config-owner-only.png?fit=max&auto=format&n=P1EEsB4-Ut35fmCr&q=85&s=0ad6734c97d61e8712ffc4e38eb09ba7" alt="OAuth consumer registration form with the owner-only consumer checkbox checked and highlighted" width="1908" height="900" data-path="connectors/wikipedia/images/client_credentials-config-owner-only.png" />
      </div>
    </Step>

    <Step title="Check the read permissions">
      <div data-guide-step data-guide-scopes="" data-guide-display-scopes-list="">
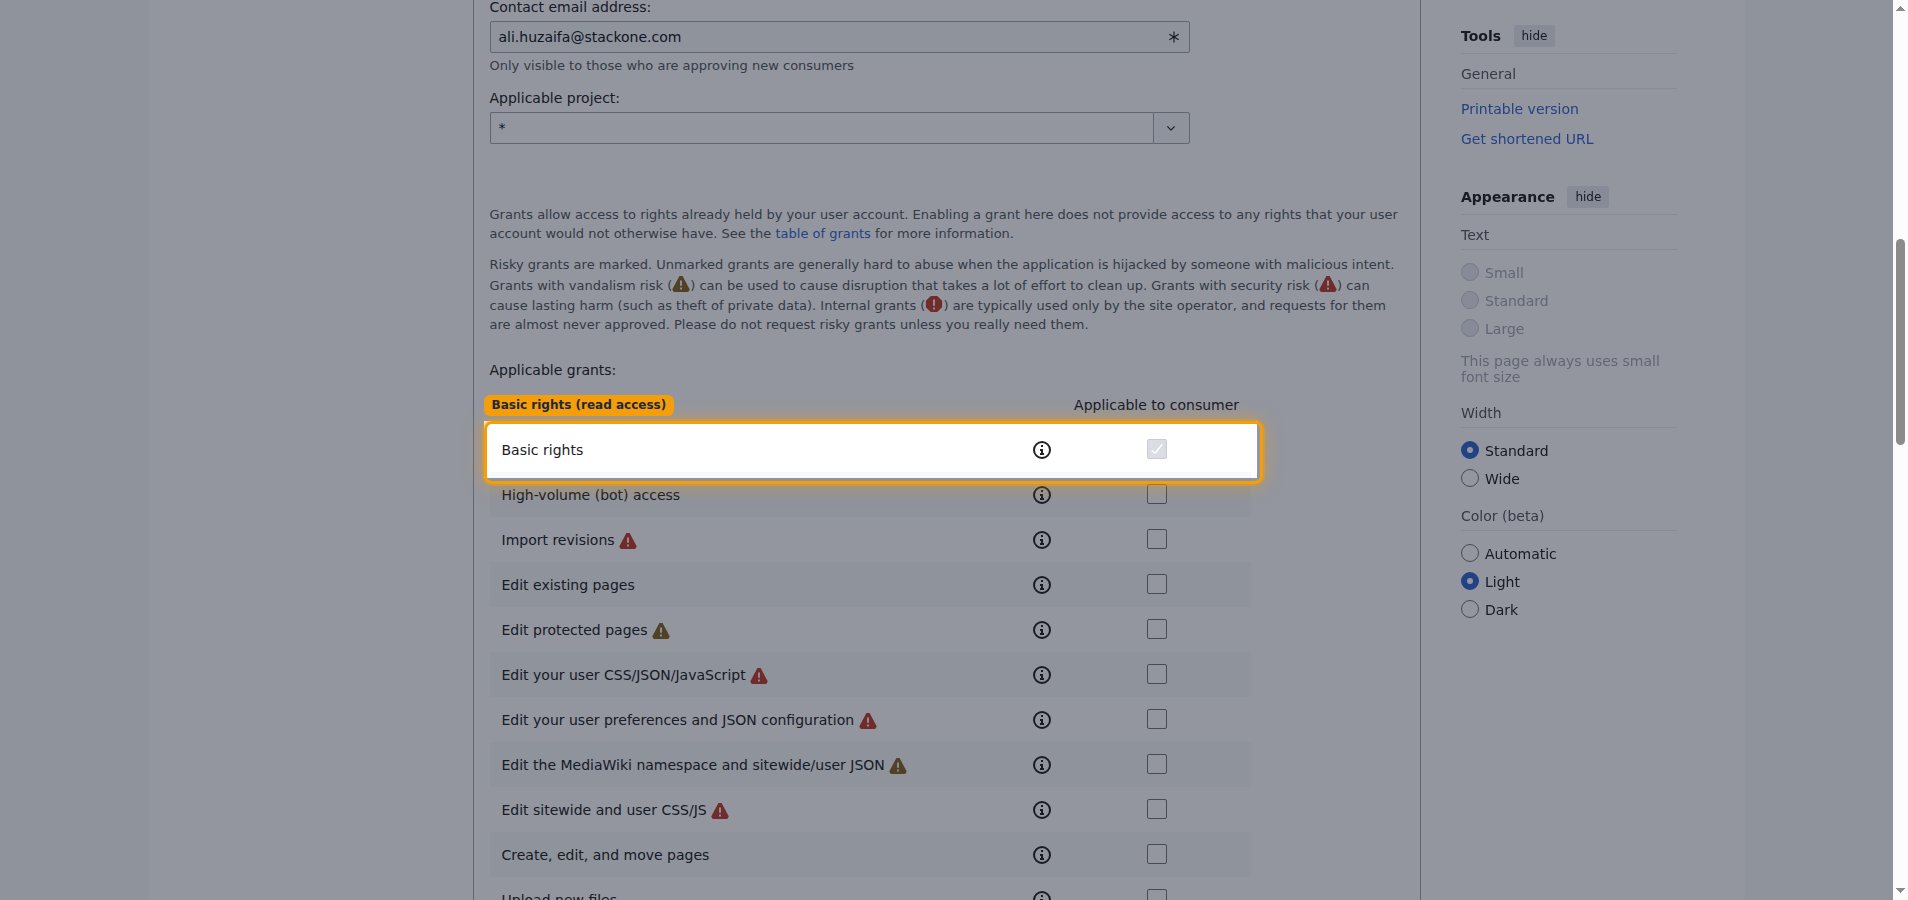
        <p>Under <strong>Applicable grants:</strong>, <strong>Basic rights</strong> is enabled by default and is sufficient for reading Wikipedia content. Leave the other, higher-risk grants unchecked.</p>

        <img src="https://mintcdn.com/stackone-60/P1EEsB4-Ut35fmCr/connectors/wikipedia/images/client_credentials-config-permissions.png?fit=max&auto=format&n=P1EEsB4-Ut35fmCr&q=85&s=4b61c336a2c410d6d899176bdd0f7b2c" alt="Applicable grants table with the Basic rights row highlighted" width="1908" height="900" data-path="connectors/wikipedia/images/client_credentials-config-permissions.png" />
      </div>
    </Step>

    <Step title="Accept the policy and submit">
      <div data-guide-step data-guide-scopes="" data-guide-display-scopes-list="">
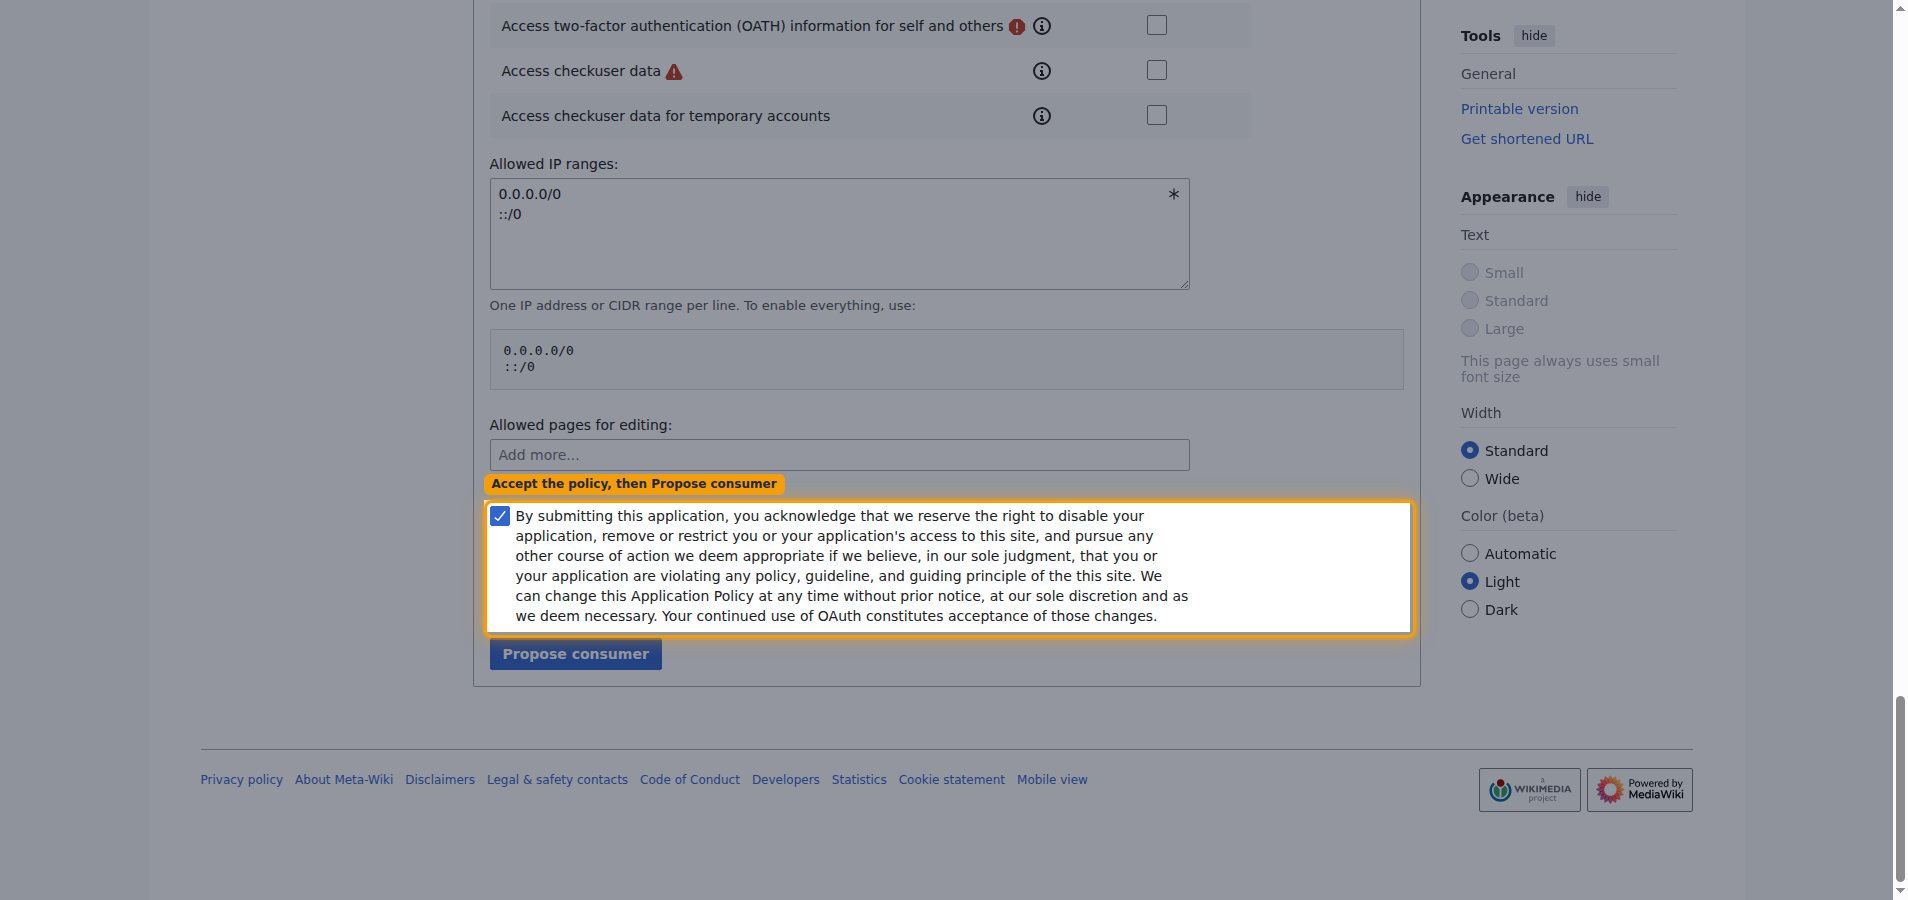
        <p>Check the application policy acknowledgement — the <strong>By submitting this application, you acknowledge...</strong> statement — then click <strong>Propose consumer</strong>. This checkbox is required; the form will not submit until it is ticked.</p>

        <img src="https://mintcdn.com/stackone-60/P1EEsB4-Ut35fmCr/connectors/wikipedia/images/client_credentials-config-accept-policy.png?fit=max&auto=format&n=P1EEsB4-Ut35fmCr&q=85&s=d7162aa45b89abaedb772b3a0679d806" alt="Policy acknowledgement checkbox ticked with the Propose consumer button below it" width="1908" height="900" data-path="connectors/wikipedia/images/client_credentials-config-accept-policy.png" />
      </div>
    </Step>

    <Step title="Copy your credentials">
      <div data-guide-step data-guide-scopes="" data-guide-display-scopes-list="">
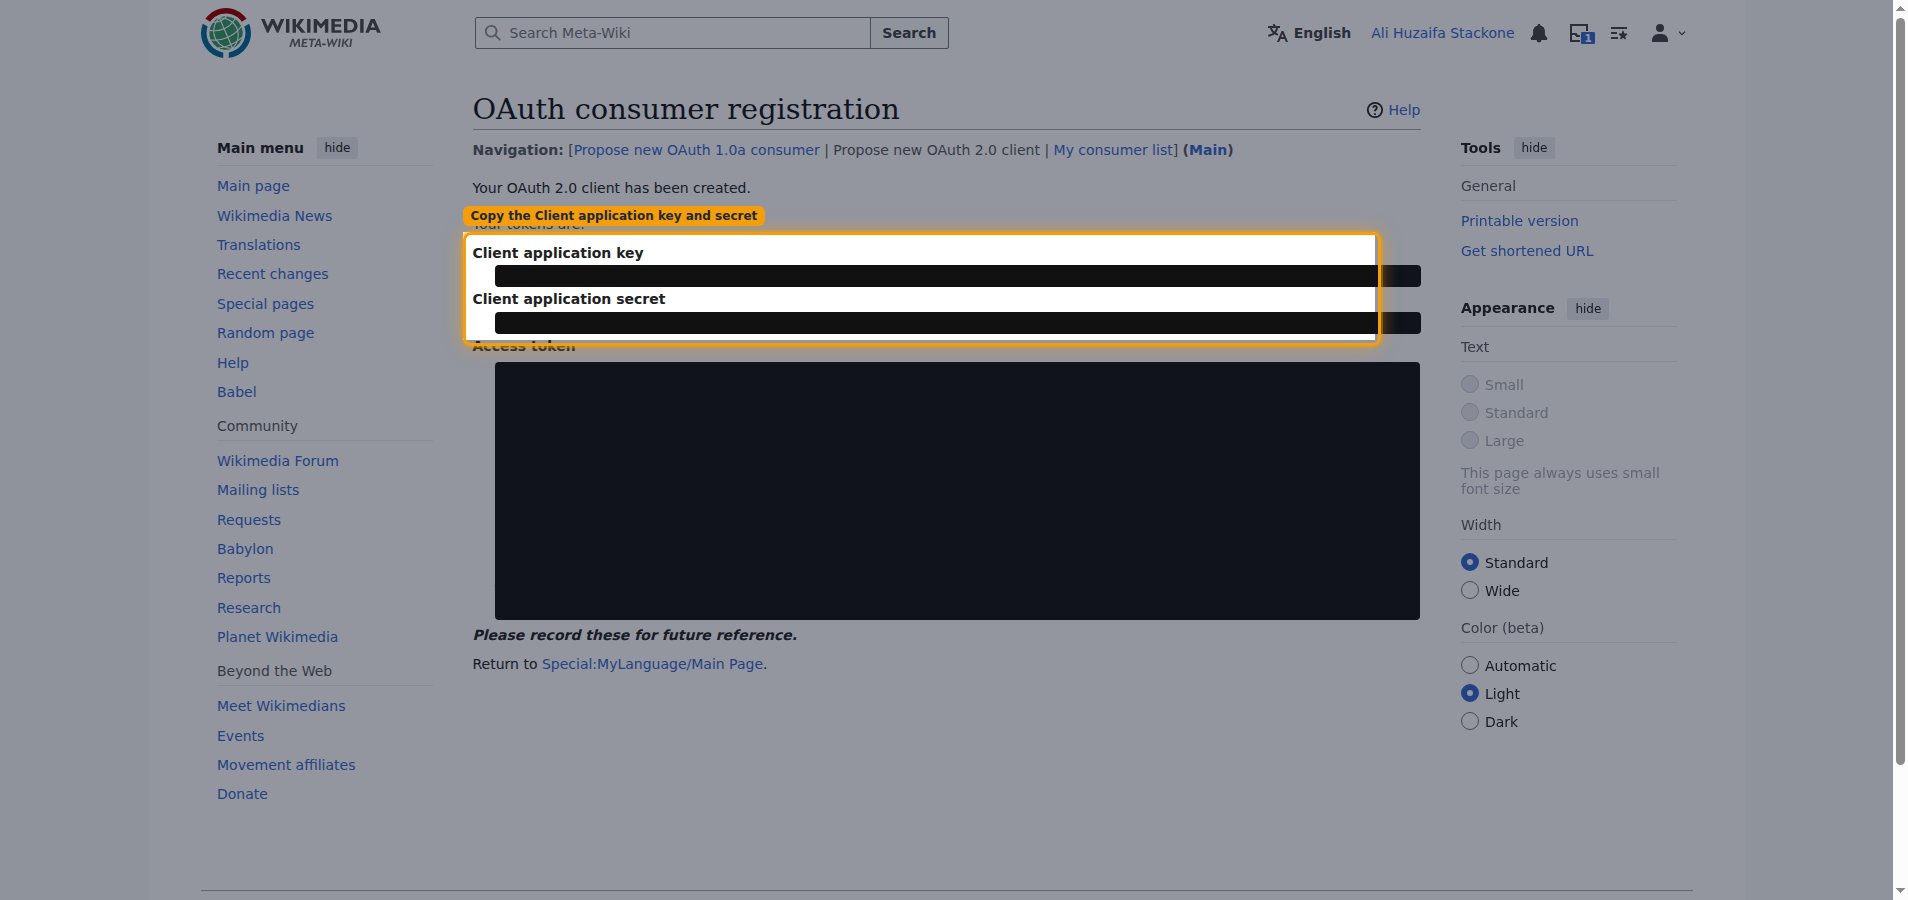
        <p>Meta-Wiki shows <strong>Your OAuth 2.0 client has been created.</strong> with <strong>Your tokens are:</strong> listing the <strong>Client application key</strong>, <strong>Client application secret</strong>, and <strong>Access token</strong>.</p>

        <ul>
          <li>Copy the <strong>Client application key</strong> into the <strong>Client ID</strong> field in StackOne Hub.</li>
          <li>Copy the <strong>Client application secret</strong> into the <strong>Client Secret</strong> field in StackOne Hub.</li>
          <li>These tokens are only displayed once — record them for future reference before leaving the page.</li>
        </ul>

        <img src="https://mintcdn.com/stackone-60/P1EEsB4-Ut35fmCr/connectors/wikipedia/images/client_credentials-config-credentials.png?fit=max&auto=format&n=P1EEsB4-Ut35fmCr&q=85&s=e45d9d74fa20125d28f8c7fa35af1762" alt="OAuth consumer registration result screen showing the Client application key and Client application secret" width="1908" height="900" data-path="connectors/wikipedia/images/client_credentials-config-credentials.png" />
      </div>
    </Step>
  </Steps>
</section>

<section data-guide-section data-guide-scopes="">
  <h2>Find your language code</h2>

  <p>Your language code selects which language edition of Wikipedia this connection reads from.</p>

  <Steps>
    <Step title="Find your language code">
      <div data-guide-step data-guide-scopes="" data-guide-display-scopes-list="">
        <p>The <strong>Language Code</strong> is the subdomain of the Wikipedia edition you want to read from.</p>

        <ul>
          <li>Check the subdomain — the part before `.wikipedia.org`.</li>
          <li>Example: if your URL is `https://en.wikipedia.org`, your <strong>Language Code</strong> is `en`.</li>
          <li>Common values: `en` (English), `es` (Spanish), `fr` (French), `de` (German), `ja` (Japanese).</li>
          <li>Enter this value in the <strong>Language Code</strong> field in StackOne Hub.</li>
        </ul>
      </div>
    </Step>
  </Steps>
</section>

<div data-whitelabel-hide>
  <h2>Linking the Account from the Hub</h2>

  <Steps>
    <Step title="Navigate to the Hub">
      Use one of the three <a href="/guides/accounts-section#linking-accounts">Linking Account Methods</a> to access the Hub.
    </Step>

    <Step title="Fill out the fields">
      Fill out the following fields using details from your provider:

      <ul>
        <li><strong>Client ID</strong></li>
        <li><strong>Client Secret</strong></li>
        <li><strong>Language Code</strong></li>
      </ul>
    </Step>

    <Step title="Connect">
      <ul>
        <li>Click <strong>Connect</strong></li>
        <li>If applicable, the provider will redirect you to a sign-in or authorization page. Complete the provider's authorization flow.</li>
        <li>Once authorization is successful, you will see a confirmation popup</li>
      </ul>
    </Step>
  </Steps>

  <p>If the account linking is successful, you will see the newly linked account in your <a href="/guides/accounts-section">Accounts</a> page.</p>
</div>