> ## Documentation Index
> Fetch the complete documentation index at: https://docs.stackone.com/llms.txt
> Use this file to discover all available pages before exploring further.

# Connect Ticketmaster with API Key – StackOne Hub

> Link a Ticketmaster account in the StackOne Hub using API Key. End-user guide to authorize the integration and start using Ticketmaster actions.

<section data-guide-section data-guide-scopes="">
  <h2>Create a Ticketmaster developer account</h2>

  <p>The Ticketmaster Discovery API is authenticated with an API key that comes from a free<br />Ticketmaster developer account. Start by opening the developer portal and signing in.</p>

  <Steps>
    <Step title="Open the developer portal">
      <div data-guide-step data-guide-scopes="" data-guide-display-scopes-list="">
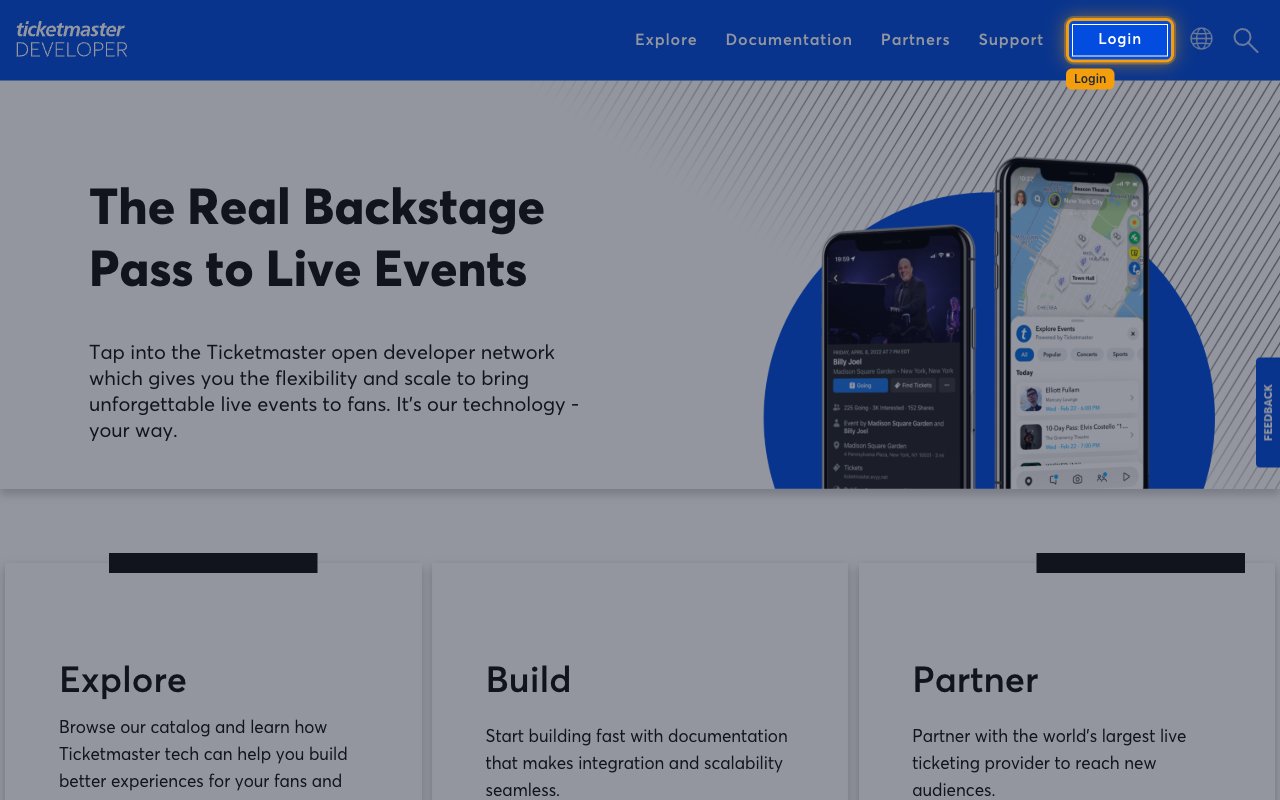
        <p>Go to the <a href="https://developer.ticketmaster.com/" target="_blank" rel="noopener noreferrer">Ticketmaster Developer Portal</a> and click<br /><strong>Login</strong> in the top navigation bar.</p>

        <img src="https://mintcdn.com/stackone-60/iledswWMKgfXNDdn/connectors/ticketmaster/images/custom-config-open-portal.png?fit=max&auto=format&n=iledswWMKgfXNDdn&q=85&s=defef10b86a8797318f6673b4b6a2028" alt="The Ticketmaster Developer Portal home page with the Login button highlighted in the top navigation bar" width="1280" height="800" data-path="connectors/ticketmaster/images/custom-config-open-portal.png" />
      </div>
    </Step>

    <Step title="Create an account">
      <div data-guide-step data-guide-scopes="" data-guide-display-scopes-list="">
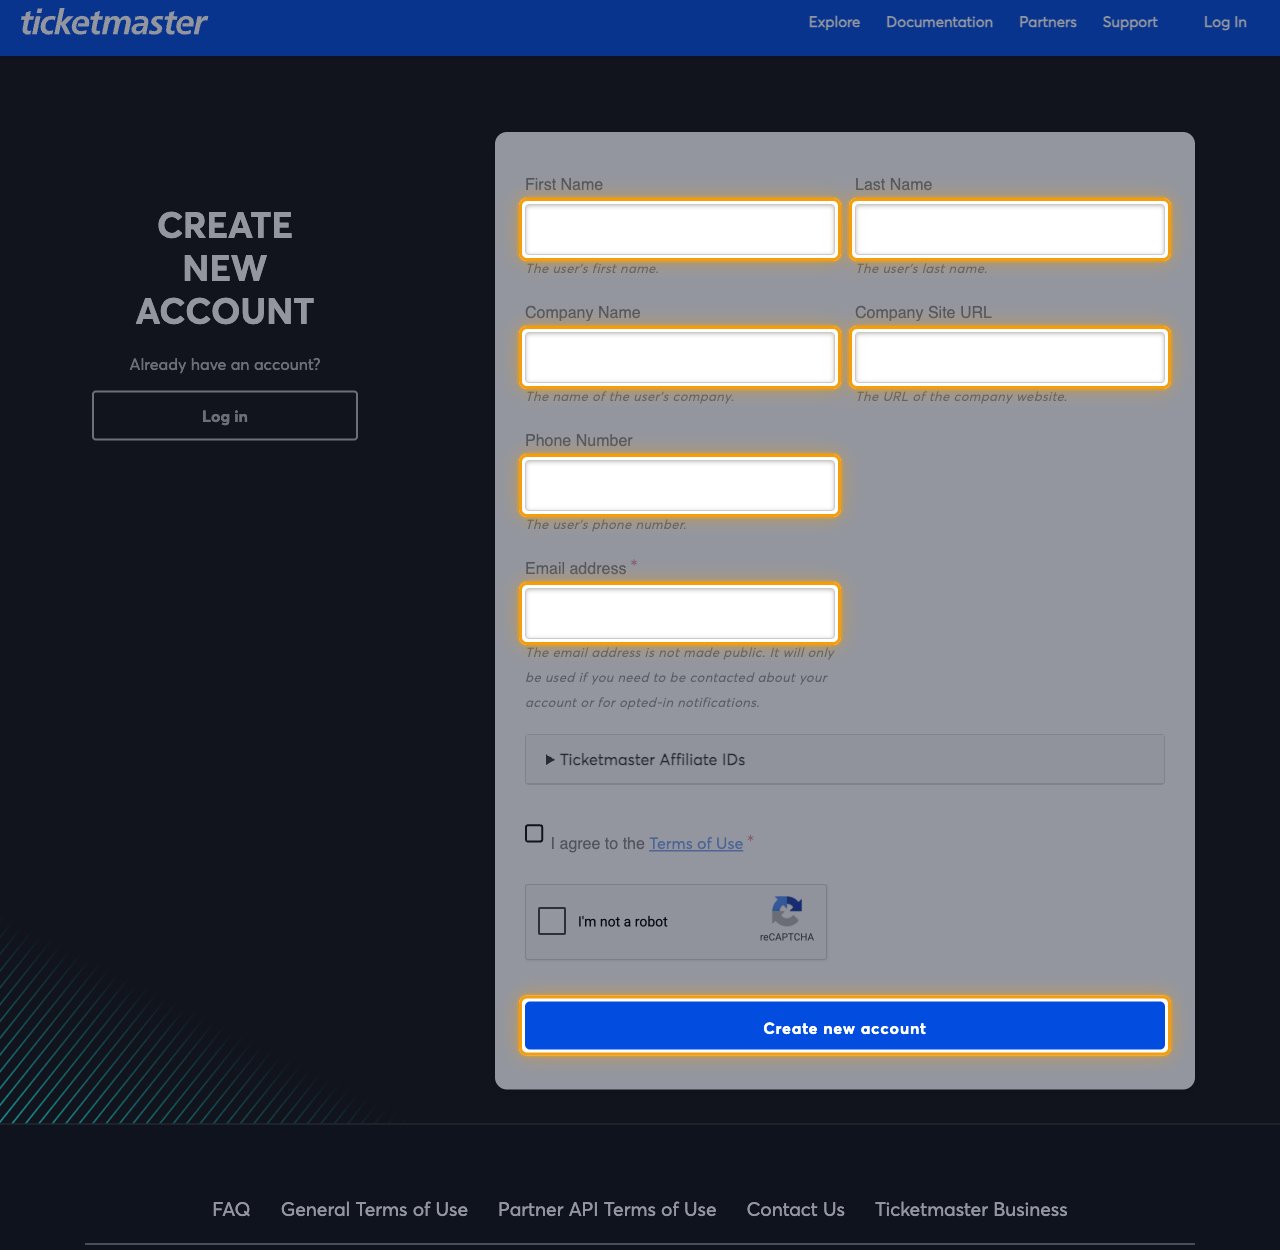
        <p>If you do not have a developer account yet, open the <a href="https://developer-account.ticketmaster.com/user/register" target="_blank" rel="noopener noreferrer">Ticketmaster developer account<br />registration page</a> and complete<br />the <strong>Create New Account</strong> form:</p>

        <ul>
          <li><strong>First Name</strong> and <strong>Last Name</strong> — your name.</li>
          <li><strong>Company Name</strong> and <strong>Company Site URL</strong> — your organization and its website.</li>
          <li><strong>Phone Number</strong> — a contact number.</li>
          <li><strong>Email address</strong> — the address the account is registered to. This is required, and it is where account e-mails are sent.</li>
          <li>Tick <strong>I agree to the Terms of Use</strong>, complete the <strong>I'm not a robot</strong> check, then click <strong>Create new account</strong>.</li>
        </ul>

        <img src="https://mintcdn.com/stackone-60/iledswWMKgfXNDdn/connectors/ticketmaster/images/custom-config-create-account.png?fit=max&auto=format&n=iledswWMKgfXNDdn&q=85&s=ab90766b71f22143e424c699612613c4" alt="The Create New Account form on the Ticketmaster developer portal with the name, company, phone, email fields and the Create new account button highlighted" width="1280" height="1250" data-path="connectors/ticketmaster/images/custom-config-create-account.png" />
      </div>
    </Step>

    <Step title="Sign in to the portal">
      <div data-guide-step data-guide-scopes="" data-guide-display-scopes-list="">
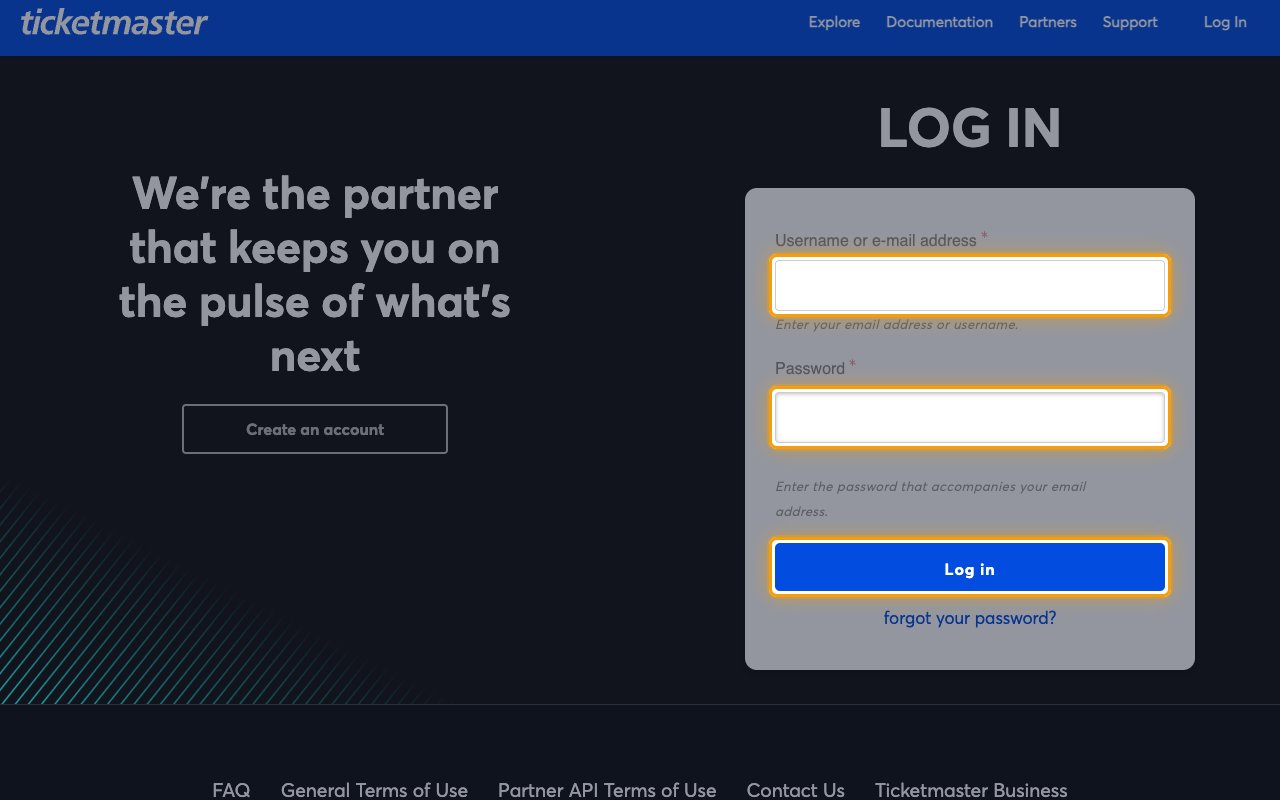
        <p>Open the <a href="https://developer-account.ticketmaster.com/user/login" target="_blank" rel="noopener noreferrer">Ticketmaster developer sign-in page</a> and fill in the <strong>Log In</strong> form, then click <strong>Log in</strong>.</p>

        <ul>
          <li><strong>Username or e-mail address</strong> — the e-mail address or username of your developer account.</li>
          <li><strong>Password</strong> — the password for that account.</li>
        </ul>

        <img src="https://mintcdn.com/stackone-60/iledswWMKgfXNDdn/connectors/ticketmaster/images/custom-config-sign-in.png?fit=max&auto=format&n=iledswWMKgfXNDdn&q=85&s=c45b3f9b8e3a739755c5d451a846295f" alt="The Ticketmaster developer portal Log In page with the Username or e-mail address field, Password field and Log in button highlighted" width="1280" height="800" data-path="connectors/ticketmaster/images/custom-config-sign-in.png" />
      </div>
    </Step>
  </Steps>
</section>

<section data-guide-section data-guide-scopes="">
  <h2>Create an app and copy your API key</h2>

  <p>Your API key lives on an app in the developer portal. Every app carries its own <strong>Consumer<br />Key</strong>, which is the value StackOne uses as the API key.</p>

  <Steps>
    <Step title="Open My Apps">
      <div data-guide-step data-guide-scopes="" data-guide-display-scopes-list="">
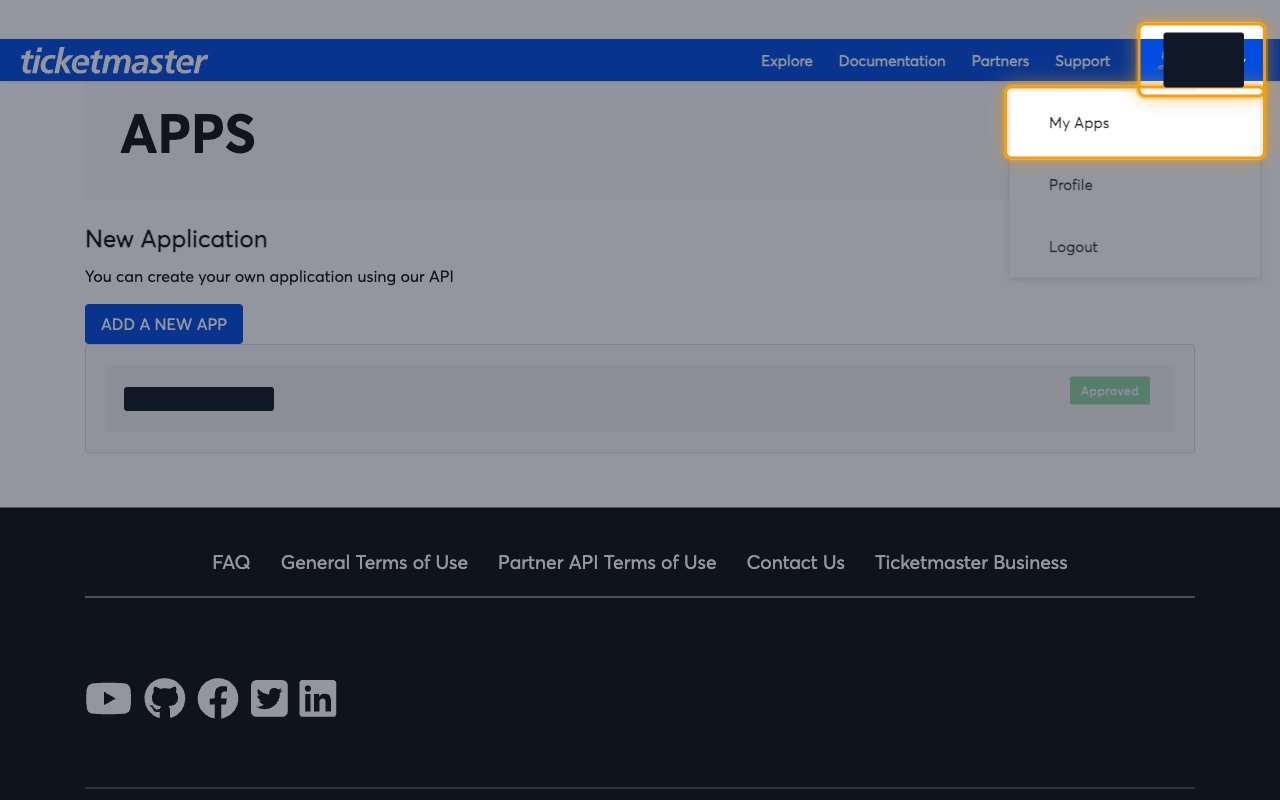
        <p>Click your account name in the top-right corner of the portal, then click <strong>My Apps</strong> to<br />open the <strong>Apps</strong> page.</p>

        <img src="https://mintcdn.com/stackone-60/iledswWMKgfXNDdn/connectors/ticketmaster/images/custom-config-my-apps.png?fit=max&auto=format&n=iledswWMKgfXNDdn&q=85&s=1c2b27f2572f81230a6eb7884d0d8e1d" alt="The account menu open in the Ticketmaster developer portal header with My Apps, Profile and Logout listed, and My Apps highlighted" width="1280" height="800" data-path="connectors/ticketmaster/images/custom-config-my-apps.png" />
      </div>
    </Step>

    <Step title="Add a new app">
      <div data-guide-step data-guide-scopes="" data-guide-display-scopes-list="">
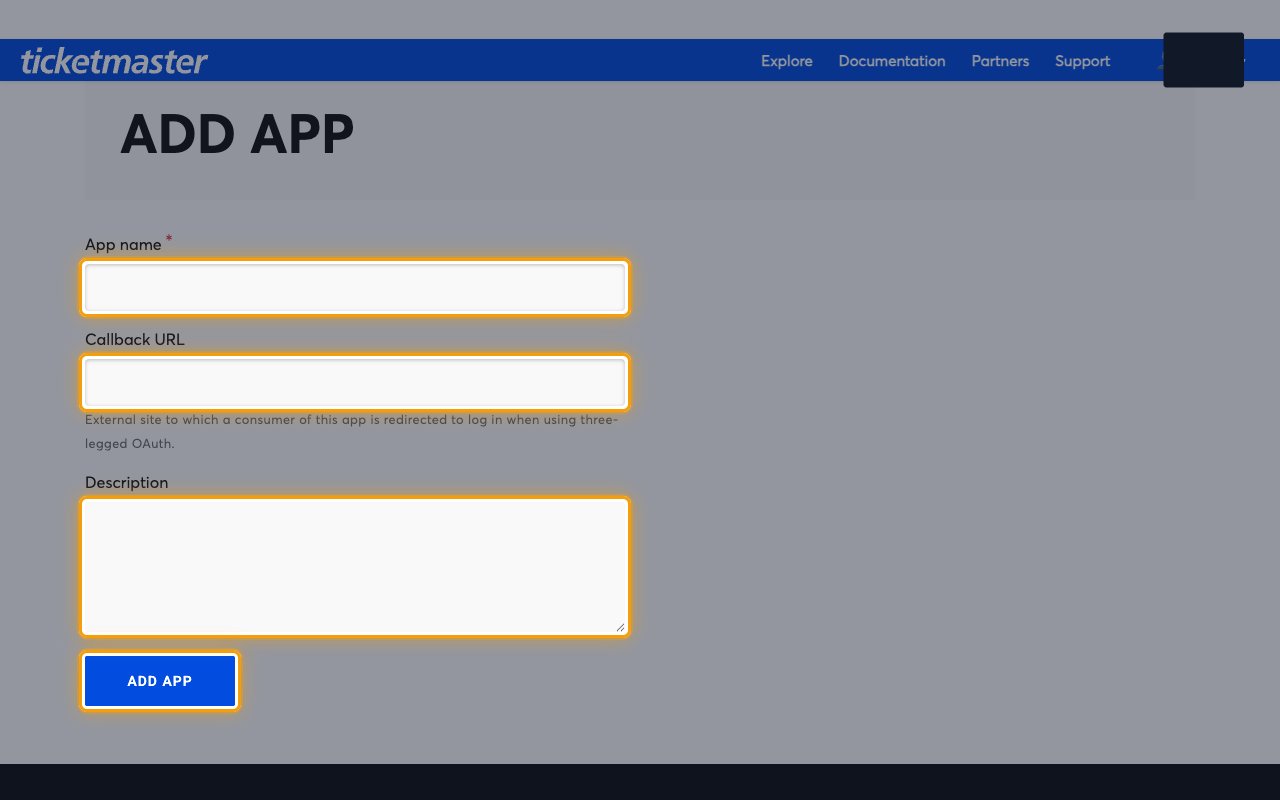
        <p>On the <strong>Apps</strong> page, click <strong>ADD A NEW APP</strong> under <strong>New Application</strong>, then complete the<br /><strong>Add App</strong> form and click <strong>ADD APP</strong>.</p>

        <ul>
          <li><strong>App name</strong> — a name for the app, for example `StackOne Integration`. This field is required.</li>
          <li><strong>Callback URL</strong> — used only for three-legged OAuth, so leave it empty for the Discovery API.</li>
          <li><strong>Description</strong> — an optional note describing what the app is for.</li>
        </ul>

        <img src="https://mintcdn.com/stackone-60/iledswWMKgfXNDdn/connectors/ticketmaster/images/custom-config-add-app.png?fit=max&auto=format&n=iledswWMKgfXNDdn&q=85&s=fdd75bccd8868c6f4c534c84e65dd467" alt="The Add App form in the Ticketmaster developer portal with the App name, Callback URL and Description fields and the ADD APP button highlighted" width="1280" height="800" data-path="connectors/ticketmaster/images/custom-config-add-app.png" />
      </div>
    </Step>

    <Step title="Verify the app was created">
      <div data-guide-step data-guide-scopes="" data-guide-display-scopes-list="">
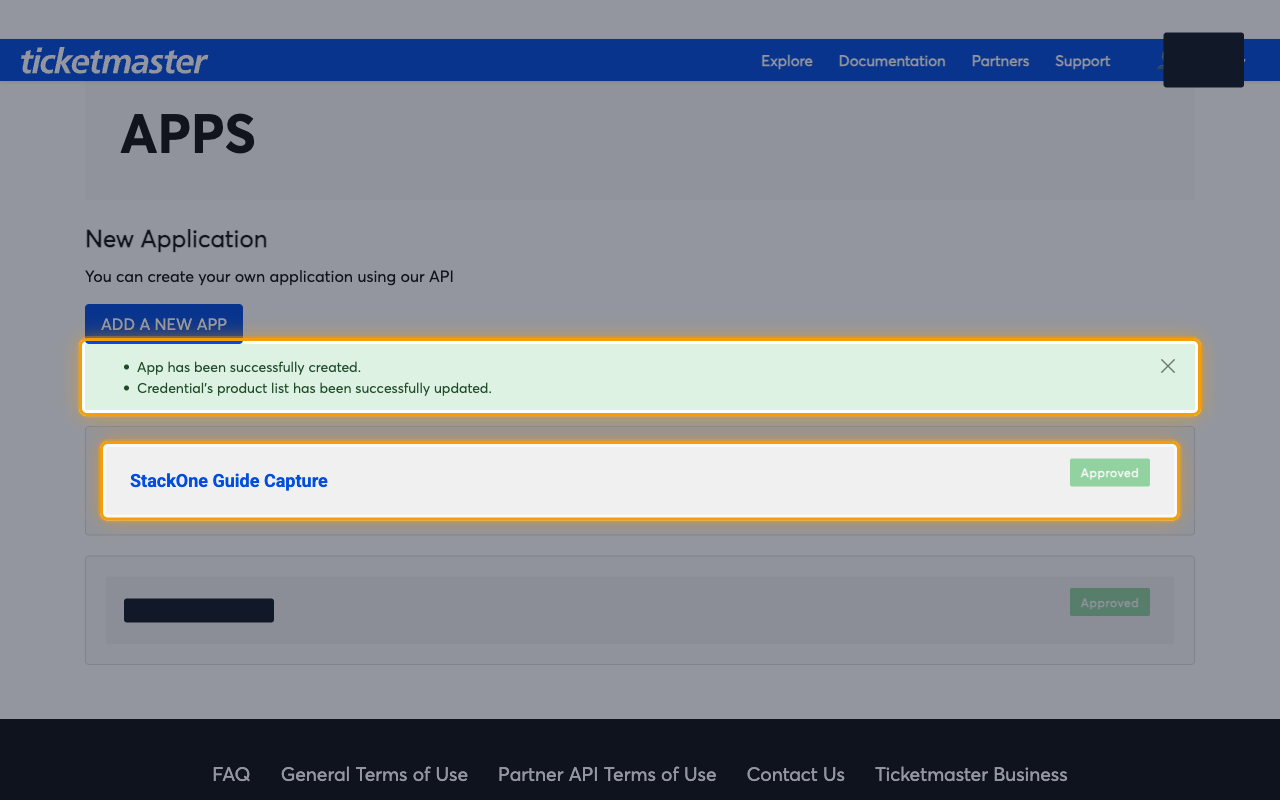
        <p>The <strong>Apps</strong> page confirms <strong>App has been successfully created.</strong> and<br /><strong>Credential's product list has been successfully updated.</strong> The new app appears in the<br />list marked <strong>Approved</strong>, and its API key is ready to use straight away.</p>

        <img src="https://mintcdn.com/stackone-60/iledswWMKgfXNDdn/connectors/ticketmaster/images/custom-config-app-created.png?fit=max&auto=format&n=iledswWMKgfXNDdn&q=85&s=ae268291966b0353daa0909ae6fe9a20" alt="The Apps page showing the success message App has been successfully created and the new app listed with an Approved badge" width="1280" height="800" data-path="connectors/ticketmaster/images/custom-config-app-created.png" />
      </div>
    </Step>

    <Step title="Open the app credentials">
      <div data-guide-step data-guide-scopes="" data-guide-display-scopes-list="">
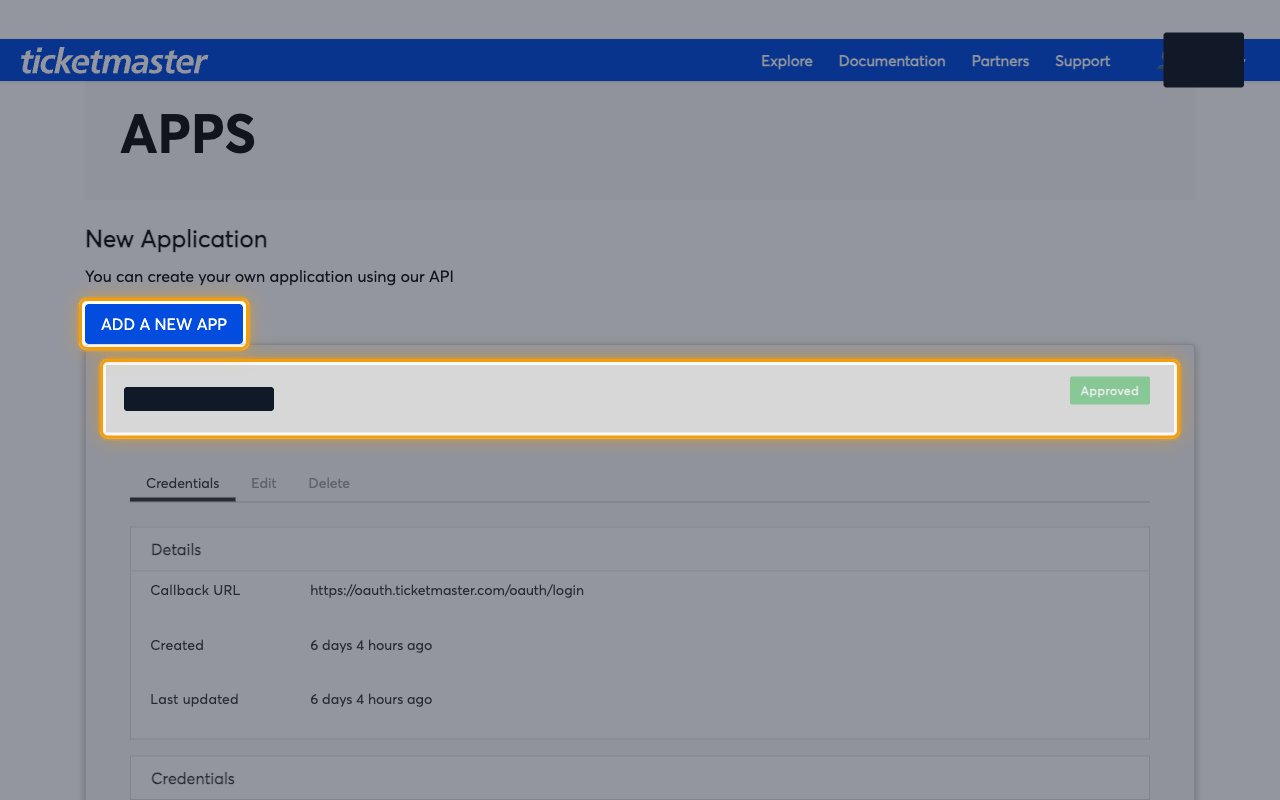
        <p>Click the app's name in the list to expand it. The <strong>Credentials</strong> tab opens by default and shows a <strong>Details</strong> panel with the app's <strong>Callback URL</strong>, <strong>Created</strong> and <strong>Last updated</strong> values.</p>

        <img src="https://mintcdn.com/stackone-60/iledswWMKgfXNDdn/connectors/ticketmaster/images/custom-config-open-app.png?fit=max&auto=format&n=iledswWMKgfXNDdn&q=85&s=2d95e0cd2c1e1b52c2143ef91efac6cd" alt="An expanded app on the Apps page showing the Credentials, Edit and Delete tabs and the Details panel" width="1280" height="800" data-path="connectors/ticketmaster/images/custom-config-open-app.png" />
      </div>
    </Step>

    <Step title="Copy the Consumer Key">
      <div data-guide-step data-guide-scopes="" data-guide-display-scopes-list="">
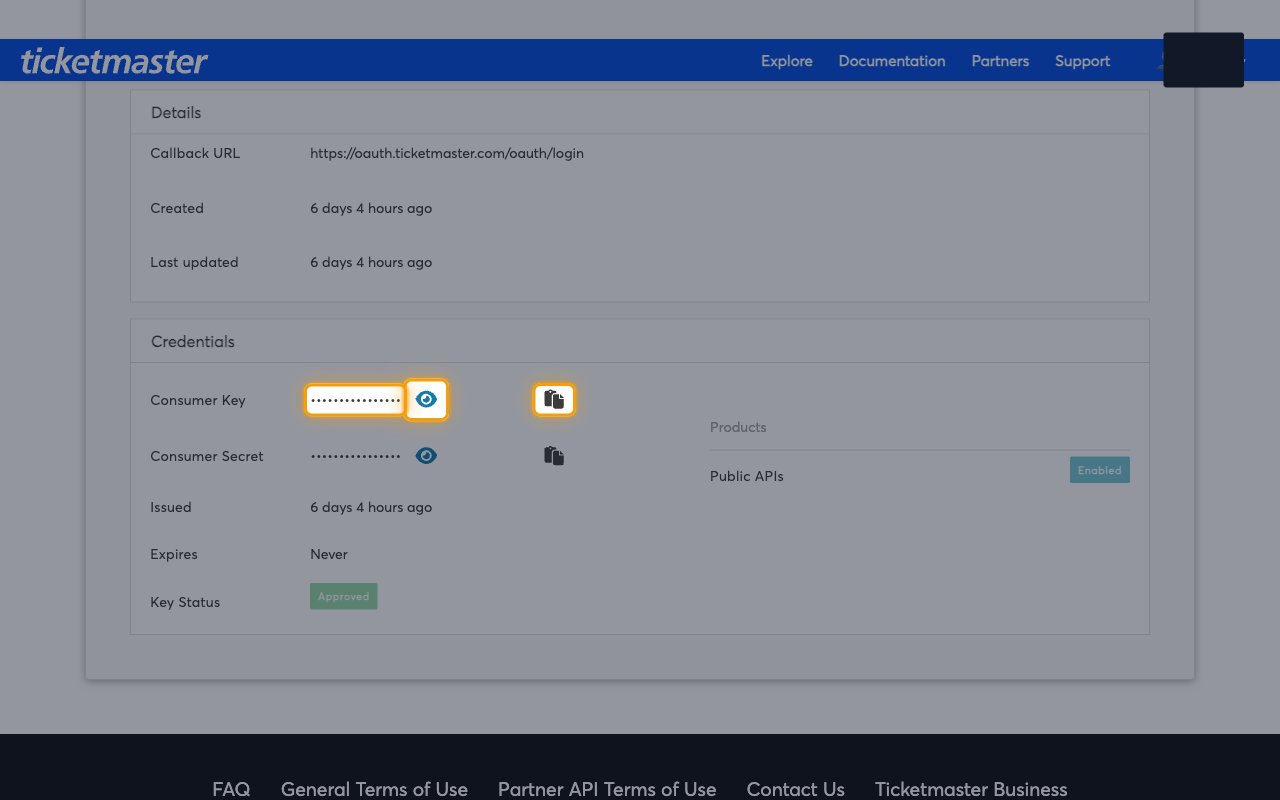
        <p>Scroll to the <strong>Credentials</strong> panel. Click <strong>Toggle key visibility</strong> next to<br /><strong>Consumer Key</strong> to reveal the value, or click <strong>Click to copy</strong> to copy it straight to<br />your clipboard. This <strong>Consumer Key</strong> is your API key.</p>

        <ul>
          <li><strong>Expires</strong> shows <strong>Never</strong> and <strong>Key Status</strong> shows <strong>Approved</strong>, so you can come back to this panel and copy the key again whenever you need it.</li>
          <li>Under <strong>Products</strong>, <strong>Public APIs</strong> shows <strong>Enabled</strong>, which is the access the Discovery API needs.</li>
        </ul>

        <img src="https://mintcdn.com/stackone-60/iledswWMKgfXNDdn/connectors/ticketmaster/images/custom-config-consumer-key.png?fit=max&auto=format&n=iledswWMKgfXNDdn&q=85&s=b0d765c5fb46525902fd705791723c89" alt="The Credentials panel of a Ticketmaster developer app with the masked Consumer Key value, the Toggle key visibility eye button and the Click to copy button highlighted" width="1280" height="800" data-path="connectors/ticketmaster/images/custom-config-consumer-key.png" />
      </div>
    </Step>
  </Steps>
</section>

<section data-guide-section data-guide-scopes="">
  <h2>Connect Ticketmaster in StackOne</h2>

  <p>Finish the connection by entering the key you copied in StackOne Hub.</p>

  <Steps>
    <Step title="Enter the API key">
      <div data-guide-step data-guide-scopes="" data-guide-display-scopes-list="">
        <p>Paste the copied value into the <strong>API Key</strong> field in StackOne Hub and complete the<br />connection.</p>

        <ul>
          <li><strong>API Key</strong> — the <strong>Consumer Key</strong> of your app from the developer portal's <strong>My Apps</strong> page.</li>
        </ul>
      </div>
    </Step>
  </Steps>
</section>

<div data-whitelabel-hide>
  <h2>Linking the Account from the Hub</h2>

  <Steps>
    <Step title="Navigate to the Hub">
      Use one of the three <a href="/connect/managing-connectors/linking-accounts">Linking Account Methods</a> to access the Hub.
    </Step>

    <Step title="Fill out the fields">
      Fill out the following fields using details from your provider:

      <ul>
        <li><strong>API Key</strong></li>
      </ul>
    </Step>

    <Step title="Connect">
      <ul>
        <li>Click <strong>Connect</strong></li>
        <li>If applicable, the provider will redirect you to a sign-in or authorization page. Complete the provider's authorization flow.</li>
        <li>Once authorization is successful, you will see a confirmation popup</li>
      </ul>
    </Step>
  </Steps>

  <p>If the account linking is successful, you will see the newly linked account in your <a href="/gateway/concepts/linked-accounts">Accounts</a> page.</p>
</div>